A 3D printer might have been one of the most exciting purchases my household has ever made. First, our basic bed-slinger 3D printers were simple enough that a 12-year-old could put them together solo. Plus, the ability to print basically whatever we wanted, whenever we wanted, was super cool.
A few years ago, as a newbie to 3D printing, I spent ages on Google researching possible fixes for all the weird problems that cropped up. Even now, as our printers are becoming old news as technology advances, the same issues continue to plague 3D printing forums. Things often go wrong with 3D printers, and often in weird ways, but especially with bed-slinger models. Here’s what to consider could go wrong, plus how to fix it — or at least a starting point for finding a fix.
Advertisement
Blown fuses
theriault/Shutterstock
For anyone who’s worked on any kind of machine before, it’s probably not surprising to learn that 3D printers have fuses. Yet if your printer suddenly stops working, you might not suspect a blown fuse as the primary culprit. Since many different things can go wrong with a 3D printer, checking at least one of its fuses can be a good place to start troubleshooting.
A couple of signs that your printer has a blown fuse include failure to power up or a completely blank and unresponsive touch screen. With Elegoo printers, for example, the primary indicator that you’ve blown a fuse is the touch screen failing to work. Elegoo suggests checking the fuse in the power switch before moving on to other potential issues.
Advertisement
In most cases, fixing a blown fuse is straightforward. On Elegoo printers, the power switch fuse pops out of a tiny compartment next to or inside the power cable port. On other printers, like a Prusa 3D printer, you might need to change the fuses on your printer’s sandwich board, modular board, or XL Splitter board. Of course, you should proceed with caution if you’re opening up your 3D printer’s guts — especially if the manufacturer doesn’t endorse that kind of DIY fix.
Advertisement
Outdated drivers
There are plenty of important things to know about 3D printing, many of which you’ll learn through trial and error. After all, 3D printing is inherently an adventure in DIY, and we’re not just talking about the actual printing of your custom files. While we would argue that 3D printing can be accessible to just about everyone, you may need a little technical know-how.
Case in point? Like your PC or laptop, 3D printers require drivers. If something goes wrong with a driver, you might be facing a blue screen of death. Unlike a computer, though, a 3D printer can — in our experience — be brought back to life after the death screen.
Many newer printers are like your Wi-Fi-enabled home printer — they can stay connected to the internet and automatically download updates. If you’re working with an offline printer, however, you’ll need to manually download the firmware, then install it on your machine. The most important step to reviving a 3D printer with an outdated driver is to make sure you find the right firmware package for your make and model. Bambu Lab makes that easy with its Wiki, and other manufacturers have a similar offering.
Advertisement
Melted wires
Possibly one of the most frustrating yet weird things that can go wrong with your 3D printer is the heat of the bed or hot end melting your cables. Given that certain parts of a 3D printer can get very hot — the nozzle could hit 554 degrees Fahrenheit, depending on the printer and the filament you’re working with — you might expect some heatproofing on the components.
Though our Creality and Elegoo printers have the cables bundled together, we’ve still had melty experiences when leaving printers unattended. In fact, that was one of the earliest experiences my household had with 3D printers, which led us to a bunch of 3D printed accessories, including cable management pieces.
Advertisement
The good news is that even if your cables are exposed to high heat, the contact may be brief enough that you don’t have to replace the cables. We felt comfortable continuing to use our 3D printer post-melt because the inner wires were not exposed, but that’s not expert advice by any means. Our best advice is to secure your cables before you ever hit the power switch on a new printer, just in case.
Advertisement
Faulty thermistor
Sure, 3D printing can save you money, but it’s also wise to set aside a budget for not only 3D printer accessories, but also replacement parts. Plenty of things can go wrong, and you may not always be able to fix a specific part. One of the weird things that seems to go wrong more often than you may expect is a faulty thermistor.
One warning sign that your thermistor is bad, according to Creality, is temperature fluctuation. Whether your hot end doesn’t reach full heat, or your printer bed can’t maintain a steady temperature, the thermistor could be at fault. Some printers will also throw up error codes, specifically flagging thermal runaway, and a faulty thermistor could be the culprit. Fortunately, a replacement hot end with thermistor for our Creality Ender-3 V2 was only about $20 on Amazon, but it still involved some time, patience, and a bit of support from Creality.
Your printer likely has two thermistors, though some have three. For example, Prusa printers have these temperature sensors on both the hot end and the printer bed, but the Prusa i3 MK3S+ has a third for monitoring ambient temperature. You might need some basic tools (like multiple sizes of Allen keys, a screwdriver, and pliers) for thermistor replacement, and your best bet is to find a guide specific to your printer brand and model.
Advertisement
Incorrect voltage
One especially weird problem that I never expected with 3D printers was the possibility for the printer to be set to the wrong voltage. Although many newer budget-friendly 3D printers may have remedied the issue, a friend once struggled to power up their used Creality machine. Only when they realized their Ender had a voltage switch set to 230V (for Europe) instead of 115V (most common in North America) were they able to actually use the printer.
In our friend’s case, the printer wouldn’t turn on at all when plugged in and set to the wrong voltage. However, Elegoo, for one, notes that the wrong voltage can cause issues like unexpected restarts due to low power, motherboard damage, or a fire. If you have a new (or new to you) 3D printer that won’t power up or randomly powers down, checking the voltage settings could help resolve the problem.
Advertisement
That said, some newer 3D printers reportedly have auto-switching power supplies. For example, Bambu Lab has a power supply that auto-switches based on whether you’re using a filament dryer or only the printer itself. Be sure to read the manufacturer’s guide for your particular model, though. Despite a thorough search, we had a hard time finding specifics on voltage switching for big-name models like Creality, Bambu Lab, and Elegoo.
Advertisement
Filament clog
Since a 3D printer’s job is to print 3D objects, you might think that it would just… do that. Unfortunately, most 3D printers eventually stop printing, albeit temporarily, due to filament clogs. Clogs seem to be a common problem with a variety of printers (at least, in our experience with Creality and Elegoo, to name two).
Filament clogs are so common that Creality, for one, has a guide on how to clear clogs. That guide also involves steps on how to disassemble your hot end to remove filament from the extruder shell, gears, and even inside the buffer casing. It’s not exactly fun to scrape filament out of your printer, but that’s not the worst part.
The most challenging part of filament clogs is that it’s hard to figure out why they happen. Bambu Lab lists common extruder clog causes as excessive heat, extrusion gear inconsistencies, overly soft filament (or damp PVA), and inconsistent filament diameter. Nozzle clogs, however, can be caused by a lack of heat and partial pre-existing clogs. It may take some trial and error to resolve the problem that’s causing clogs. You might want some spare parts on hand, like a new hot end or, at the very least, spare nozzles.
Advertisement
Thermal runaway
Jiri ‘Tashi’ Vondracek/Shutterstock
In some cases, thermal runaway can be caused by a faulty thermistor. Replacing a thermistor is its own issue, but fortunately, not the most complicated fix we’ve encountered. Yet in other cases, thermal runaway is its own problem that requires some sleuthing and troubleshooting.
Though it’s frustrating, thermal runaway auto-shutoffs are a safety feature. As Prusa explains, the safety feature cuts off the heat to avoid fires. Yet thermal runaway can happen in many different situations where it’s unlikely a fire will happen. For example, Prusa gives a possible scenario where low ambient temperatures (like an unheated garage in the winter) can lead to thermal runaway because when the printer fan turns on, the printer lacks the power to maintain its necessary temperature. If you’ve determined that external temperatures aren’t a factor, and your equipment is otherwise functional, you may want to perform PID tuning.
PID stands for Proportional Integral Derivative, and tuning PID is basically calibrating your printer to get its heat calculations correct. Fortunately, most 3D printer brands offer guides on how to handle PID tuning, because the process is different between, for example, Creality and Prusa printers.
Advertisement
Layer shift
The first time you experience layer shift with a 3D printer, you might be a bit miffed. If 3D printers are meant to 3D print, why is it so difficult to get a quality print sometimes? It turns out that like any other machine, a 3D printer needs some TLC, especially if it’s a bed-slinger model (which our Creality and Elegoo machines are).
Advertisement
Bed-slinger 3D printers involve movement of the print head along the X- and Z-axes, while the bed moves along the Y-axis. With so much movement of the bed — unlike Core XY printers, where the bed is stationary — it’s inevitable that a bed-slinger 3D printer will occasionally need a mechanical tune-up.
Unfortunately, layer shift could be the first indication that your printer has loose parts, or that you’re trying to run it at a speed it can’t quite manage. Plus, the larger your printer, the higher the odds it will develop problems with speed and vibration, says Creality, because the problems essentially scale up with it. If you’re experiencing layer shift, troubleshooting can start with checking for physical barriers to the bed moving properly, making sure your filament is dry, and slowing down the print speed.
Advertisement
Cold nozzle
Failure to heat up sufficiently is a relatable problem with 3D printers of all types. How you address the problem depends on whether it’s a hot end or bed heating issue. If you’ve determined that the bed is plenty toasty, the hot end could have an unseen issue that’s making your prints fail, or fail to start at all.
A cold nozzle is another offbeat problem with 3D printers that can have a range of causes. If your nozzle (and thus the hot end itself) fails to heat up at all, the problem might be easier to troubleshoot than if you have temperature fluctuations after reaching your desired temp. If there’s no power going to the hot end, you may have a thermistor issue, a blown fuse, or an incorrect setting.
Conversely, if the hot end gets hot, but then fluctuates, you might be looking at the same issues and an array of other ones. While the problem could still be the thermistor, fuse, or firmware, partial filament clogs, dry filament, or loose wires could also be to blame. Some printers will throw an error code (an Elegoo may give code 103, for example), which gives you a place to start troubleshooting.
Advertisement
Brittle filament
Novikov Aleksey/Shutterstock
Like other 3D printer mishaps, layer shift is a problem with a long list of potential causes. One of those potential causes is the filament itself. Moist filament can behave differently in a 3D printer than properly dry material, for starters. Yet temperature and humidity fluctuations can also make your filament too brittle to print properly, leading to layer shift, clogs, and other problems. Moisture basically degrades the quality of the filament over time, and that can happen even in relatively dry-feeling environments.
A brittle filament can snap between your fingers, or you might not notice a problem until you’re trying to print with it. A simple way to fix (and avoid) brittle filament is to keep it stored in a dry and temperature-controlled environment. Polymaker, a filament brand, suggests drying your filament before printing for the best results.
Advertisement
Though Polymaker mentions using an oven to dry your filament, we’d recommend a filament dryer. Not only do various filament types have ingredients that are definitely not meant to mingle with food, but filament dryers are basically set-and-forget. Most filament spools will arrive packaged in plastic, complete with desiccant packets, which are suitable for storage. Once you open your filament, check for flexibility before printing, and consider a spin in the dryer first.
Advertisement
Dirty build plate
You might expect a 3D printer to work perfectly out of the box because it’s brand-new. Unfortunately, that wasn’t our experience with our first, second, or third printer. We learned pretty quickly that a bare-bones printer required a lot more effort than we expected. On a positive note, most 3D printers are practically infinitely customizable. One of the best investments we made was flexible build plate surfaces for each of our printers.
Each time you print on a glass bed, cleaning the filament off might be a struggle. Especially if you let the printer cool down first, it may be nearly impossible to remove prints that cover a significant surface area. I admit to running some prints under hot water to get them to come off the build plate, but even that didn’t help get all the gunk off.
The problem is that even invisible debris can affect bed adhesion and, therefore, the quality of your prints, if not the success of the print job itself. A scraper is a useful 3D printed tool to help keep your print bed clean, but don’t stop there. Consider a flexible build plate add-on, and make sure to clean it regularly after you scrape any filament or printer glue off it. Isopropyl alcohol is a recommended cleaner for glass and most other bed types, according to Creality, but our advice is to follow the manufacturer’s recommendations for your printer or the build plate you add onto it.
Advertisement
Clicking
Iloliloli/Getty Images
3D printers make a lot of noises, and not all of them are a bad thing. Yet a clicking noise coming from your 3D printer is probably not good. One common problem that results in a clicking sound is the extruder having problems. According to Creality, there are many reasons why your extruder may click, and all of them involve some close examination and trial and error to solve.
A filament clog could lead to clicking, as could temperature problems that trap filament inside the nozzle or cause it to get backed up into the hot end. Clicking can also be a result of the filament tension being too tight. If your filament roll has the loose end pulled taut, that’s not a good sign. Wet filament (even if it has dried) can become misshapen, which can lead to the same clogging type issues.
Temperature inconsistencies, including the extruder motor overheating because of clogs, can also cause clicking. Creality recommends checking for clogs, ensuring your filament is in good shape, and taking a close look at the mechanical inner workings of your printer to make sure gears aren’t slipping.
Advertisement
Random beeping
Have you ever turned on your 3D printer, set up a print, and it started working… only to have it freeze and start beeping almost immediately? It’s one of the weirdest problems we’ve had with 3D printers, and it seems like an inexplicable issue. What problem could possibly result in the printer stopping and screaming at us?
Advertisement
This weird problem, like many others, can have a few different causes. Newer printers may also throw up an error code while beeping, while others might act like they’re having a meltdown with no explanation. While most 3D printer brands don’t specifically address beeping (likely because they address the associated error codes), nearly any kind of issue can cause a printer to freeze and alert you.
In fact, just about every weird thing that can go wrong with your printer could create an error code. For example, some printers seem to freeze up when the file you’re using is corrupt, or if your SD card wasn’t formatted properly. Others will alert when there is a thermistor issue, while firmware incompatibility can also halt a print. In short, if your printer beeps and freezes without giving a descriptive error code, you may have to start from zero when it comes to troubleshooting.
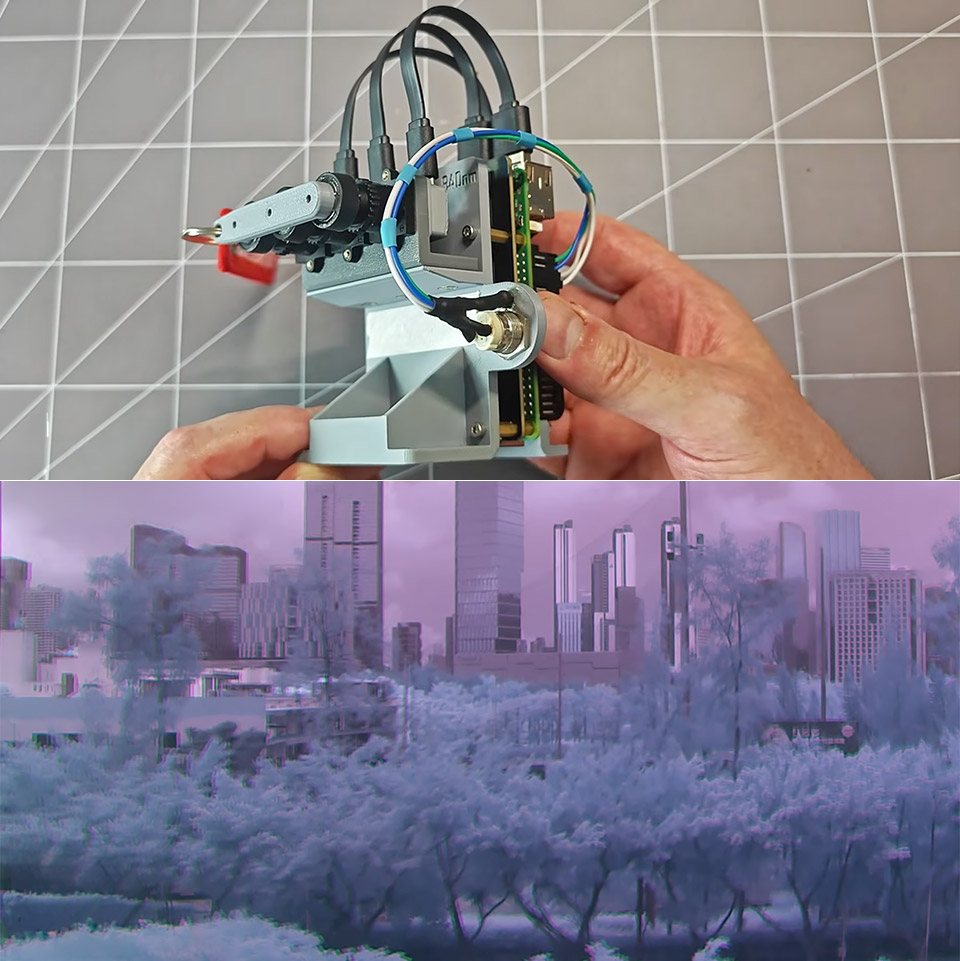
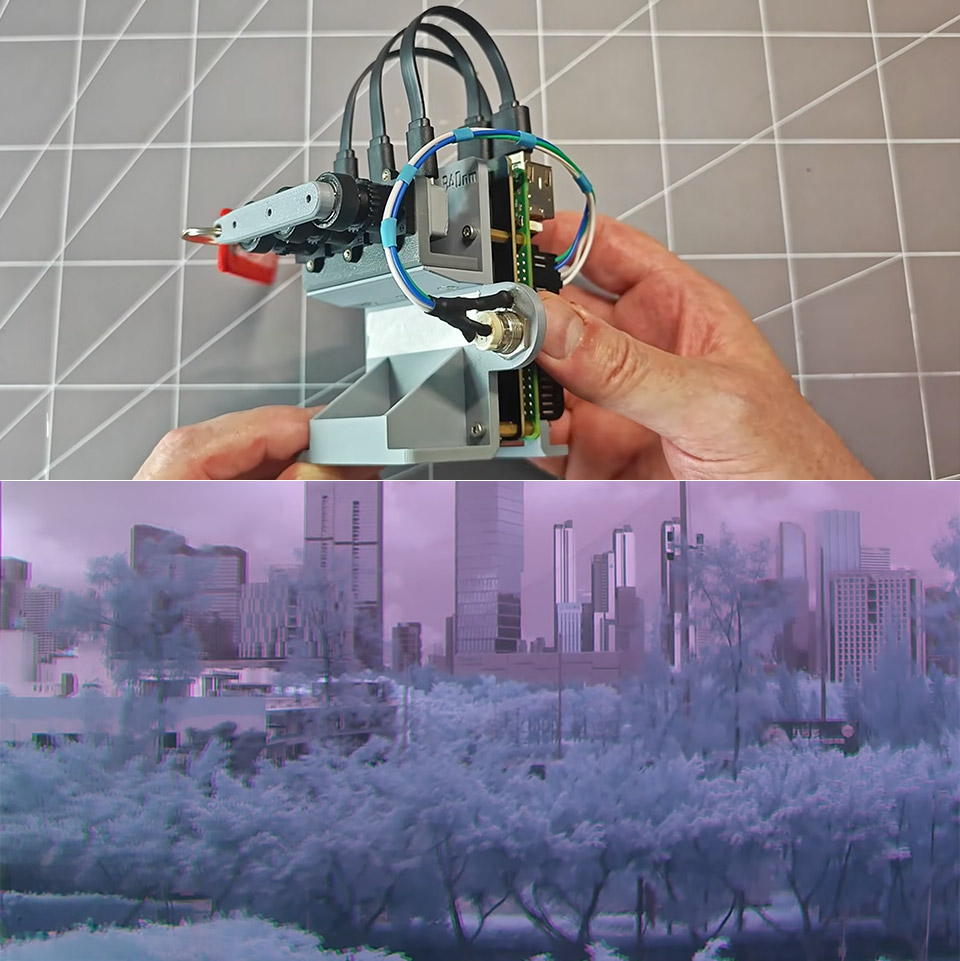
Silicon-based CMOS camera sensors are cheap and plentiful, but they’re rarely used to their full potential: they can detect a greater range of wavelengths in the infrared spectrum than they can in the visible spectrum, but in most cameras this is blocked by an IR-cut filter. [Project 326]’s infrared camera system reverses this: it records infrared images in color while blocking out visible light.
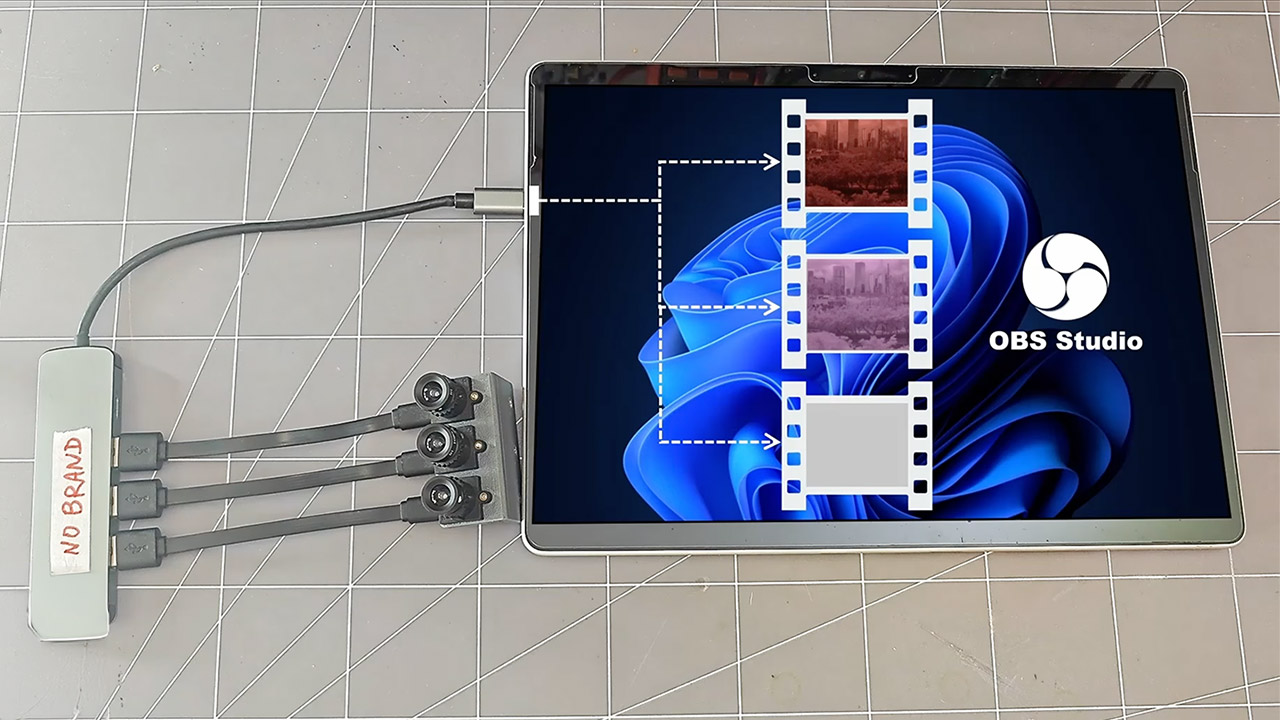
The system uses three USB webcams, each with its IR cut filter removed and replaced with a different dichroic IR band-pass filter. One filter is centered at 750 nm, one at 850 nm, and one at 940 nm. There is no band overlap; in testing, each camera only detected an infrared flashlight tuned to its own filter wavelength. The original cameras didn’t hold the sensors in a consistent position, so [Project 326] designed new housings. Using three lenses, each with distinct aberrations, introduced some difficulties in alignment. [Project 326] originally intended to use a pair of beam-splitting prisms with only one lens, but this proved too difficult to align using 3D-printed frames.
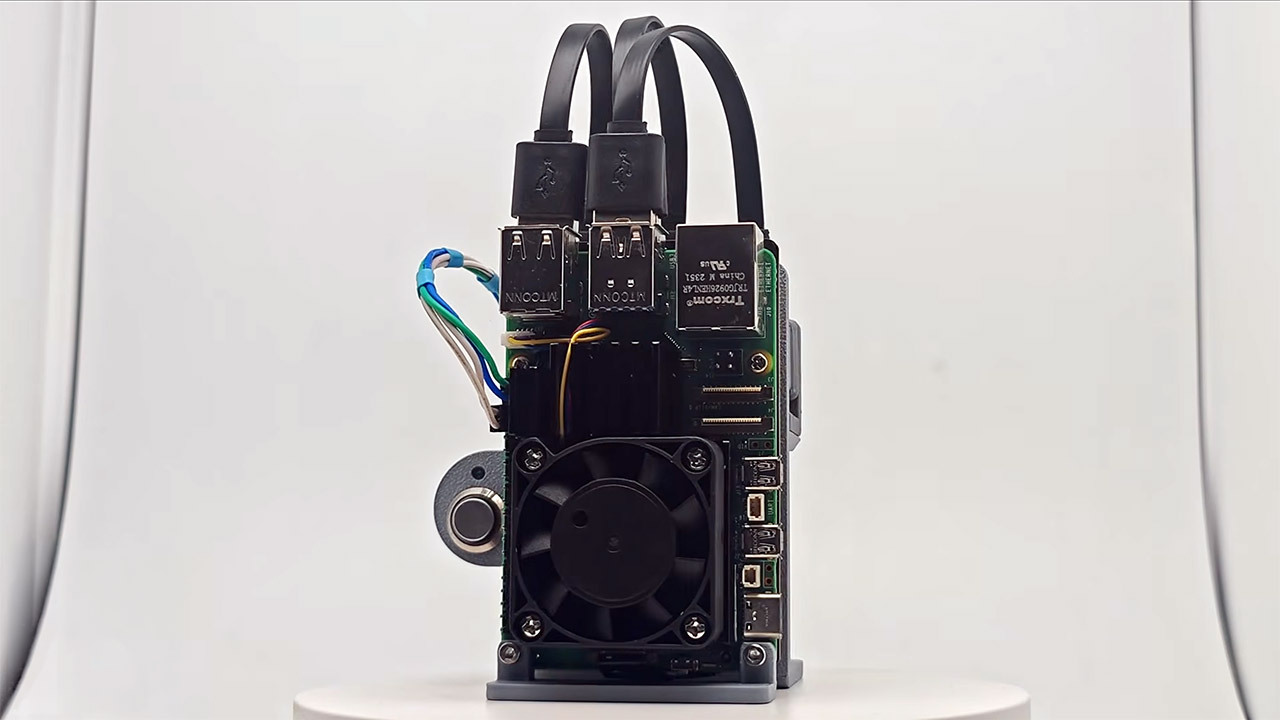
A Raspberry Pi records a separate monochromatic stream from each camera, which can then be processed into a composite color video. The first frames need to be manually aligned, but afterwards a script can apply the alignment to the rest of the video. Finally, the channels are mapped to colors, with the precise mapping being freely changeable. There were some few unexpected issues: each camera has its own, not terribly precise, local oscillator, and they drifted apart by about one or two frames per minute. Parallax error, on the other hand, was less severe than might be expected: at close range it’s noticeable, but by a distance of 35 meters, it represents less than one pixel of distortion.
Advertisement
The resulting images look great, and it’s easy to forget that they’re being captured without the use of any visible light. We’ve seen a similar technique (though extending into the visible range) used to recreate the surreal effect of Aerochrome film.
A semester’s worth of notebooks, printouts, and loose assignment sheets can turn your backpack into hefty luggage. This is where the iPad steps in, not by making your reading list shorter, but by making your academics less cluttered. Add an Apple Pencil, and the same tablet can handle handwritten lecture notes.
It’s not all work and no play, as the iPad can double as a handheld gaming console or streaming device. But at the end of the day, the real question is, “Which one is right for you?” With the various models under its belt, Apple has an iPad for everyone. It currently sells four very different iPads and two relevant Pencil models, with compatibility changing depending on the tablet.
My advice is to buy the least expensive iPad that comfortably supports your coursework. Another thing to keep in mind is compatibility. While the USB-C Apple Pencil works with every iPad listed below, the Apple Pencil Pro supports the M4 iPad Air, M5 iPad Pro, and A17 Pro iPad mini. Meaning, it doesn’t work with the standard A16 iPad. So with that out of the way, here are the best iPads to consider.
Apple iPad 11-inch with A16
Apple
Best affordable iPad for most students
Pros
Advertisement
Clean design and premium build
Sharp display for the price
Plenty of A16 silicon firepower
128GB storage for the same price
Battery life doesn’t disappoint
Cons
Accessories are a little too pricey
No Apple Intelligence or Stage Manager
Stylus support is outdated
Non-laminated display, again
Slow charging
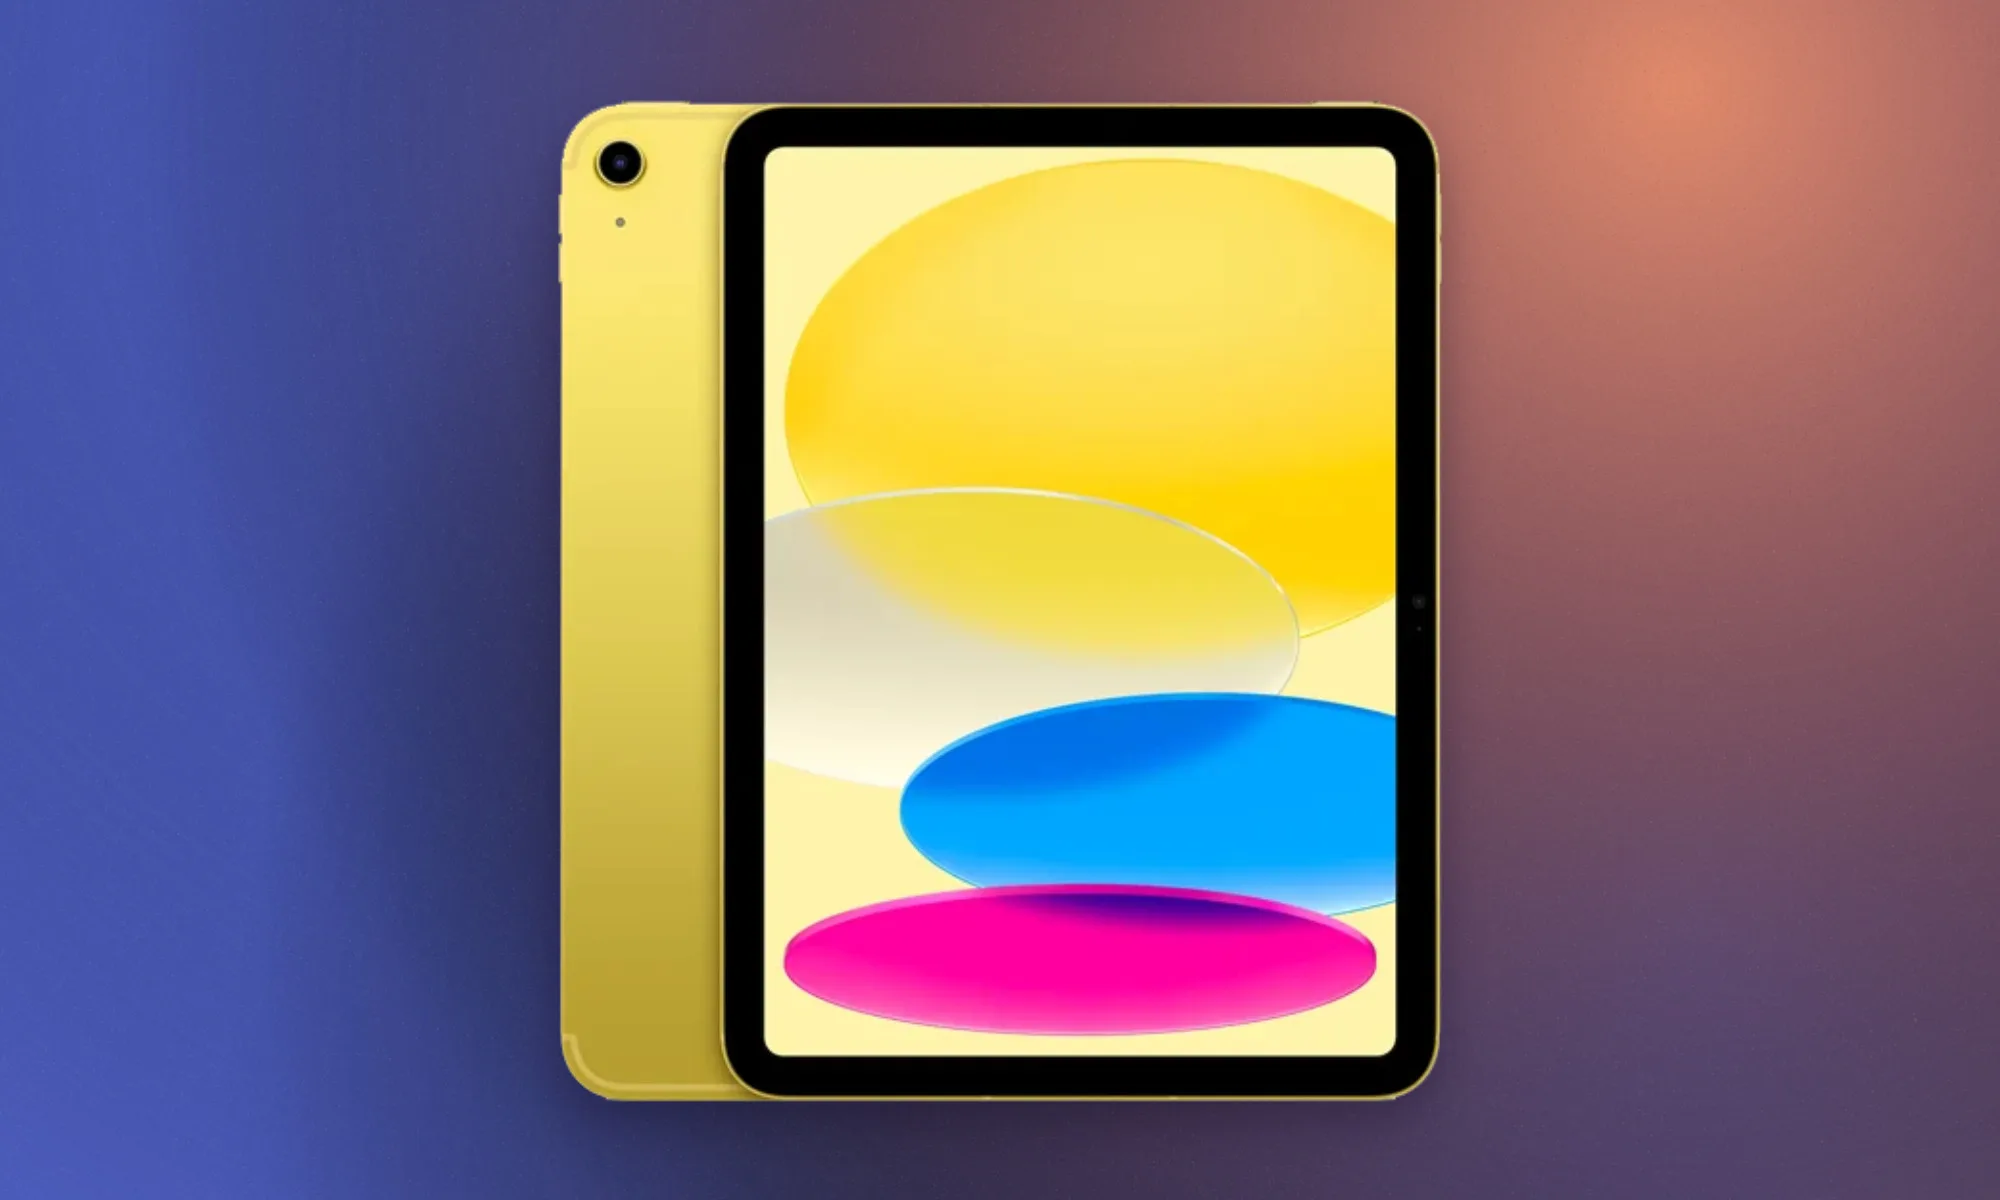
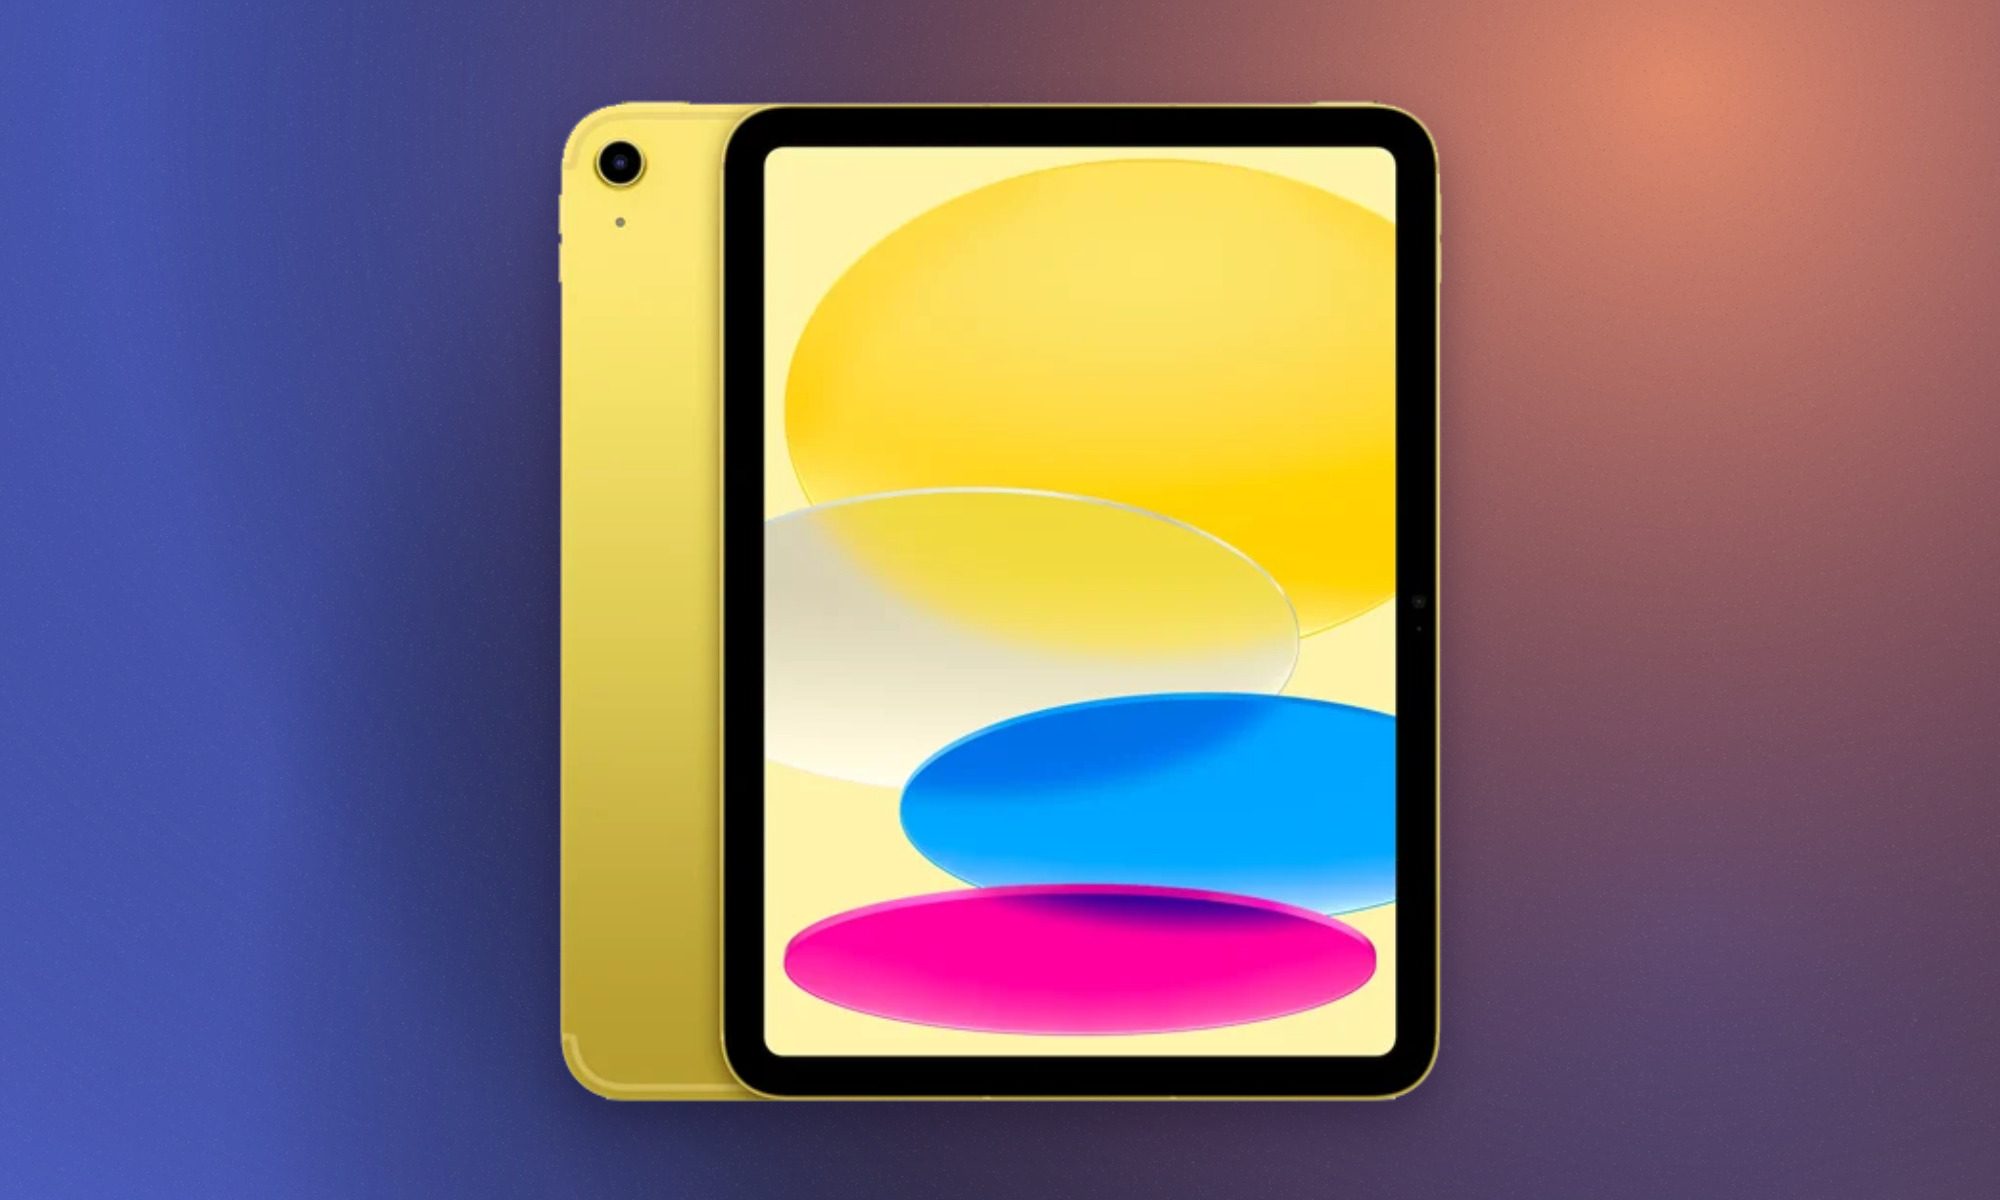
The standard iPad is the sensible pick for students who need a digital notebook, which can be used as a research and entertainment device without spending laptop money. Its A16 chip comfortably handles web browsing, video calls, photo editing, and even gaming. Apple also doubled the starting storage to 128GB, providing far more breathing room for downloaded lecture recordings and offline videos.
This model is our best overall pick for most people. The upgraded storage, solid battery endurance, and great performance in particular make it worth considering. It would’ve been an even more attractive package if Apple packed it with a display that goes past 60Hz and offered an anti-reflection coating. One big omission is Apple Intelligence, but for students whose workload centers around notes, documents, and media consumption, these limitations aren’t a deal breaker for under $450.
Apple iPad Air 11-inch with M4
Apple
Best iPad for most demanding students
Pros
Clean design and premium build
Sharp display for the price
Plenty of A16 silicon firepower
128GB storage for the same price
Battery life doesn’t disappoint
Cons
Accessories are a little too pricey
No Apple Intelligence or Stage Manager
Stylus support is outdated
Non-laminated display, again
Slow charging
The latest iPad Air is the sweet spot for students who expect their tablet to cover several years of increasingly demanding coursework. Its M4 chip and 12GB of unified memory provide enough headroom for illustration, CAD work, photo editing, music production, programming tools, and more intense workflows. The fully laminated Liquid Retina display supports P3 wide color and has an anti-reflective coating, making it considerably better for drawing and visual work than the standard iPad.
This is the entry-point to Apple’s premium tablet lineup, and I can easily recommend it. Apple Pencil Pro and Magic Keyboard support also let the Air shift between handwritten notes, creative input, and laptop-style typing. Apple continues to reserve 120Hz ProMotion and OLED technology for the Pro, which makes the Air’s 60Hz screen conspicuous at this price. The 128GB base configuration can also fill quickly with large creative projects. Even with those limitations, the Air offers a stronger combination of portability and processing power than any other iPad in the range.
Apple iPad Pro 11-inch with M5
Apple
Best iPad for art, Filmmaking, and design students
Pros
Advertisement
Clean design and premium build
Sharp display for the price
Plenty of A16 silicon firepower
128GB storage for the same price
Battery life doesn’t disappoint
Cons
Accessories are a little too pricey
No Apple Intelligence or Stage Manager
Stylus support is outdated
Non-laminated display, again
Slow charging
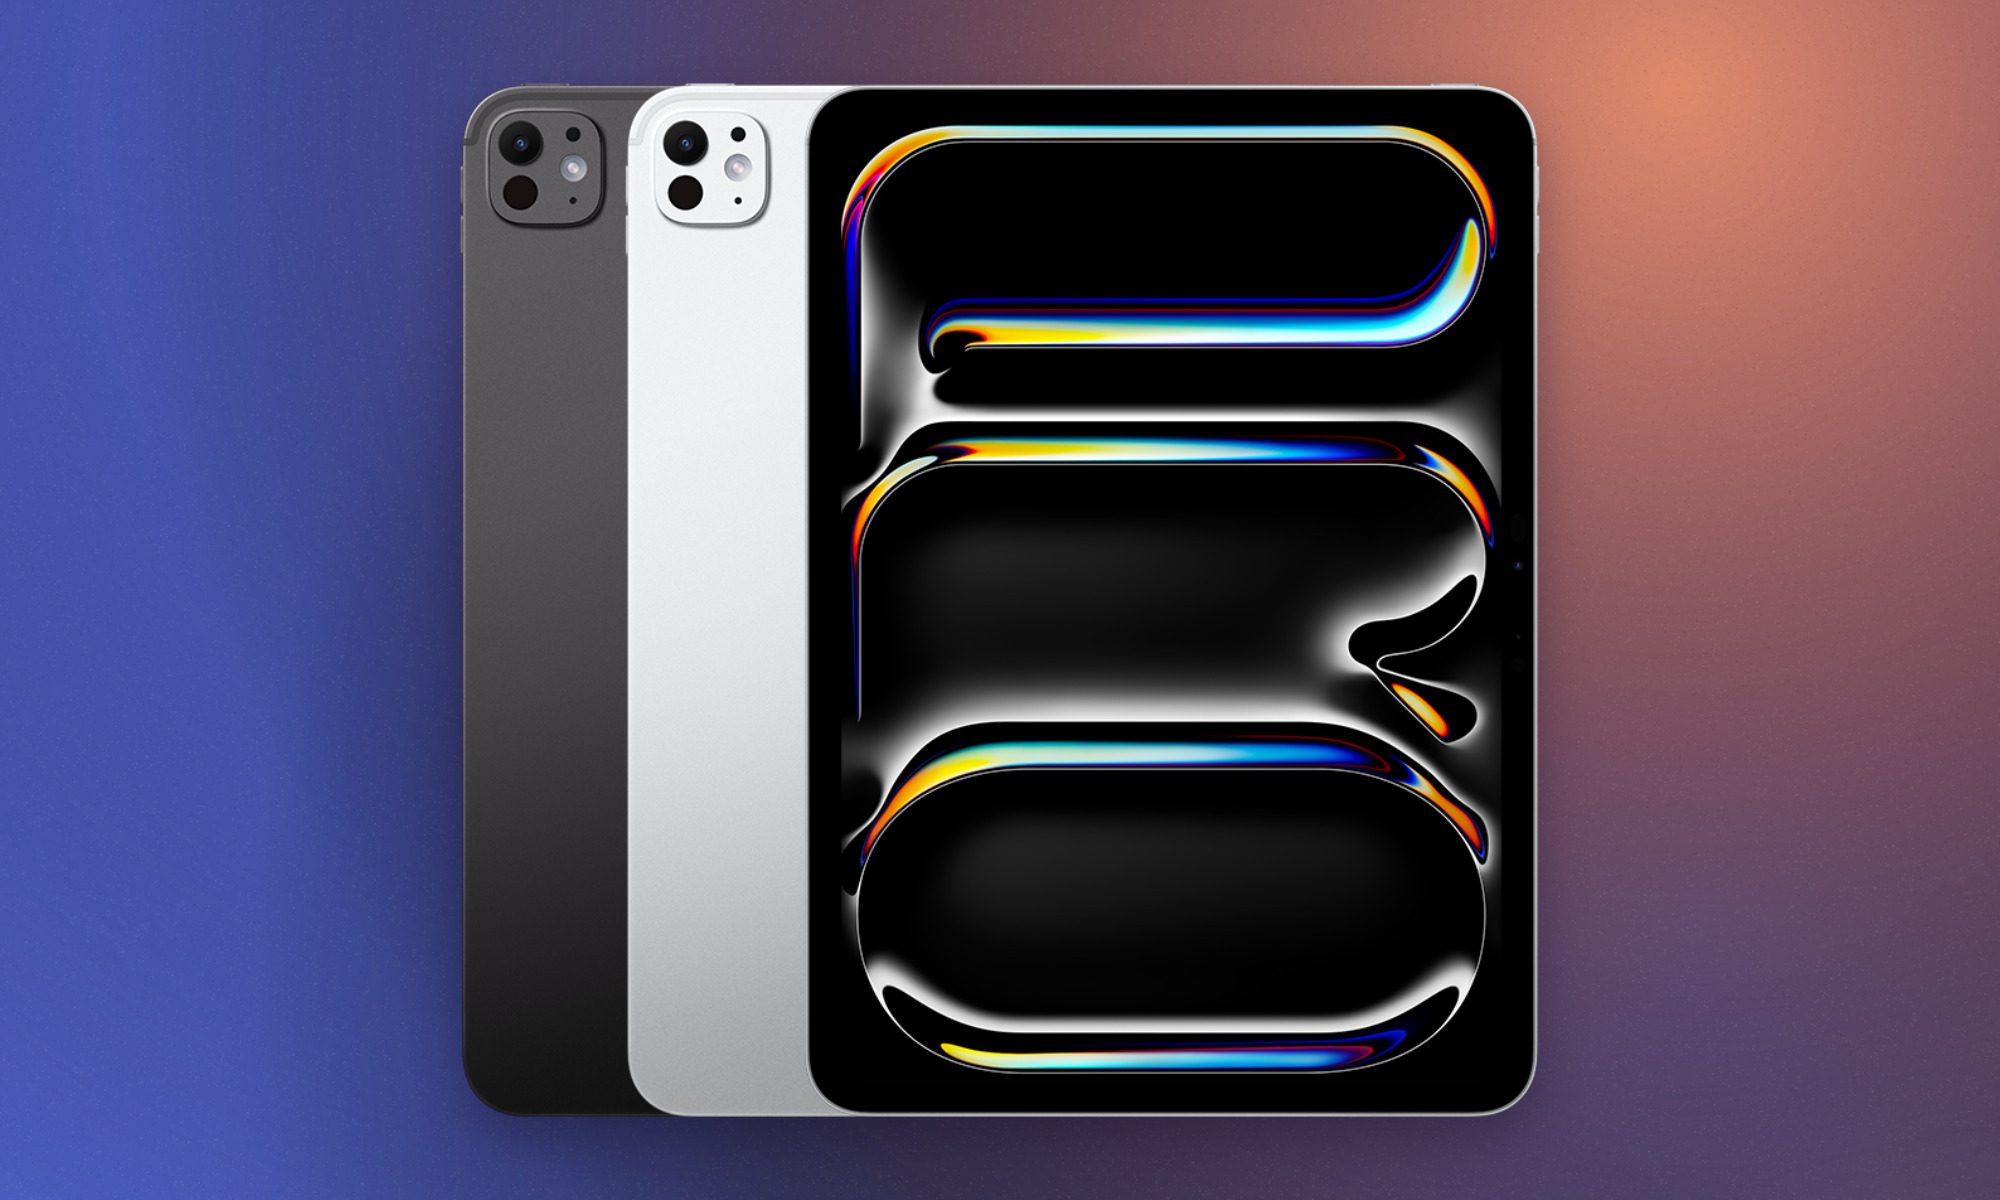
If you were to ask me who even needs the iPad Pro, the answer is pretty specific. It belongs in the hands of animators, filmmakers, architects, and other design students who can genuinely use its cutting-edge hardware. Its tandem OLED Ultra Retina XDR display combines perfect blacks, a 120Hz ProMotion refresh rate, P3 color, and up to 1,600 nits of peak HDR brightness. That panel alone makes it superior to most tablets in the market.
It is also well suited to color-sensitive artwork, HDR video, detailed photo editing, and most importantly, Pencil-heavy creative process. The M5 chip adds enormous processing and graphics capability, while Thunderbolt connectivity supports fast external storage and high-resolution displays. Pick the Wi-Fi configuration if you’re trying to get the best possible deal, but you’ll have to rely on the campus internet or your smartphone for internet connectivity.
Add the Magic Keyboard and Apple Pencil Pro to the list, and the complete setup can cost just as much as a premium laptop. Though the Pro has earned that expense with these specialized hardware that it offers. It’s not for light work, clearly.
Apple iPad mini with A17 Pro
Apple
Best iPad for carrying everywhere
Pros
Clean design and premium build
Sharp display for the price
Plenty of A16 silicon firepower
128GB storage for the same price
Battery life doesn’t disappoint
Cons
Accessories are a little too pricey
No Apple Intelligence or Stage Manager
Stylus support is outdated
Non-laminated display, again
Slow charging
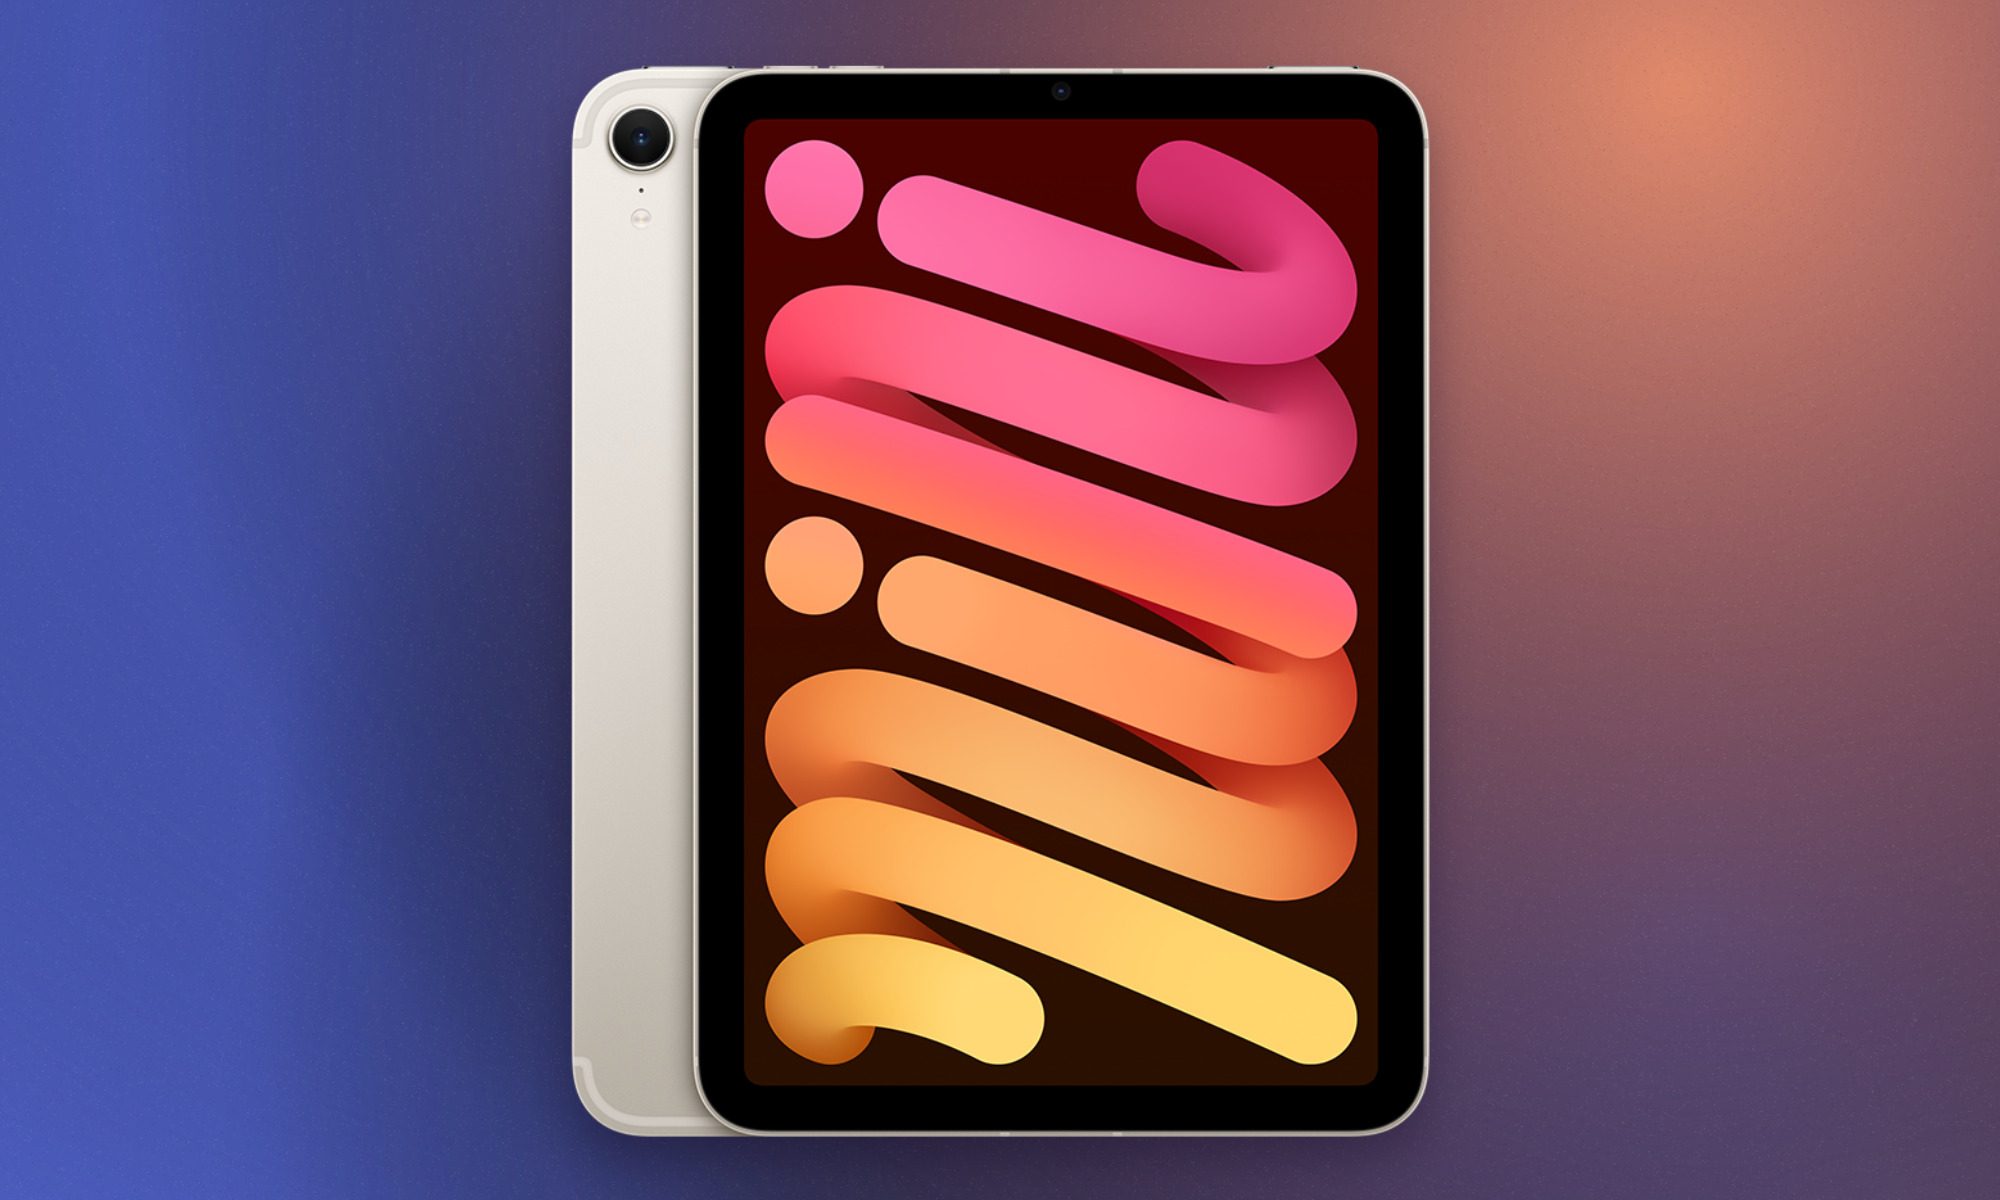
Lecture halls do not always provide enough desk space for your laptop or large-sized tablet with a complete setup. The iPad mini solves this problem with a more compact 8.3-inch screen and a body that weighs just 0.65 pounds. So it easily slips into a small bag, sit beside a laptop, or be held in one hand while you annotate a document with the other.
Packing the A17 Pro, you get access to Apple Intelligence and demanding apps, while the laminated P3 display offers a more direct Pencil experience than the standard iPad. Apple Pencil Pro compatibility makes the mini especially appealing for quick diagrams, field notes, and sketching. In our review, we were particularly impressed by its portability and unexpectedly capable performance.
Advertisement
But the compact display does reduce the space available for windowed multitasking. Writing long essays on an attached keyboard is also less comfortable than using an Air or Pro. For students who already own a laptop and want a portable companion for notes and reading, the mini may be the most useful iPad in the entire lineup.
Apple Pencil with USB-C
Apple
Best Apple Pencil for everyday note-taking
Pros
Most affordable Apple Pencil model
Charges easily via USB-C cable
Handy sliding cap covers port
Attaches magnetically to iPad edge and supports Hover on iPad Pro
Cons
No built-in pressure sensitivity support
Lacks magnetic wireless charging ability
No Apple Find My support
Most students buying an Apple Pencil use it for taking notes or sketching, which makes the Apple Pencil with USB-C a great affordable pick. It provides the same basic precision, low latency, palm rejection, and tilt support that make writing on an iPad feel so intuitive.
The Pencil attaches magnetically to compatible iPads for storage, although pairing and charging require a USB-C cable hidden beneath its sliding cap. Apple removes pressure sensitivity and the advanced gestures found on the Pro, which limits its appeal for illustrators and other creative students who adjust strokes through pressure. But for its price, I can easily recommend this stylus for everyday uses. Its broad compatibility also eliminates much of the confusion surrounding Apple’s stylus lineup.
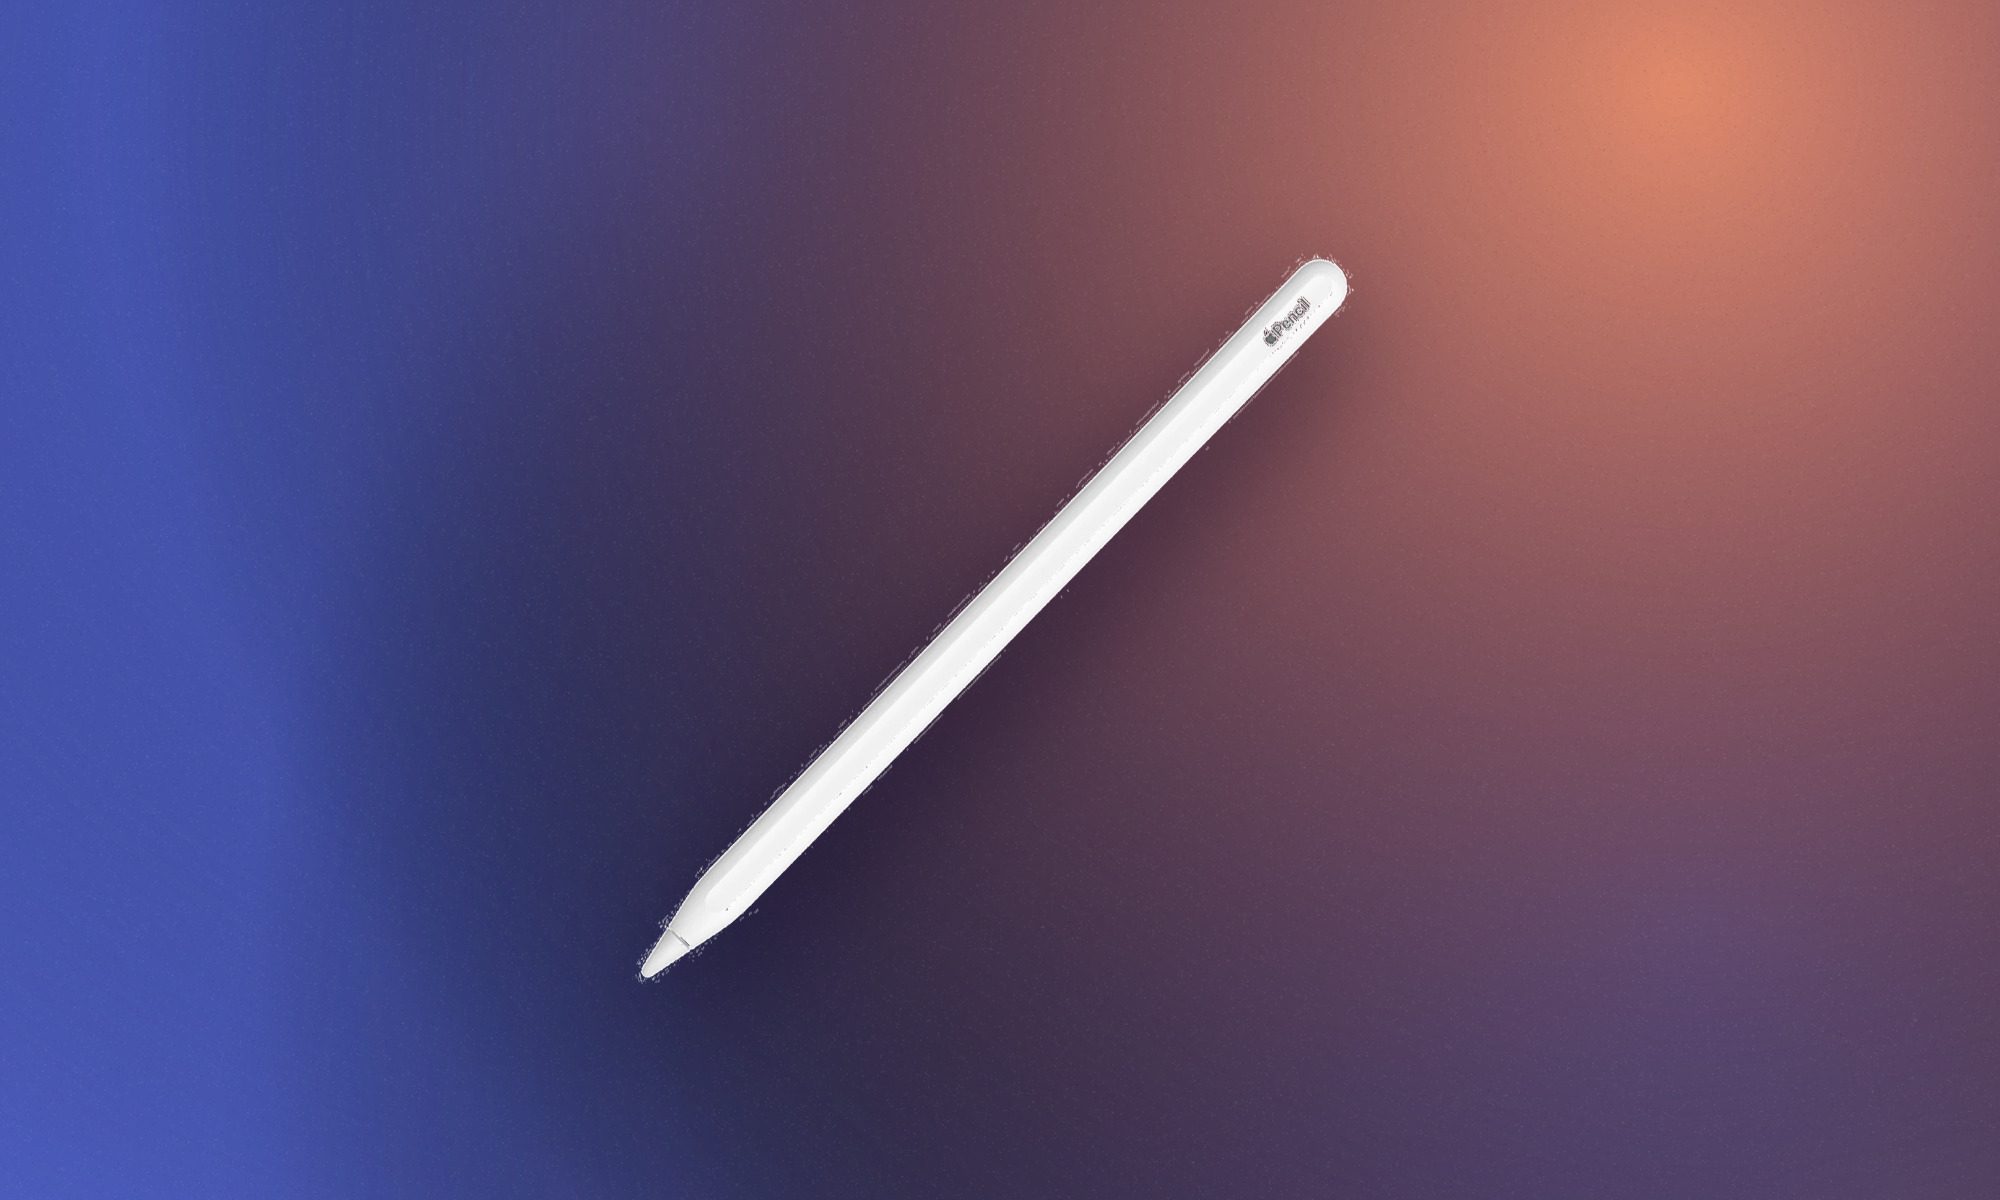
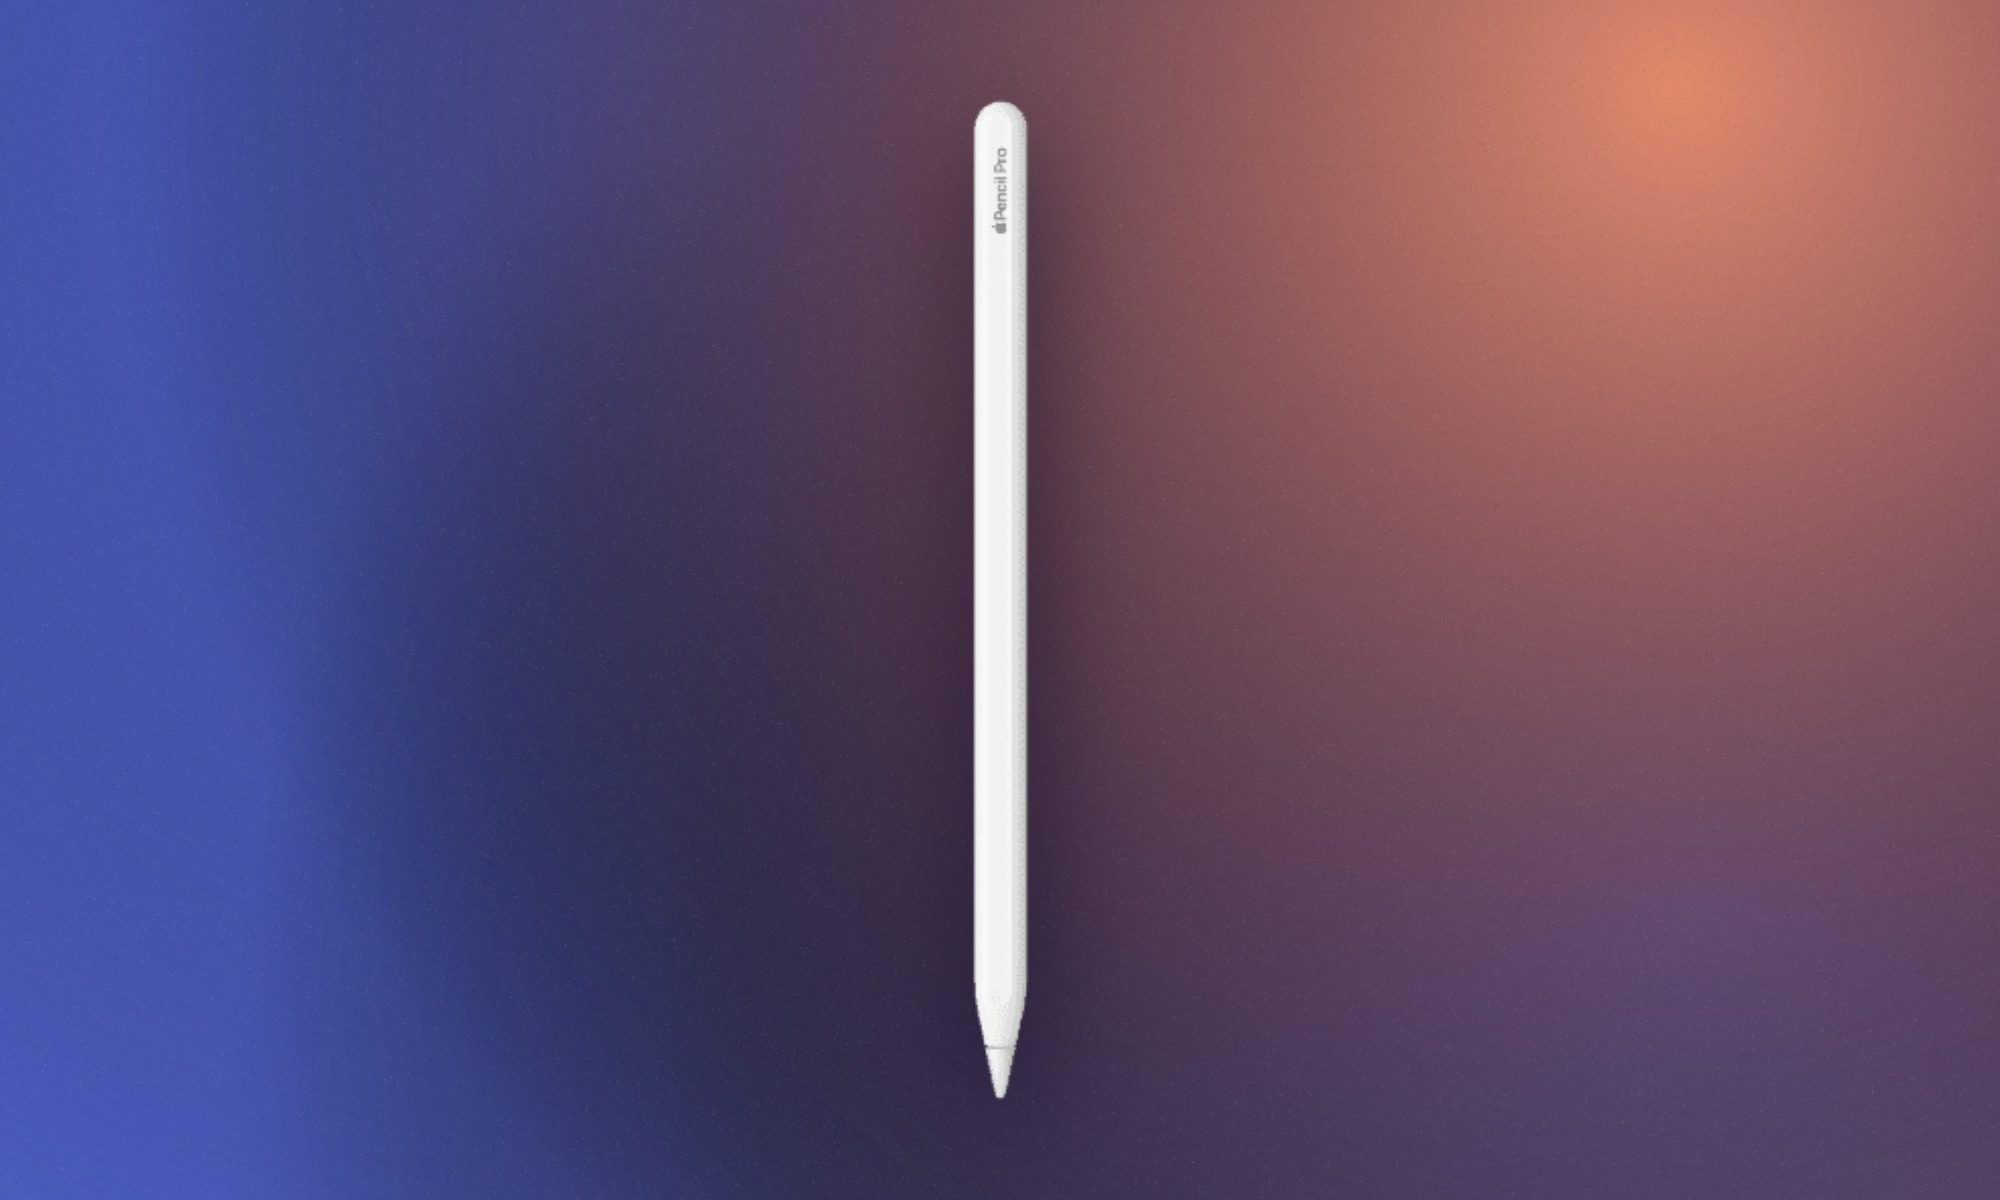
Apple Pencil Pro
Apple
Best Apple Pencil for creative students
Pros
Advertisement
Intuitive squeeze gesture opens palettes
Haptic feedback feels incredibly realistic
Find My tracking prevents loss
Charges and pairs magnetically wireless
Cons
Only works with newest iPads
Expensive investment for casual users
No backward compatibility for older iPads
Apple Pencil Pro earns its name through controls that can genuinely elevate your experience with iPads. You get the everyday convenience of the regular stylus along with the added functionality that makes illustration, designing, and other creative work better. Squeezing the barrel opens a contextual palette, while double-tapping can swap between a pen and eraser.
Barrel roll tracks the Pencil’s rotation for shaped brushes, and haptic feedback confirms gestures without forcing you to look away from the canvas. It also pairs and charges magnetically, eliminating the USB-C cable required by the cheaper Pencil. Find My support provides some reassurance when a $129 accessory disappears beneath a pile of textbooks. Students whose work revolves around Procreate, Photoshop, animation, and other such work will really see the benefit.
Pinkie promise gains 200-plus new participants and precisely zero enforcement
President Trump has expanded his Ratepayer Protection Pledge to include power companies, datacenter developers, cooperatives, and state governments, saying the move will shield consumers from rising energy costs driven by the datacenter boom.
In a speech at the Environmental Protection Agency (EPA) HQ in Washington, Trump said the pledge will now extend across the full chain of parties whose decisions determine household bills. This includes the utilities that supply power, the developers that build the facilities, and the state authorities that regulate energy rates and infrastructure.
Advertisement
“We’re here today to continue the incredible progress we’re making in communities nationwide to ensure that as new datacenters go up, and they’re going up all over, electricity bills for American families will actually come down,” he declared.
The original signatories of the pledge – the “Munificent 7” of Amazon, Google, Meta, Microsoft, OpenAI, Oracle, and xAI – agreed to cover the full cost of any extra resources required to satisfy their energy demands.
Advertisement
But as was pointed out at the time, these hyperscalers do not set the rates ultimately paid by consumers; utilities and state regulators play crucial roles there. The expanded pledge now brings those parties into the tent.
According to the White House, more than 200 additional utilities, datacenter developers, cooperatives, and states have now joined the pledge. The White House claims the pledge covers roughly 80 percent of the power delivered to American homes and businesses, supposedly protecting 263 million people when a datacenter is built nearby.
Trump went on to say that many datacenter developers will have to generate their own power on site, effectively turning themselves into utilities.
“It’s hard to believe, but you need double the electricity that we have right now, maybe even more than that, to really fulfill what you want to do,” Trump said.
Advertisement
“We’re leading China [in AI] by a lot, and using our old grid would not have worked. And I came up with the idea that you build your own plant. This way nobody can complain,” he added.
The Reg believes many datacenter operators were already generating their own on-site power before Trump claimed responsibility for the idea.
“We’re insisting that AI datacenters and big tech companies pay their own way. And that’s what they’re doing, and they’re happy to do it, because this way, they’re going to be able to function, and function brilliantly. They’re going to have a lot of electricity left over and they’ll put that into the grid, so we’ll actually end up with more electricity,” Trump claimed.
But as The Register pointed out previously, the text of the Ratepayer Protection Pledge makes no mention of enforcement. There are no apparent penalties should any of the signatories fail to prevent consumer bills rising because of demand from AI datacenters, so this appears to be very much a voluntary agreement.
Advertisement
We asked the White House and the EPA what actions might be taken if signatories to the pledge were found to be failing in their commitments, and will update if we get a response.
The measure seems likely to be put to the test, as the latest data from Synergy Research estimates the total capacity of US datacenters will double over the next three years, driven by an aggressive build-out by hyperscale operators.
The pipeline of future large facilities known to the research biz currently stands at almost 1,500 worldwide, with almost half of those in America. That represents around 45 gigawatts of extra IT capacity set to be added over the next few years.
Synergy chief analyst John Dinsdale says that availability of power and rising local concerns over server farms are crimping many new plans for facilities.
Advertisement
“But it is also clear that datacenter developers will continue to find ways around those issues and that booming demand will continue to drive aggressive capacity growth. Over the next five years, the US will continue to account for well over half of the world’s operational datacenter capacity.” ®
With heaps of praise from practically everyone about the redesigned form factor of the new Galaxy Z Fold 8, why has Samsung decided to keep on with the boxier design in the form of the Galaxy Z Fold 8 Ultra? The answer, in Samsung’s eyes at least, is productivity.
The firm claims that the boxy 1:1 aspect ratio of the Galaxy Z Fold 8 Ultra’s 8-inch foldable screen is designed to run two regular 6.5-inch smartphone apps side-by-side, while the 4:3 aspect ratio of the regular Z Fold 8’s 7.8-inch inner panel is better suited to social media, watching movies and playing games.
However, after using the regular Galaxy Z Fold 8 for the past few days, I’d argue that the opposite is true; it can be just as productive as its Ultra sibling, if not more so. It just depends on what you’re up to.
Split-screen works just as well on the Fold 8
Samsung’s Ultra productivity angle makes a lot of sense on paper. The ability to use what is essentially two smartphone-sized apps at once does make the Ultra a great option for productivity – but that doesn’t mean the Fold 8 isn’t.
Advertisement
Image Credit (Trusted Reviews)
Advertisement
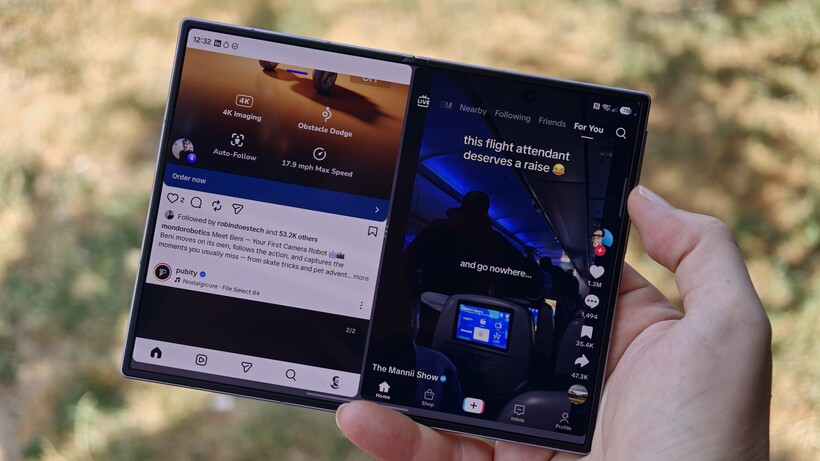
Just like the Fold 8 Ultra, you can run two apps side-by-side in a split-screen view, with space to run a third resizable floating app on top on the Z Fold 8. Yes, with a squatter, wider screen than the Ultra’s boxy aspect ratio, you don’t see quite as much of both apps at once, but it’s still more than usable.
Image Credit (Trusted Reviews)
I’ve opened up Google Docs and Chrome side-by-side to tweak an article on-the-fly before posting, I’ve dragged-and-dropped large video files from the Google Files app to my NAS drive, and I’ve had recorder and notes running simultaneously for a recent briefing – and I’ve not really had any major complaints.
Yes, the Fold 8 Ultra remains the better option if you do a lot of split-screen multitasking, but for more occasional use, the Fold 8 remains a solid option.
Editing videos on a wider screen is way better
In fact, I’d argue that the opposite is true; the wider 4:3 aspect ratio of the regular Z Fold 8 actually lends itself better to specific tasks like video editing than the 1:1 Fold 8 Ultra.
Image Credit (Trusted Reviews)
Advertisement
I’ve been testing out the Insta360 Luna Ultra for the past few days (what a bit of kit – but that’s a story for another day) and decided to lean into social media content creation to see what it could do. Once I shot a few clips on the Luna Ultra, I imported them to the Z Fold 8 using the Insta360 app.
Advertisement
At this point, I’d usually transfer everything to my PC and edit on my big 34-inch ultrawide monitor – but I instead set myself the challenge of editing a TikTok video entirely on the Z Fold 8. And, honestly, it went way better than I expected.
I first booted up the regular CapCut mobile app, but the app informed me that the Fold 8’s screen was big enough to qualify for the more advanced CapCut Pad app – so I downloaded that instead. And it was a joy to use on the inner foldable screen.
Image Credit (Trusted Reviews)
There’s plenty more available at your fingertips than the CapCut mobile app designed for small screens, making it much easier to create quick cuts, adjust video and audio properties, throw in transitions, edit audio and generate captions. And the wider screen means you get to see more of your editing timeline than you would on the boxy 8 Ultra, meaning less time swiping across your timeline to find your edit.
From start to finish, I had a quick 30-second video fully edited and exported in just under 30 minutes, ready to post on TikTok. That’s a real edge for content creators right there.
Advertisement
Advertisement
What does this mean for the Ultra form factor?
So if the regular Z Fold 8 falls into the ‘pretty good’ category for split-screen multitasking and arguably the ‘better’ category for things like video editing, what does this mean for the ‘productivity-focused’ Fold 8 Ultra design?
Image Credit (Trusted Reviews)
It’s hard to say for now. Samsung isn’t going to just drop the foldable design it has insisted on for the past eight generations because that’d be an admission that it got it wrong.
Instead, I think it’ll depend more on sales figures for the Fold 8. If, as I’m suspecting, it outsells the pricier Fold 8 Ultra, we could indeed see a shift from Samsung with next year’s Fold 9 collection. We’ve already seen Samsung quickly cancel projects based on poor sales figures – I’m looking at you, Galaxy S25 Edge – and it could well be the case for the Fold 8 Ultra.
We’ll just have to wait and see for now, I suppose. But one thing is for sure; the Z Fold 8 isn’t just the content-focused foldable Samsung claims it is.
The sport of fencing requires keeping score, just like so many other similar pastimes. When their club’s existing scoring rig broke, [jc0025] stepped up to build a scoring box of their own, using the typical tools of the maker trade.
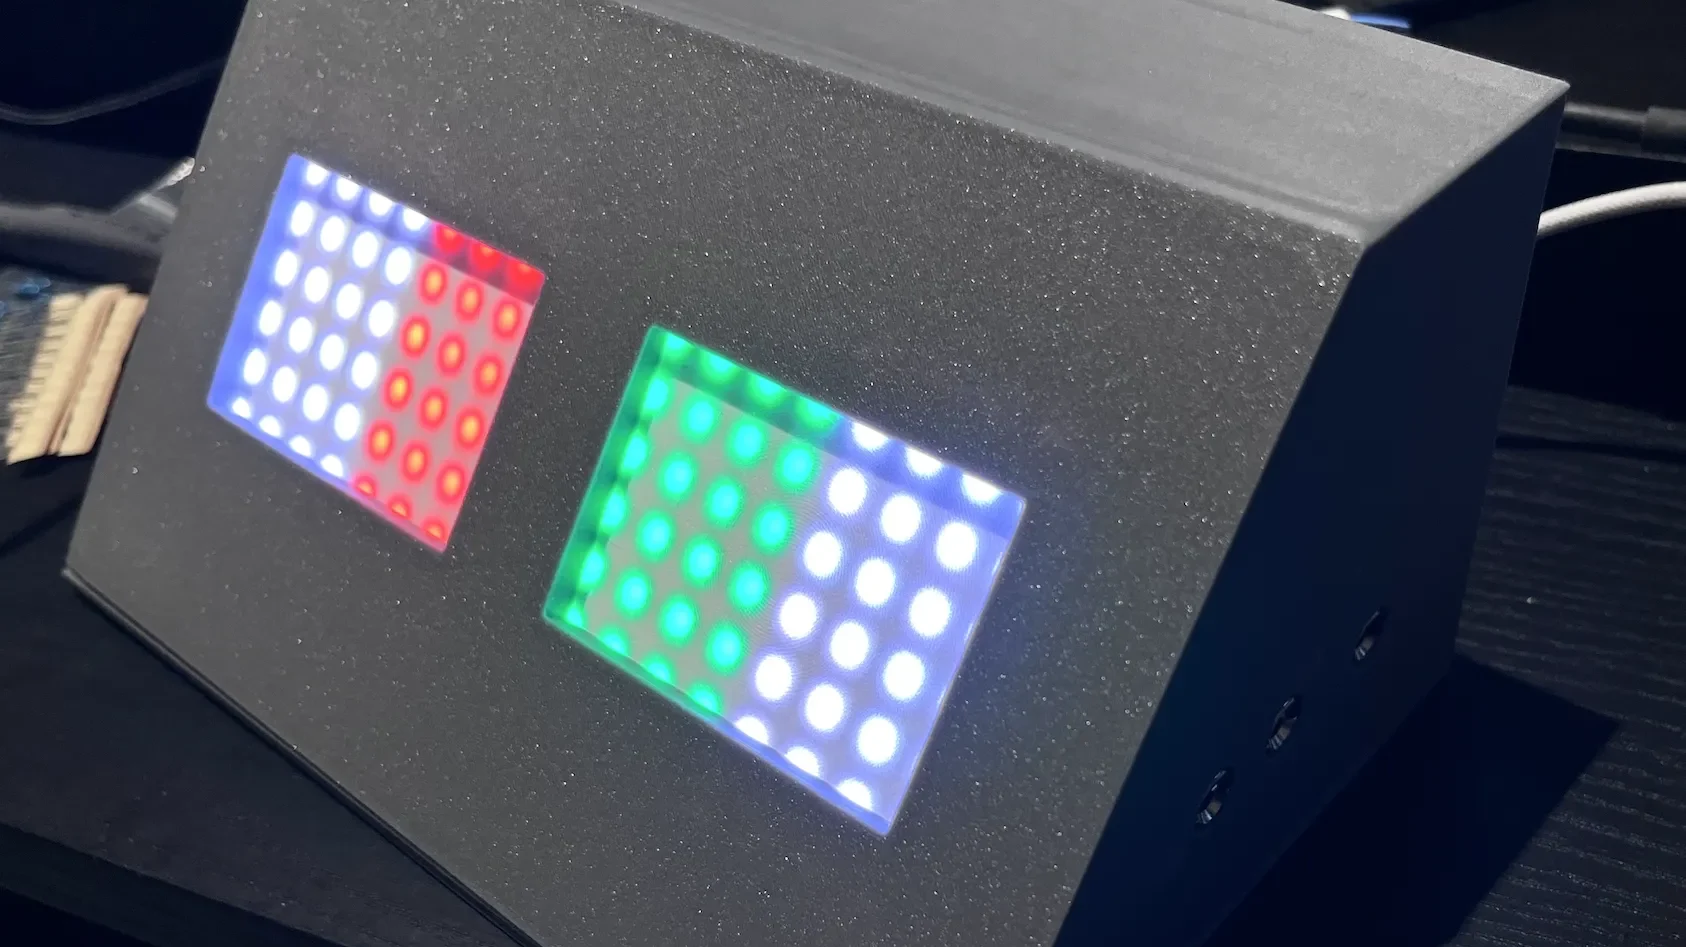
The brains of the operation is an Arduino Nano, running the venerable ATmega328P. It’s set up to drive a pair of 8×8 WS2812B addressable LED panels. It’s also hooked up to a pair of fencing socket blocks, which hook up to the lamé (jacket), weapon, and guard of each player for electronically scoring hits. The Arduino is thus programmed to respond to various conditions, lighting the LEDs in turn. For example, the tip of one player’s weapon hitting the other player’s lamé will fire a colored light, allowing the hit to be scored. Meanwhile, a tip hitting the floor will fire a white light, indicating off-target. There’s also a buzzer for sonic indication, as well. Everything is wrapped up in a tidy 3D-printed housing, while power is courtesy of a USB-C charger hooked up to the unit.
Most cameras ignore a wide stretch of near-infrared light that plants reflect and certain materials absorb in unexpected ways. One maker spent three months turning three ordinary USB webcams into a single system that records that invisible band as full color video. Project 326 started with the same $15 modules many people already own. Each sensor already responds to near-infrared once the factory IR-cut filter is gone.
That filter is placed between the lens and the sensor to prevent typical photographs from becoming foggy. Taking it out is a simple process: open the camera housing, remove the tiny red or green glass or plastic piece, and your sensor will become far more sensitive to anything above 700 nanometers. The catch is that even with a full-spectrum camera, while that infrared-pass filter is in place, you’ll still receive monochrome images since colour requires three different cameras, each locked to a narrow slice of the infrared spectrum.
Premium Image Quality: Upgrade to Link 2 4K webcam with a 1/2″ sensor. Captures true-to-life webcam 4K visuals with HDR and low-light performance for…
Professional Audio: Experience best-in-class audio with advanced AI noise-canceling algorithms. Filter out unwanted background noise for clear…
True Focus: Insta360 Link 2 streaming camera with Phase Detection Auto Focus (PDAF). No more blurry shots—this web cam ensures instant focusing and…
Dichroic bandpass filters effectively resolved the isolation issue. You only need to put a filter on each camera that is centered around 750 nanometers, another around 850 nanometers, and a third around 940 nanometers; they will pass only a little window of wavelengths while rejecting everything else, including normal visible light. After a few tests with handheld infrared flashlights, you can observe that each one only hits one camera: a 745-nanometer lamp would light up the first camera, an 850-nanometer lamp the second, and a 940-nanometer lamp the third, with no overlap.
Getting the mechanical alignment correct was far more difficult than the optical filters. He tried utilizing a beam-splitting prism and a single shared lens to ensure that all three sensors saw the same scene, but 3D-printed mounts couldn’t keep the optics stable enough, so the idea was abandoned. In the end, he decided on three different lenses side by side. He removed the sensors from their original boards and remounted them on new printed circuit boards, ensuring that each chip sits squarely and at the same distance from the lens. The new housings maintain everything nice and rigid, as we’re talking a baseline of roughly 17 millimeters between cameras, which is small enough that parallax only interferes with the image at close range.
He had to switch the footage to a Raspberry Pi because Windows wouldn’t let him utilize three identical USB cameras at the same time. Python programs are currently pulling simultaneous monochromatic streams and writing them out as independent MKV files; but, because these webcams use free-running RC oscillators, their frame rates are drifting by one or two frames per minute.
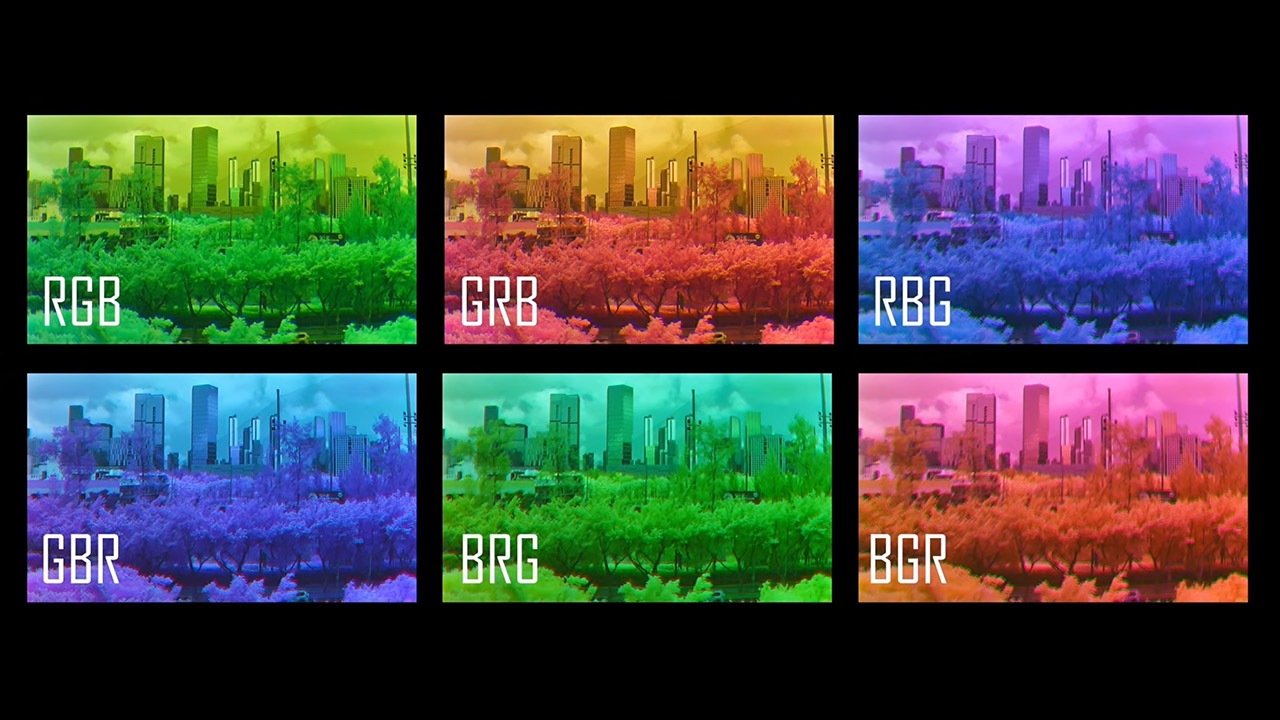
To address this, he set up a post-processing system that also handles the minor geometric offsets. He uses DaVinci Resolve to manually align the first frames of each stream, including translation, scale, and rotation, and then a script applies those fixes to the rest of the sequence. Once he had three grayscale videos layered on top of one another, he simply assigned each to a red, green, or blue channel. There are six different mappings, and selecting the appropriate one can significantly alter the final appearance of elements such as flora, sky, and skin.
Its first usable color footage resulted from testing conducted outside under the scorching tropical sun. Leaves that appear to be one solid green to our eyes begin to break apart into distinct tones as you use the near-infrared light that reflects off them to add depth to the footage. Atmospheric haze behaves differently when picked up in the three various color bands, giving distant objects a layered appearance that draws the observer in. Now, the system still needs some fine-tuning to get the focus right, and a steady hand is required, since one of the early recording sessions was ruined because the silly lens cap remained on throughout. The Python scripts used to capture the footage, as well as the 3D printed objects, are available on GitHub for anyone interested in following in his footsteps. [Source]
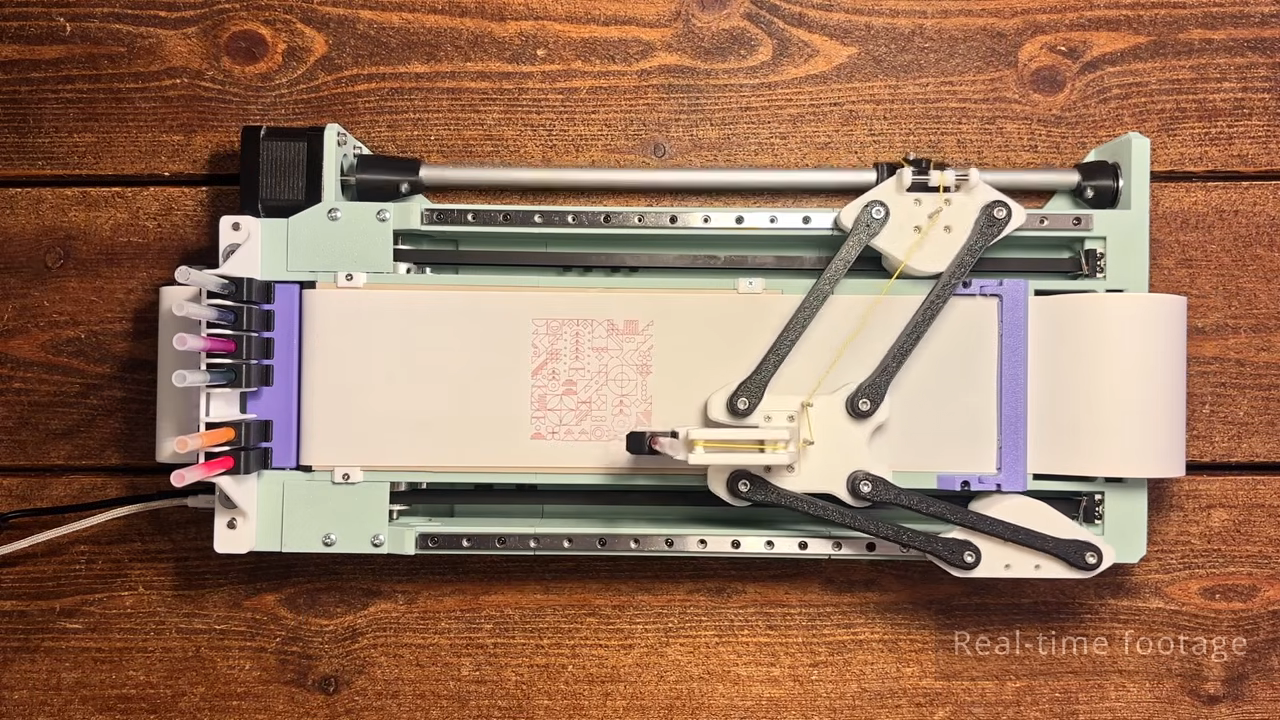
The build relies on a unique motion system, wherein two NEMA 17 stepper motors drive either side of the linkage to control the position of the end effector—in this case, a pen carriage. By controlling the position of each side of the mechanism, it’s possible to move the pen through XY space. Running the show is an Arduino Nano, fitted with a GRBL shield and appropriate stepper motor drivers.
The magnetic tool changer is particularly nifty, too. It allows the plotter to grab a different ink at will to add more color to the drawing. It’s well-designed, with the plotter able to change inks without losing accuracy or otherwise fumbling the switchover. The plotter uses Muji ball point pens, which are available in a range of colors and draw with slick, clean lines. It’s also quite a fast plotter, thanks in part to [András]’s efforts to keep the pen carriage light by using a smart mechanism to offload the pen lifting actuator to the main body.
Advertisement
[András] has plans available, but you’re going to have to pay for them. Still, it’s always nice to see a new machine in the wild. Video after the break.
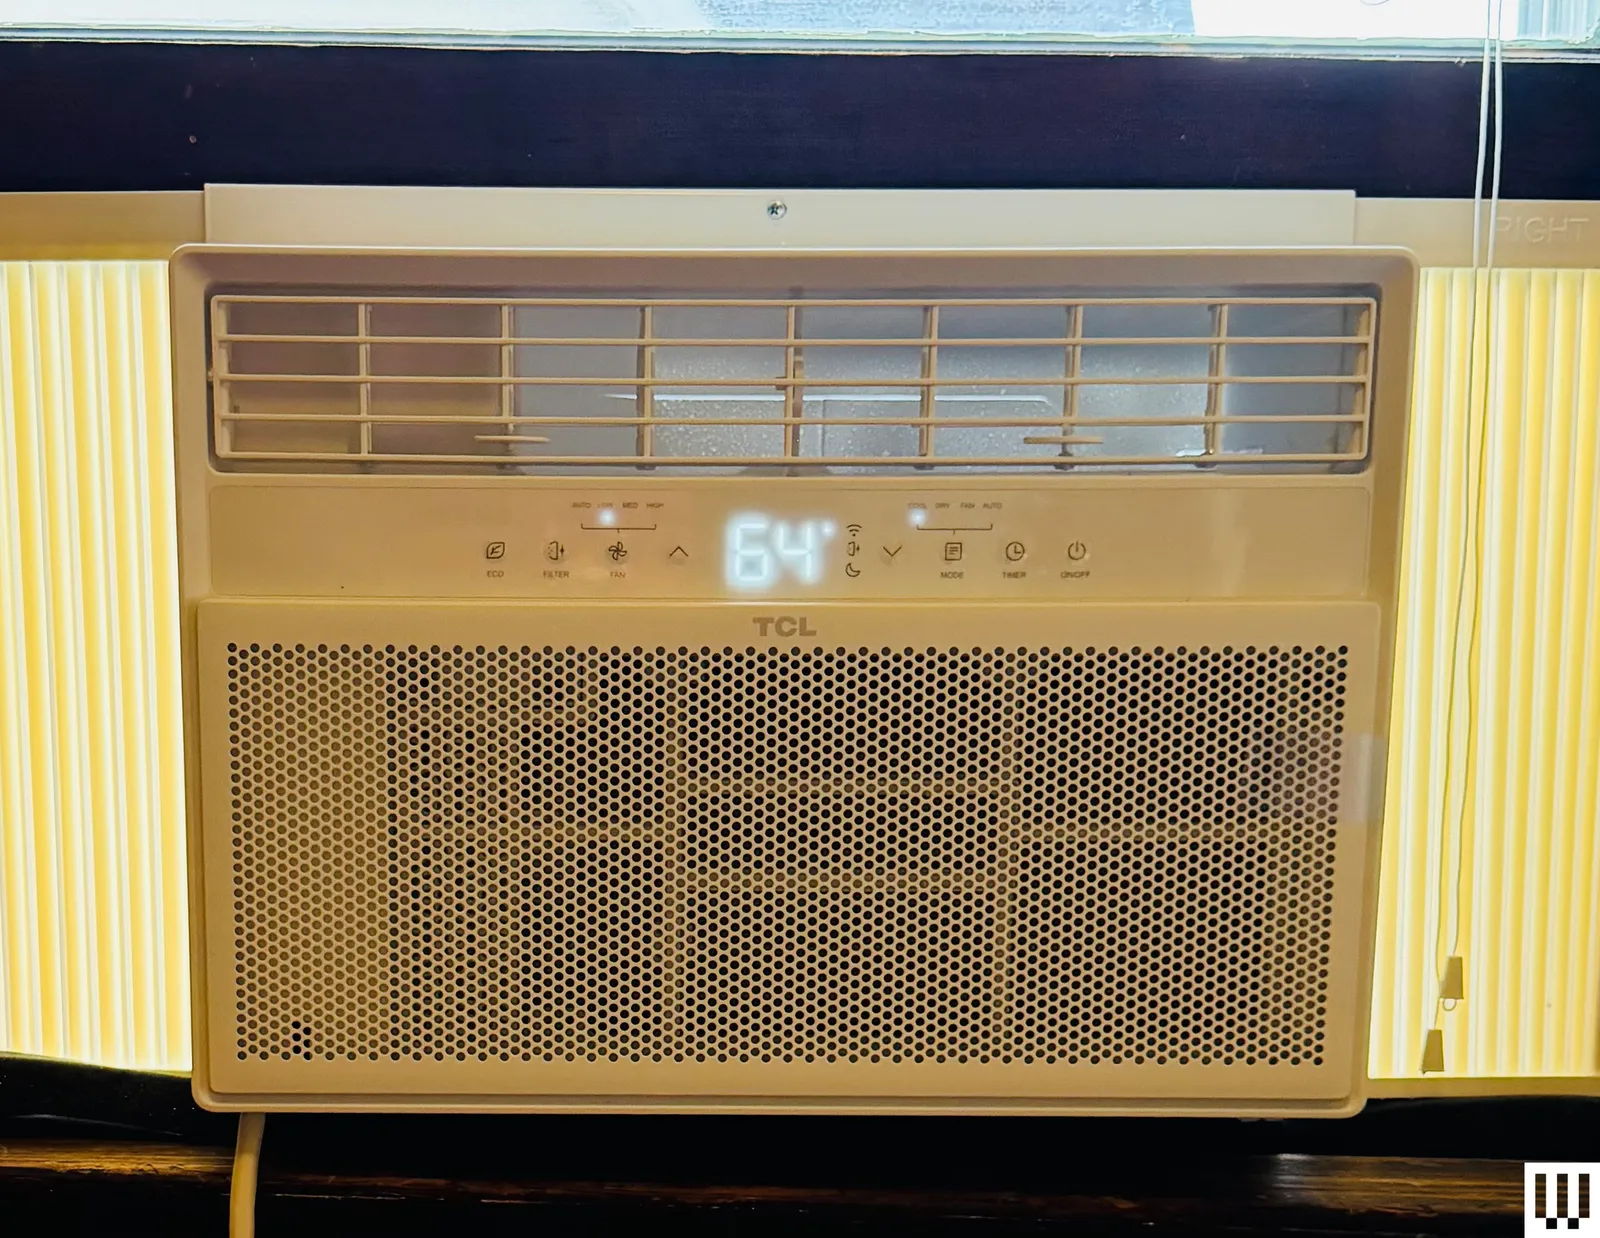
TCL Q-Series Air Conditioner (10,000 BTU) for $369: Chinese electronics company TCL has been making air conditioners for only five years, but it is tackling the category the way it did for TVs—that is, by quickly conquering turf with excellent value. I tested the 10,000-BTU version of the Q Series window AC in an 120-square-foot upstairs bedroom that gets very little flow from my home’s central AC. It took three hours to drop the temperature by 10 degrees from a sweltering 78, but as it operated at a fairly quiet 60 decibels, I didn’t mind it. Installation was a breeze thanks to the included frame. The TCL has Matter connectivity, but I was not able to get it to connect to my Apple Home app, apparently a common issue. There is a remote that has all the controls from the unit itself. The thermostat is accurate within one degree, and the unit reliably turns itself on and off to keep the room temperature on its mark. The CEER rating ranks an impressive 15.0, equaling WIRED’s top-pick Midea, and the TCL costs $100 less at the same power output. But while quiet compared well with many other models, this TCL is still louder than the Midea and doesn’t offer the U-shaped device’s superior insulation. Easy install may be a selling point over the U-Shaped model. —Martin Cizmar
Dreo Portable Air Conditioner 740S (10,000 BTU) for $700: Look, I’m loving the new generation of portable air conditioners but not because they’re portable. Fact is, wheels aside, they’re pretty big and heavy, and the thick hoses make them bulky in a room. But they’re easy to install without lifting into a window frame, a real boon for solo residents. And because the only thing that needs mounting in a window is a bracket for the hoses, these ACs can be used on pretty much any window shape—a boon especially for those in older buildings. The Dreo has all these virtues, plus a respectable 12 CEER rating, courtesy of dual hoses and a smart inverter. (In general, avoid portable units without dual hoses, as this can cause a depressurization effect that lowers efficiency.) I’ve been using this portable in the difficult-to-access window in my 150-square-foot office, and its effects are basically instant. The evaporative cooling tech also means I don’t have to drain water. But our top-pick Zafro offers a lower price, and a slightly better CEER efficiency rating at a similar operating noise level of around 60 to 65 decibels on high fan speeds. Still, this is an excellent portable AC unit. If you see a deal, snap it up.
Advertisement
GE AWAS05BBA Window Air Conditioner Unit (5,000 BTU) for $231: This 5,000 BTU unit is less powerful than our favorite budget window air conditioner pick from GE. There’s no app and no remote, and airflow options are limited: You can’t direct air up and down, only left and right. But it’s the cheapest model we recommend, relatively easy to install, and much quieter than you’d expect for the price. It’ll cool a small 150-square-foot space quickly and mostly frictionlessly. But we haven’t tested it as long as for our top budget pick.
LG Window Air Conditioner Unit (12,000 BTU) for $379: The LG 12,000 BTU Smart Window Air Conditioner offers efficient large-room cooling at a surprisingly low price. It weighs 90 pounds and requires professional installation with a bracket. Its 60-decibel operation places it squarely in the middle of the pack on noise. This said, WIRED reviewer Lisa Wood Shapiro found it blends into a room well with its white-on-white design, and that the filter replacement indicator light is useful. The app was laggy and difficult to use during Wood Shapiro’s testing, but there is a remote.
Advertisement
Friedrich Kuhl Air Conditioner for $1,228: This unit from Friedrich is among the most expensive we’ve tested, and one of the heaviest—in part because of a metal chassis designed to provide easy maintenance access and deter first-floor break-ins. This model allows adding a custom Friedrich FreshAire MERV 13 filter to clean the air as it cools. The screen is easy to read, and the device comes with a remote. An app lets you schedule the unit’s use over the course of the week, but note that connection with the smart app was a little janky, and it paired only with 2.4 GHz signals.
EcoFlow Wave 2 for $1,299 (but usually on sale for much less): Wood Shapiro tested the newest model, but previous models of the EcoFlow are often available at steep discounts. After happily testing the EcoFlow Wave 1 for more than a year in his wife’s office, WIRED senior editor Julian Chokkattu far preferred the EcoFlow Wave 2 (8/10, WIRED Recommends) because it’s both lighter and more cost-friendly, with a higher 5,100 BTU rating (up from 4,000). A heating mode rated at 6,100 BTU means you can keep using it in the winter to warm up. The company says it’s best for rooms up to 107 square feet. You do need to place it near a window to have one of the included ducts connected to the vent to take hot exhaust from the back of the unit out of the room. What makes this unit versatile is its alternate power sources. You can use a standard AC outlet, but you can also buy an add-on battery to keep it working when you don’t have access to electricity, or hook it up to solar panels.
Zero Breeze Mark II for $999: With its 2,300 BTU, the Zero Breeze (7/10, WIRED Review) won’t have the same cooling power as the EcoFlow Wave, but it’s much lighter at 17 pounds. This bundle includes a battery that makes the whole thing weigh about 30 pounds, but you’ll get four hours of use without needing to be near a wall outlet. Like the EcoFlow, you get a few vent pipes to direct exhaust away and direct cool air to a specific area, but unlike the EcoFlow, you can’t charge the battery and use the AC at the same time.
Advertisement
Zero Breeze Mark III for $1,399: As WIRED reviewer Chris Null notes, the Mark III (7/10, WIRED Review) is both larger than the Mark II and quite a bit heavier, now at 22 pounds. Add on the 1,022-Wh battery pack and you’ll pack on another 14 pounds, though that frees you from having to be near a power outlet. New for the Mark III is the fact that batteries can now be stacked and charged in sequence, each daisy-chained to the next (though at $600+ per battery, this can get pricey fast). Each Mark III battery also has extra outputs that can be used for other devices—one USB-C port, one USB-A port, and a 12-volt DC socket. However, the Mark II battery had all of the above plus a second USB-A port. No word on why this was removed. However, the new version is a bigger, punchier unit by most standards and a worthwhile buy for outdoors enthusiasts
Frequently Asked Questions
What Size Air Conditioner Do I Need?
Advertisement
Look for the BTU, or British thermal unit. In the case of air conditioners, the number of BTUs per hour measures how much heat the compressor can remove from a room. It’s a quick and easy way to figure out whether an AC unit is powerful enough to cool your space.
The BTU rating also helps you avoid using a too-powerful unit, which will cool too quickly without dehumidifying, and possibly lead to mold formation in the room and within the device.
To find the right power air conditioner for your room, you’ll want to find the square footage of your room by multiplying its length and its width. The US Department of Energy’s guidelines call for a minimum of 20 BTUs for every square foot of space. But this figure also assumes optimal conditions and good efficiency. For a 150-square-foot room, more typical recommendations are to opt for a 5,000 BTU AC unit. If the room is especially sunny, high-ceilinged, or has poor insulation, you may even want a 6,000 to 7,000 BTU unit for that space.
When in doubt, your best bet is to use a BTU calculator. For a truly precise estimate, here’s a complex whole-house BTU calculator that takes into account building layout and construction, plus your location and climate. For a fast and dirty rule-of-thumb BTU calculator, try here.
Advertisement
Check the combined energy-efficiency ratio (CEER) rating. The specs on any air conditioner you buy should list a CEER rating, which is one of the best ways of checking the energy efficiency of a unit. You’ll usually see a number between 9 and 15. The higher the number, the less you’ll pay when the electricity bill comes around. A cheap window AC unit will save you money at first, but you may end up shelling out more in the long run. The US Energy Star program has a website that lets you browse AC units based on their CEER ratings.
Check local laws. Some cities, like New York, require installing brackets to support your window AC. A simple one like this model should do the trick, though we haven’t tried it out. You may also need to head to a hardware store for some plywood to make sure your windowsill sits flat, but this depends on the type of windows you have and the AC model you buy. Get a friend to help you out with installation. These units can be heavy and difficult to hold, and the last thing you want is to drop one out the window.
Measure your window. Before you buy, read up on the supported window types and sizes for the AC unit you’re looking at, and measure your window to be safe. Make sure to seal any gaps as best you can with the included foam. (You can always buy more if you need it.)
A company spokesperson said that it’s “still exploring all our options for the best approach.”
If you’re an owner of any of Meta’s AI glasses, you should take advantage of the Conversation Focus feature while you can. As first reported by The Verge, Meta is pausing its rate limits for the accessibility feature that uses the glasses’ speakers to amplify the voice of who you’re talking to. Meta spokesperson Tyler Yee told The Verge, “we heard the feedback so we’re pausing its subscription tests for now,” adding that “Conversation Focus will remain available for free through our Early Access Program for early testers while we work on a better approach.”
Last month, Meta discreetly added rate limits to its Conversation Focus feature for its smart glasses. The feature would be free to use until you surpassed three hours a month, after which you would have to pay for a $20-a-month Meta One Premium Plan, which still had a cap of 15 hours of use per month. It’s still unclear why Meta added rate limits to the Conversation Focus feature, since it was proven by The Verge to run on device and without an Internet connection.
Advertisement
While Meta made the choice to keep the Conversation Focus feature free for now, there’s no clarity on its future yet. According to Yee, Meta wants “to make sure we get it right” when talking about the feature, and that the company is “still exploring all our options for the best approach.” Even more vague, the Meta spokesperson told The Verge that “some premium features will be subscription-based over time,” attributing this to how charging for certain features helps Meta sustain its strategy of subsidizing hardware prices.
DreamScapes A/V didn’t arrive at Southwest Audio Fest 2026 with a soundbar, a folding table and a bowl of mints. They showcased a 32,000-watt, 11.8.6 home theater featuring Alcons Audio CRMSQ Series with eight infrasonic subwoofers, Trinnov audio processing, Kaleidescape movie playback, Lumagen video processing, Christie 4MK15 projector and 150-inch Stewart Filmscreen G3 2:05:1 screen. The system is one of two immersive theaters and five two channel hi-fi systems being demonstrated by DreamScapes during the three day show.
That 32,000-watt figure comes from DreamScapes and has not been independently measured by eCoustics. Even so, eight infrasonic subwoofers should provide sufficient evidence that someone checked the hotel’s insurance policy.
Related Reviews:
Alcons Audio Goes Big in Dallas
The main DreamScapes theater took over the Press Club, adjacent to event registration. DreamScapes says the installation improved upon the theater it created with Keith Yates Design at Capital Audiofest 2025, adding a larger room, more loudspeaker channels and further software updates.
A Separate Alcons System for Music
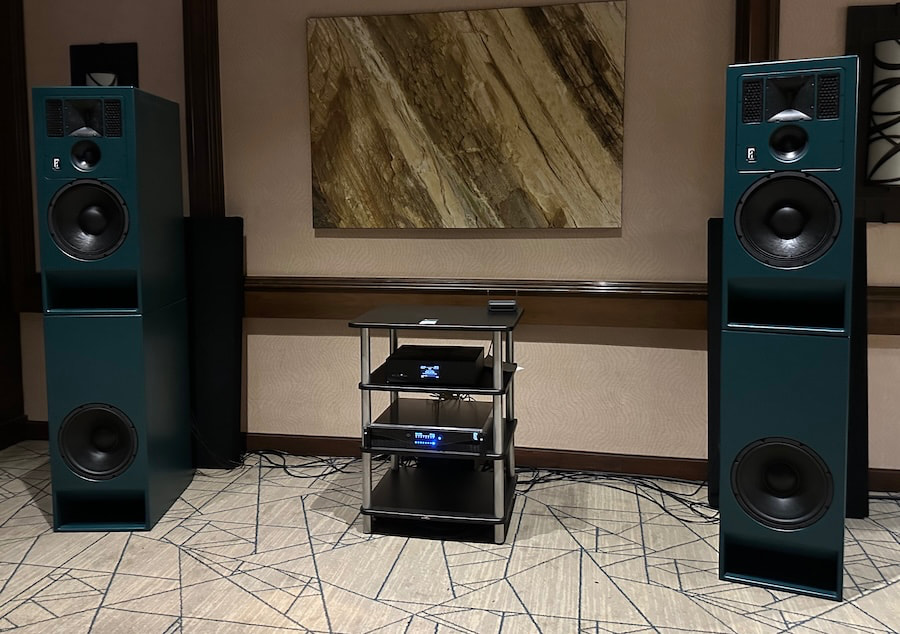
DreamScapes also demonstrated Alcons MR12 monitors with MB12 bass units for two channel listening to reveal how proprietary Pro Ribbon transducers from the company’s cinema and professional monitoring products could sound in your home. The complete system only included two more components. The Grimm Audio MU2 for streaming, digital conversion, and preamplifier duties, which fed the external Alcons ALC amplified loudspeaker controller that power and actively crossover the MR12 monitors and MB12 bass modules.
Theory Audio Design Gets Its Own Theater
The second DreamScapes theater featured a less expensive Theory Audio Design9.2.4 system in Room 1043. It combined Theory loudspeakers, subwoofers and controllers with Kaleidescape Strato V playback, Trinnov AltitudeCI processing, Lumagen video processing, Epson QL7000 projector and a 135-inch Stewart Filmscreen Harmony G3 acoustically transparent screen.
Advertisement
Having installed and reviewed a Theory Audio Design system, I know the company’s loudspeakers can deliver considerable output, dialogue intelligibility and dynamic impact without becoming aggressive. Theory’s new DLC and PLC loudspeaker controllers also add Dante and AES67 networking, DSP and substantially greater channel capacity.
More Hardware Upstairs
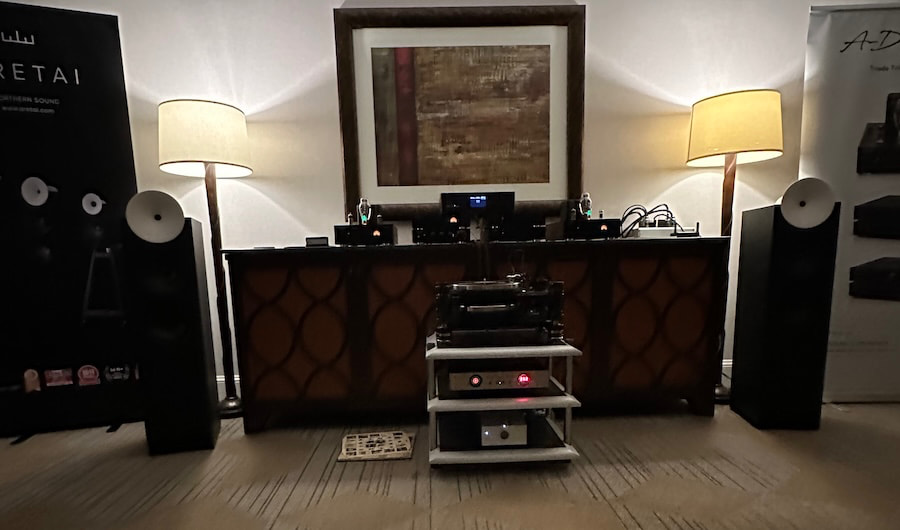
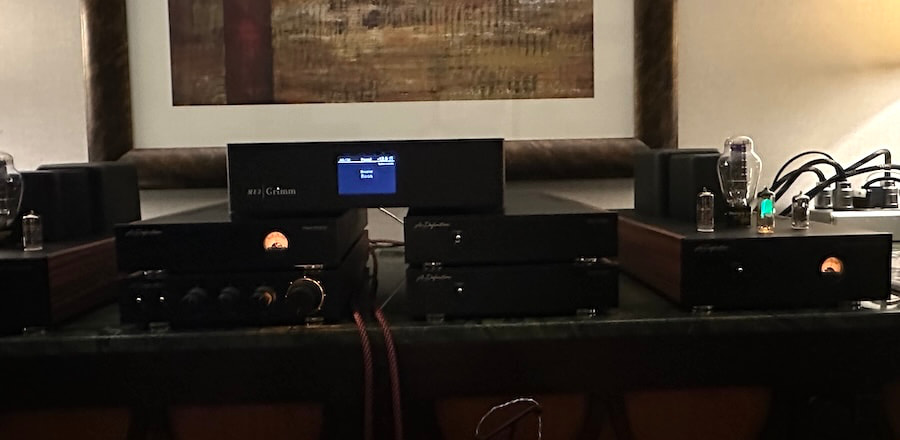
The 10th Floor Presidential Suite featured five additional two channel systems, including Aretai loudspeakers, Benchmark Electronics, A-Definition tube electronics, Kronos analog components, the Mola Mola Lupe phono stage and active loudspeakers from Norway’s Sigberg Audio.
The Sigberg Audio Manta, Saranna and 10D are covered separately because their active architecture and controlled directivity deserve more than a brief mention beneath 32,000 watts of home theater mayhem.
The Bottom Line
Southwest Audio Fest is primarily associated with two channel audio, but the DreamScapes rooms demonstrate why properly designed home theater belongs at events like this.
The Alcons installation combines a large channel count, eight infrasonic subwoofers, sophisticated audio and video processing and professional cinema technology inside a hotel demonstration room. The separate Theory Audio Design theater provides a second look at what an integrated immersive system can achieve without requiring a commercial auditorium.
Advertisement
Will either system fit inside the average living room? Probably not.
Advertisement. Scroll to continue reading.
That is hardly the point. The best audio show systems should demonstrate what is possible when engineering, installation expertise and budget are permitted to operate without much adult supervision.
Pricing & Availability
All components are currently available from DreamScapes A/V, but we haven’t been able to verify all pricing. Once provided, this article will be updated.






















































You must be logged in to post a comment Login