If you have already spent some time exploring Destiny 2, you will know that finding case files is one of the key activities of the game. Among the many available to collect, seven are hidden throughout the EDZ. Since the game does not provide precise map markers for these collectibles, tracking them down can be challenging.
In this detailed guide, we will outline the location for every EDZ case file present in this looter-shooter.
As mentioned earlier, there are seven case files hidden throughout the EDZ. Since each is in a different patrol zone, you will need to travel across the entire destination to collect them all. It is also worth noting that you may encounter enemies along the way and will likely have to defeat them while searching for the files. Moreover, EDZ must be the active Distortion destination to gather the collectable. Here are the exact spots to collect the case files:
Advertisement
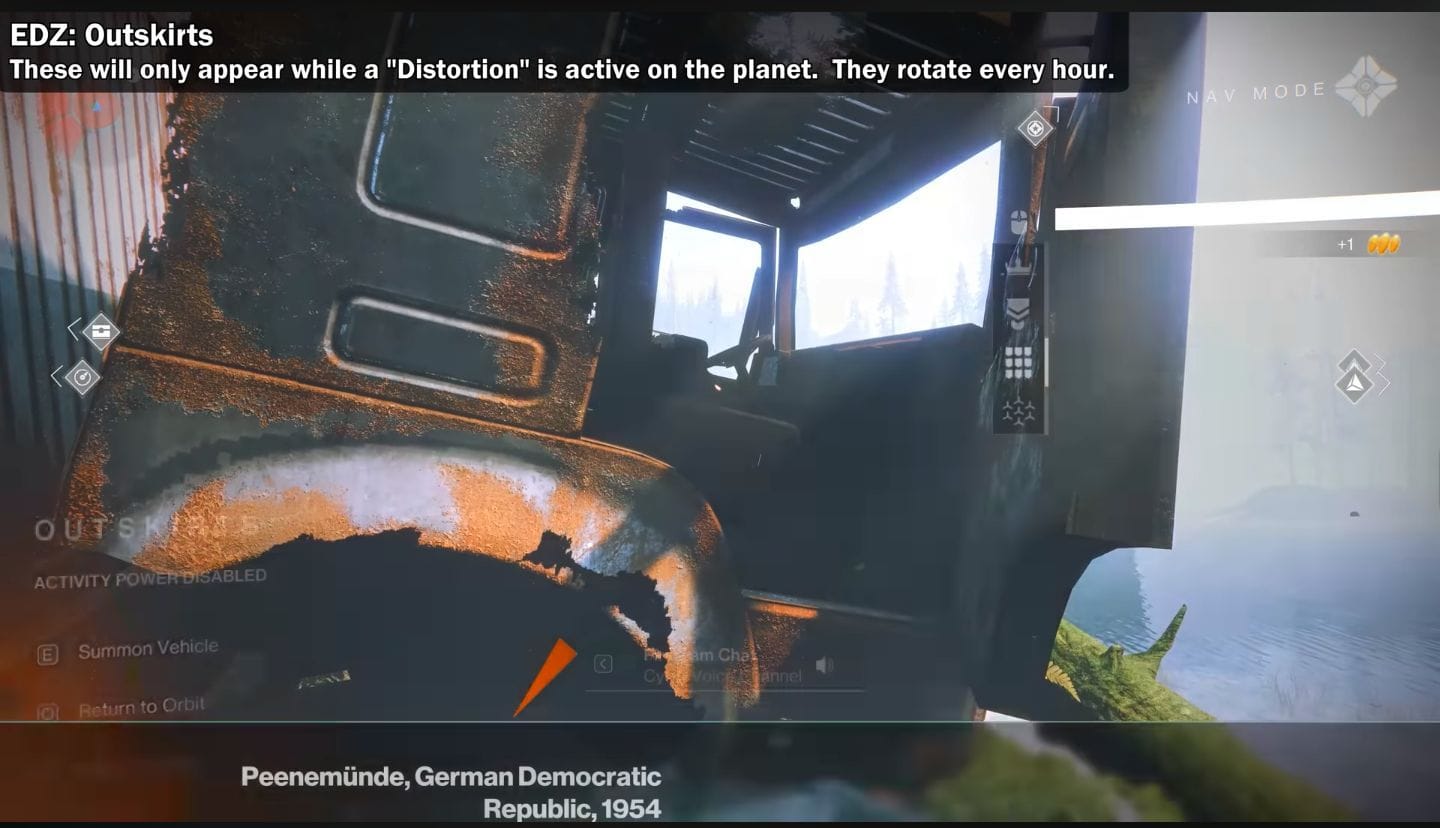
Outskirts case file location
Do not forget to check the truck in Destiny 2 (Image via Bungie || YouTube/@Esoterickk)
The case File in the Outskirts is one of the easiest to collect. Head to the Outskirts and look for a truck parked on the elevated area across the shallow pool of water. Once you reach the vehicle, you will find the case file on the driver’s seat.
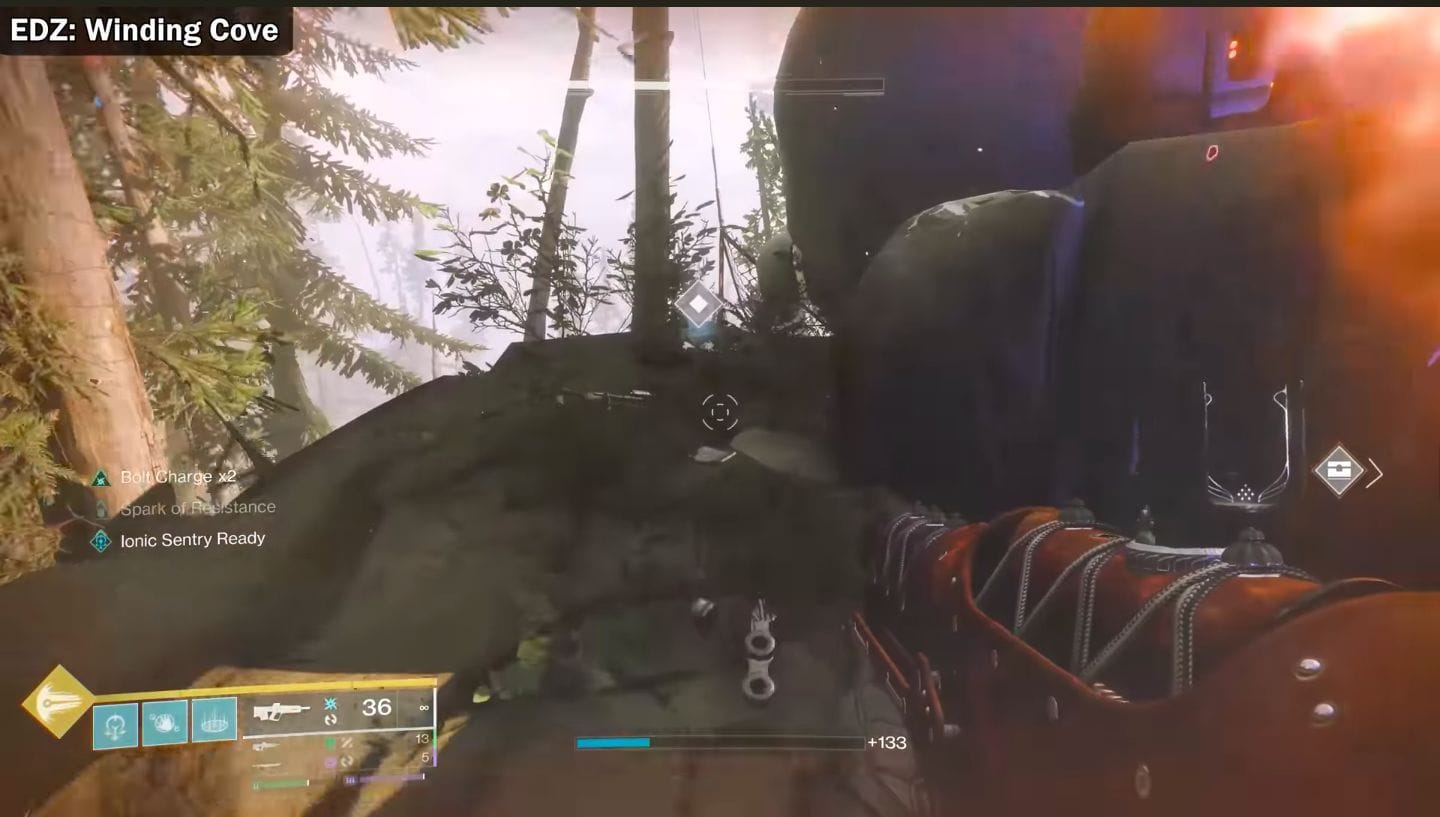
Winding Cove case file location
Enter the structure (Image via Bungie || YouTube/@Esoterickk)
Use the Winding Cove fast travel point to reach the area. From there, follow the path on the left until you arrive at a cave entrance. Enter the cave and continue through it. After emerging on the other side, you will reach the top of a cliff. Collect the case file from the ground at the very end.
Firebase Hades case file location
Arrive at the correct room (Image via Bungie || YouTube/@Esoterickk)
After arriving at Firebase Hades, look for a doorway on your left. Enter the structure and continue all the way to the end. The Case File is located inside at the far end of the area.
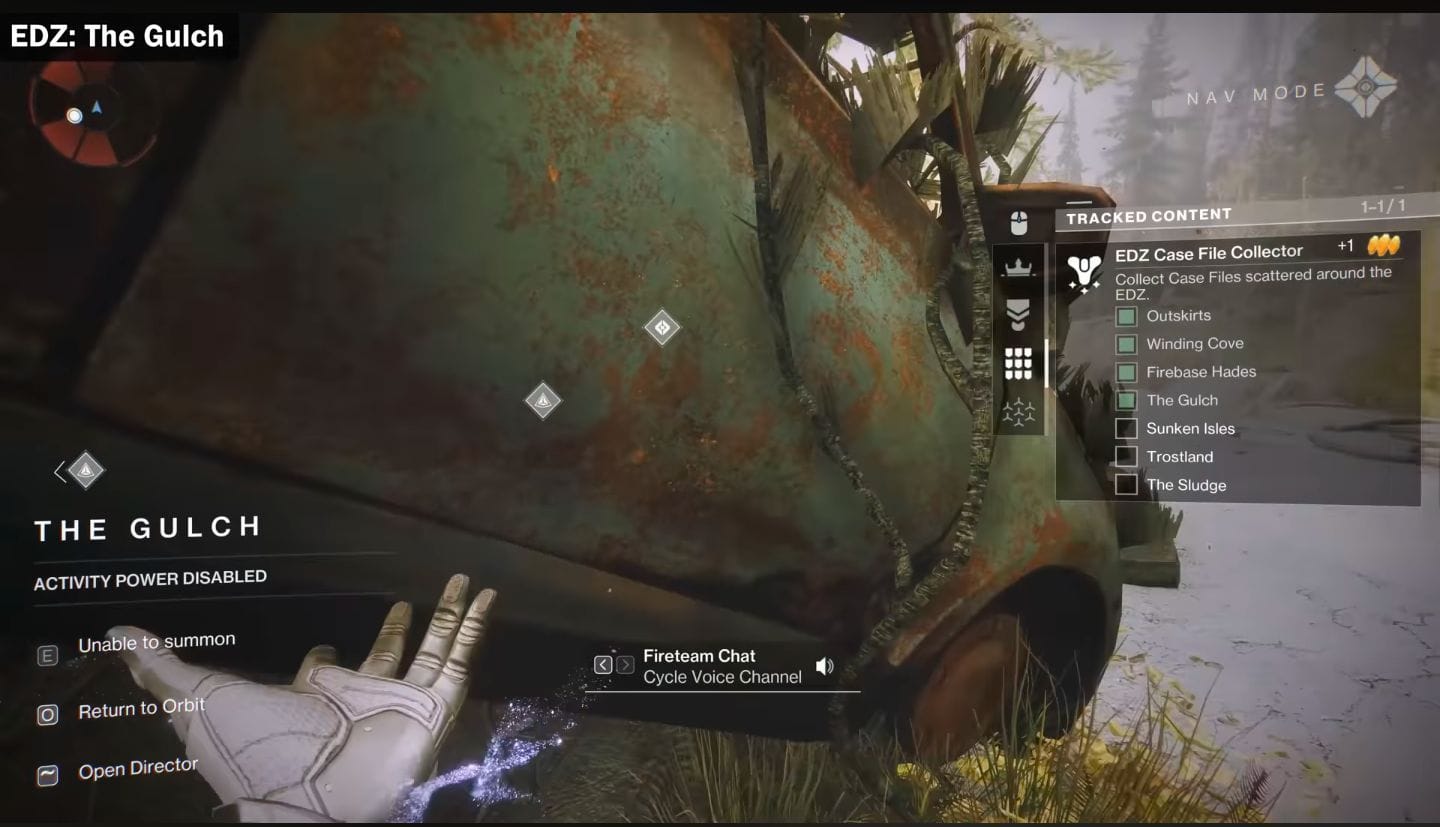
Look beneath the car (Image via Bungie || YouTube/@Esoterickk)
Fast travel to The Gulch and follow the road westward. Keep moving until you come across a wrecked car in the middle of the road. The case file is underneath the vehicle. To collect it, move around to the opposite side of the wreckage.
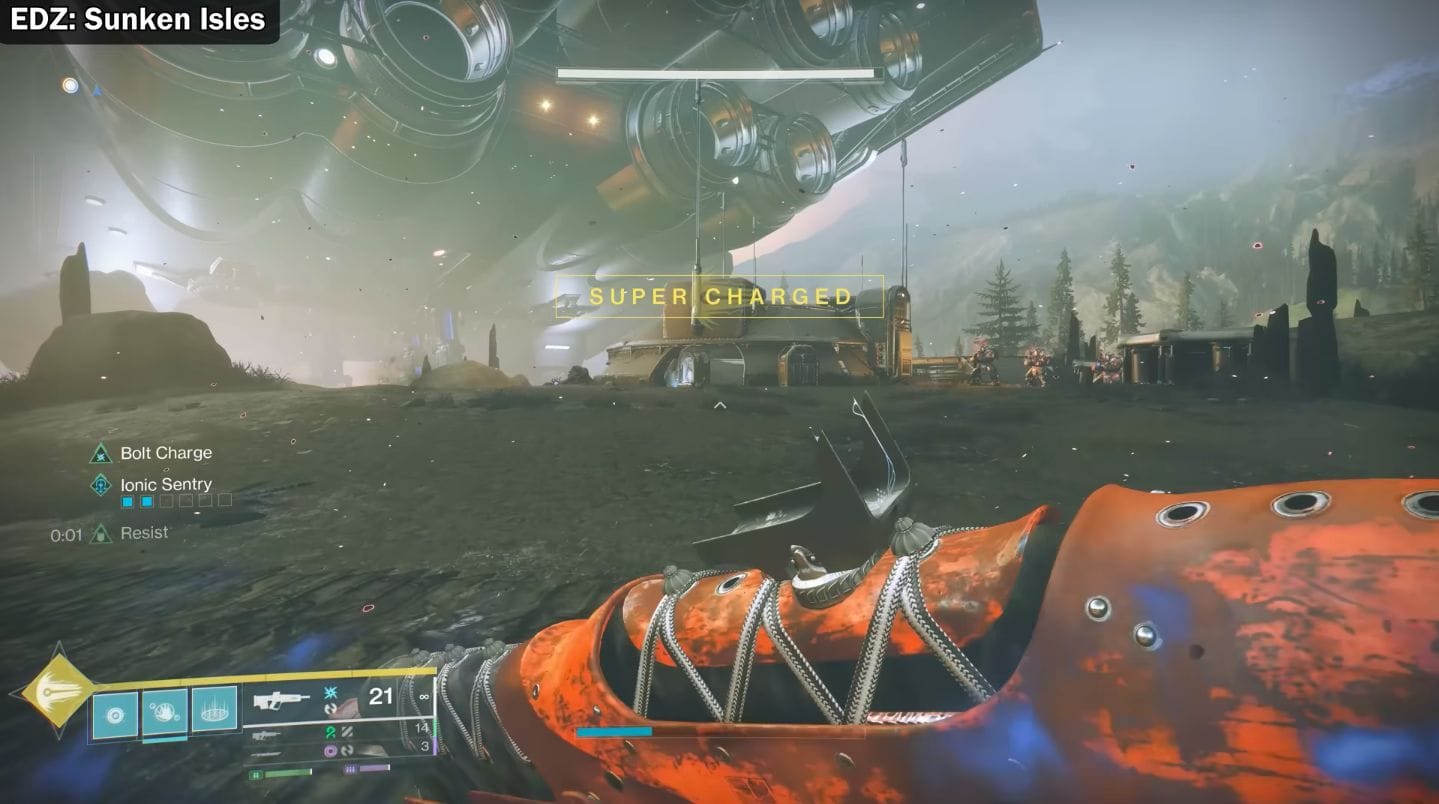
Sunken Isles case file location
Visit the dome-shaped structure (Image via Bungie || YouTube/@Esoterickk)
Use the Sunken Isles fast travel point to reach the area. Nearby, you will spot a dome-shaped structure. Enter the building and look toward the machines on the left side. The case file is resting on top of the second machine.
Collect the case file from the top of the corner present at the very end (Image via Bungie || YouTube/@Esoterickk)
In Trostland, look for the wrecked building next to the church. To locate it more easily, enter through the doorway with “SCHNEL” written above it. Once inside, continue to the very end of the building. You can find the case file in the left corner of the final room.
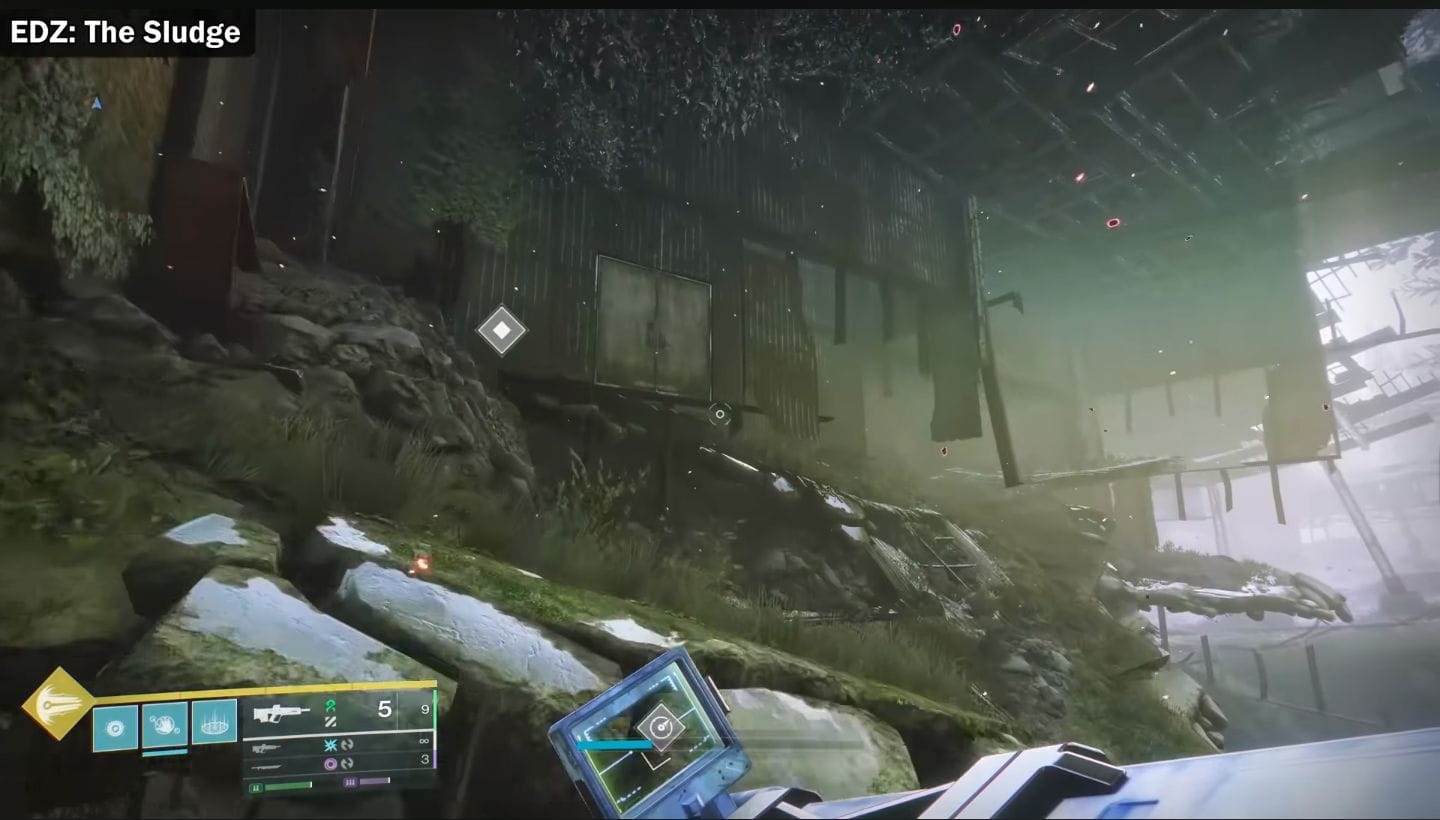
The Sludge case file location
Go around the building (Image via Bungie || YouTube/@Esoterickk)
Fast-travel to The Sludge and look for a container-like, wrecked structure on your left. Jump onto the doorway of the structure. Since the entrance is blocked, move around to the back of the building to find the final EDZ case file in Destiny 2.
BLAINE, Minn. — On Sunday morning, Jackson Koivun woke up with a three-shot lead and prepared for the biggest round of his life.
But first, breakfast.
He sat with his father, George, like they had all week. Jackson knows what everyone is saying — the rising star with all the trophies and all the hype is out in front. He doesn’t like to pay attention to it, but sometimes it’s impossible to avoid.
“I wish people would just tone it down a little,” he told his father, while chomping on a banana and sipping a protein shake. “It’s just another day on the golf course.”
Advertisement
His father, recounting the conversation while watching his son at TPC Twin Cities on Sunday, says Jackson’s comments were more about respect. There’s a lot of good players out on Tour, Jackson thinks. Why should he get all this attention?
George says his son’s humility is his best trait. “He has a little bit of swagger,” George says, “but not too much.”
Others might see it differently — a stone-cold killer on the golf course who writes confidence, trust and dominate on his glove.
Golf’s next big thing or rising star or prodigy or whatever kind of superlative you want to throw out there — Koivun probably won’t like any of them — officially introduced himself to the golf world on Sunday, or at least to those who didn’t know him already.
Advertisement
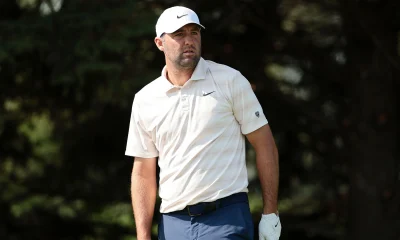
The 21-year-old pro closed with a five-under 66 to finish 25 under and win the 3M Open to secure the first PGA Tour victory of his career, and it came in just his 13th career start and only his third as a professional. Oh, and he staved off a handful of major champions, including the world’s top-ranked player, Scottie Scheffler, who was breathing down his neck all afternoon. Scheffler shot 63 and had to settle for second.
Koivun might not like all of the attention, but he should probably get used to it. The hype just might be real.
THE ONLY CHILD OF GEORGE AND MEGHAN, Jackson got his start on a nine-hole course in California, but he soon became addicted to the game. His parents knew he had a special talent, but his dad realized its full potential when they went to the Future Masters in Dothan, Ala., when Jackson was 14. He was the only California kid entered and won. George remembers the “full rainbow” of SEC coaches following him.
He picked Auburn, where he would go on to have one of the greatest college careers in history.
Advertisement
In his first year on the team, Koivun won the Phil Mickelson Award (top freshman) as well as the three major Player-of-the-Year awards: the Haskins, Hogan and Nicklaus. Auburn won its first NCAA Championship.
As a junior, he won six times in 13 starts, and a dozen of those were top-10 finishes. Just last month, as the world’s top-ranked amateur, he led the Tigers to their second national title in three years. He won the Haskins, Hogan and Nicklaus awards again to become the only player to win all three twice.
“I think Jackson’s mature beyond his years,” said Auburn assistant coach David Johnson, who flew to Minneapolis on Sunday morning to watch the final round. “He’s really built for this lifestyle and built for this game. He knows what he wants out of life and he’s showing it and going to get it.”
By the end of his sophomore season, Koivun had earned his PGA Tour card through the PGA Tour University Accelerated program, where college players earn points toward a Tour membership, but he decided to return for his junior season. He knew early it would be his last.
Advertisement
He played the 2026 U.S. Open as his final amateur event and tied for 23rd, officially turned pro and missed the cut at the John Deere Classic. It was a rare dud — in his seven PGA Tour starts as an amateur last year, he finished in the top 11 four times, including a T4 at the Procore Championship, where he beat eight of the 10 U.S. Ryder Cup players in the field. Two weeks ago, he tied for 10th at the ISCO Championship. This week he opened with 64-68 but took the lead with a Saturday 61.
He wasted little time on Sunday, too. On the par-4 1st hole, Koivun stuck a wedge 17 inches from the cup and made birdie. He added birdies on 4 and 6, and at one point six players were tied for second. One was Scheffler — the game’s top player chasing down its most promising youngster.
The World No. 1 shot three under on the front nine and rattled off three straight birdies on Nos. 10-12 to get to 20 under, three behind Koivun.
Those who know Koivun best say his top qualities are his positivity, consistency, mental game and fearlessness. But he’s also got all of the shots and is known for a lethal putter, which he started to show off.
Advertisement
With Scheffler racing up the leaderboard, Koivun made his first key save by rolling in a 15-footer for par on 9, keeping the lead three. A couple of holes later, Scheffler lipped out a 5-footer for birdie, and Koivun responded with a birdie on 12.
Back and forth they went. Scheffler birdied 16 and 18 to shoot 63 and take the clubhouse lead at 22 under. It looked unlikely anyone besides Koivun would beat it. The 21-year-old pro led by two with four holes left.
IF YOU ASK KOIVUN, he’ll tell you his best trait is different than what his dad might say.
“I feel like I’ve gotten a lot better over the past couple years of being able to beat guys with my mentality,” he said. “Sometimes I watch guys hit on the range and I don’t feel like I’m the most talented out there, but if I can go out there and believe and use my brain to my advantage, then that’s definitely kind of like a superpower.”
Advertisement
It’s not like Koivun doesn’t know how to win, but how do you prepare for Scottie Scheffler chasing you down on a Sunday?
On 15, Koivun found the fairway and had a stress-free two-putt par. On 16, the 301-yard par-4, Koivun drove the green for the second day in a row and made birdie. Seventeen? Easy par.
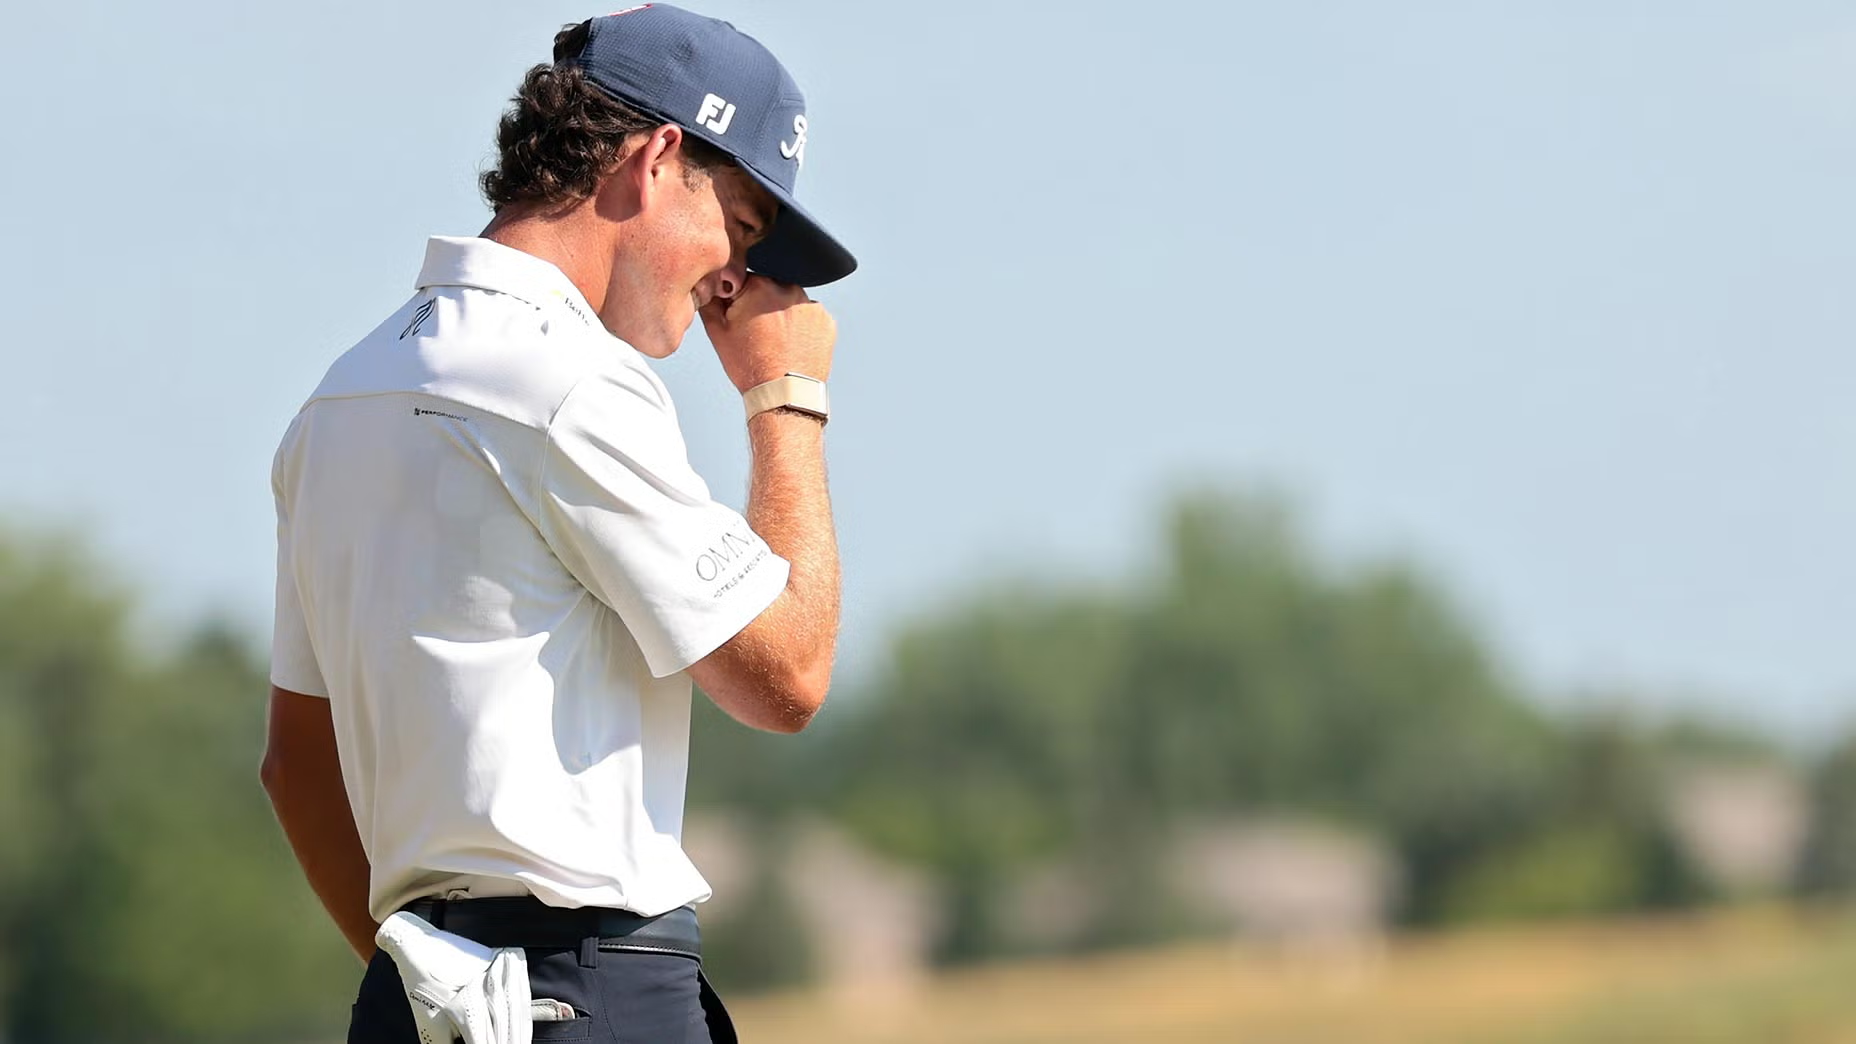
The lead on 18 was three. All you have to do is avoid the water. Seven shots to win. Then he became human.
He hit the ground behind the ball on his tee shot and hit the shortest drive of the week (249 yards) on the finishing hole. Koivun covered his face with his hands. He laid up and hit a wedge that ran off the back of the green and then hit his chip fat, leaving 14 feet for par. It didn’t look pretty, but he had shots to play with.
Advertisement
“I definitely had some nerves coming down on 18,” Kouvin said. “All throughout the crowd I kept hearing, Scottie’s coming, Scottie’s coming, and I just tried to tone that out and keep playing the golf I knew I could.”
And since he didn’t make a bogey all weekend, he drained that putt too and then transformed. He fist-pumped. He ran his hands through his hair. He exhaled. The emotion finally poured out. He knelt down and soaked it in.
“It never really feels like you’re going to win until you make the putt, and that’s kind of when all the emotions come crashing down on you,” he said. “I think I did a really good job this week of staying level-headed, but I felt like that was an appropriate time to show some emotions.”
Do you believe the hype? Koivun could certainly be a star. But for now, he’s just a PGA Tour winner. That’s a great place to start.
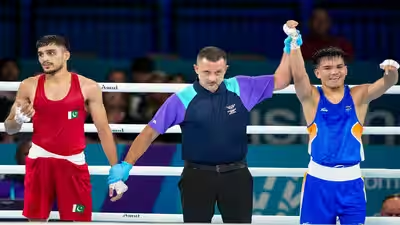
A mystery WWE NXT talent made an explosive first impression at the latest Lucha Libre AAA Worldwide television tapings, laying out one of the promotion’s biggest stars in a shocking angle that left fans with more questions than answers.
AAA held its Verano de Escándalo television tapings on July 25 at Arena San Marcos in Aguascalientes, Mexico, where three weeks of upcoming programming were recorded. During one of the show’s closing moments, a masked man wearing overalls stormed the ring and attacked Psycho Clown. While AAA did not identify the attacker during the segment, details of the angle quickly surfaced following the tapings.
Thanks for the submission!
Advertisement
The mystery assailant was revealed to be Drake Morreaux, a WWE developmental talent. Although his identity was kept hidden on camera, his distinctive tattoos, along with comments made during WWE LFG, confirmed that it was Morreaux making his first appearance for AAA.
Advertisement
You can watch the clip of Morreaux attacking Psycho Clown in the post below:
The debut also brought an end to a mystery that had been unfolding on AAA programming for weeks. An unknown attacker had previously assaulted members of Los Psycho Circus, including Murder Clown, Panic Clown, and Dave the Clown. On the June 27 episode of AAA television, Pagano was found bloodied backstage, while a message reading “Psycho is next!” was left on a locker room mirror. Morreaux’s attack confirmed he was the person behind the string of assaults.
His move to AAA had been teased months earlier during an episode of WWE LFG that aired on May 3. In the segment, Shawn Michaels informed Morreaux that there was no place for him in NXT at that time, but assured him that a major opportunity awaited him in AAA.
Drake Morreaux’s WWE journey before his AAA debut
Drake Morreaux spent close to three years developing his craft under the WWE banner. He trained at the Performance Center and was mentored by The Undertaker on the inaugural season of LFG, where he was viewed as one of the show’s promising prospects.
Advertisement
Although he gained experience across NXT Level Up, EVOLVE, and numerous live events, Morreaux was never able to establish himself as a regular on weekly NXT programming. His only main roster appearance came on the February 16, 2024, episode of SmackDown, where he teamed with Javier Bernal and faced The Authors of Pain, but it did not lead to a permanent role.
After Shawn Michaels informed him on WWE LFG that there was no immediate place for him in NXT, Morreaux was presented with an opportunity to continue his career in AAA – a move that has now culminated in his surprise debut.
It will be interesting to see what’s next for the 28-year-old star, now that he will work alongside The Undertaker in AAA, who serves as a coach and booker for the brand.
Advertisement
Why did you not like this content?
Was this article helpful?
Advertisement
Thank You for feedback
Get all the hottest wrestling news FIRST by clicking here
After a 53-year wait, the New York Knicks captured their first NBA championship, sparking celebrations across New York City. Thousands of fans lined the streets of Manhattan for a historic ticker-tape parade, turning a Thursday workday into a spontaneous holiday as the city honored its victorious team.
NEWYou can now listen to Fox News articles!
Advertisement
There are levels to everything, even when you are a professional athlete.
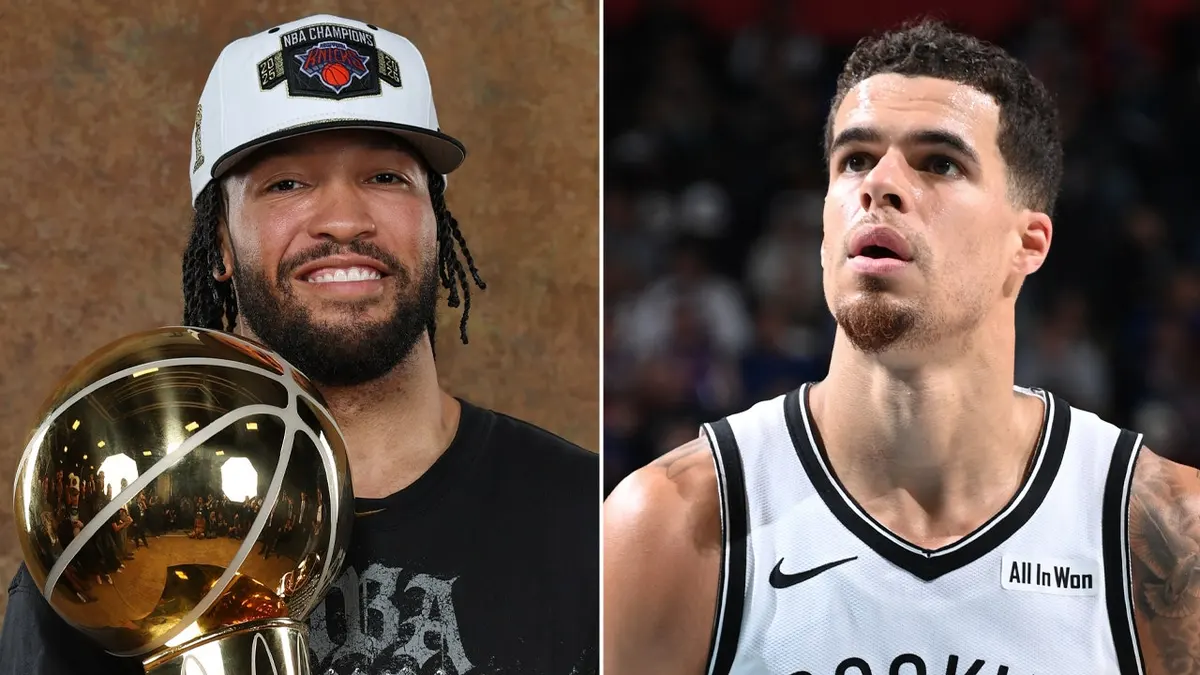
Just look at what happened when Jalen Brunson, an NBA champion with the New York Knicks, and Michael Porter Jr., who stars for the Brooklyn Nets on the other side of town, arrived at a venue in a video that has since gone viral.
Brunson, who was alongside his wife, Ali, happened to arrive at a World Cup after-party hosted by Justin Bieber in New York City at the same time as Michael Porter Jr., who was with his former Denver Nuggets teammate Peyton Watson.
New York Knicks star Jalen Brunson and Brooklyn Nets star Michael Porter Jr. had two different experiences at a nightclub in New York City.(GETTY)
Porter may make more than Brunson per season ($40.8 million per season compared to $37.7 million), but the latter has achieved the ultra-rare “King of New York” status.
That means Brunson and his wife don’t need to wait in a queue or make sure they’re on a guest list when arriving anywhere. Porter, on the other hand, had to do just that.
The video shows Porter and Watson, who are both champions in their own right after winning the NBA title in 2023 with the Nuggets, needing to check in at the front door of the venue.
Advertisement
Meanwhile, the Brunson couple walked right through the front door, as camera flashes lit up the area right away.
Jalen Brunson of the New York Knicks drives on Michael Porter Jr. of the Denver Nuggets during the first quarter at Ball Arena in Denver on Thursday, March 21, 2024.(Denver Post)
“Mr. Brunson, how are you?” the security guard at the front door said to the NBA Finals MVP.
In New York lore, playing for the Knicks carries a certain weight compared to being in Brooklyn with the Nets. For one, the Knicks are the more iconic franchise, playing in “The Mecca” that is Madison Square Garden. The history, the rabid fans, and of course, this particular group led by Brunson winning the first title in 53 years, has electrified the city more than the Nets have.
The Nets moved from New Jersey to Brooklyn in 2012, and though they’ve had some teams with solid NBA All-Stars since then, they are never expected to take over the percentage of Knicks fans across the five boroughs.
Advertisement
The Nets have been in rebuild mode for the past three seasons, including Porter Jr.’s first during the 2025-26 campaign with Brooklyn. While he enjoyed career highs in points (24.2 per game) and assists (3), the team went 20-62 to finish third-to-last in the Eastern Conference.
Jalen Brunson, his wife Ali Marks and their daughter, Jordyn James Brunson, are seen at the New York Knicks ticker-tape parade along the Canyon of Heroes on June 18, 2026, in New York City.(GC Images)
Porter Jr. and Watson didn’t have trouble getting in after checking with the guest list coordinator, but the comparison between the Knicks and Nets got its latest debate topic.
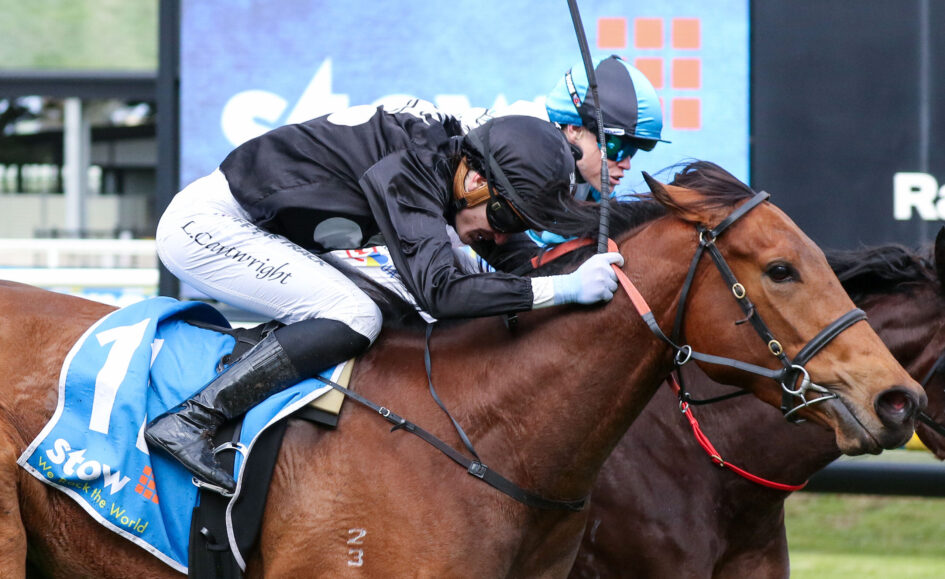
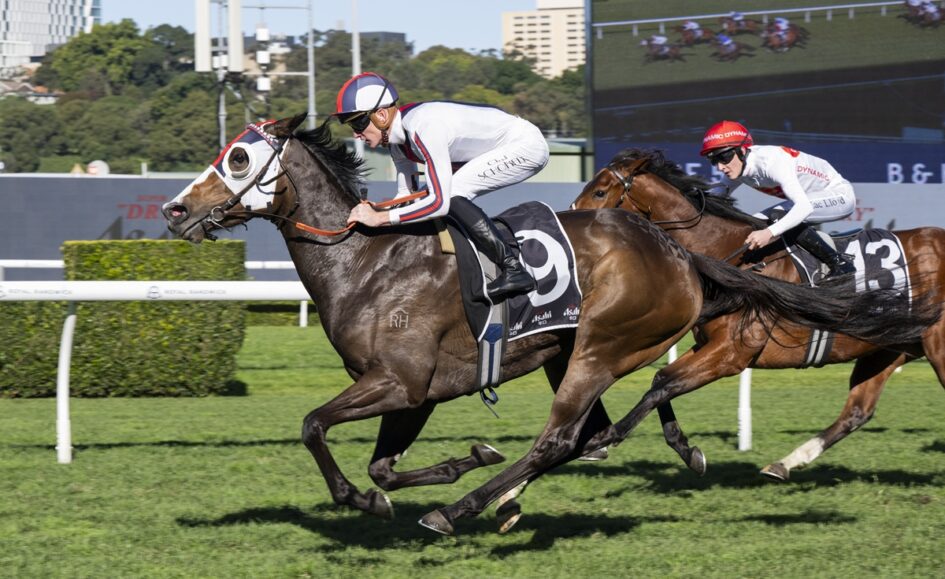
Trainer Nick Ryan decided to debut Doubt Time at Caulfield after a convincing midweek gallop at Flemington.
The stable was also keen to support the two-year-old gelding, which saw a significant market shift from $31 to $8 before it secured a victory in the Stow Robotics Handicap (1100m) on Saturday.
With apprentice Luke Cartwright in the saddle, Doubt Time triumphed by a nose over the $3.50 favourite Resolutely, with Stakes ($5) a further 1-¾ lengths back.
The colt, a son of Doubtland who was a dual Stakes winner before retiring to stud, was ridden conservatively by Cartwright before unleashing a strong finishing run.
Advertisement
“He’s very much like his father,” Ryan stated. “His father won his first start on a Soft 7 at Kensington, and he came from back and swamped them.”
“We trialled here last week, and then I galloped him on Thursday morning on the inside grass at Flemington. I pushed the button a little bit in the last 50 (metres) and I nearly fell off the back of him. The penny has finally dropped, and I said to Luke to keep him in your hands, bounce, squeeze, travel, and if you’re a bit back, don’t panic.”
“He’s got an 8.05 metre stride on the data, and he’s not fully developed and I said it’s very important for you to get room to the outside. He’s never had one with the whip, and when you shake him up, he’s going to launch, whether that’s running home to finish fourth or fifth, or winning, I had a feeling of what he was going to do.”
Ryan indicated that the gelding would not be rushed back to the track and would likely be sent for a spell.
Advertisement
“He’s two, so we’ll have to see how he is in the morning, how his shins are,” Ryan added. “He’ll definitely be in the paddock next week, for how long, I don’t know. He’s had three jump-outs and two trials, and he had come here (Caulfield) twice. I did dual accept for Wodonga on Sunday, but we were always coming here, so we’ll see how he pulls up, but that was pretty impressive.”
Explore the latest racing markets for the Stow Robotics Handicap at Australia’s top racing betting markets.
Brad Widdup finds himself contemplating the considerable future potential of Satono Jasmine, a filly who has now recorded her fourth successive triumph at Randwick, leaving the trainer unsure of her ultimate limits.
Having commenced Satono Jasmine’s racing campaign with modest expectations, Brad Widdup is now uncertain about the filly’s ultimate capabilities after she achieved her fourth win in succession at Randwick.
In her second racing campaign, Satono Jasmine transitioned seamlessly into Saturday grade, producing a brilliant turn of foot from the rear of the field to secure the B & K Group Australia Handicap (1800m) at Randwick.
“I don’t know where it’s coming from,” Widdup commented on the filly’s acceleration.
Advertisement
“I thought she could win a maiden and maybe a class one, but not many do what she is doing.”
Satono Jasmine’s Randwick victory followed a sequence of provincial wins and a midweek city success.
Despite it being off-season racing, few horses manage to achieve a four-win streak, leading Widdup to ponder how much further the daughter of Japanese sire Satono Aladdin might progress.
“I really don’t know. That stallion is a pretty good stallion, and she might be the one,” Widdup said.
Advertisement
“She has come a long way, and she’s got a bit to learn.
“We don’t (know where her ceiling is). We’ll give her a break and see what happens.
“I won’t be charging into the spring now. I’ll probably get her back for the early autumn and have a look, try to win a couple of races after Christmas and see where that leads to.”
Chad Schofield has been the jockey for three of Satono Jasmine’s four wins and rated Saturday’s effort as her most impressive.
Advertisement
“That was her best one yet,” Schofield stated.
“I just let her travel, albeit on a slow speed, but geez, when I pulled her to the outside in the straight she accelerated hard and fast. Every time I ride her she has felt better.”
Satono Jasmine ($3.80 favourite) won by a margin of 1-1/4 lengths from Horizons ($3.90), with the Victorian mare Oraqua ($12) finishing with vigour for third, another long neck behind.
Check out the latest Sydney racing markets with Australia’s leading betting sites.
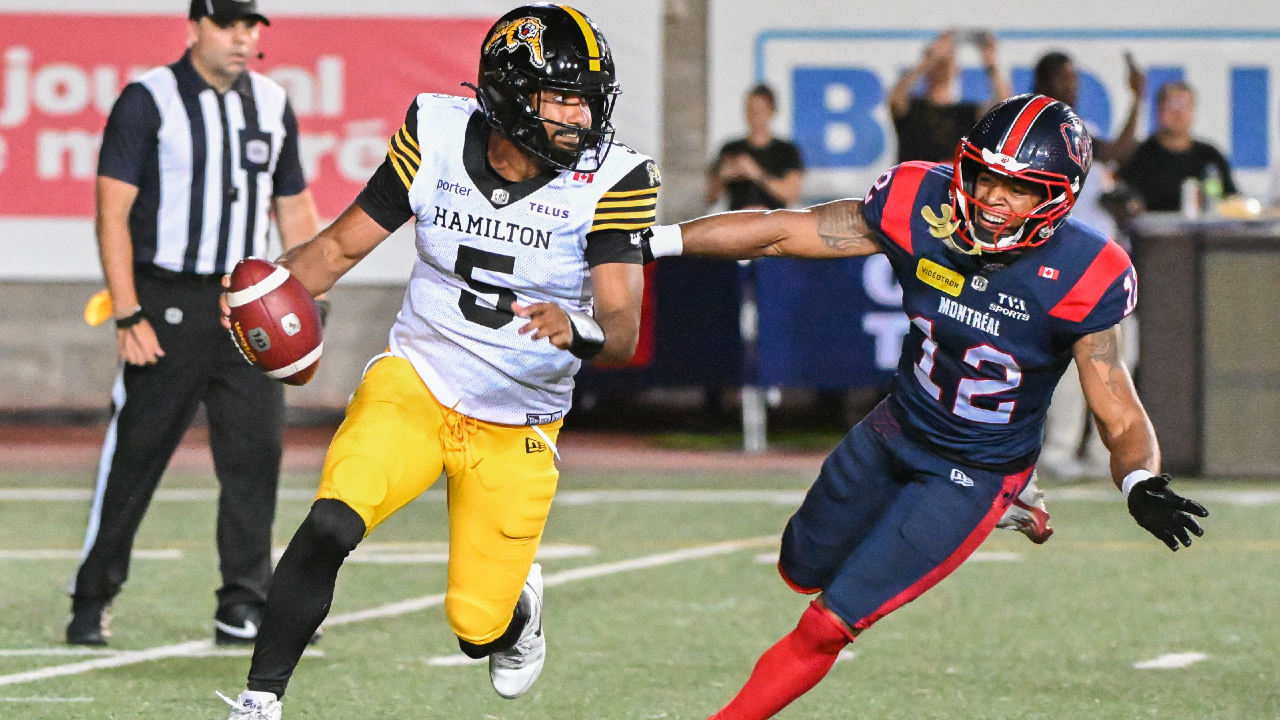
MONTREAL — Jose Maltos Diaz kicked two fields and a single with just under three minutes left in the final quarter as the Montreal Alouettes beat the Hamilton Tiger-Cats 31-18 in front of 21,014 fans at Percival Molson Stadium on Sunday.
Trailing 18-17 late in the game, Alouettes linebacker AlexandreGagné blocked Hamilton punter Mitch McCarthy’s kick, giving Maltos Diaz prime field position deep in the Hamilton zone. He kicked a 35-yard field goal to give the Alouettes a 20-18 lead.
Maltos Diaz added another field goal less than a minute later from 46 yards out, his third in as many tries during the game.
Montreal quarterback Davis Alexander was 21-for-29, throwing for 187 yards in the win. Alexander also threw his first interception of the season late in the first half. The American had not thrown a pick in a CFL-record 356 regular-season passing attempts, a mark he set just last week.
Advertisement
Short-yardage quarterback Terry Wilson scored a pair of touchdowns from the one-yard line in his Montreal debut.
Wilson signed with Montreal on July 6 after spending the past two seasons with the Winnipeg Blue Bombers.
Running back Travis Theis scored a touchdown with 24 seconds remaining on the clock to seal the win for Montreal. He also rushed for 156 yards, his second consecutive 100-plus rushing yard game of the season.
DeVonte Dedmon, playing in his first game of the season, accounted for 100 yards off kick returns for the Alouettes.
Advertisement
Montreal (6-1) won its fourth straight home game and moved six points ahead of both Hamilton (3-4) and Toronto atop the East Division standings. The win also gave the Alouettes the season-series and tiebreaker, should both teams finish with the same record at the end of the regular season.
Tiger-Cats quarterback Tre Ford completed 15 of his 23 pass attempts for 164 yards and a touchdown. He was also intercepted once. Ford also rushed for an additional 24 yards and was sacked three times in the contest.
The 28-year-old Niagara Falls, Ont., native started his second straight game for the Tiger-Cats following an ankle injury to starter Bo Levi Mitchell earlier this month that required surgery.
Hamilton kicker Marc Liegghio made his lone field goal attempt from 46 yards.
Advertisement
Montreal found itself in the red zone on their opening drive of the game, thanks to a 33-yard kickoff return by Dedmon and consecutive 20-plus yard rushes by Theis. The Alouettes, however, were forced to settle for a 17-yard Maltos Diaz field goal.
The Tiger-Cats responded in a big way thanks to their special teams’ unit.
Isaiah Wooden Sr. returned Joseph Zema’s punt 100 yards for his first touchdown of the season that gave Hamilton the lead. It was the first punt return touchdown given up by Montreal since Aug. 4, 2022.
The Alouettes regained the lead early in the second quarter following an 11-play drive that began at Montreal’s own nine-yard line. It culminated in a one-yard score by Wilson.
Advertisement
Hamilton wasted little time getting on the board to begin the second half, as Ford found wide receiver Kenny Lawler for a 33-yard touchdown pass that gave Hamilton the lead.
The lead would prove to be short-lived, however, thanks to Hamilton’s lack of discipline. The Tiger-Cats took back-to-back penalties for a total of 31 yards, including a 21-yard roughing infraction by linebacker Wynton McManis that led to his ejection.
With the ball placed at the Montreal one-yard line, Wilson once again ran the ball into the end zone for his second touchdown of the game.
Liegghio added a field goal late in the third quarter.
Advertisement
Tiger-Cats: Host the Calgary Stampeders (3-4) on Saturday.
Alouettes: Visit the Ottawa Redblacks (0-6) on Friday.
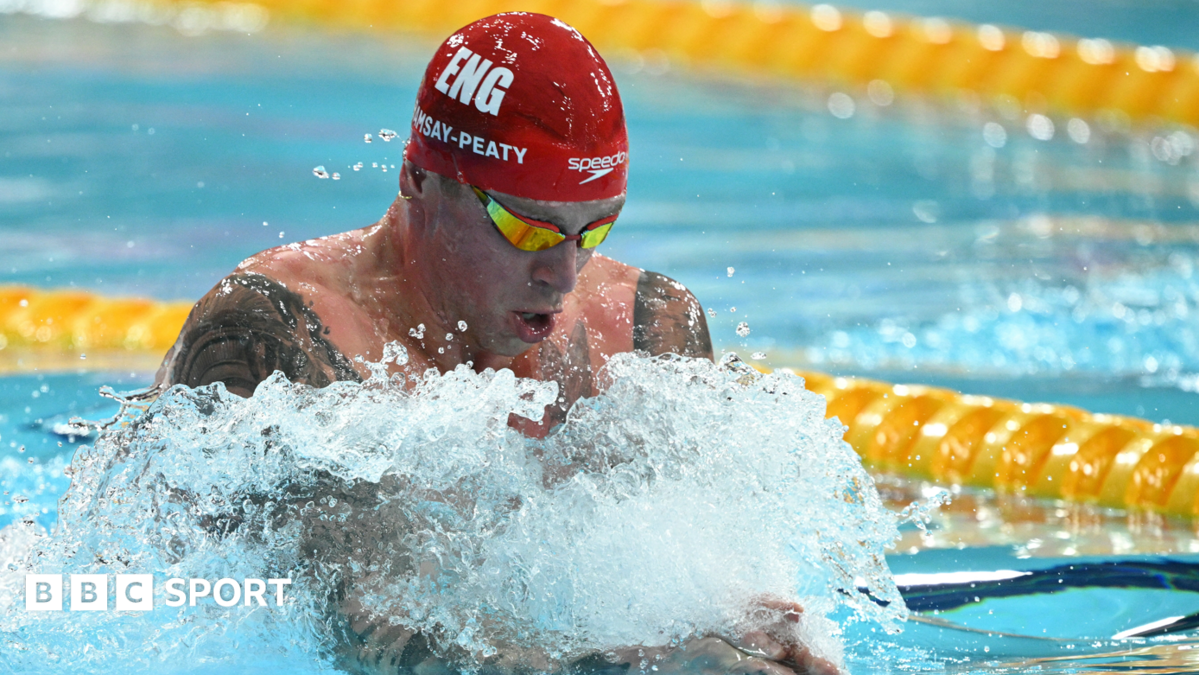
England’s Adam Ramsay-Peaty will have the chance to defend his men’s 50m breaststroke title at the Commonwealth Games after qualifying third fastest for the final.
The 31-year-old, who broke down in tears after taking bronze in the 100m on Saturday night, finished second in his semi-final with a time of 26.82 seconds.
World record holder Ramsay-Peaty will have to close the gap to South Africa’s Michael Houlie – who set the pace with 26.61 – when he races in the final on Monday at 20:07 BST.
Australia’s 100m breaststroke gold medallist Sam Williamson and Jersey’s silver medallist Filip Nowacki will also line up in the final.
Advertisement
“I think I’ve still got a little bit more to grow. I think there was a massive lesson in yesterday,” three-time Olympic gold medallist Ramsay-Peaty told BBC Sport.
“I can’t change anything obviously, so we have to get over it. I also know the trajectory I have to be on now and it’s a little bit different to what I thought it was.
“I’ve also got to remind myself that I haven’t swam a championships in two years. I put a lot of expectation on myself coming into this games.
“But as you know, the best athletes in the world, you don’t do it in training, you have to actually compete well and that is a skill on its own and we have to get used to that.
Advertisement
“I’m enjoying it and we’ll have to see what that result is tomorrow.”
Ramsay-Peaty’s team-mate Max Morgan finished sixth in the same semi-final race and was eliminated.
Cristiano Ronaldo takes on acting and producing role in new football drama featuring Thierry Henry and Damian Lewis/ Iamge: Instagram
Cristiano Ronaldo is preparing to add another chapter to his post-playing career after signing on to executive produce and appear in a new television drama centred on British football.The Manchester United and Real Madrid legend, who now captains Saudi Pro League side Al-Nassr and Portugal, will feature in the series titled Day 1s, with fellow Premier League great Thierry Henry also set to appear in the production. The project marks Ronaldo’s first major move into television drama following his success on the pitch and his growing business ventures away from football.
Ronaldo takes first major step into television drama
The 41-year-old will serve as an executive producer on Day 1s while also appearing in the series, which explores the intricacies of British football through the story of a powerful football agent.Speaking when announcing the project, Ronaldo described the venture as another milestone beyond his playing career.“This is an exciting chapter for me, as I look ahead to new ventures,” Ronaldo said.The series is being produced by UR•Marv Studios, the production company Ronaldo co-founded earlier this year with filmmaker Matthew Vaughn, whose directing credits include the Kingsman and Kick-Ass franchises.
CJP Jantar Mantar Protest Updates
When announcing the launch of independent film studio UR•Marv alongside soccer star Cristiano Ronaldo in April last year, British film director Matthew Vaughn said the venture was created to challenge the conventional model of film and television production. Speaking to ESPN, Vaughn added: “Cristiano has created stories on the pitch that I could never have written, and I look forward to creating inspiring movies with him.”
Thierry Henry also joins the project
Advertisement
Ronaldo will be joined by former Arsenal and France striker Thierry Henry, adding another high-profile football figure to the production.The two former Premier League rivals, whose careers frequently fuelled debates over the league’s greatest-ever players, are now collaborating away from the football pitch.According to The Sun, filming has already begun at Barnet FC’s stadium in north-west London, where Henry was recently photographed during production. An exclusive insider source told The Sun that cameras are already rolling on location, with production quietly underway at the non-league ground.
Hollywood star Damian Lewis and football icon Thierry Henry lead the cast of Cristiano Ronaldo’s Day 1s, with filming now underway/ Credit: Click News and Media via The Sun
The series is expected to feature an ensemble cast that also includes British actor Damian Lewis, rapper Dave and newcomer Carlotta Banat.
Fictional football agent at the heart of the story
Advertisement
Rather than focusing on real footballers, Day 1s centres on Stanley Dalton, a fictional elite football agent portrayed by Homeland and Billions star Damian Lewis.The concept was created by football agent Darren Dein, who also serves as an executive producer on the series. Dein is well known within football circles and represents Henry.According to The Sun, the drama aims to present a more authentic look at the modern football industry, contrasting with the lighter comedic approach of series such as Ted Lasso.A television industry source told the publication that the project is expected to attract significant attention from streaming platforms.“It’s likely to spark a bidding war between the streamers,” the source told The Sun.“The sheer calibre of figures behind it, not to mention the cast, means it’s a prestige project, albeit a surprising one for Ronaldo as he crosses into making dramas.”The same source added that the show’s timing could prove significant following the recent FIFA World Cup.“After the World Cup, there’s a renewed international interest, particularly in the States, in British football. It’s one that’s been growing for some time with shows like Ted Lasso.“But this isn’t a sitcom. It’s definitely a drama, with some comedic elements, and has some serious names backing it.”
Expanding beyond football
The television project is the latest example of Ronaldo expanding his portfolio beyond football while continuing his playing career.The Portugal captain remains one of the sport’s biggest global figures, with more than one billion followers across social media platforms. He also continues to captain Al-Nassr and represented Portugal at the 2026 FIFA World Cup, scoring three goals during the tournament.Away from the pitch, however, his ambitions continue to grow through UR•Marv Studios, with Day 1s becoming one of the company’s first flagship productions.The series represents an unusual crossover between elite football and scripted television, bringing together decorated footballers, established Hollywood talent and experienced industry figures in a project that could become one of the sport’s most high-profile entertainment ventures. While Ronaldo is no stranger to the spotlight, having fronted global advertising campaigns, featured in feature-length documentaries and built the CR7 brand into a worldwide business, this project marks a different chapter in his career. Rather than simply being the face of a production, the Portugal star is helping create it, taking on roles behind the camera as a producer while also appearing on screen in a scripted drama.With filming already underway and Ronaldo, Henry, Damian Lewis and Matthew Vaughn among the leading names attached, Day 1s is shaping up to be one of the most closely watched football-themed television productions currently in development.
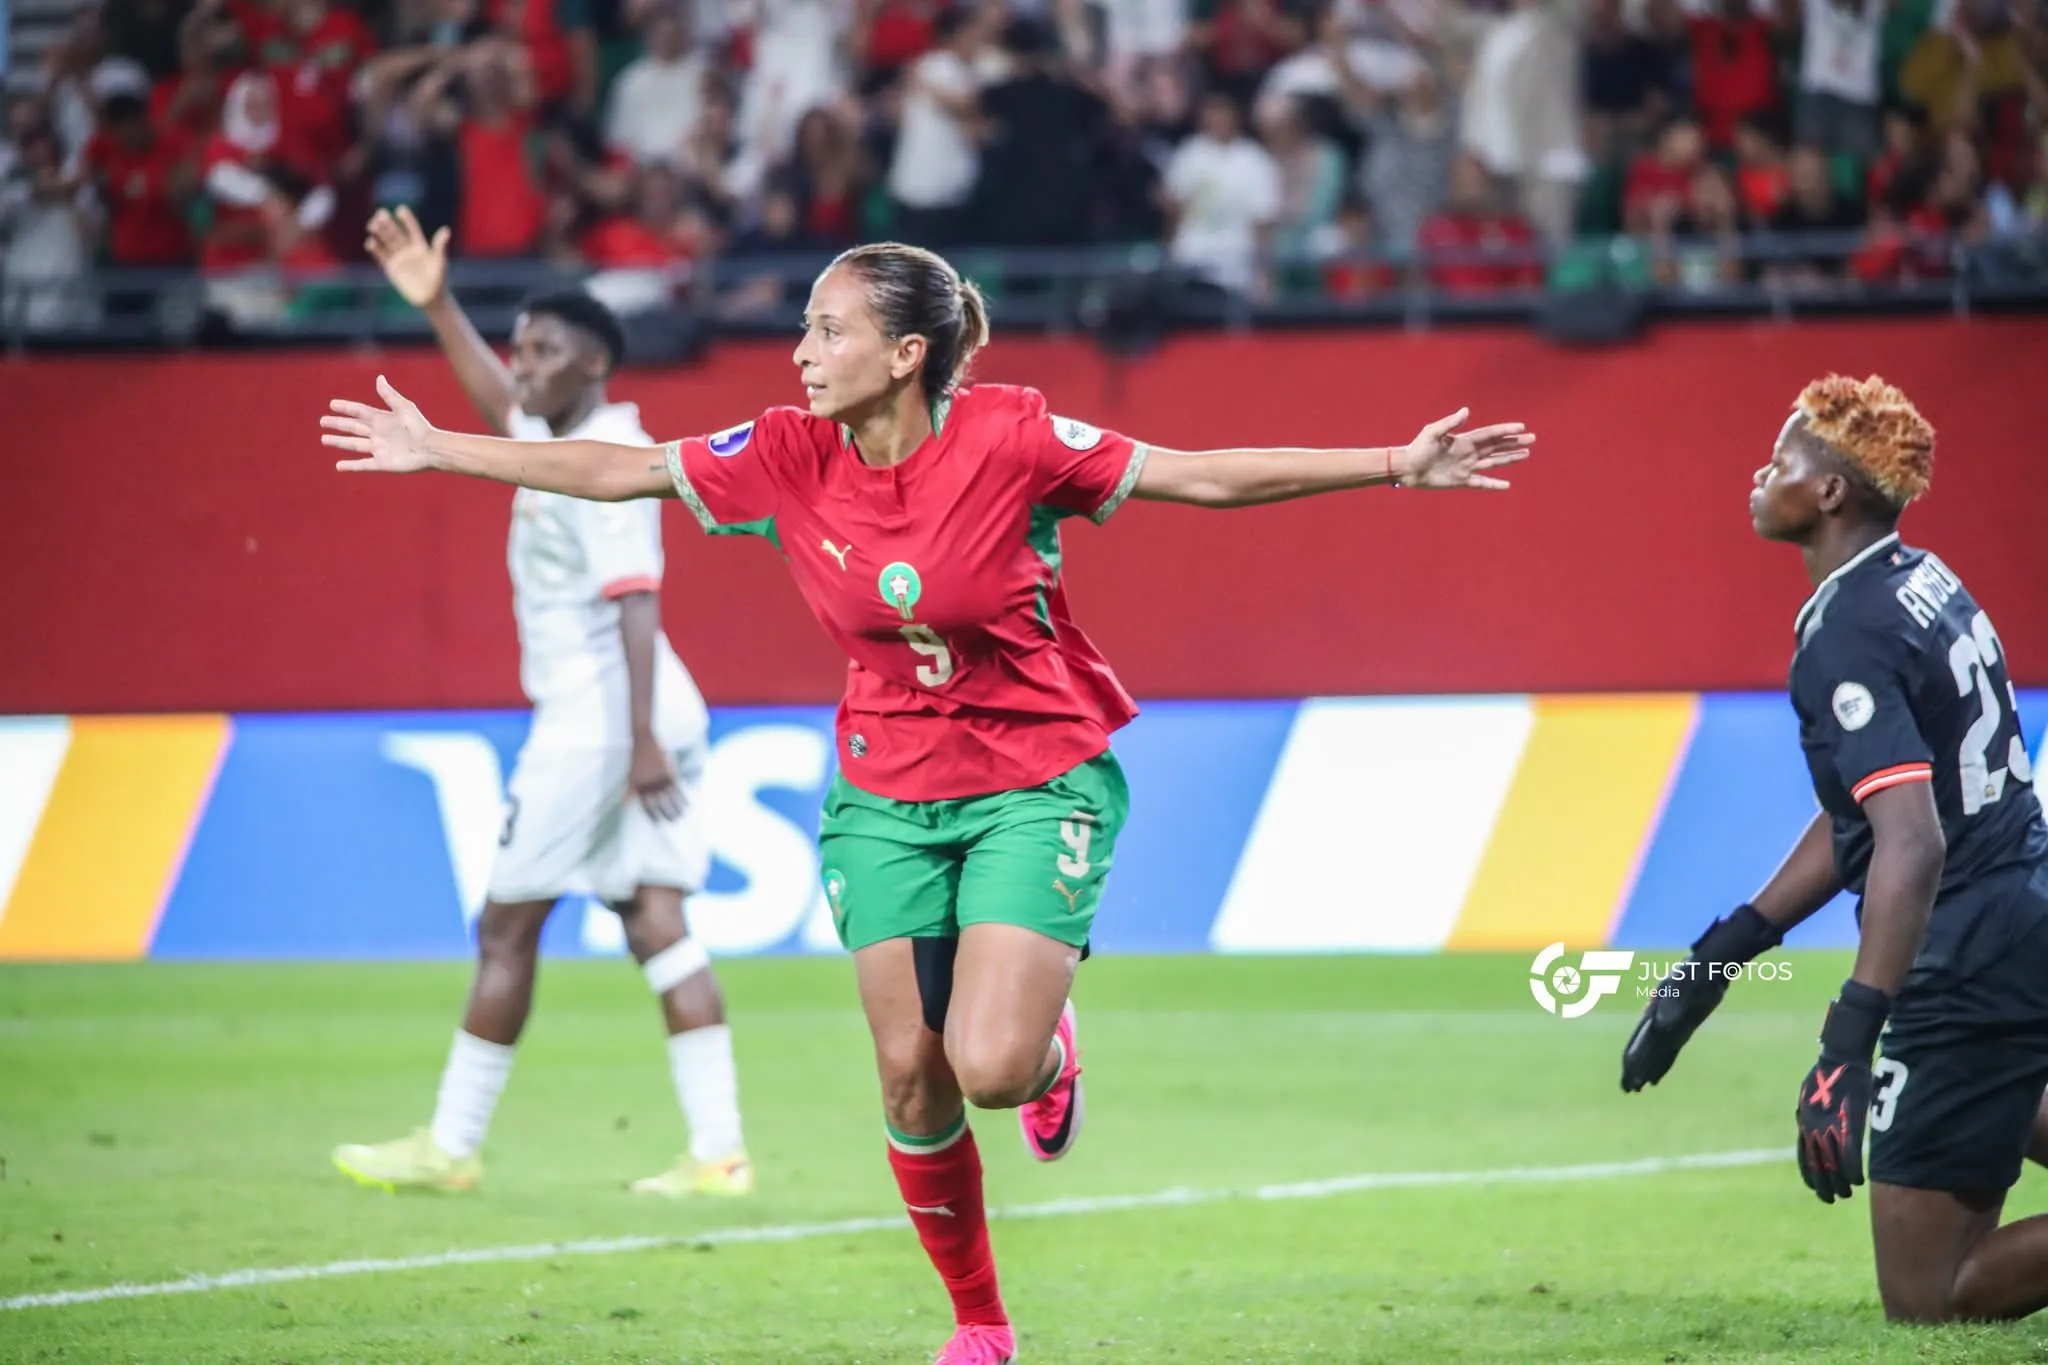
Hosts Morocco made a flying start to the 2026 Women’s Africa Cup of Nations with a comfortable 4-0 victory over Kenya in their opening Group A match on Sunday night in Rabat.
The Atlas Lionesses took control early and opened the scoring in the 19th minute through Sakina Ouzraoui. Maryame Atiq Ez-Zity doubled the lead nine minutes later to put Morocco firmly in charge.
Experienced striker Ibtissam Jraïdi then scored twice, finding the net in the 32nd minute before adding her second just two minutes into the second half to complete the 4-0 win.
Advertisement
Kenya made three changes at half-time in an attempt to turn the game around, but Morocco remained in control and created more chances before comfortably seeing out the match.
The result puts Morocco at the top end of Group A after the opening round of matches. Earlier on Sunday, Algeria defeated Senegal 2-0 in the group’s other fixture.
Morocco will now look to build on the impressive victory in their next group match, while Kenya must respond quickly to keep their hopes of reaching the knockout stage alive.


You must be logged in to post a comment Login