Since the Oculus Quest 2, the VR industry has been chasing a high point that seems impossible to re-summit — let alone surpass. I mean, how can you compete with popularity propelled by global pandemic-caused lockdowns and ultra-low costs when people are no longer trapped in their homes and facing down RAM-crisis-fuelled tech price hikes?
You can’t. But the Meta VR Glasses give me hope that’ll change, that VR is on an upward swing again.
The Meta Quest 3 tried its best, but improved specs, full-color mixed reality, and incredible exclusives like Batman: Arkham Shadow and Marvel’s Deadpool VR seemingly weren’t enough of a draw for people. I loved the system, but checking the most recent (August 2026) Steam Hardware Survey (which should include the most dedicated, most likely to upgrade players, as the Quest systems aren’t native PCVR headsets), the Quest 2 still narrowly tops the list despite being pulled from shelves over two years ago and being replaced close to three years ago by the Quest 3.
Advertisement
Latest Videos FromTechRadar
The Apple Vision Pro was much hyped before launch, but it seemingly had even less staying power than the Quest 3 thanks to its extremely high price. Samsung’s Galaxy XR headset, as much as I like it, is a gadget I wouldn’t be surprised if even most techie people didn’t know it existed.
(Image credit: Shutterstock / Boumen Japet)
You could do a whole analytical breakdown on why each device struggled to hit the mark, but as I see it, there’s one key issue: value.
The Quest 2 was incredible value. At £299 / $299 / AU$479 it’s approaching tech impulse-buy territory. You can grab it on a whim and be fairly confident you’ll get enough use out of it to justify the price whether you’re stuck inside because of Covid-19 or not — even just as a novelty you only get out on occasion, or to see your nan get wowed by some simple demo app.
At $499.99 / £479.99 / AU$799.99 (its original launch price), the Meta Quest 3 is instantly a much harder value proposition to justify. For a start, you need to spend a lot more time using the Quest 3 before it becomes ‘worth it.’ But for gamers, the headset costs as much as a PS5 disc edition — or a digital-only PS5 plus a game or two — and even as a VR enjoyer, it’s easy to understand why people would favour the Sony console and its incredible performance and game catalogue to fill their time.
Sign up for breaking news, reviews, opinion, top tech deals, and more.
It’s also still a bit too bulky to wear all day every day for productivity tasks — something Meta was ironing out at the time on the software side too. Big screen entertainment wasn’t ideal either — the Quest 3 lacked many streaming services, and the few it did have often relied on terrible apps that were terrible to use and didn’t support high-quality streams.
Advertisement
(Image credit: Meta)
The Vision Pro and Samsung Galaxy XR headset solved some of these issues, but they didn’t address headset bulk — the Apple Vision Pro actually weighs a good chunk more than a Quest 3 or Quest 2 — and they’re also a lot more expensive (costing $3,499 / £3,199 / AU$5,999 and $1,799 / £1,699 respectively).
To get your money’s worth, you’d ideally use these headsets every day to help maximise your productivity across app windows, and to kick back with some entertainment most evenings — or at least fairly regularly. But as someone who tried doing this for a week with the Galaxy XR (the lighter of the two), it’s simply not a comfortable enough experience — my neck wanted to give up after a day and a half.
They’re both great for using from time to time, but they cost far too much to be something you wear infrequently.
Advertisement
(Image credit: Future / Lance Ulanoff)
Emerging from the ashes
The Meta VR Glasses, however, hit the nail on the head in (almost) every regard. At only around 3.52oz /100g, they are a device you can easily wear for hours, and Meta has finally improved its entertainment and productivity software support.
The only notable negative aspect is the price. $1,299 (pricing TBC in other regions) is cheaper than its current rivals, but still four times more expensive than the Oculus Quest 2. With its weight, I can definitely see myself wearing this headset often enough to make that price justified, but for less VR-forward folks it might not seem that way — especially after our recent flops.
I hope they can give it a try, however, as I fell in love with the Meta VR Glasses instantly, and I expect plenty more fans will materialize once they launch in 2027.
Advertisement
(Image credit: Meta)
Hardware aside, I’m also simply glad to see the return of VR as a descriptor.
I get that technically the VR Glasses are a mixed reality device, but MR never really took off as a descriptor (it’s quite similar to the shortening of mister, Mr), and I don’t love XR — it’s too generic to really mean anything because it includes AR, VR, MR, and all different ways these technologies can manifest.
VR headsets are a known quantity, and the VR Glasses do feel like the spiritual successor to the Quest headsets Meta and Oculus pioneered. It’s a small thing, but I like that VR has returned — rising from the ashes in a manner that feels appropriate for the Project Phoenix device.
(Image credit: Meta)
Advertisement
Rebuilding what it broke?
The elephant in the room for many will be that Meta contributed somewhat to the sense of doom and gloom in VR after it made sweeping cuts through its Reality Labs teams and first-party development studios — canning projects in the process.
We’ve also seen third-party VR studios close or downsize since Meta’s announcement as it becomes clear VR isn’t in quite the boom period it once was. Showcasing Meta’s situation was merely part of a bigger trend of VR struggles, rather than an isolated case of awfulness.
(Image credit: Future)
It’s clear that VR has been generally struggling, but I’m hopeful the VR Glasses, in conjunction with Xreal Aura (which ticks a lot of the same boxes) and other future headsets / glasses, will help to bring excitement, accessibility, and users back to VR.
We’ll have to wait and see, but I think the future of VR is looking a little brighter again.
Still sporting the 2022 iPhone 14 Pro and are debating whether it’s time to upgrade? You’ve come to the right place.
We’ve compared the specs of the iPhone 18 Pro to the iPhone 14 Pro and noted the key differences to help you decide whether you think it’s worth splurging on the newer model.
The iPhone 18 Pro is currently available to buy, with a starting price of £1199/$1199 for its 256GB handset. It also comes in a choice between four colours: Black, Silver, Glacier and Burgundy.
Advertisement
Advertisement
As the iPhone 14 Pro launched back in 2022, it’s not surprising that it’s no longer available to buy directly from Apple. However, it is possible to find refurbished handsets on third-party sites, with the price ranging from around £300 to £400 depending on the condition.
iPhone 18 Pro runs on Apple’s most powerful chip – A20 Pro
One of the biggest differences between the iPhone 18 Pro and iPhone 14 Pro comes under the hood. While the iPhone 18 Pro runs on Apple’s A20 Pro, a mobile chip that’s hailed as the brand’s fastest ever, the iPhone 14 Pro is powered by the four-year-old A16 Pro.
We’re yet to review the A20 Pro chip ourselves, however Apple claims it enables multi-tasking, gaming and AI tools to all run impressively quickly and smoothly, without any lag.
Advertisement
iPhone 14 Pro. Image Credit (Trusted Reviews)
That’s not to say the iPhone 14 Pro’s A16 chip isn’t impressive. During our time with the phone, we found that it was able to comfortably play any Apple Arcade game and could even handle video exports and edits too. In fact, we concluded that there was “almost too much power here”.
Apple Intelligence is not available on the iPhone 14 Pro
Following on from the above, while the iPhone 18 Pro’s A20 Pro chip enables the running of Apple Intelligence, the iPhone 14 Pro’s A16 doesn’t.
Advertisement
While we don’t recommend buying an iPhone purely for Apple Intelligence, as it still feels very much like an afterthought and many of its features will likely go unused, it’s undeniable that the lack of the toolkit ages the iPhone 14 Pro.
Image Credit (Apple)
Even so, although Apple doesn’t publicly reveal how many years of software support iPhones receive, we can guess that the iPhone 14 Pro likely has around three more years of updates. This is based on the assumption that Apple gives its iPhones seven years of updates – and that Apple has recently ceased support for the 2019 iPhone X series.
iPhone 18 Pro has Pro camera controls and variable aperture
The iPhone 18 Pro is equipped with three rear cameras, which are headlined by the 48MP fusion main lens with variable aperture. This, according to Apple, is its most “advanced camera ever made” and promises excellent performance across both bright and low lighting conditions, as it’s able to let in more or less light according to your shooting conditions.
Advertisement
iPhone 18 Pro. Image Credit (Apple)
Apple’s Pro controls return for the iPhone 18 Pro and Pro Max, which means you can customise your shooting experience. For example, you can manually adjust the aperture, the shutter speed or customise the photographic styles too.
Advertisement
Although the iPhone 14 Pro also has three rear lenses albeit with different resolutions, including a 48MP main lens, 12MP ultrawide and 12MP telephoto. Overall we found the iPhone 14 Pro able to take excellent shots regardless of the lighting conditions and even stated it to be one of the best camera phones of its time.
iPhone 14 Pro. Image Credit (Trusted Reviews)
However, it does lack the Pro controls that the iPhone 18 Pro is fitted with. In addition, while the iPhone 18 Pro can shoot in up to 4K@120fps, the iPhone 14 Pro maxes out at 4K@60fps. Finally, the iPhone 18 Pro can reach up to 8x zoom whereas the iPhone 14 Pro reaches 3x.
iPhone 18 Pro has a slightly larger display
The age of small phones like the iPhone 13 Mini seems to be well and truly over, as the iPhone 18 Pro measures 6.3-inches compared to the iPhone 14 Pro’s 6.1-inches. Even so, both handsets are equipped with plenty of premium screen technologies including ProMotion, an always-on screen and a Dynamic Island too.
iPhone 18 Pro Dynamic Island. Image Credit (Apple)
iPhone 18 Pro has USB-C charging
Another feature that ages the iPhone 14 Pro is with its charging port. While the iPhone 18 Pro, and all other iPhones since the iPhone 15 series, has a USB-C port, the iPhone 14 Pro still uses Apple’s old Lightning port.
Advertisement
Advertisement
Early Verdict
The iPhone 18 Pro looks like a serious upgrade over the iPhone 14 Pro, thanks to its powerful A20 Pro chip, triple 48MP camera set-up and the inclusion of Apple Intelligence. If you want the most powerful iPhone then the 18 Pro is an easy recommendation.
However, that doesn’t mean the iPhone 14 Pro is a bad option. In fact, its chip is still pretty powerful, its camera set-up is solid and it’s a decent size too – especially if you prefer smaller handsets.
We spend hours testing every product or service we review, so you can be sure you’re buying the best. Find out more about how we test.
PixelMob Portable AI Workstation: 30-second review
Specs
Display: 7-inch OLED touchscreen Brightness: 1,100 nits Operating system: Android Memory: 12GB LPDDR5 RAM Internal storage: 256GB as standard Storage expansion: Three M.2 slots, supporting up to 24TB total storage Card slots: CFexpress Type B, SD and microSD Connectivity: USB-A, USB-C, HDMI input, HDMI output, LAN and 3.5mm headphone jack CFexpress transfer speed: Up to 800MB/s Internal battery: 11,600mAh External battery: Sony NP-F compatible Dimensions: 104 x 195 x 25mm Weight: 550g
Advertisement
If digital creatives, from photographers to videographers, were to design a piece of kit, it would be the PixelMob Pro. It’s essentially a fully featured asset manager that lets you plug in a variety of storage media from cameras or external hard drives, then organise and edit them onto its internal storage, all through its large touchscreen interface.
The system runs on Android, and much of the interface and usability will feel familiar to many. Still, dedicated apps such as Lightbox, Sequence, Cones, and Framebox let you manage and edit all the files, and in addition to these there are a few familiar apps that you can download as well, such as CapCut, Lightroom and a selection from DJI; there’s even a direct connection to Cloud Storage for additional backup.
Getting started was straightforward, with a few small workflow issues, such as setting up a lightbox, before things really started to make sense.
Advertisement
Latest Videos FromTechRadar
Before getting properly started, I downloaded and updated the firmware, which took a good hour. However, after a restart and refresh, the device was finally set and ready to go.
When I plugged in my first SD card, it took about 5 to 10 seconds for it to appear, ready for the files within to be either partially or fully downloaded and backed up to the internal drive. The whole process is relatively straightforward. However, you do need to set up a Lightbox before you start, which took me a while to figure out.
If you download the files directly without first creating a Lightbox, you won’t be able to navigate or manage them, so it’s an integral part of the workflow, and throughout there are small workflow points like this, but updates through the test have addressed most. It would have been helpful to have a few tooltips at the start when you first use the PixelMob, just to point you in the right direction.
Advertisement
However, once you get used to how the workflow goes, it’s all easy enough, and there are plenty of input options, including USB, USB-C, SD, microSD and CFexpress Type B. They’ve even included a Type B to Type A adaptor in the box, which is handy for anyone using a Sony camera.
Sign up to the TechRadar Pro newsletter to get all the top news, opinion, features and guidance your business needs to succeed!
Once you get into the flow and work out how to use Lightbox, Sequence, and Cones, things start to make sense. If you’re out in the field as a photographer or videographer looking for a decent way to back up all your image and video files, then while asset managers have been available for years, the PixelMob takes everything up a notch or two.
However, while the form and function of this device are superb for the most part, it would be good if some small workflow issues could be addressed, I’ll cover those in the Performance section.
Advertisement
There are also certain build-quality issues. The outer casing doesn’t feel as high quality as it could and feels more like a prototype than a finished product.
The fact that it takes a standard Sony NP-F battery at the back is superb for battery longevity. However, the battery doesn’t fit neatly and, although it has a securing lock to keep the battery in place, the fit just isn’t quite right, so it rests in place rather than locking firmly.
One thing I did like about my NP-F battery plugged into the back is that it makes a very nifty stand.
Another point is that some CFexpress Type B cards took a long time to be recognised, and a couple of the larger 1TB and 2TB models weren’t recognised at all. In those cases, I had to use a card reader plugged into the USB-C port for them to connect.
Advertisement
However, aside from build quality and a few workflow issues, this is a solid unit. What I really liked was that, while it comes with 256GB of internal storage ready to go, it’s in the form of an M.2 2280 module.
The internal storage can be upgraded, with three M.2 slots available and support for up to 8TB modules, potentially giving you up to 24TB of internal storage.
Since this is from UniDrive, it comes with UniDrive NAS software. It also has features like cloud backup, and it even has a LAN port on the back. Essentially, if you ask any photographer what they want for a backup solution on site and back in the studio, this small touchscreen box has it all.
Once the workflow issues are resolved, along with possibly slightly better build quality for the outer casing, this will be a must-have for many professional photographers or videographers.
Advertisement
PixelMob Portable AI Workstation: Price & availability
(Image credit: Alastair Jennings)
At present, the PixelMob has launched through Kickstarter as the PixelMob Portable AI Workstation for Creators. The full listing can be seen at Kickstarter here, while the official website is regularly updated with additional information here.
Advertisement
PixelMob Portable AI Workstation: Design & build
(Image credit: Alastair Jennings)
The PixelMob’s design and build look very outdoorsy. It looks like a tough tablet or oversized mobile phone, and the screen size sits somewhere in between at seven inches with an OLED screen.
It has a brightness of 1,100 nits, which is impressive, and it runs on Android, so it supports many Android apps. In fact, you can install apps from DJI and other manufacturers if you want to connect it to a drone, your mobile phone or even your camera.
What I also liked was that you can connect it directly to the Sony A7 IV; in my case, you can use it as a professional monitoring system, essentially as a second screen and as a way to back up full-resolution files to the device.
In terms of size and weight, it measures 104 x 195 x 25mm and weighs 550g, putting it somewhere between a large mobile phone and a small tablet.
Advertisement
A quick look around the body shows plenty of input options, including CFexpress Type B, which enables up to 800MB/s transfer speeds, SD, microSD, USB-A, and USB-C. On the side are another USB-C port and the power button.
On the top, there are two HDMI ports, one input and one output, another USB-C port and the LAN port. On the base, there’s a connector, and on the back there’s an NP-F mount so you can add standard NP-F batteries.
For memory, it comes with 12GB of LPDDR5 RAM and 256GB of internal storage. The internal SSD can be upgraded, and there are two additional M.2 slots so you can add up to three at 8TB a piece, for 24TB of internal storage in this one small unit.
Inside, an 11,600mAh battery powers the device and, under extreme loads, this will last two to three hours, or around six hours with lighter use. In standby mode, you’ll get over a week. Then, of course, you can plug in the NP-F battery for extended working time.
Advertisement
When I unpacked the PixelMob, I wasn’t so impressed by the overall design. It looked OK and had the same sort of look that you expect from a tough phone or tablet, but this just isn’t backed up by the build quality.
The slightly plasticky exterior feels a little cheap and not very robust. Through the test, the outer casing did stand up to life in my backpack, although I’ll admit to being a little more careful with it than I would usually be.
I also found a few other bits and pieces as I went around the build, such as access to the back panel where you can install additional drives. It felt a little light and was held in by just one crosshead screw. If you shake the device, it also has a rattle, which is from the power button area.
Most notably, the battery holder for an external NP-F battery wasn’t quite the right fit. Still, these issues detract from what is potentially an extraordinary piece of kit.
Advertisement
PixelMob Portable AI Workstation: Features
(Image credit: Alastair Jennings)
When I picked up the PixelMob, I was struck by the sheer volume of features available. Essentially, the main point is it’s designed to back up your camera storage media quickly while you’re on the move, then let you download everything to a machine or NAS as soon as you get home. But then it does more, enabling you to manage and edit the content, tether to a camera and even take control to capture different styles of images.
Thanks to the intelligent onboard software and its Android platform, it’s easy to adapt it to a professional workflow. Even if you’re a keen enthusiast, there’s plenty here to get everything organised.
So whether you’re a photographer, videographer or just somebody who needs to transfer and display data in various locations, the PixelMob is a superb option.
Advertisement
In terms of features, it has internal storage that lets you transfer data from cameras and other devices directly onto the unit. From there, you can edit and manage those files and assets. You can even use it as a media player with HDMI output to a larger screen.
The content you save to the device is managed by built-in AI that scans the files and offers smart subject recognition and other AI features for file organisation.
If you’re a photographer or videographer, you can use that large seven-inch screen to monitor your camera. You simply plug it in through HDMI, and you can use it as a link between your camera and larger monitoring and recording systems.
You can even use it for tethered shooting or as a video-review device. It includes a huge range of creative options that photographers and videographers will inevitably find useful.
Advertisement
In my testing, one of the best features for photography and video was the ability to get quick on-site previews, and I could store files on the device to edit them directly while out and about. Essentially, I had everything stored in one location that I could then use to start the file organisation.
For backups, all storage media I use is compatible with slots for CFexpress Type B cards from my Canon EOS R5 C. My two Sony A7 IVs both use CFexpress Type A, and with the adaptor, I could plug those into the CFexpress Type B port and back them up as well. It also has slots for SD UHS-II and microSD.
I could also plug in a USB-A 3.2 or USB-C device and download further data to the machine. The only issue is that the standard 256GB is quite small, so for this test I added an extra M.2 drive to expand storage by 1TB.
Inside, it has a relatively large internal battery which provides plenty of power for around two hours of heavy use. However, if you’re out and about with large cards, especially if you max out the internal storage, you’ll want a bit more battery power.
Advertisement
The great thing is that the company has decided to use the NP-F battery format, which is used by a huge amount of photography equipment, monitors, and other accessories. I have a stack of them in my kit bag, so they plug directly into the back of the unit, further extending battery power.
Essentially, that internal storage gives you an extra layer of protection, letting you back up all your storage media on a shoot and preview it. Where this one differs is that it also plugs directly into your camera and, with features like time-lapse video, star trails, HDR bracketing, focus bracketing, and panorama merging, gives you additional tools to use with your camera.
What’s more, you can back everything up to the cloud if and when you need.
So when it comes to features, this is one of the most feature-packed devices that I’ve ever looked at. Essentially, it looks like they’ve taken photographers’ full wish list and combined it into one small, handy-to-carry box.
Advertisement
PixelMob Portable AI Workstation: Performance
(Image credit: Alastair Jennings)
When the PixelMob Pro arrived, I was surprised to find its size and weight somewhere between a mobile phone and a tablet, as previous devices of this type, not going back to those made by Epson, are generally rather small.
However, this is a lot more involved and getting started was all easy, if slightly time-consuming. First, after fully charging the internal battery to 100%, I ran through the updates, making sure everything was on the latest version.
The first stage of updating took around 30 minutes. Once the main bulk of the Android and hardware firmware updates finished, there were further updates for the AI processing and many of the pre-installed apps. Altogether, getting everything completely up to date can take a long time.
Advertisement
The system is essentially based on Android, and it’s great to see that you can install many familiar apps if you want. As you drag left on the screen, for instance, it shows a list of standard apps. While the Play Store isn’t part of the system, if you click Apps and then Third Party, you’ll see a list of pre-approved apps that have been added for download and are fully compatible with the system.
These include DJI apps, Instagram, Adobe Lightroom, Pinterest and Snapseed, amongst others. Importantly for further testing, Sony’s Monitor & Control app is also available, which lets me control my Sony A7 IV.
Hopefully, as this system develops, we’ll see equal compatibility for Canon, Nikon, Panasonic, Fujifilm and others. Once you’ve applied all updates and restarted the system, you can start copying data to it or use the PixelMob Pro as a tethering device for your camera systems.
Before I went into the main review and checked out what it could do on the performance side, I also looked at the internal storage. As standard, it comes with 256GB; however, as I flipped open the back and removed the back panel that’s secured with a crosshead screw, I noticed two additional M.2 ports.
Advertisement
That means that if I removed the 256GB drive that was already in and replaced it with an 8TB option, then I could potentially have up to 24TB of internal storage, which is the same amount as my NAS drive that I use in the studio.
Potentially, I could have everything from my NAS, image-wise, on this device and still have room to back up images and video on every shoot I go on.
However, 8TB M.2 SSDs are hugely expensive, so for this test I just popped in a 1TB drive alongside the 256GB drive that was already installed.
I formatted it into the system using the UniDrive application, which I’ve used in the past for previous UniDrive products. It was extremely straightforward, and I was pleased to see the app has developed along with the workflow, which is now much easier to progress through than it was when I looked at UniDrive well over a year ago.
Advertisement
Once the drive format was complete, I was able to start downloading my files from CFexpress cards, SD cards, and microSD cards.
The cameras I used were the Canon EOS R5 C, using CFexpress Type B cards, and the Sony A7 IV, using CFexpress Type A cards with the adaptor supplied with the device.
With each, you take the card out of your camera, plug it into the side of the PixelMob Pro, and after around five seconds, the system recognises the card. A simple tap will then download it to the machine. However, as I found, before you do that on the first run, it’s important to set up a Lightbox.
One of the apps at the bottom of the screen is the Lightbox app. Essentially, tap it, click New, and add your new Lightbox. Once that’s done, you can simply click to import all of the files from your SD or CFexpress card directly to that folder, and then a few interesting things happen. First, the files transfer, then the internal AI processes them. This gives you a full set of auto-tagged options and highlights whether the file is JPEG or RAW.
Advertisement
Clicking the folder shows a thumbnail, and the rendering is exceptionally quick. To be honest, it’s faster than when I try to review stuff using Adobe Bridge. As you scroll through, you can see each file; once you find a picture you like, just tap it, and it’ll open.
If you’ve taken several images that are very similar, say you’ve taken three iterations of the same point, then it’ll recognise those images as a burst and group them. This makes scrolling through hundreds of images, which photographers often have to do, that much easier.
It also shows you similar files. If you’ve got lots of similar files, it also does face recognition, so if there are people you know, you can add them, as you do with many online photo applications.
As you go through the different functions and features, it’ll also show you images that are overexposed or underexposed. If you want, you can go into the AI settings and switch on options such as Basic Assist, Similar Photos, portrait detection (where you can upload specific people), bird recognition, and empty-scene detection, which are all exceptionally useful.
Advertisement
If you do have an image, you can select it and apply star ratings and flags, check the colour, or take it through to Cones, where you can start editing the image with the built-in image editor.
Again, it gives you plenty of options and control. With some of the larger JPEG files that I started to manipulate, it can be a little slower initially to load the image. Still, once you start applying filters, each filter and adjustment applies extremely quickly. For an on-the-move solution, it’s really very slick.
Alongside the more standard enhancement edits, there’s also a whole bunch of stacking edits. So if you’ve been out taking star trails, astro time-lapses, focus or exposure sequences, which you can all do tethered, Cones gives you all of the functions and features to edit those pictures within the confines of this small box, and that is very clever, especially with the touch screen.
Likewise, alongside Cones you also have Framebox, which is essentially a built-in video editor, but personally I downloaded CapCut and utilised that as it’s a much better application.
Advertisement
These applications are all exceptionally clever, and many enable either a wired or wireless connection to your mirrorless camera, which I found incredibly useful and well beyond anything I’ve used before. For the most part, I used the tethered connection to the Sony A7 IV, and the initial setup took a bit of to-and-fro, but was simple enough once the right options on the camera were selected.
Connecting with the Sony A7 IV, all I needed to do was click the option that I wanted from the Sequence modes, make sure that I had a USB-C cable connecting the Sony to the PixelMob Pro and, after a few seconds, with PC Remote switched on in the camera, I was then able to see a live-stream feed directly on the PixelMob from the camera.
With simulated long exposure, I could select the capture interval and simulated exposure, then click Next and start capture. It then ran through the sequence, capturing 30 images and triggering the camera for each one. While I’ve seen small devices that enable this sort of triggering, I haven’t seen anything quite as advanced work so seamlessly.
The resulting image combines all 30 pictures the camera takes. It processes them to create a simulated long-exposure shot, something you can normally only do with an ND or variable ND attached to your camera.
Advertisement
You can also go through to the standard tethered shooting modes. Open the Tether app, click the camera you want to connect, then select the Lightbox. Again, it’s a good idea to create a new Lightbox. Here, you don’t get the live feed from the camera. Instead, you use the camera tethered to the box, and every time you take a picture, it instantly appears on the device, saved and ready to review.
You can keep taking pictures, and they’ll download directly from the camera to the device’s internal storage. It’s an absolutely superb option for stills. However, when you switch your camera to video, that tethered option doesn’t work, and you’ll have to go back to the more normal monitoring option and to record video you switch to another application.
Video is handled by Deck. With this mode selected, essentially the entire device becomes a monitor for the camera. You’ve got your HDMI running from the camera straight into the device, and a simple record button lets you record directly onto the PixelMob. You can record at either 5, 10, 20, 30 or 50Mbps.
It’s not comparable with an Atomos Shinobi or Ninja, but it’s a great device for creators. You can even add LUTs for different colour-grading effects at the same time, making it a really flexible device.
Advertisement
Should you buy the PixelMob Portable AI Workstation?
Ultimately, the PixelMob is one of the most feature-packed devices that I’ve ever looked at for photographers, videographers and creators. It enables complete image management, but it goes well beyond storing image files and becomes a bigger part of your workflow.
You can use it for tethering, video recording and, obviously, organising, editing and sharing your video and image files while you’re out and about. It combines portable storage, AI-assisted organisation, tethered shooting, image editing and video monitoring in one compact device, and the ability to expand the internal storage makes it even more useful.
Some areas still need refinement. Some workflow issues mean you have to duck in and out of various apps, and while you can do a lot, some of them are a little simplistic in certain ways. CFexpress compatibility is also inconsistent, and the outer casing feels quite plasticky compared with the quality of everything else.
Advertisement
However, these applications are there to support your creative media, and what the PixelMob enables is far more than any other device that I’ve seen. The system’s flexibility and how well it fits into a professional creative workflow make it an extremely capable device and one that I will be using going forward.
Swipe to scroll horizontally
Value
Packed feature set that goes well beyond most asset managers, but at a price.
4
Advertisement
Design
Practical design, but build needs refinement, especially the choice of plastics.
3
Features
Advertisement
Exceptional range of creative workflow tools with some small refinement needed.
5
Performance
Fast, with plenty of flexibility in its use from storage to capture.
Advertisement
4.5
Overall
One of the most exciting products for photographers available despite small build quality issues.
First look: Meta is rolling out two AI-powered tools designed to make game creation for Horizon more accessible: Horizon Create, a mobile app, and Horizon Studio, a browser-based tool with more granular controls. Games made with the tools will also reach users on Facebook and Instagram. Both products will initially be available through early access, with Meta now accepting waitlist sign-ups.
The tools let creators use prompts to build 2D or 3D mobile titles. Meta said the games can include multiplayer, progression systems, art direction and difficulty balancing. Creators can also revise the games after the AI generates an initial version.
“Both enable creators to turn any idea into a complete 2D or 3D mobile game, complete with progression systems, balanced difficulty, art direction, multiplayer, and more, then refine every element to their standards,” Meta said.
Meta has not revealed how much control creators will have over the generated game logic, artwork or other technical components. But the company is still presenting the tools as a way to create full games rather than simple interactive experiments.
Advertisement
That is an important difference in the emerging market for AI game-development tools. Google’s Project Genie, for example, can create short interactive experiences, but Meta says Horizon Create and Horizon Studio are built to produce games with the systems that support longer play sessions.
Meta will also promote games created with the new tools across Facebook and Instagram. Titles built with Horizon Create and Horizon Studio can be recommended to users on both platforms and played directly without leaving the apps.
The company said someone viewing a game clip on Instagram could join a multiplayer game in seconds without downloading another app or being sent elsewhere. “Your game lives natively in the feeds where people already discover content and connect with friends,” Meta said.
The move also reflects Meta’s effort to make Horizon less dependent on virtual reality. Horizon began as a VR app, but Meta has recently shifted its focus to mobile access. Putting Horizon-made games inside Facebook and Instagram could expose them to a much larger audience than the Horizon platform has attracted on its own.
Advertisement
The company is also moving into an area where Roblox has a major advantage. The online game platform has 123 million daily active users and has been adding AI-powered creation features, including a mobile tool that lets users generate games with prompts. Horizon, in contrast, has not reached anything close to that scale.
Rush did not really become Rush on their 1974 debut. That record gave us “Working Man,” landed them a deal with Mercury Records, and proved that three young musicians from Toronto could make enough noise for Americans to pay attention, but Fly By Night is where you can hear the future taking shape.
More specifically, part of that future arrived in a Ford Pinto carrying a tall, skinny drummer with short hair and a rather unconventional method of transporting his drums. Neil Peart showed up for his July 1974 audition with his kit packed in garbage bags, which probably did not scream future Rock and Roll Hall of Famer to Alex Lifeson.
Then he sat down and played.
Peart officially joined Rush on July 29, 1974, shortly before the band began its first U.S. tour. Geddy Lee and Lifeson had already started moving toward more progressive material, but finding a drummer capable of following them there was another matter entirely.
Advertisement
The first thing they jammed with Peart at his audition was “Anthem.” Lee later recalled that Peart was so good that auditioning the drummer who followed him became almost painfully academic, while Lifeson remembered being struck by how active his playing was and how hard he hit the drums.
From the opening attack of “Anthem” on Fly By Night, you can hear it.
There is still plenty of Led Zeppelin and Cream in Rush’s bloodstream at this stage. Lee and Lifeson had spent their formative years learning Cream songs, and Zeppelin’s impact on the early band was hardly subtle, but Peart helped push those influences into something increasingly difficult to mistake for anybody else.
His drumming was more aggressive, intricate, and compositionally involved than what Rush had attempted on the debut. Just as importantly, his arrival encouraged Lee and Lifeson to think differently about how songs could be constructed.
Advertisement
The transformation is immediate. They no longer sound like some very talented guys who might still be rehearsing in a rec hall basement somewhere around Willowdale.
They are beginning to sound like Rush.
Related Reading:
Neil Peart
Enter The Professor
It is almost impossible to discuss Fly By Night without turning part of the conversation into a Neil Peart story because his arrival changed far more than the drum parts.
Advertisement. Scroll to continue reading.
Peart would become one of the greatest rock drummers of his generation, but reducing his contribution to his playing ability misses half of what made him so important to Rush. He was private and introverted by nature, a voracious reader, intellectually curious to an almost intimidating degree, and unusually articulate when he decided he had something worth saying.
Advertisement
Lee and Lifeson quickly discovered something else useful about their new drummer: he liked words.
They did not particularly enjoy writing lyrics, and Peart did. He eventually became Rush’s principal lyricist, immediately expanding the band’s universe beyond much of the conventional rock subject matter heard on the debut.
Peart wrote the lyrics for six of the eight songs on Fly By Night. “Best I Can” and “In the End” originated before he joined, which makes the album an especially interesting transitional document because pieces of the previous Rush exist alongside material pointing directly toward what followed.
“Beneath, Between & Behind” was the first lyric Peart wrote for the band. “Rivendell,” inspired by Tolkien, could hardly be further removed from the lyrical world of “Need Some Love,” while the title track drew from Peart’s own experience leaving Canada for England when he was eighteen.
Advertisement
Fantasy, literature, travel, individualism, philosophy and eventually science fiction were entering the building. Rush suddenly had considerably more to talk about.
Still Zeppelin And Cream But Becoming Rush
It would be revisionist nonsense to pretend that Fly By Night emerged fully formed as the classic Rush sound. The heavy blues and British hard rock influences remain obvious, particularly the impact of Led Zeppelin and Cream that helped shape Lee and Lifeson long before Peart appeared.
What changes is what Rush begin doing with those ingredients.
Peart’s rhythmic vocabulary gives Lifeson more room to fracture riffs, change direction, and think beyond straightforward hard rock arrangements. Lee’s bass playing becomes more active because it has a drummer capable of meeting him practically anywhere, and the three musicians begin functioning less like guitar, bass, and drums occupying separate lanes and more like three lead players somehow negotiating the same piece of road.
Advertisement
That interplay would eventually become one of the defining characteristics of Rush.
You can hear its beginnings all over Fly By Night. The music becomes tighter even as the arrangements become more ambitious, and the band sounds considerably more confident taking risks that might have collapsed with a less capable rhythm section.
Peart did not erase their influences overnight. He helped provide the foundation that allowed Rush to stop merely reflecting them.
Advertisement. Scroll to continue reading.
Advertisement
By-Tor Opens The Door
Nothing on Fly By Night points toward the next decade more clearly than “By-Tor and the Snow Dog.”
The 8:37 four-part composition grew from an inside joke involving two dogs belonging to manager Ray Danniels, but Peart transformed that silliness into a good-versus-evil fantasy populated by Prince By-Tor, the Snow Dog, the River Styx, battles, and enough sword-waving imagery to frighten an FM program director.
Lifeson later described it as the first time Rush attempted a multipart piece of music. That makes it far more important than its wonderfully ridiculous origins suggest.
The basic idea would rapidly expand.
Advertisement
Caress of Steel followed later in 1975 with “The Necromancer” and the nearly twenty-minute “The Fountain of Lamneth.” Then came the side-long title suite on 2112, followed by “Cygnus X-1” and “Xanadu” on A Farewell to Kings and the even more elaborate material on Hemispheres.
“For my money, “Xanadu” remains one of the greatest songs Rush ever recorded. At more than eleven minutes, it is atmospheric, thunderous, technically ridiculous, and gives all three musicians enough room to demonstrate precisely why nobody ever needed a fourth member.
It is also easy to draw the line backward from “Xanadu” to “By-Tor.” The latter sounds like three young musicians realizing they can stretch a rock song into something larger; the former sounds like three masters who know exactly how to control the scale, dynamics, pacing, and drama of a long-form composition.
Watching Anika Nilles play “Xanadu” with Lee and Lifeson on the 2026 Fifty Something tour brought all the feels for me. Hearing those opening swells again and watching another extraordinary drummer navigate Peart’s parts was a reminder that this particular branch of the Rush family tree began more than five decades earlier with songs like “By-Tor.”
Advertisement
It Almost Went Down The Tubes
There is an important wrinkle in the story because Rush’s march toward progressive rock was hardly greeted by record company executives throwing rose petals at their feet.
Fly By Night gave the band confidence to push further, and Caress of Steel pushed much further. Perhaps too far, at least commercially.
Released only seven months after Fly By Night, Caress of Steel devoted much of its running time to “The Necromancer” and “The Fountain of Lamneth.” Those extended pieces offered little help to conventional radio programmers, audiences did not respond the way the band expected, and the resulting tour became grim enough that Rush jokingly called it the Down the Tubes Tour.
The joke had teeth.
Advertisement
Advertisement. Scroll to continue reading.
Peart later recalled that Caress of Steel had not actually sold dramatically fewer copies than the preceding records, but Mercury was in turmoil and three albums selling roughly 100,000 copies each did not exactly make Rush untouchable. Lee and Lifeson have both described how disappointing and confusing the response was, with the band genuinely concerned about where things were headed.
The record company subsequently advised Rush not to make another concept album.
That decision might be the most Rush thing Rush ever did.
Instead of retreating toward three-minute singles, the band opened its next album with a seven-part science-fiction suite lasting more than twenty minutes. 2112 became their commercial breakthrough and effectively earned Lee, Lifeson, and Peart the freedom to chart their own course for the rest of their career.
The progression matters when listening to Fly By Night. “By-Tor” was not just some eccentric deep cut about two dogs given mythological identities after somebody had a laugh on the road; it was the first significant step down a musical path that nearly destroyed their career before becoming the reason they had one.
Rivendell And The Other Side Of Peart
“Rivendell” demonstrates that Peart’s impact was not simply about longer songs, heavier drumming, or fitting more notes into every available square inch.
Advertisement
Inspired by J.R.R. Tolkien, the song strips away most of the force heard elsewhere on Fly By Night. There is no percussion, the presentation is largely acoustic, and its almost pastoral quality provided Rush with an early opportunity to explore texture and mood instead of simply seeing how hard they could hit the listener.
The literary direction is unmistakable.
Peart’s reading habits would continue to influence his lyrics for decades, but Fly By Night is where listeners first encountered just how broad his frame of reference could become. Fantasy and mythology were part of it, but they were never the entire picture.
The title track proves that.
Advertisement
“Fly By Night” grew from Peart’s experience leaving Canada as a young man for England, giving the album something personal and autobiographical alongside the fantasy. That combination of internal reflection and enormous fictional landscapes would become another Peart trademark.
Advertisement. Scroll to continue reading.
One minute Rush could be contemplating Rivendell. A few years later they would be flying into a black hole.
Perfectly normal Canadian behavior.
Advertisement
The Mobile Fidelity Edition
Mobile Fidelity Sound Lab has now returned to Fly By Night as part of its Rush reissue campaign covering the band’s studio catalog from 1974 through 1985.
The numbered edition spreads the album across two 180-gram LPs cut at 45 RPM and carries a $59.99 price. Mobile Fidelity says Krieg Wunderlich mastered the release using the original 1/4-inch, 15 IPS analog master with the following chain:
1/4-inch 15 IPS analog master → DSD 256 → analog console → lathe
The records are pressed at Fidelity Record Pressing and packaged in a Stoughton gatefold jacket with a bonus photo print.
Advertisement
So no, this is not an AAA release.
The debut certainly benefited from Mobile Fidelity’s treatment. My review copy of the 45 RPM Rush offered considerably greater tonal weight, bass impact, and overall substance than the other pressings in my collection, even if no mastering engineer was going to magically turn the album into Moving Pictures or even Power Windows.
Fly By Night presents a much more interesting challenge.
Neil Peart is the first thing you notice, and on this pressing his impact is impossible to miss.
Advertisement
His drumming hits harder on this pressing, but sheer impact is only part of it. There is considerably more definition around his playing, and the increased clarity makes his precision much easier to follow. That matters on Fly By Night because Peart is already doing things rhythmically that separate this band from the one that recorded the debut. MoFi does not make the performance sound artificially larger; it simply makes it easier to hear how much Peart had changed the foundation underneath Lee and Lifeson.
That added clarity also benefits Alex Lifeson. His guitar playing has more edge and presence, with greater separation from Lee’s bass and Peart’s drums. There is more information around the notes, particularly when the arrangements get busier, and that gives the album a degree of scale and control that I have not always heard from other versions.
Advertisement. Scroll to continue reading.
“By-Tor and the Snow Dog” benefits enormously. The different sections have more presence, the transitions feel more deliberate, and the instrumental passages carry considerably more weight. You can hear the three musicians beginning to understand what they could accomplish when nobody was telling them that a rock song needed to be four minutes long and finished before the radio programmer reached for the phone.
Advertisement
It is not “Xanadu.”
That song, especially on a really capable system, can become absolutely enormous in the room. The opening atmosphere, Lifeson’s guitar, Lee’s bass and keyboards, and Peart’s percussion build into something almost physical. All three musicians get to demonstrate what they had become by A Farewell to Kings, and it remains one of my favorite Rush tracks, period. Knowing that Mobile Fidelity has an UltraDisc One-Step edition of that album coming has me more than a little curious about what they are going to do with it.
But Fly By Night is the beginning of that journey, and the MoFi pressing does a very good job of making the connection clearer.
“Rivendell,” however, remains “Rivendell.”
Advertisement
The additional resolution does not suddenly push Geddy forward in the mix. If anything, greater clarity makes me wish somebody had turned up his microphone or asked him to remove the Cott Black Cherry from his mouth before Terry Brown hit record. Considering that Pancer’s on Bathurst was already feeding Toronto and had its own connection to Rush, I can picture the entire scenario rather too easily.
Swallow, Gershon. Swallow.
That quirk aside, Mobile Fidelity has done a really solid job with Fly By Night. There is more weight, greater definition, stronger instrumental separation, and enough additional clarity to reveal just how quickly Rush were evolving once Peart joined the band. Most importantly, none of that comes at the expense of the energy that makes the album work.
The $59.99 asking price is not insignificant, especially if you already own multiple copies, but this is not one of those audiophile reissues where you have to convince yourself that the triangle sounded slightly more dimensional at 2:47.
Advertisement
The improvement is easy to hear.
For Rush fans with a good analog setup, the Mobile Fidelity 45 RPM edition of Fly By Night is definitely worth buying. It gives Peart’s arrival the weight and precision it deserves, gives Lifeson’s guitar more bite, and lets “By-Tor” stretch its legs without pretending this 1975 recording is something it was never meant to be.
If you missed the hubbub this week, it was discovered that the Raspberry Pi Foundation added code in the firmware that locks the boot process up if non-original RAM chips are detected onboard. Hot-rodding your Pi is a time-honored tradition in these parts. We do wonder just how many folks are taking the risk of hot-airing the memory off the board, versus paying the extra cash to get one with more RAM. But according to Raspberry Pi, enough boards are showing up that have the RAM surreptitiously replaced, and often defective, that they took the step to lock the machine down.
Should users be alerted to potentially unscrupulous behavior by the companies selling them single-board computers? I think we’d all say “sure”. But should that entirely brick the device? And prevent people from upgrading their own? The hacker in me says “no”. Is there any way to reconcile these two? Our own [Arya Voronova] suggests that it’s no big deal to flash an older version of the initial firmware, and we concur, although it does leave behind all the improvements since 2023, and it will only get less fresh as time goes by.
How to announce that the board has non-factory memory without breaking it? [Jeff Geerling] suggested a non-matching-memory bit that users could check, but then they could also neglect to check. My cellphone has a screen that appears every bootup, and requires me to press the power button to continue, because I rooted the phone and installed an open-source OS. It’s a hassle for sure, but it’s a lot better than bricking the phone or disallowing user firmware entirely.
Doing the same thing for the Raspberry Pi isn’t as easy. You never know what, if any, peripherals are connected, so you can’t guarantee that there’s a screen to alert you or even necessarily a keyboard on which you could acknowledge. We’re reminded of a similar situation with FTDI USB-to-serial converter chips ages ago. Their driver software simply refused to work with counterfeit versions of their chips. Hackers were up in arms, largely because we couldn’t know if the parts were genuine at purchase time, and the counterfeits were widely distributed even by reliable resellers.
So what about it? Can you think up a tamper-evident signal that could run on boot on a Raspberry Pi, maybe a headless system installed in some difficult-to-reach place? Maybe ideally the equivalent of the cell phone’s scare message? It would have to be hard to overlook, but keep the machine running, notifying the user that things aren’t kosher, but not preventing them from getting to work. Sounds like a tall order to us.
Advertisement
This article is part of the Hackaday.com newsletter, delivered every seven days for each of the last 200+ weeks. It also includes our favorite articles from the last seven days that you can see on the web version of the newsletter.
Want this type of article to hit your inbox every Friday morning? You should sign up!
One of the biggest roadblocks for adding countertop appliances to your kitchen is storage. For folks with a small kitchen, myself included, the struggle often looks like a constant shuffle, trading one appliance for another in the pantry. This problem is less noticeable in larger kitchens, but you might end up with more clutter than you’d like.
This modestly sized blender does far more than blend. John Carlsen/CNET
Eventually, you need to decide if you’ll use an appliance often enough to justify getting it. In my case, I’m much more likely to choose a multipurpose product like an Instant Pot pressure cooker or an air fryer. Perhaps this is why I was excited to test out the Ninja CrushBoss, which combines a large blender, food processor and small smoothie blender into a single device. I spent the two weeks using a sample unit from Ninja in my kitchen, and I’m eager to share my thoughts.
Four appliances in one. Well, kind of
The main appeal of the Ninja CrushBoss is that it comes with three vessels: a 72-ounce blender pitcher, a 64-ounce food processor bowl and a 26-ounce smoothie tumbler.
CrushBoss isn’t Ninja’s first attempt at an all-in-one kitchen system, as the Ninja Detect, Ninja Professional Plus and Ninja Foodi Power Blender all attempt similar feats. What sets Ninja CrushBoss apart are the PrecisionDice and MultiBlade Disc attachments for the food processor bowl, plus a better smoothie tumbler design than previous models.
Similarly, the blender’s preset programs change depending on which vessel you attach to the 1850-watt base motor, with each program running automatically to achieve the desired results. You can rotate the outer ring of the small LCD screen to choose your setting, then make the final selection by pressing the top of the screen inward to click. It’s not a touchscreen, but it’s easy enough to use once you learn the controls.
Intelligent blending features, PrepIQ and SmoothSense, track the type and consistency of what you’re blending, but I didn’t notice a difference compared to the preset programs or custom speed controls.John Carlsen/CNET
There isn’t much that’s special about the large blender pitcher, which uses largely the same design as other standalone Ninja blenders. It comes with a single blade assembly and presets for mincing, small chopping and large chopping. The smoothie tumbler is similarly simple, with its small blade assembly supporting ice crushing, blending and smoothie presets. Compared to older tumblers, the Travel Tumbler’s main upgrade is a better carrying handle, flip-top lid and a large smoothie straw — it’s more like a Stanley cup than a NutriBullet personal blender.
Last, but not least, is the food processor, which has the most accessories, including a chopping blade, dough blade, MultiBlade Disc and the PrecisionDice assembly. Where the Ninja Detect’s food processor included reversible stainless steel discs, the MultiBlade attachment is largely plastic, with specific inserts depending on the model you choose. The model I tested came with inserts for thick slices, crinkle-cut slices and shredding — Ninja also sells inserts for thin slices, french fries and julienning.
While I understand that the plastic MultiBlade Disc and inserts reduce the amount of stainless steel in the package, I can’t help but wonder about their long-term durability compared to all-metal discs.John Carlsen/CNET
I call it a kind of four-in-one appliance because the smoothie tumbler’s main benefits are, naturally, smoother blending consistency than the large pitcher and greater travel portability with the included lid and smoothie straw. You can still use the large pitcher for family-size smoothies and anything too big for the other two vessels, so adding a blending function to each vessel is largely superfluous. Similarly, the dicing kit is hardly an appliance on its own, since you’ll see it on other food processor brands like KitchenAid and Breville.
How useful is the Ninja CrushBoss?
My Ninja CrushBoss tests were informal, so I mostly wanted to see whether it could handle a few tasks, like making salads, smoothies, processing cheese and chopping a few kinds of vegetables. I tested every attachment and accessory in the box, with most receiving multiple tests.John Carlsen/CNET
Of the three vessels, I spent the most time with the food processor. I used the PrecisionDice attachment to prepare a fruit salad, which went very smoothly and had no issues with mango, watermelon, strawberries and pineapple. I pureed some blackberries with the food processor’s chopping blade to add more texture to the salad, though the smoothie attachment was ultimately a better option for crushing the blackberry seeds.
Next, I swapped the dicing attachment for the MultiBlade and sliced potatoes and cucumbers with the normal and crinkle-cut attachments. Again, the results were very good. Things were a little less consistent when I processed carrots and cabbage with the shredder for a quick coleslaw, as some bits of each remained unprocessed between the blade and lid. The amount of unprocessed vegetables was minimal, so I tossed them into a bowl of ramen instead of manually chopping them for the coleslaw.
Advertisement
The point of the cheese test was to find the food processor’s limits, so I’m happy to report the motor safety cutoff and error messages worked as intended when I stressed the unit too much.John Carlsen/CNET
To give the food processor a proper workout, I brought out the cheddar cheese, which I put through the shredder, slicer and dicer. As you might suspect, the cheese worked best with the shredder, with very little waste and no clogs. The other two attachments are less suitable for cheese, with the slicing disc producing passable slices. However, I clogged the dicing tool when I tried to make cheese cubes. I ultimately succeeded with some tiny cubes, but I don’t recommend it.
The Best Blenders We Tested in 2026
While I didn’t use the dough blade attachment much, it seemed good for mixing bread dough into a state where I could knead it by hand. I ran three cycles using the dough preset — though I admit the last cycle was because I forgot to add an ingredient. One reason I finished by hand was that I could hear the motor straining a bit toward the end of the second and third cycles.
Even if I’m not 100% on board with using it for dense bread dough, the unit is plenty powerful for cookie dough and cake batter.John Carlsen/CNET
I suspect the CrushBoss can handle the job, as the manual says it can hold up to 2 pounds of dough and shut off if necessary, but it took only a minute of hand-kneading after processing to reach the consistency I wanted. My advice: Listen to your machine and avoid tasks that trigger the auto-shutoff too often. Fortunately, my testing didn’t surface any problems with the system’s durability.
Beyond the food processor bowl, little stood out about the blender pitcher and smoothie tumbler attachments. Each did well with various levels of blending, pureeing and ice crushing, but nothing so outstanding that my ancient Oster blender couldn’t also do. The biggest advantages over my modest blender are the pitcher’s size — even if it’s more than I need in my kitchen — and the tumbler’s portability. Ninja says CrushBoss isn’t suitable for hot blending, so you can’t safely use it with hot liquids.
Advertisement
The challenge of modular kitchen systems like Ninja CrushBoss
Somewhat paradoxically, the modular nature of the Ninja CrushBoss is also its biggest weakness — at least for me.John Carlsen/CNET
Although I’m happy that I don’t have to store three motorized bases for separate specialty appliances, all of Ninja’s vessels and attachments are bulky enough that they’d take up an entire shelf in my kitchen cabinets. There’s not really a safe way to store the extremely sharp food processor discs, so I ultimately kept them in a carrying case for a massage gun I threw out ages ago. Fortunately, you can safely store the largest blender blade assemblies in each vessel.
The other challenge is that while all of the attachments are dishwasher-safe, that only applies to the top rack. My older dishwasher’s top rack isn’t adjustable, so I can’t fit any of the vessels inside and I have to wash them all by hand. This isn’t a problem I experience with the glass jar of my Oster blender, or the slightly smaller vessel of the Tribest Backspin I tested in 2025. At least the other parts fit, which made cleanup much more manageable.
My point in calling these out isn’t to discourage anyone interested in the CrushBoss, but to note that storage space and dishwasher space still matter before you buy.
Should you buy the Ninja CrushBoss?
The CrushBoss’s value becomes more apparent as the amount of food increases.John Carlsen/CNET
As I used the Ninja CrushBoss 4-in-1, I kept coming back to one central question: “Who is this for?” Ultimately, it’s a harder question to answer than I thought. I have no problem recommending each function separately — blending, smoothies, dicing and food processing — because it seems to do all of these well enough.
For example, this particular setup should work well for two types of households: large families and meal preppers. I grew up in a large family, and having an appliance to prepare a huge amount of ingredients for every meal is a no-brainer. Another group that might benefit is the meal-prepper, regardless of household size.
Still, selling everything together in a single kit is excessive for someone like me, who has a small apartment. I have plenty of travel cups for smoothies and rarely need to process large amounts of food. Ninja thankfully offers various CrushBoss configurations and will most likely sell the attachments separately down the line, like with its older products. Personally, I’d love a configuration with only a large pitcher and food processor — I don’t need a smoothie tumbler.
Advertisement
At $320, the Ninja CrushBoss 4-in-1 costs about what you’d pay for separate Ninja appliances, but it is pricier than previous generations of Ninja’s modular kitchen systems, even without the dicing kit. This is a drop in the bucket compared to getting similar attachments for a Vitamix Ascent X. Despite my personal reservations, I think the Ninja CrushBoss 4-in-1 is a great idea, especially for folks looking to consolidate multiple specialty appliances into a single modular system. It taps into the reason why people love the classic KitchenAid stand mixer, and that’s a good thing.
John Carlsen has more than a decade of experience testing and reviewing home tech products, with a major focus on smart home security. He earned his BS in journalism from Utah Valley University. In addition to his CNET contributions, John has written for Android Police, TWICE, Home Theater Review, SafeWise, ASecureLife and Top Ten Reviews.
See full bio
There’s a new Garmin Fenix smartwatch on the market with a better screen and tons of new features, but is it enough to warrant an upgrade? The Fenix 9 will set you back $1,000, the same price we saw the previous generation launch for. Like all Garmin Fenix models before it, this one’s built for athletes and outdoor adventurers who want to take on everything from ultramarathons to mountain climbing to open-water diving.
The Fenix 8 is already a well-rounded and highly capable watch that covers almost every possible scenario. Since the new model’s release, the company has, on occasion, discounted the older version. For instance, during the week that the Fenix 9 launched, you could get the 43mm Fenix 8 on sale for $850. The new Fenix starts at $999.99 (43mm) and goes up to $1,099.99 for the 51mm size.
Since you can still get both models from Garmin, what exactly sets them apart and how should you choose? The company has its own blog post detailing some of the changes, but of course, you’ll want input from a source that isn’t trying to sell you its latest product. We’ll go beyond the spec sheet to look at what’s different between the two generations, what stayed the same and where each watch makes the most sense depending on how you train and live.
Advertisement
Display and case
This is the first clear area of improvement for the Fenix 9. The smartwatch features an AMOLED display that Garmin says is “twice as bright” as the Fenix 8’s. As a refresher, the Fenix 8 was the first of its family to feature an AMOLED panel (the Fenix 7 and 7 Pro used “Sunlight-visible, transflective memory-in-pixel (MIP)” displays).
Garmin did not disclose the specific number of nits for the Fenix 8’s AMOLED screen, but it does say the Fenix 9 Pro version reaches up to 3,000 nits of brightness, so a bit of math suggests the Fenix 8 came in significantly below that. For context, the Apple Watch Ultra 4 and Pixel Watch 5 both go up to 3,000 nits at peak brightness as well.
Advertisement
The Fenix 8’s AMOLED panel is still bright and vibrant, so it won’t be a night-and-day difference in everyday use, but for athletes who frequently train under harsh sun, the added brightness will make the screen more readable.
When it comes to the case, the standard Fenix 9 keeps the same construction as the Fenix 8 had in its higher-end models, pairing a titanium bezel with a sapphire lens. It is worth noting that Fenix 8 offered a stainless steel bezel with a glass lens on its base configuration. Still, both watches are rugged, tested to US military standards and rated for diving up to 40 meters.
Advertisement
Storage, memory and maps
Garmin
The under-the-hood improvements are more substantial than they first appear. The Fenix 9 doubles the Fenix 8’s capacity to 64GB, letting you download twice as many apps and store up to 7,000 songs from your Spotify, Deezer or Amazon Music accounts.
The Fenix 9 also has 50 percent more RAM than the Fenix 8, so it’s going to deliver a snappier performance, switching quickly between whatever apps you need to use, loading maps and so on. When it comes to map performance, Garmin also states that panning is up to 30 percent faster on the new Fenix 9, mostly thanks to a more powerful map engine.
More storage is always great, especially when you don’t have to pay extra for it. This will make it easier to load multiple regional maps and large music libraries, so you don’t have to worry about deleting songs before an upcoming trip. Frankly, that extra storage is one of the most practical reasons to upgrade.
Advertisement
Features, functionality and battery life
There are loads of features that carry between generations. These range from the built-in LED flashlight, the onboard speaker and microphone for calls and voice commands, to the ECG capability and a slew of perks like Garmin Pay, music streaming and your daily metrics.
The Fenix 9 brings some new or improved features to the table. For example, Garmin Epic is a new feature that groups multiple activities over days, weeks or months into a single shareable story in Garmin Connect. This will make your multi-day hike or training camps easier to share online. The smartwatch also makes it possible to now track stamina zones and your stamina curve, telling you more about how your endurance changes over time so you can pace yourself more effectively.
The Fenix 9 also expands its rucking features. If you’re going to adjust your pack weight mid-activity, you can now mark that up in your watch. The watch also integrates structured GORUCK workouts so you can follow guided routines, step counts and rests.
Many of these software features may eventually reach the Fenix 8 through updates, which will soften the argument for upgrading. The hardware-dependent additions like the brighter display, however, are exclusive to the new model.
Advertisement
Battery life is not something that should factor into your decision between these smartwatches. The Fenix 9 brings no upgrade over the previous model, delivering the same 29 days of use on a single charge. If battery life is something you have concerns over, you might be better off getting the Fenix 9 Pro Solar, which will get you up to 57 days of use.
How much of an upgrade is the Garmin Fenix 9 over the Fenix 8?
Garmin
Stacking the two side by side, the Fenix 9 improves on the Fenix 8 in the following ways:
It has a brighter display.
It has twice as much storage space.
It delivers faster and more detailed maps.
It brings new software features like stamina tracking and Garmin Epic.
At the same time, the fundamentals are strikingly similar as they both share the same starting price, size options, dive rating, health tracking suite, speaker and mic combo, ECG capabilities and flashlight. The Fenix 9 is more of an evolution than a revolution.
Advertisement
If you already have the Fenix 8 and you’re content with the features and specs it delivers, it’s probably not worth shelling out another thousand dollars for it. If you’re running out of storage, have a hard time seeing what’s on the screen at times and you’re dreaming about a faster map, the upgrade may be worth it.
If you don’t own the Fenix 8 but are just looking for a new smartwatch that will keep up with your training sessions and outdoor activities, then the Garmin Fenix 9 is an absolute beast that is well worth your attention and your money.
Here’s another thing to help you make a decision. Garmin guarantees critical security vulnerability patches for a minimum of two years from launch, and that window has already passed for the Fenix 8. The company doesn’t have a clear schedule we could check, and we’ve reached out for clarification on this particular policy. But if it does decide to cut off these updates anytime soon, it could leave sensitive information, including that integrated into Garmin Pay, vulnerable, much like it will happen to a bunch of other popular smartwatches.
Swapping out your turntable’s stylus is an easy upgrade.
Milan_jovic/Getty Images
As vinyl record sales continue to soar, swarms of converts are looking to upgrade their turntables. Of course, you can always invest in a high-end record player. And while cleaning your records and adding an alignment protractor can noticeably improve performance on the cheap, you may want to invest in improving the quality of your current turntable.
While newer turntables tout Bluetooth connections, your speakers are among the most important pieces of the equation when it comes to audio quality. But on the turntable itself, it’s the stylus, or needle, which will make the biggest difference in your record player’s sound quality. Logically, it makes sense. Because the stylus is the piece which picks up the grooves of your vinyl record, its quality determines the level of details your record player is going to pick up.
Styluses are made of diamond and typically come in elliptical, microliner, Shibata, line contact and spherical shapes. If you are rocking an older or budget turntable, you’re likely using a spherical stylus. Also known as conical needles due to their cone-like tips, these styluses are durable and affordable, making them a great option if you don’t spend your nights yearning for precise, detail-rich audio. However, if you’re looking to take your record game to the next level, you’ll want to invest in a higher quality stylus. But which should you choose? And how do you maximize your new stylus once its in place?
Advertisement
Picking a stylus
Josefephotography/Getty Images
If you’re looking for a budget-friendly option that delivers stellar performance, consider upgrading to an elliptical stylus. With an oval-shaped tip that increases your turntable’s contact area through two radii, elliptical styluses improve your turntable’s distortion, frequency response and modulation tracking. Cheaper than the premium options listed below, an elliptical stylus is a midrange option perfect for most casual listeners. However, take care when installing your new stylus, as improper alignment can cause noticeable wear on your records.
For a more premium experience, consider a microliner stylus, which uses a narrow, elongated tip like those used to cut your records. More agile than elliptical styluses, microliners can track high-frequency inner grooves while remaining durable, producing high-detail sound and inner-grove clarity without an audiophile-grade setup. Unfortunately, microliner styluses are more dependent on a quality setup, so be sure to pair one with a high-end cartridge and tonearms.
Those seeking audiophile performance can seek out the infamous Shibata stylus. A Japanese creation in the 1970s designed to play 4-channel vinyl discs, a Shibata’s flat narrow point increases the contact area, perfect for high-frequency recordings and high-fidelity playback. Ideal for high-res jazz and classical recordings, the pricey Shibata styluses require intensive installation to ensure proper alignment. For the most premium experience, opt for a line-contact stylus. Typically reserved for the best audiophile cartridges, the extended contact area means total fidelity to your record’s grooves. If you need a studio-grade configuration, this specialized stylus will render the highest resolutions — for a price.
Advertisement
No matter which tip you opt for, make sure to switch from a bonded stylus to a nude needle. Bonded styluses are diamond tips attached to a metal shank fastened to the cantilever. Affordable and durable, bonded styluses are commonly found in lower and midrange cartridges. However, the shank’s mass dampens the needle’s responses to the record’s grooves. However, a nude stylus, in which the diamond is fastened directly to the cantilever, has a lower mass, allowing it to better follow the grooves of your record.
Choosing the right cartridge
gadiel img/Shutterstock
Another way to improve your record player is to upgrade your cartridge altogether. Because these tiny devices convert the vibrations picked up by your stylus into the electrical signal that emanates from your speakers, some might consider upgrading your stylus without upgrading your cartridge akin to putting a new engine in a jalopy. A new cartridge can help bring out the minute details of your favorite records, improving sound quality, enhancing groove tracking, minimizing distortion, and can extend stylus life.
For simplicity’s sake, lets look at Moving Magnet and Moving Coil cartridges. Both use magnets and coils to convert vibrations of your stylus into electromagnetic signals that travel through your turntable’s tonearm to your sound system. In the former, vibrating magnets send electrical currents between two coils. Best for entry-level and midrange setups, Moving Magnetic cartridges are perfectly suitable in most cases, producing astounding sonic outputs with a punchier presentation. And while they lack the refinement of their Moving Coil counterparts, they are also substantially cheaper, easier to maintain and are often compatible with user-replaceable styluses.
Advertisement
For a more advanced setup and stylus, consider a Moving Coil cartridge, where a cantilever vibrates a pair of coils with fixed magnets. Smaller than those used in a Moving Magnetic cartridge, these coils create more subtle, precise movements, rendering better resolution. However, you’ll likely need to pair your Moving Coil cartridge with a good amplifier or high quality headphones due to the lower output levels. Pricey, delicate, and typically without user-replaceable styluses, investing in a Moving Coil cartridge isn’t for the faint of heart. However, if you choose one with an elite stylus, you may be in for an audiophile’s dream.
NVIDIA’s $16,000 RTX PRO 6000 can beat the RTX 5090, but gamers aren’t who it’s built for.
NVIDIA
By most measures, NVIDIA’s GeForce RTX 5090 is a more powerful GPU than most will ever need. Priced at $1,999 when it was announced, it has 32GB of GDDR7 memory and can consume 575W when pushed. Despite all that power, though, there’s still another step up the NVIDIA desktop GPU ladder.
That would be the RTX PRO 6000 Blackwell Workstation Edition. NVIDIA describes it as the “most powerful desktop GPU ever created.” Put another way, it’s a very powerful graphics card for people whose needs extend beyond gaming. And sure, you can buy one, but your bank account may not be very happy about it. NVIDIA’s current US price for the RTX PRO 6000 is $16,000, nearly double the $8,565 it cost when it launchedup from $13,250.
NVIDIA has not disclosed why it raised the price, although the increase comes amid sharply rising memory costs and broader GPU price hikes . What’s clear, though, is that NVIDIA is targeting the RTX PRO 6000 at AI developers, engineers, 3D artists and other professionals who can make use of hardware that would be overkill in most gaming PCs.
Advertisement
The RTX PRO 6000 is built for work, not Steam
Screenshot by Husain Parvez (NVIDIA)
The simplest way to understand the price is to start with memory. The RTX PRO 6000 features a fairly ridiculous 96GB of GDDR7 ECC memory, compared to 32GB of GDDR7 on the RTX 5090. It also has 24,064 CUDA cores and a max board power of 600W.You’re not going to suddenly find a game that needs the additional 64GB of RAM, but professional workloads can.
NVIDIA is specifically targeting that huge memory pool at massive 3D and AI projects, larger datasets, VR environments and multi-app workflows. The ability to detect and correct memory errors is also more important when a GPU is doing some serious number crunching or a long professional job than when you’re trying to eke out a few more frames in Cyberpunk 2077.
The professional premium is not just in the hardware. RTX PRO cards are supported by NVIDIA’s workstation-focused driver ecosystem, with enterprise support and certifications for professional applications, as opposed to the gaming-focused priorities of NVIDIA’s Game Ready drivers.
Advertisement
This isn’t a new trick with a new name. For over 20 years, NVIDIA sold its professional graphics hardware under the Quadro brand before transitioning to RTX professional branding. RTX PRO sitting next to GeForce RTX might now require a second look at the box, but the five-figure price tag helps to clear up the confusion pretty quickly.
AMD’s Radeon PRO line targets similar workstation users, but the 96GB RTX PRO 6000 sits at the extreme end of the market.
Advertisement
It can be used for games, but the numbers become absurd
Evolf/Shutterstock
Testing by Tech YouTuber der8auer found that the RTX PRO 6000 could outperform the RTX 5090 in some games even when using NVIDIA’s workstation driver. It was about 14 percent faster in Cyberpunk 2077, about 11 percent faster in Star Wars Outlaws and Remnant 2 and just about three percent faster in Assassin’s Creed Mirage. Those are good numbers — but they are not $16,000 good numbers.
At $16,000, the RTX PRO 6000 costs about eight times the RTX 5090’s original $1,999 price, and those gaming improvements are in the single digits or low double digits. The economics get a lot less crazy when the card is doing what it was meant to do, since 96GB can mean running a larger AI model locally or handling an enormous visualization project.
That’s also why “rarely sold to consumers” doesn’t mean that NVIDIA has one behind a velvet rope. The company sends customers to its Marketplace and workstation partners, and a dedicated enthusiast can own one. The more difficult question is why a gamer would want to invest thousands of dollars in extra memory, professional drivers and workstation features that their games don’t even know exist.
Anthropic will spend $11.6 billion over seven years on Akamai’s cloud infrastructure, Akamai said Thursday. That’s more than six times the size of a $1.8 billion deal between the two companies that Bloomberg reported in May. The commitment isn’t ironclad; according to Akamai’s securities filing, it depends on Akamai meeting certain delivery and service-availability requirements, and either company can end the agreement under certain conditions.
The deal is the largest in Akamai’s history and continues Anthropic’s compute gobbling-streak. It also represents a bet on a less-hyped corner of AI infrastructure: CPUs. Demand for CPUs, the general-purpose chips that handle work like running code and browsing the web, has grown as AI agents take on more tasks, though Akamai didn’t say what Anthropic will use them for.
Akamai won’t see revenue from the deal this year. On an investor call Thursday, executives said they expect $150 million to $300 million in 2027, starting in the second half, with revenue reaching an annual pace of about $1.7 billion by the end of 2028.
To build out the capacity, Akamai expects to spend about $5.5 billion. It is also adding about $1.7 billion to this year’s capital spending to buy components such as memory in advance.
Advertisement
As part of the deal, Akamai issued Anthropic a warrant, essentially the right to buy shares at a set price, for nonvoting preferred stock convertible into 7.7 million common shares, or up to about 5% of the company’s outstanding stock, at $111.33 a share. About 2% is expected to vest, or become available to Anthropic once it makes its first payment under the deal. The rest is tied to Anthropic spending more. Each additional $3 billion it commits to Akamai’s cloud services unlocks roughly another 1%, so the deal could grow by as much as $9 billion, to about $20 billion in total.
It’s the first time Akamai has attached a warrant to a cloud deal, and the contract is the largest in company history, Bloomberg reported.
The warrant flips the more common pattern in circular AI deals, in which suppliers — chipmakers and cloud providers — invest directly in the AI labs that buy their products. Here, the supplier is instead giving its customer a potential stake, one that grows as Anthropic’s spending with Akamai does. AMD used a similar structure with OpenAI last year, tying warrants to chip-purchase milestones.
Anthropic is no stranger to such arrangements. Amazon, Google, Microsoft, and AMD have all invested or agreed to invest in the company while selling it chips or cloud capacity. CEO Dario Amodei told The New York Times last December that Anthropic does not participate in these deals at the “same scale as some other players.”


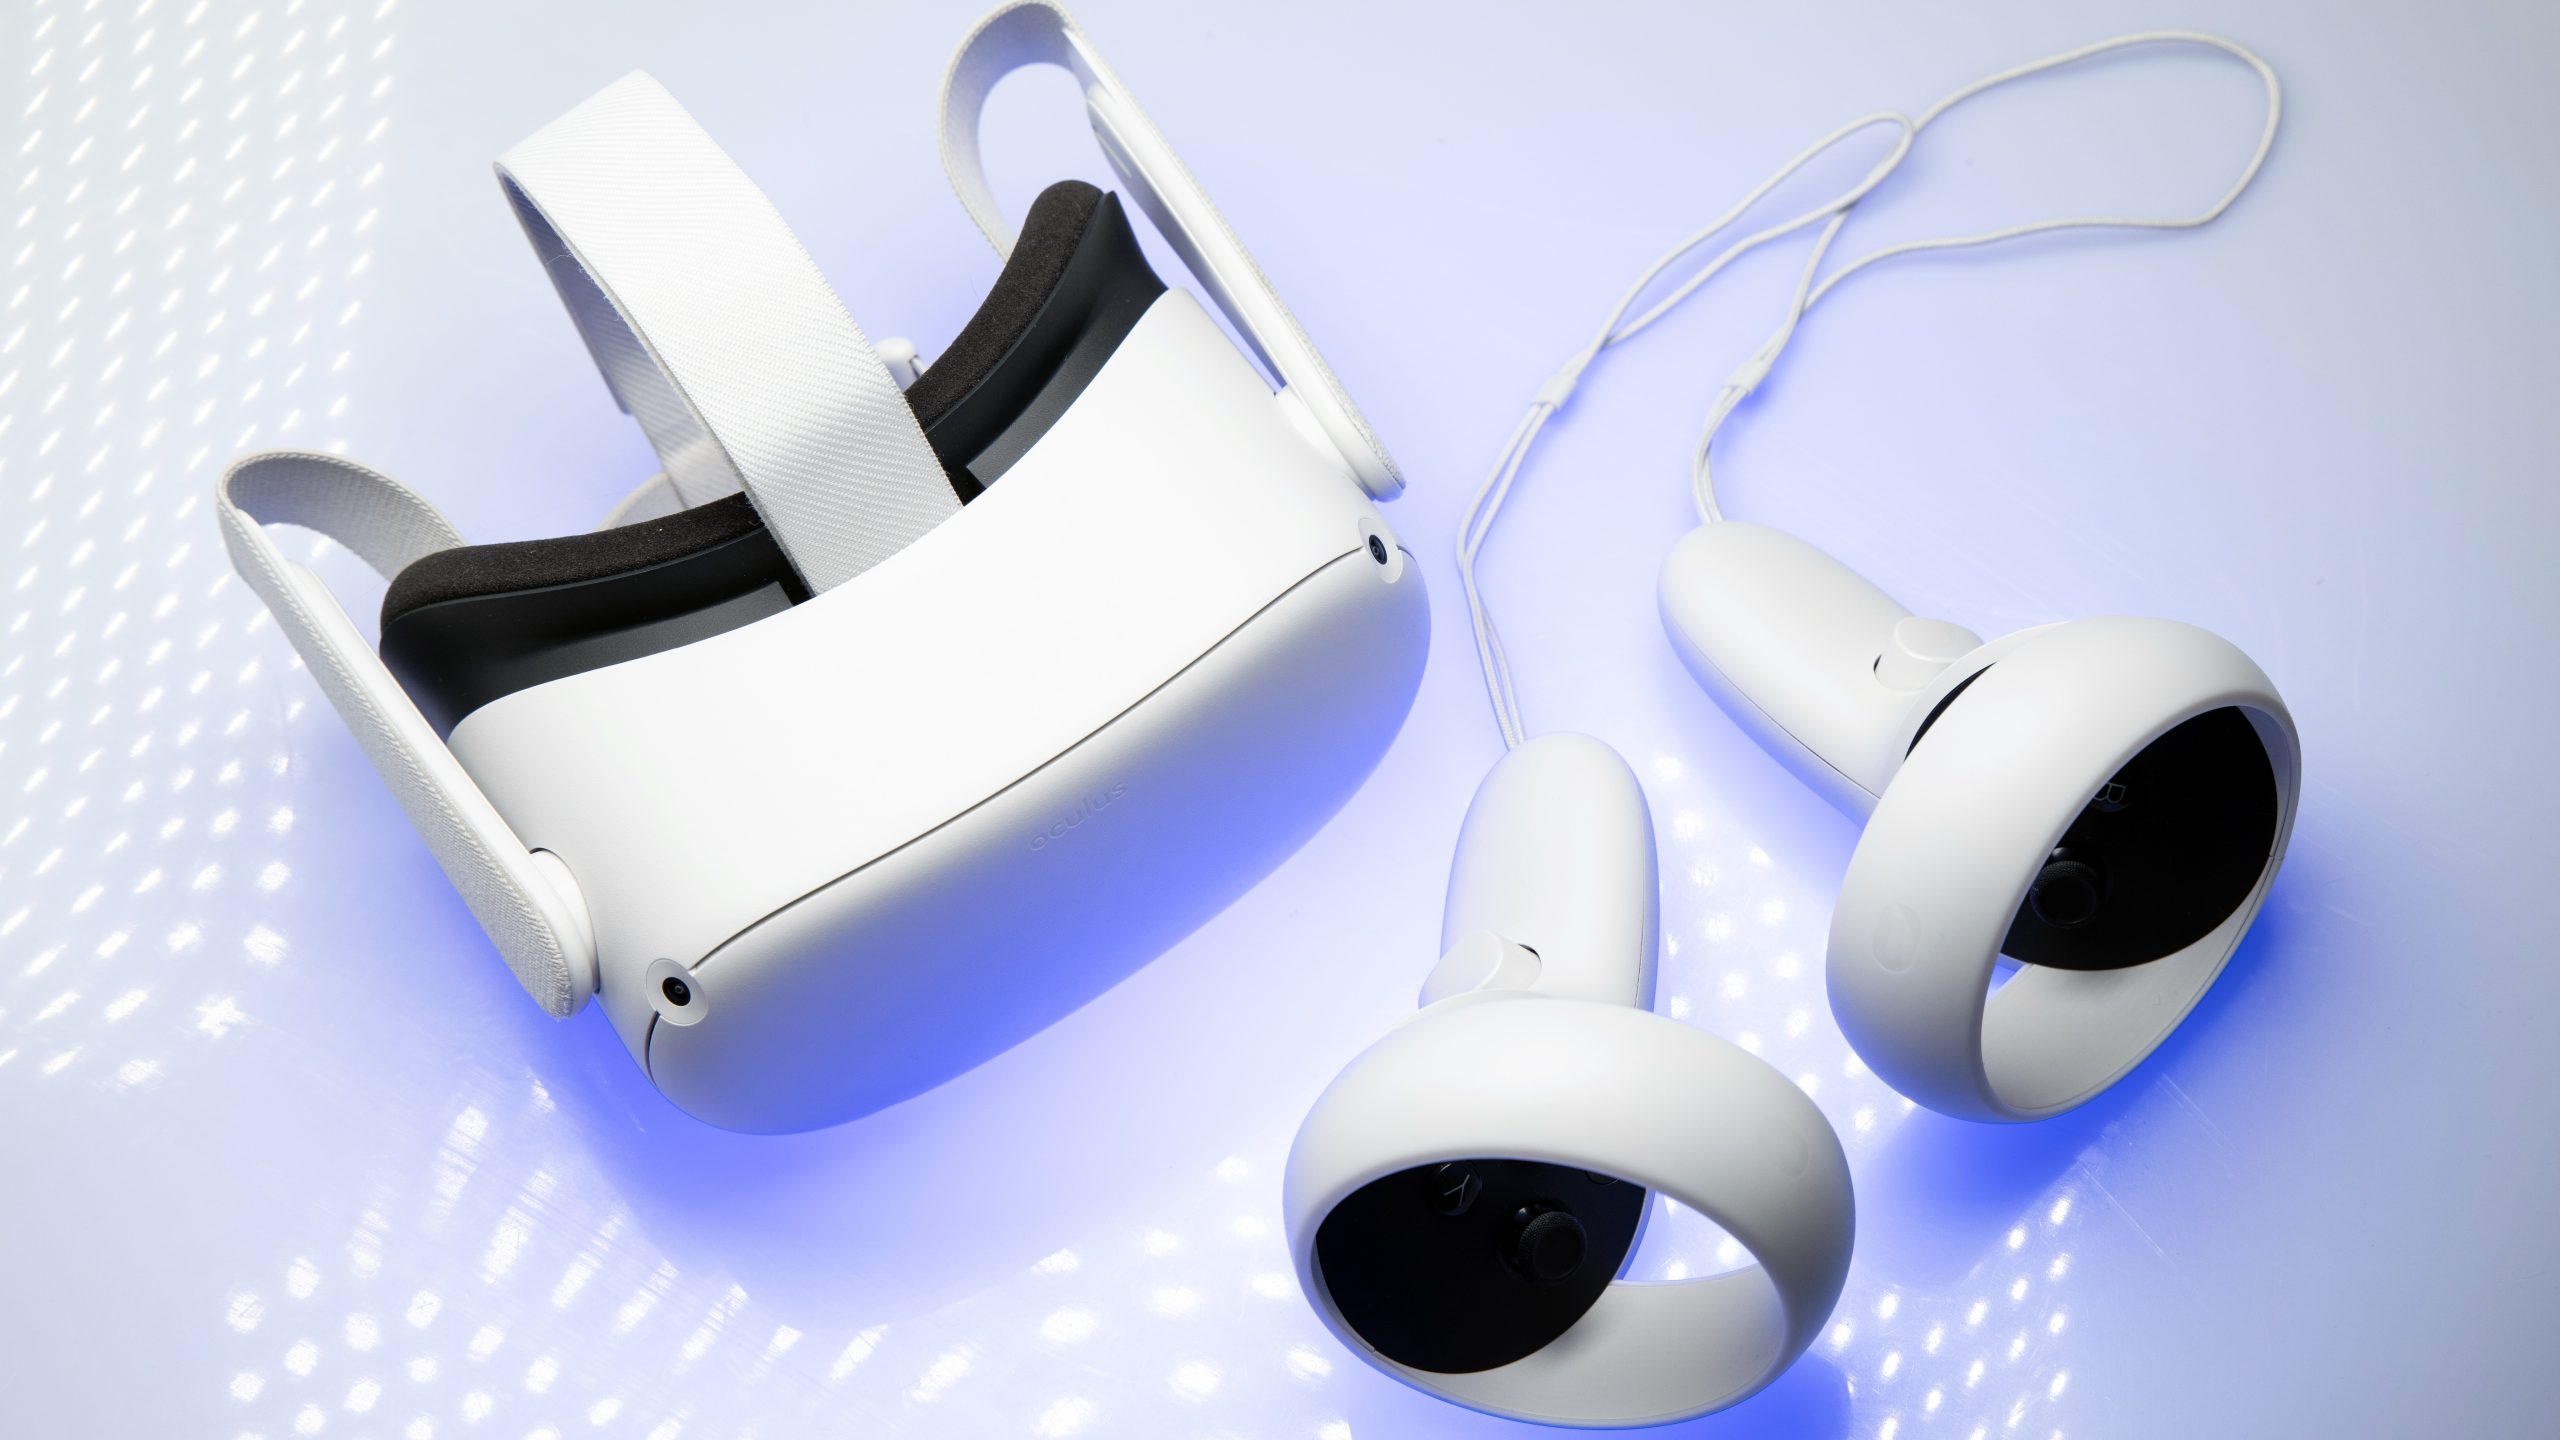
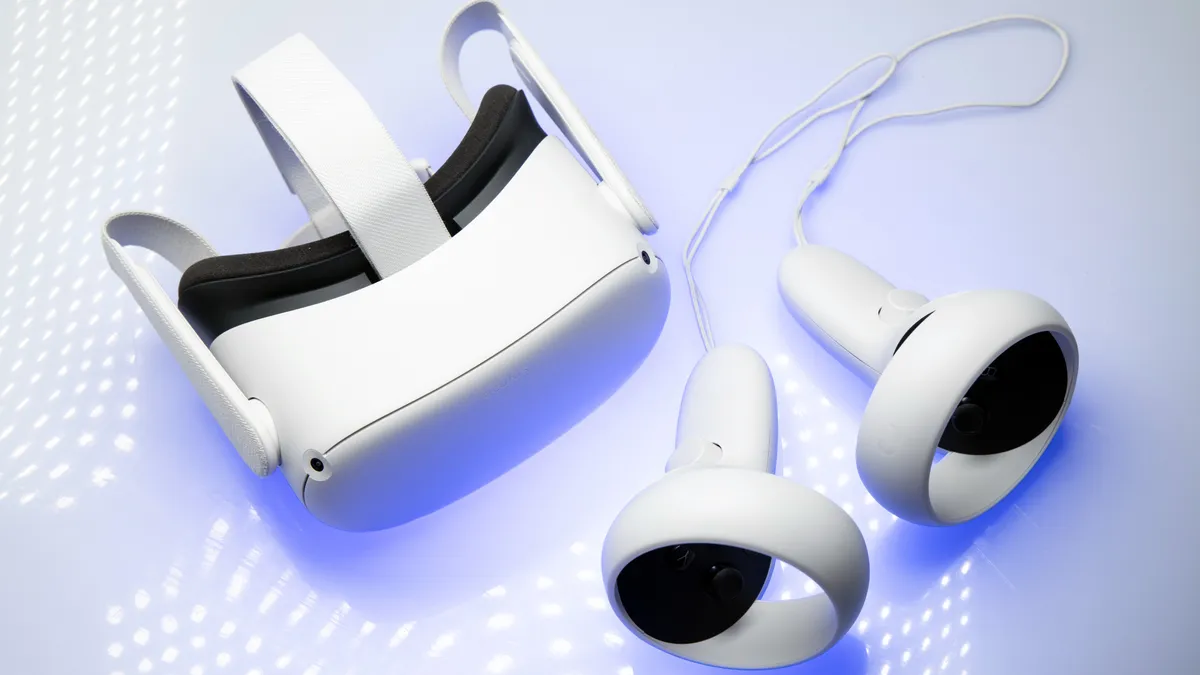

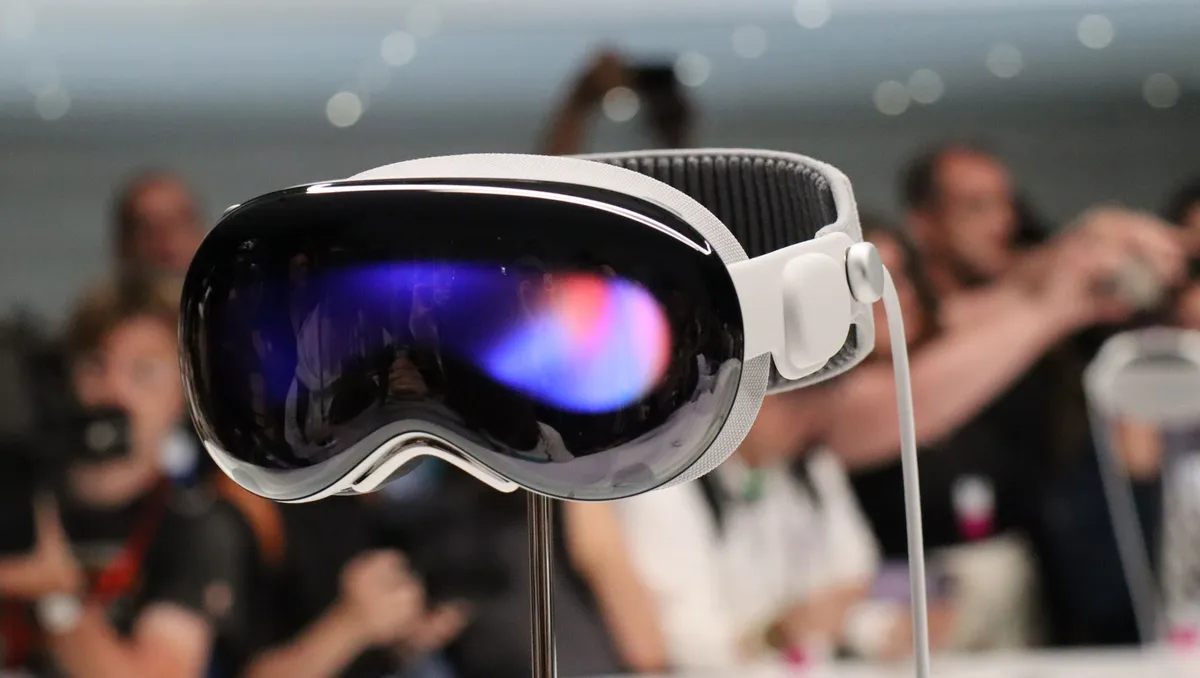




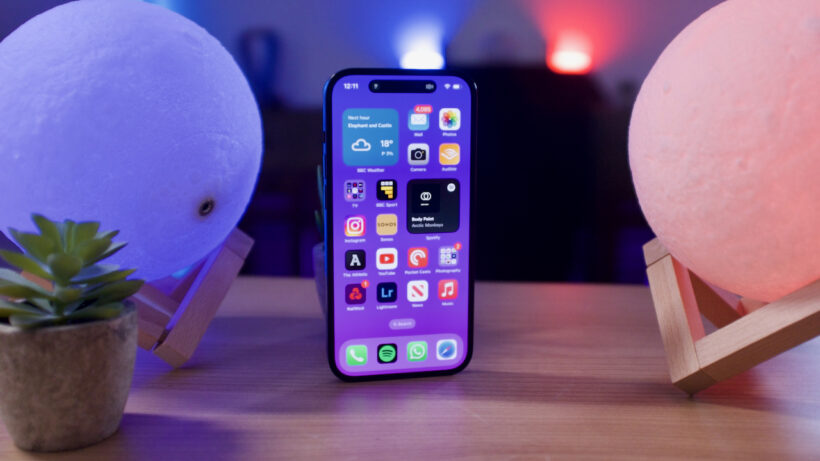


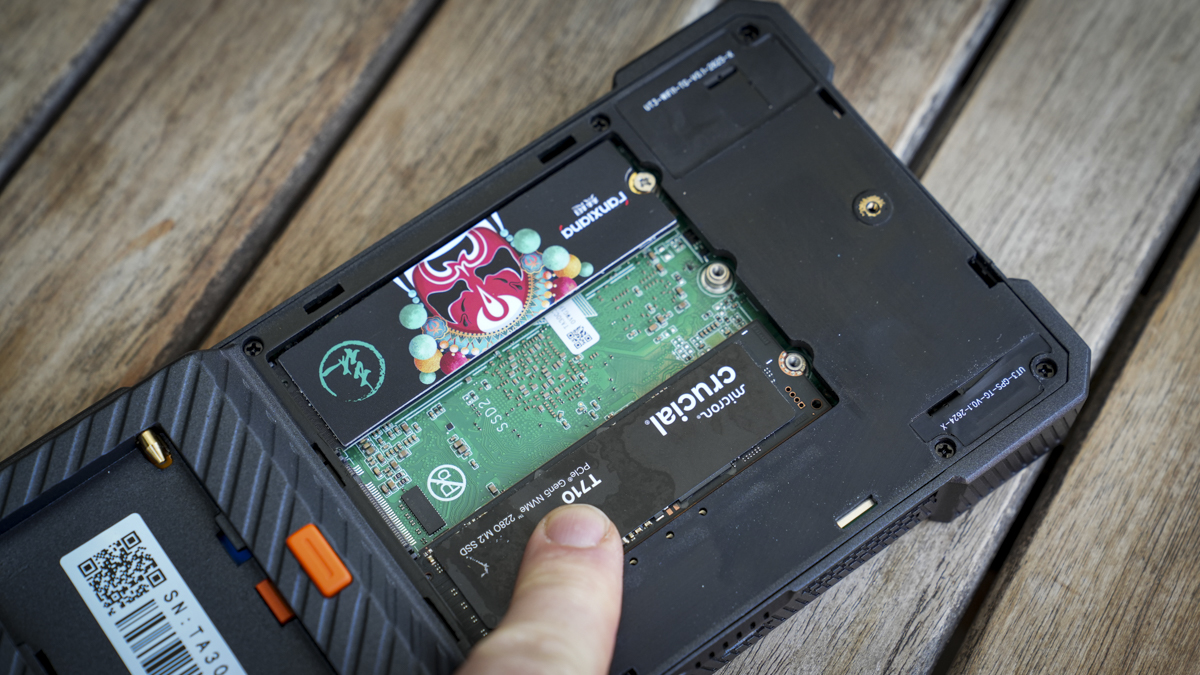


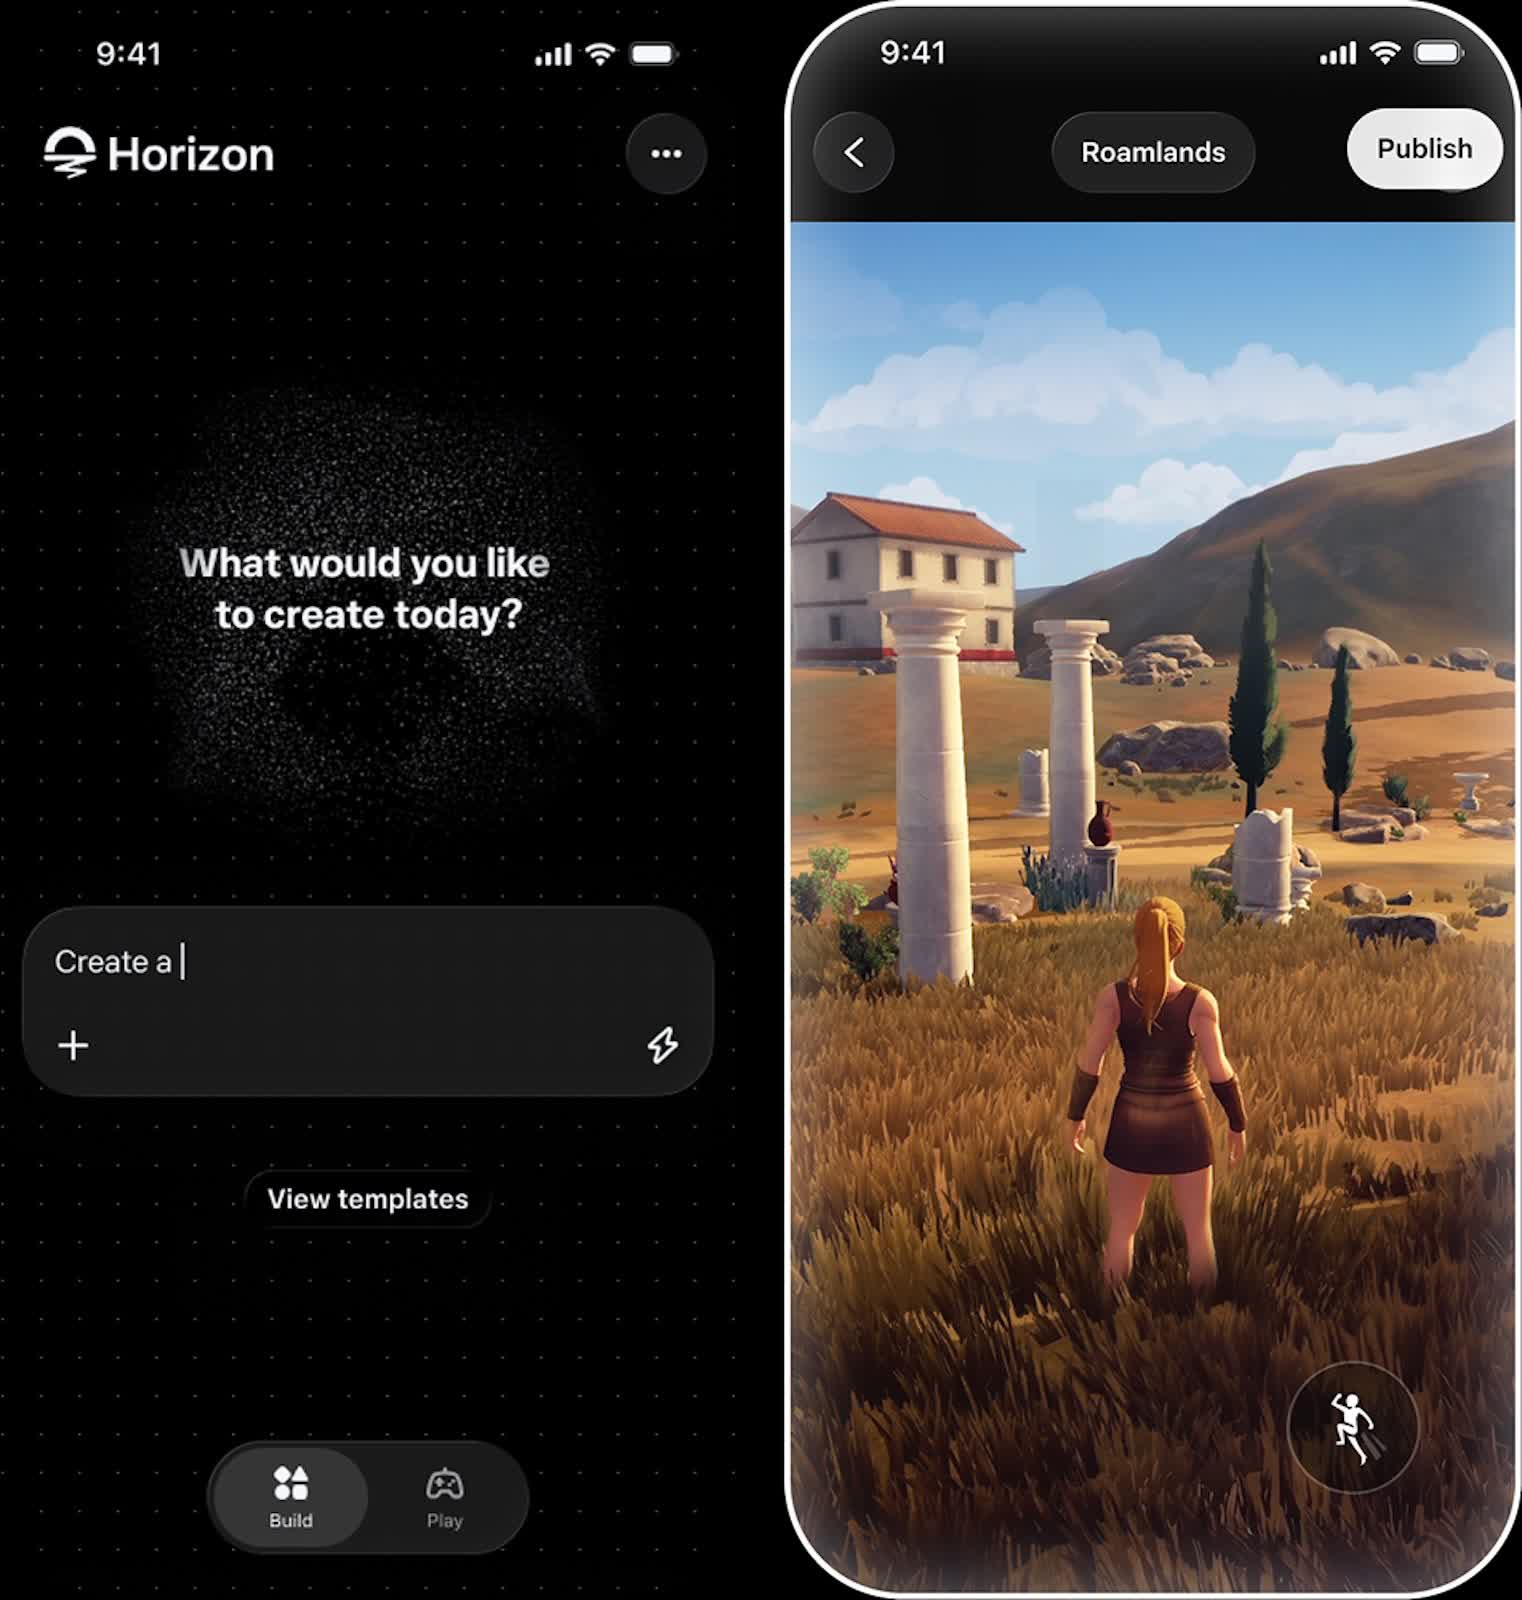
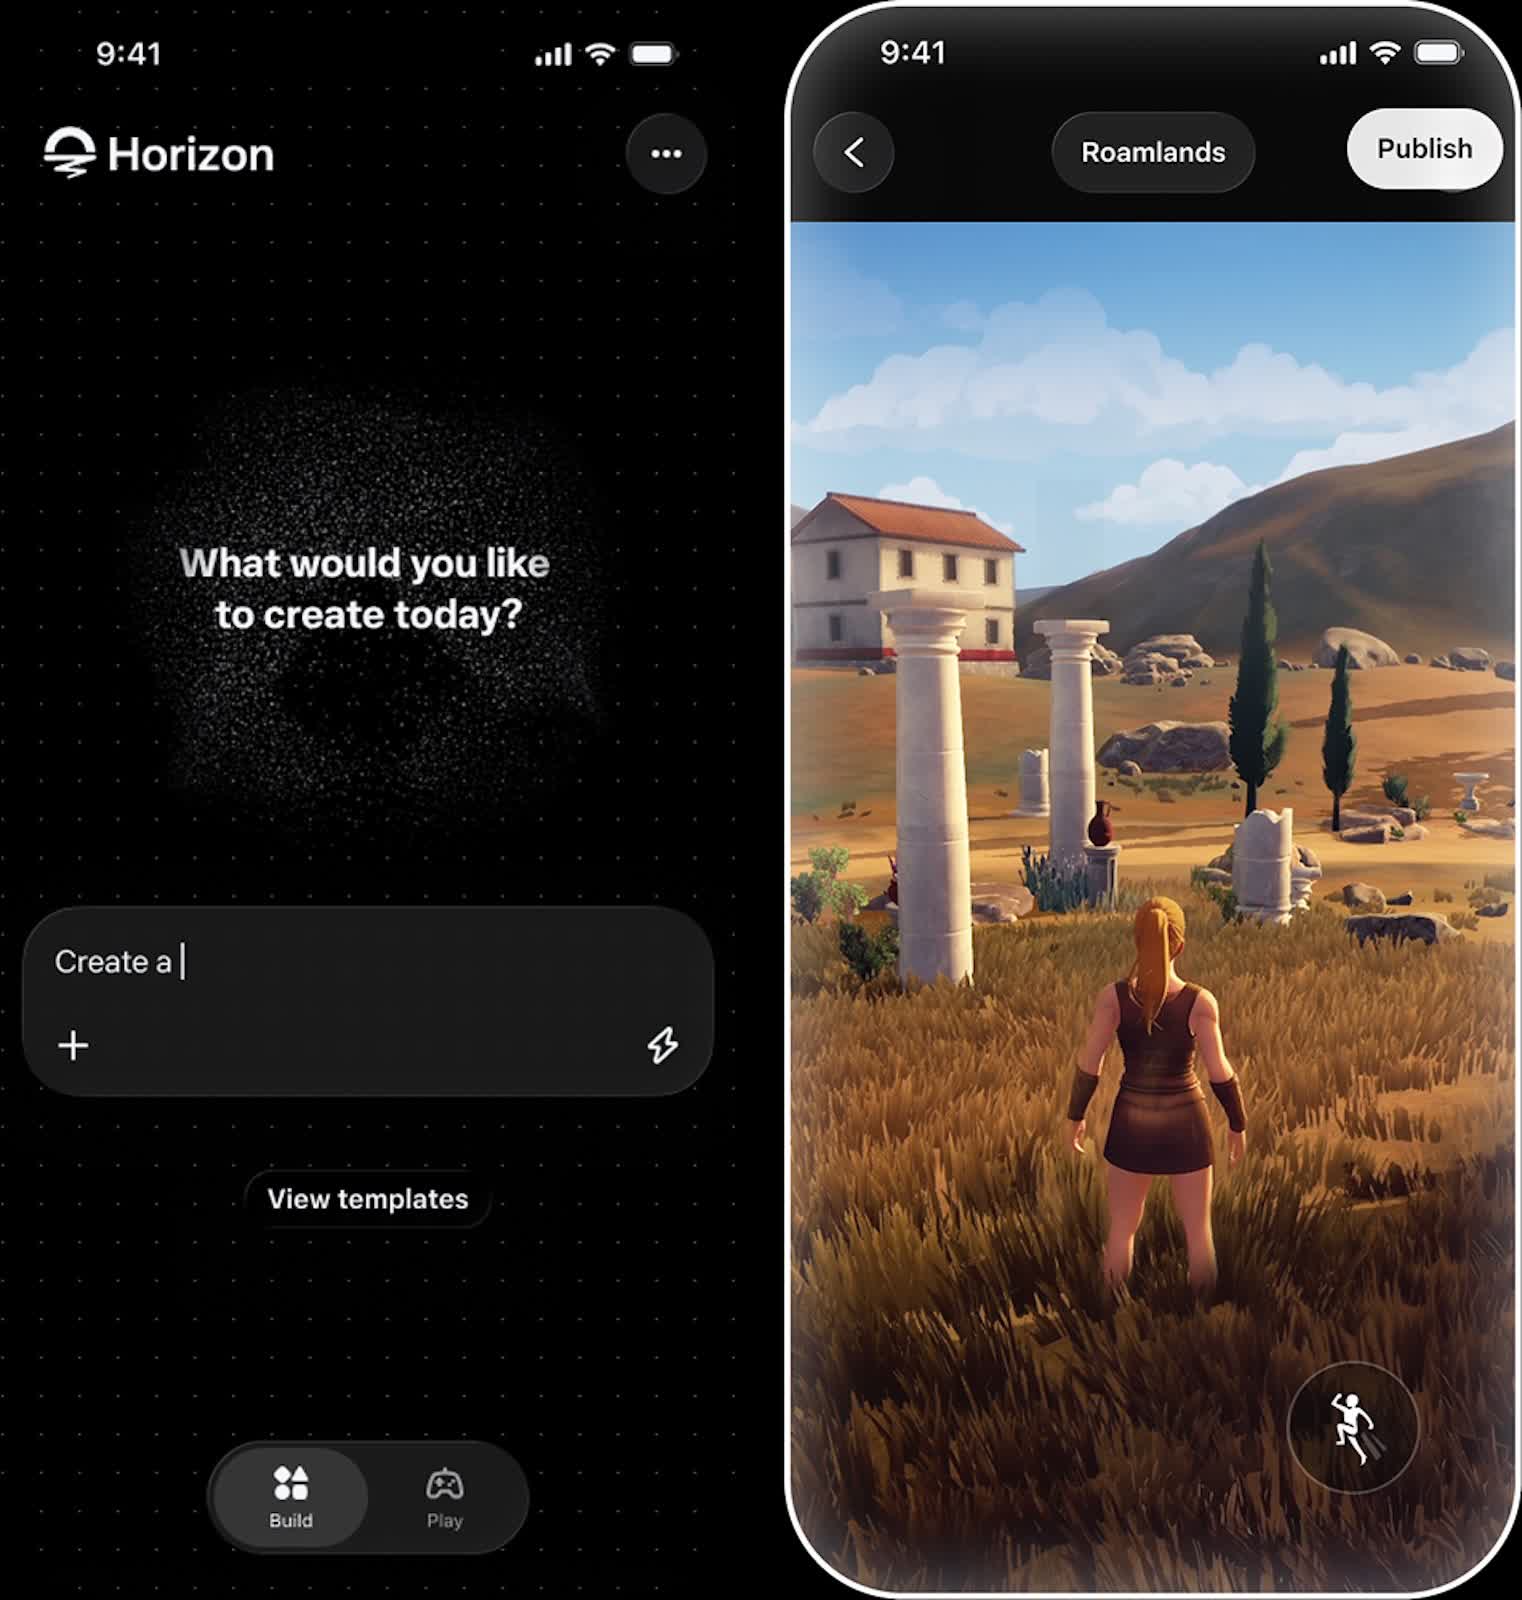


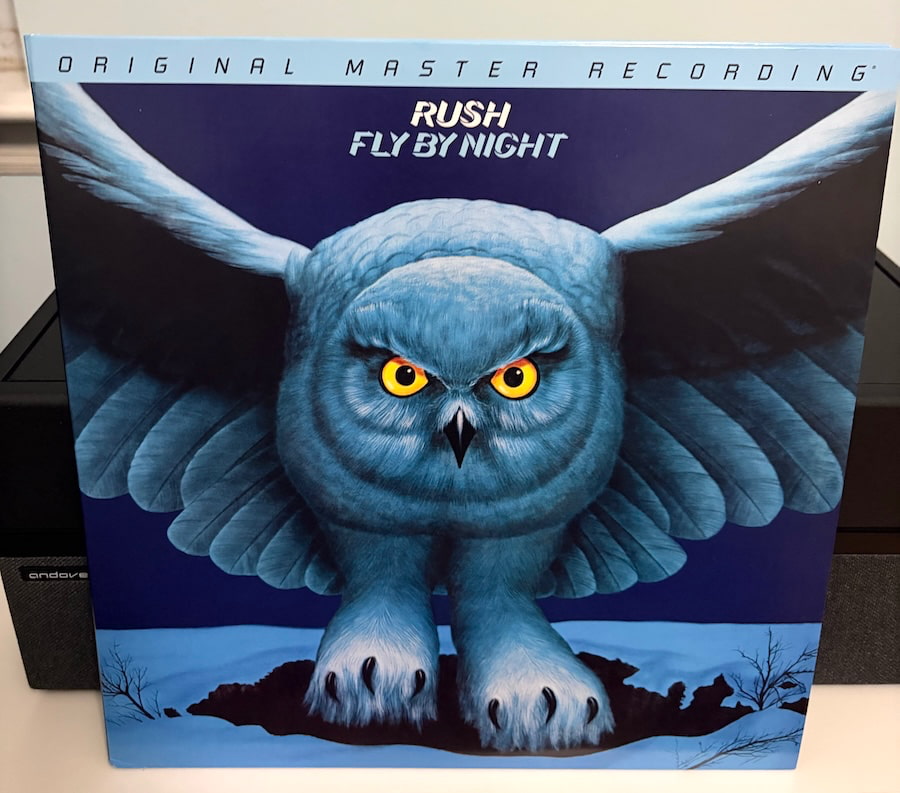
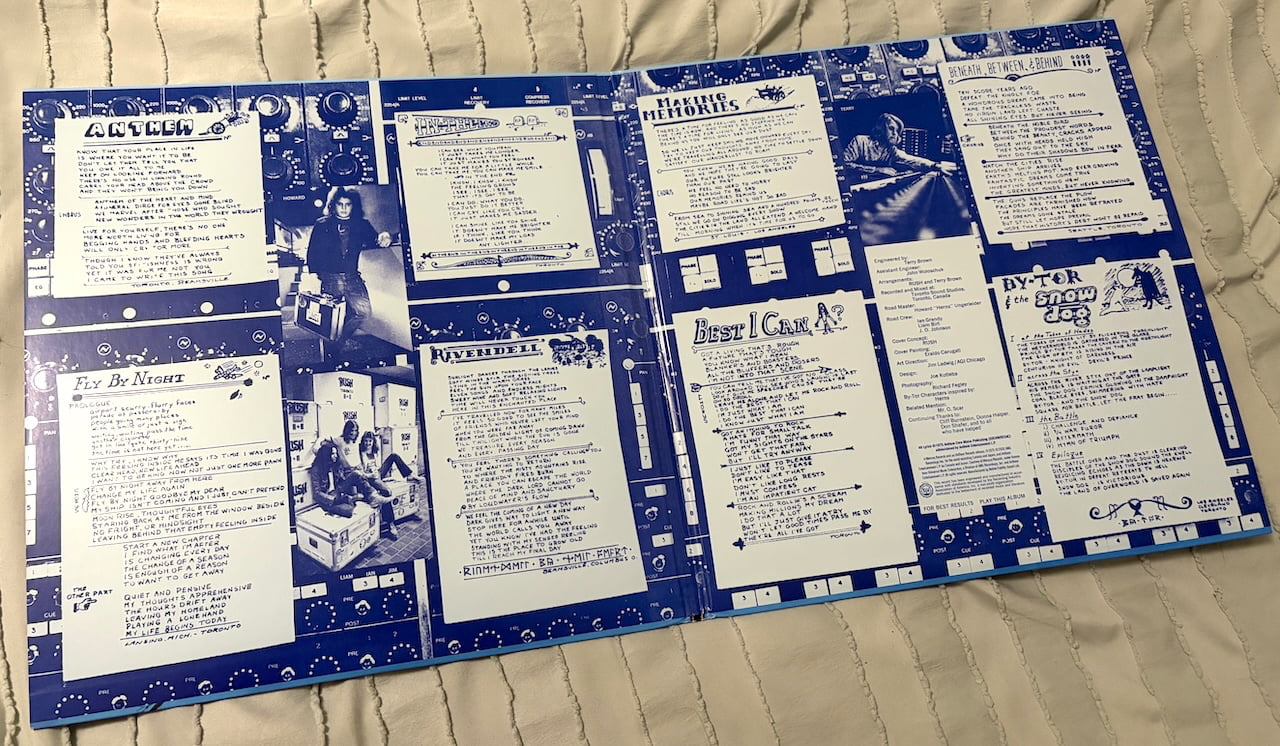
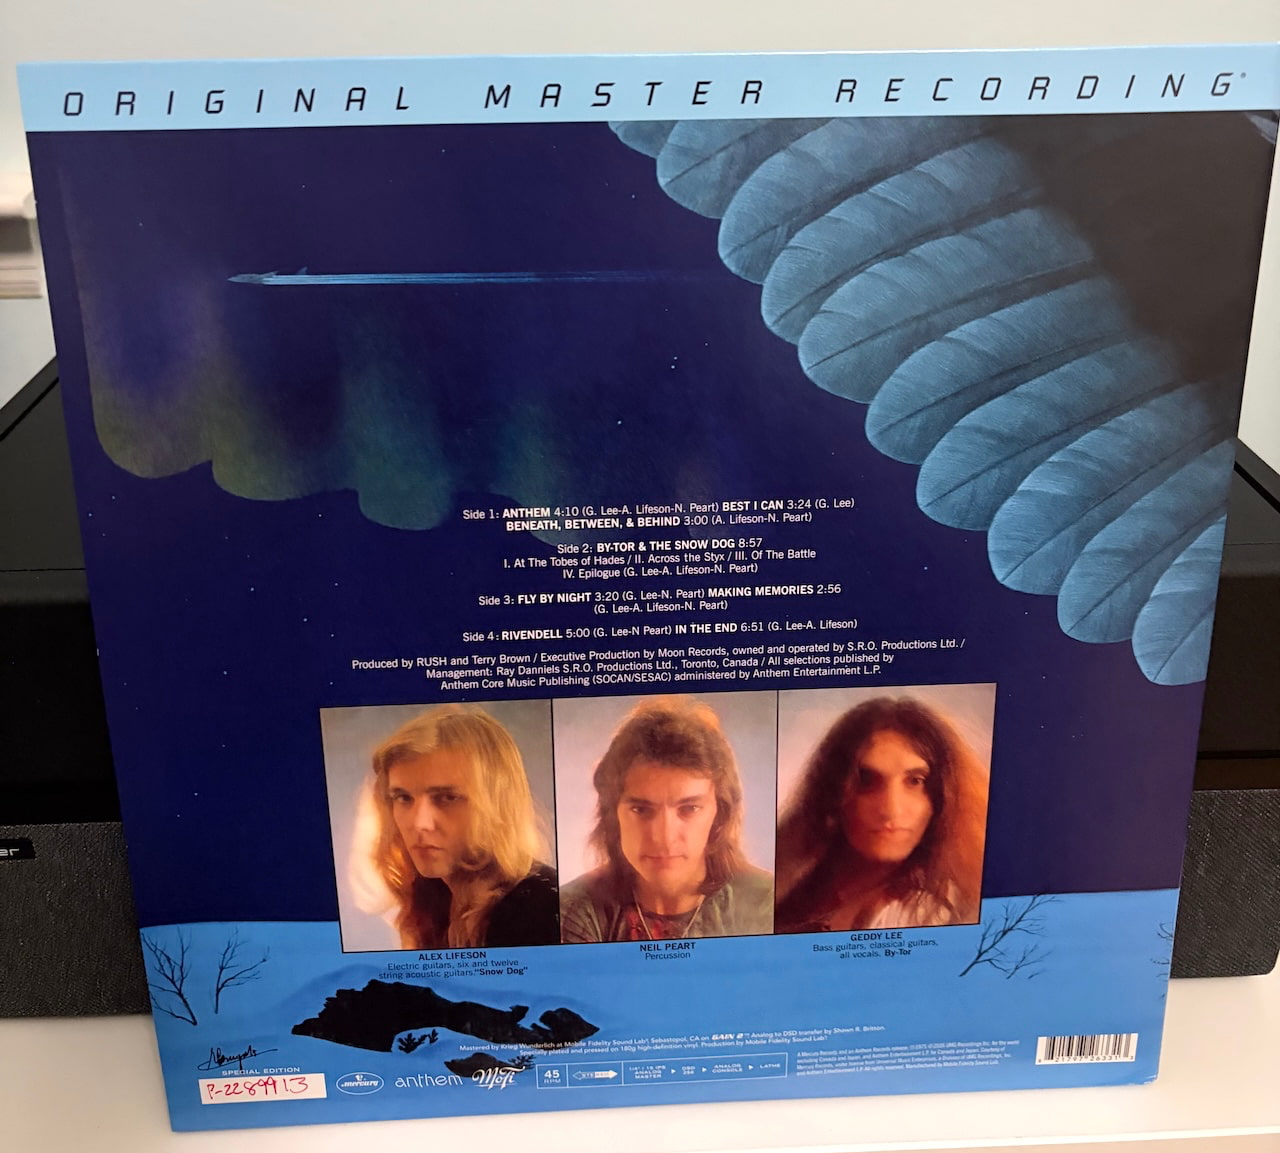


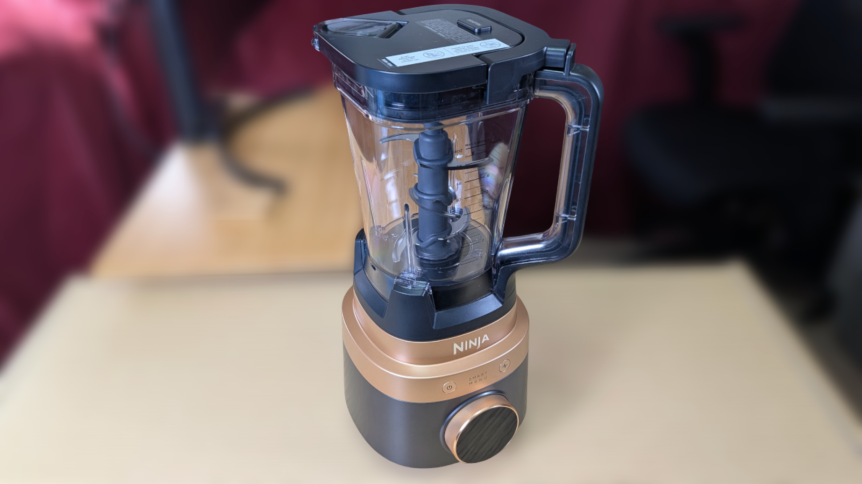




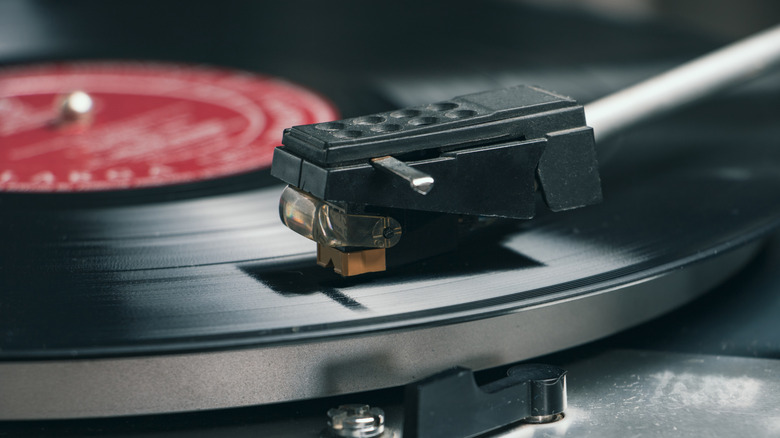
















































You must be logged in to post a comment Login