Tech
This Fisher-Price Lil Gamer Toy Now Runs Real Game Boy Cartridges

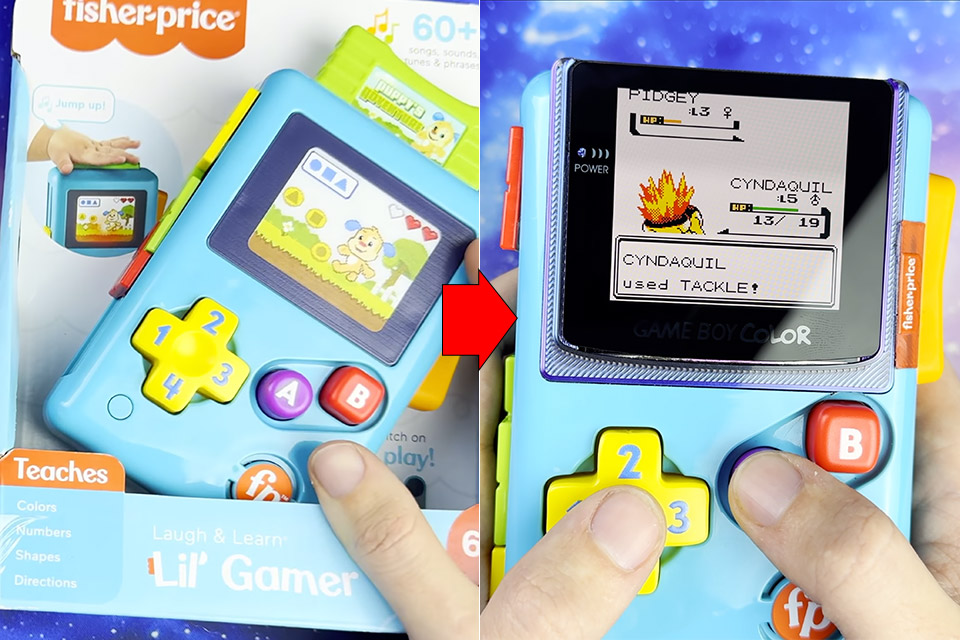
A Fisher-Price Laugh & Learn Lil’ Gamer sits on store shelves looking every bit like a colorful, oversized Game Boy meant for tiny hands. Its screen is a printed sticker, its cartridge springs in and out for show, and its buttons trigger songs and light patterns that teach shapes and colors. Press the right sequence and it even plays Super Mario Bros. sound effects. Most parents hand it over and move on. One modder named KOUZEX looked at the same plastic shell and decided it should play actual Game Boy Color games instead.


The goal was to maintain as much of the original toy’s appearance and feel intact as feasible. For us, this meant maintaining all of the huge chunky buttons, the sliding Tetris-style blocks on the side, the brilliant blue plastic, and even the orange rocker switch. This was not going to be a simple shell replacement, because the toy’s personality needed to survive the procedure.


8Bitdo FlipPad Mobile Gaming Controller for iPhone and Android
- Flip Into Play – Flip down, ready to play. Take a call or reply to a message mid-game—just flip it open without unplugging. The hinge is rated for…
- Vertical Mobile Gaming – Designed around portrait play, FlipPad brings a classic handheld feel to your phone. Perfect for retro games and…
- USB-C Plug and Play – Built-in USB-C connection makes setup simple and direct. Plug in and start playing instantly. The USB-C port is rated for over…
He began by splitting the toy open to get inside, but four large screws and a piece of hot glue glued the halves together tightly, so it required some elbow grease to separate them. Once inside, he discovered a simple board, a non-removable springy cartridge, and the familiar button membranes, all of which were exactly where he needed them. As a great touch, the button caps stayed put, so the finished product felt like the original toy in your hands, even under your fingers. For the time being, the sliding blocks and side switch have been left alone to preserve the vibe.
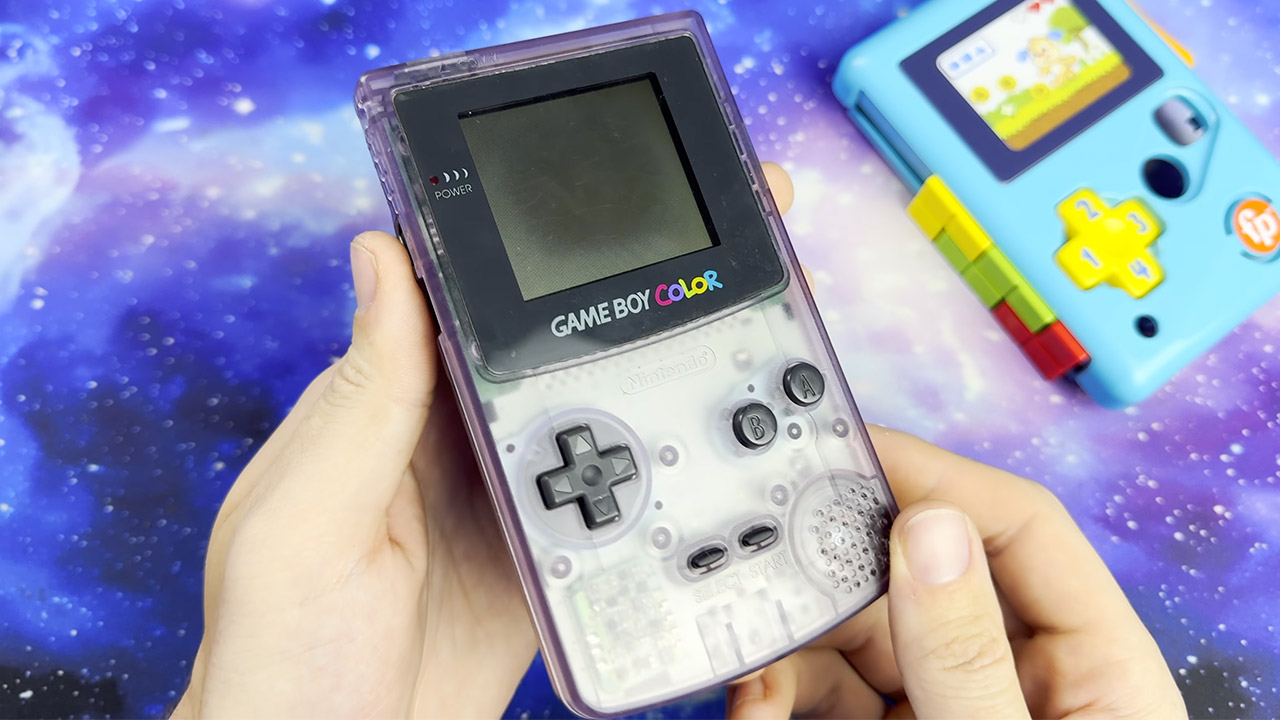
One broken Game Boy Color provided him with the necessary circuitry. He snuck its mainboard inside the toy’s cavity and was surprised to see how easily it slid in. Only minor cutting was required to ensure a snug fit, and we then connected the Nintendo board to the toy’s original button contacts and speaker. Early tests revealed that the D-pad and face buttons registered properly provided the signals were accurately mapped out. However, during one of those tests, a fuse on the Game Boy Color board blew, most likely because he was providing power in the wrong direction. Fortunately, once he removed some non-essential elements from the toy’s board, the electronics were fine, with no more damage done.

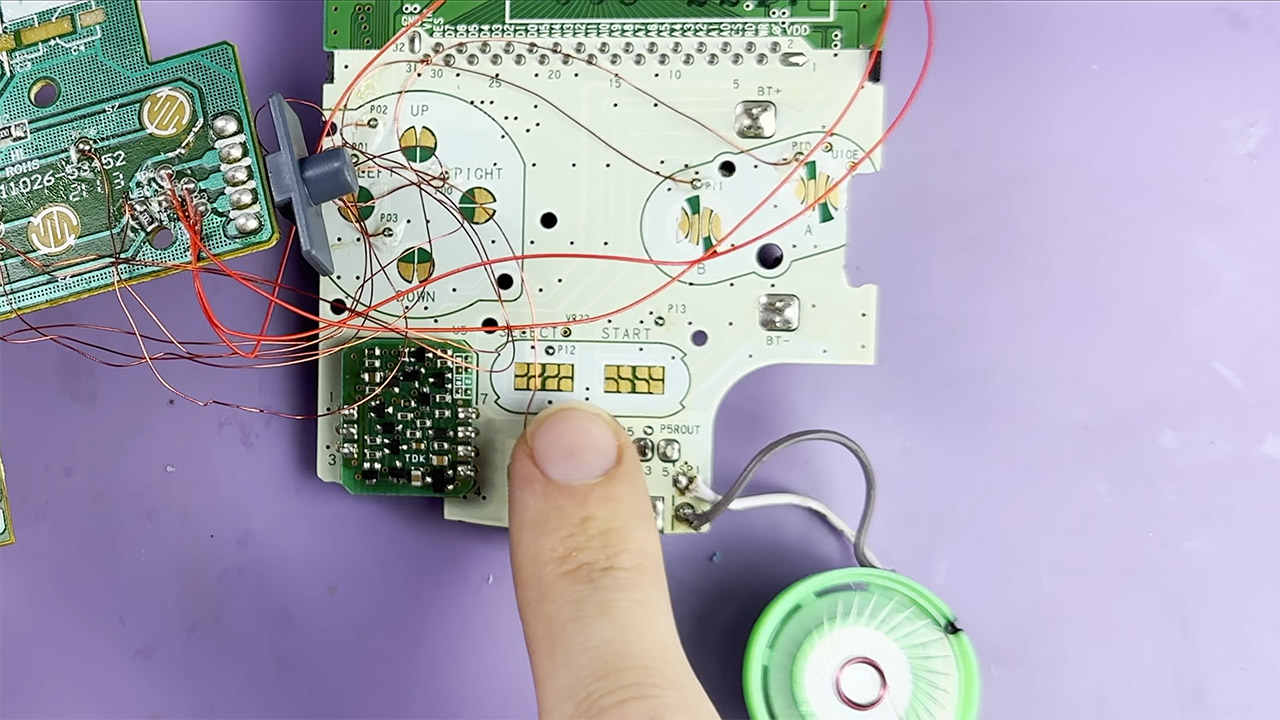
The Start and Select buttons were gone, which required some creative thinking. The orange rocker switch on the side of the toy saved the day. He put tiny switches within it, kept in place with epoxy, such that one direction would trigger Start and the other would trigger Select. The signals for the A and B buttons only needed to be altered, owing to the toy’s slightly skewed configuration in comparison to the original Game Boy. Once he sorted out the wiring, the controls behaved as he expected.
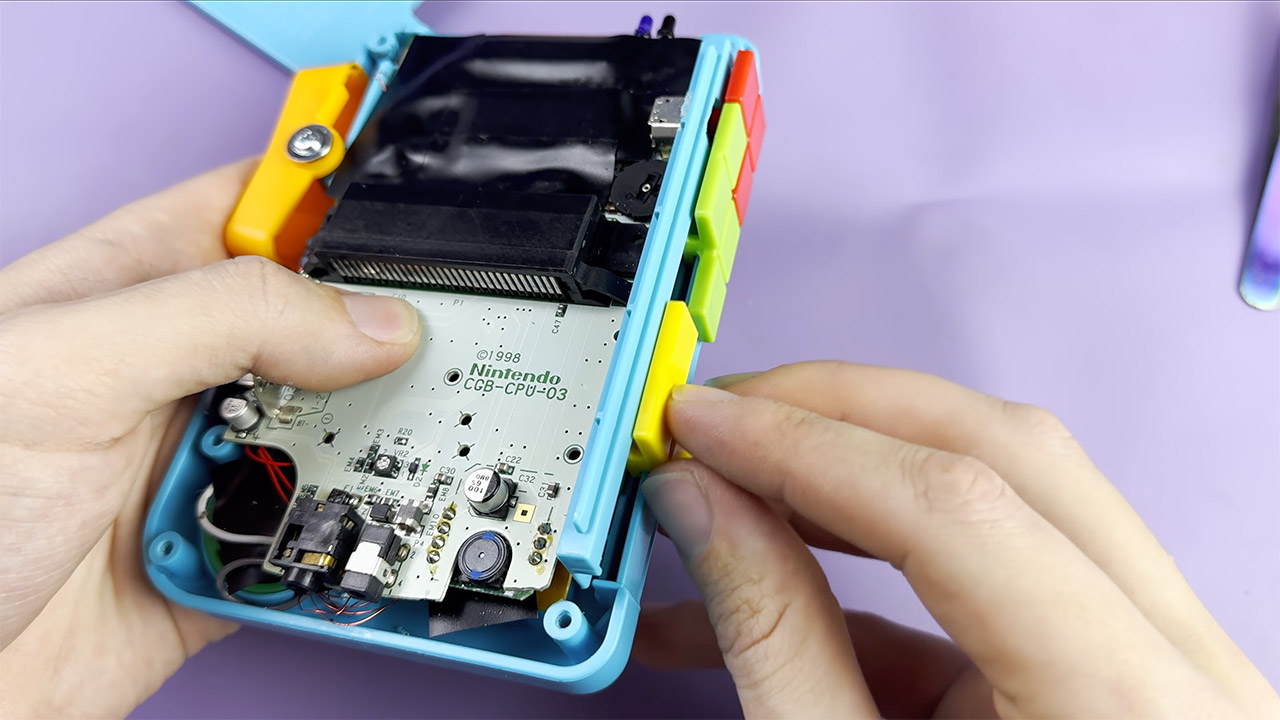
Screen work was a real test of patience, as the original Game Boy Color display had long since died, forcing him to replace it with a current OLED panel. The new screen is slightly larger than the original, and it fits well against the toy’s strong plastic. Fitting it in required some attention with a Dremel, as well as some careful 3D-printed frames and machine work to ensure a clean opening and protect the panel edges. He also connected power wires to the OLED and the power switch. The old AA arrangement was replaced by a rechargeable battery and a beautiful USB-C charging board. A little hole carved in the back of the shell allows the port to pass thru, making it easy to charge.
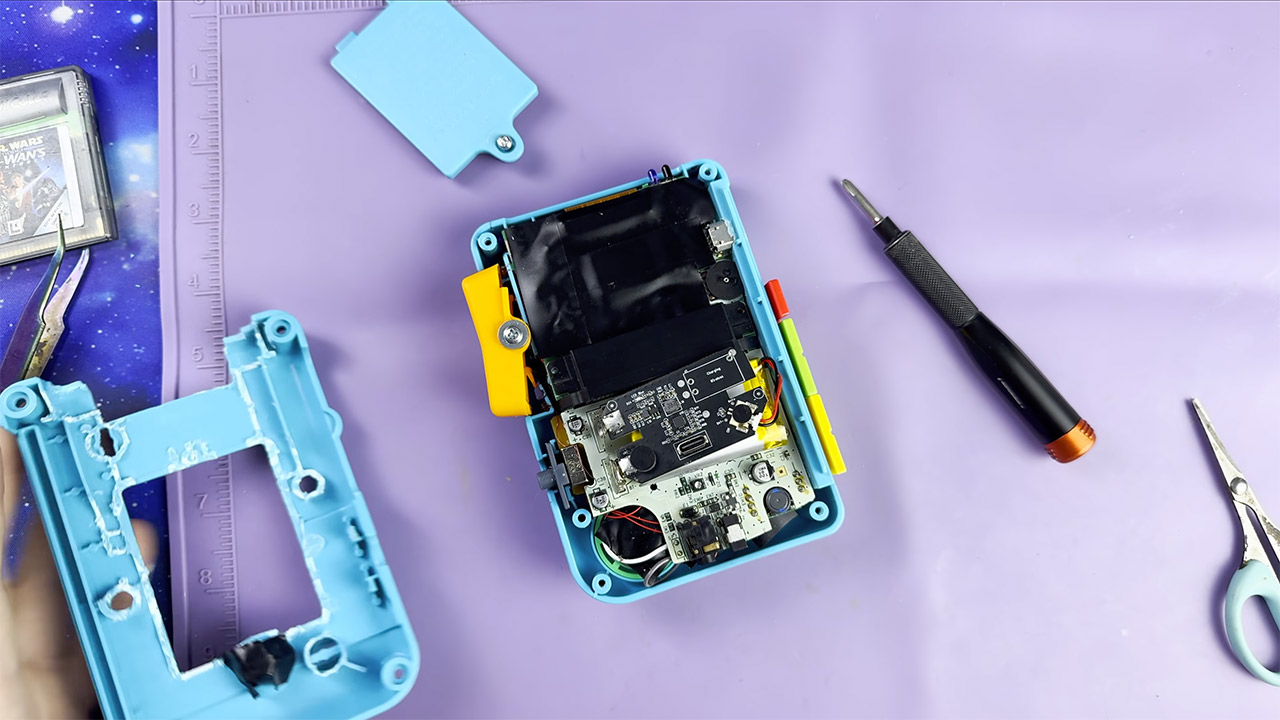
He was able to fit everything into the space inside the shell; however, he needed some room for the motherboard, battery, charge board, and cartridge slot to nestle together without turning the casing into Swiss cheese, so we had to whittle away at the excess material in gradual passes until everything fit together nice and snug. A 3D printed chunk covered the cartridge slot, and he also had a printed piece to cover some of the rougher bits left over from the fitting procedure that were beginning to look a little out of place.
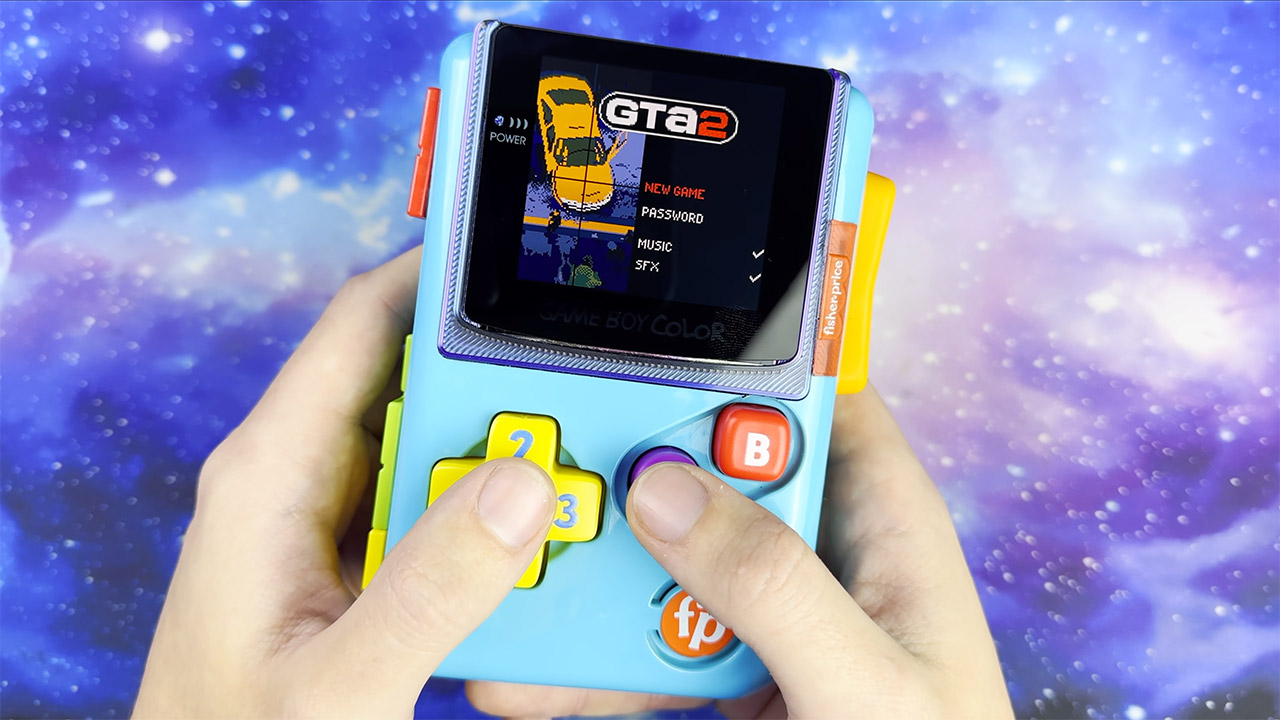
When the shell snapped shut for the final time, the device turned on and finally ran a real Game Boy Color cartridge, with no concerns about Pokémon Yellow or other programs. The OLED panel produced some great deep blacks and vivid colors, which the old screen couldn’t match. The buttons are functional, just not as sharp as the default Game Boy. The slider blocks still operate, the speaker still works, and the overall appearance remains that of a Fisher-Price toy that a toddler could pick up and throw across the room.
[Source]
You must be logged in to post a comment Login