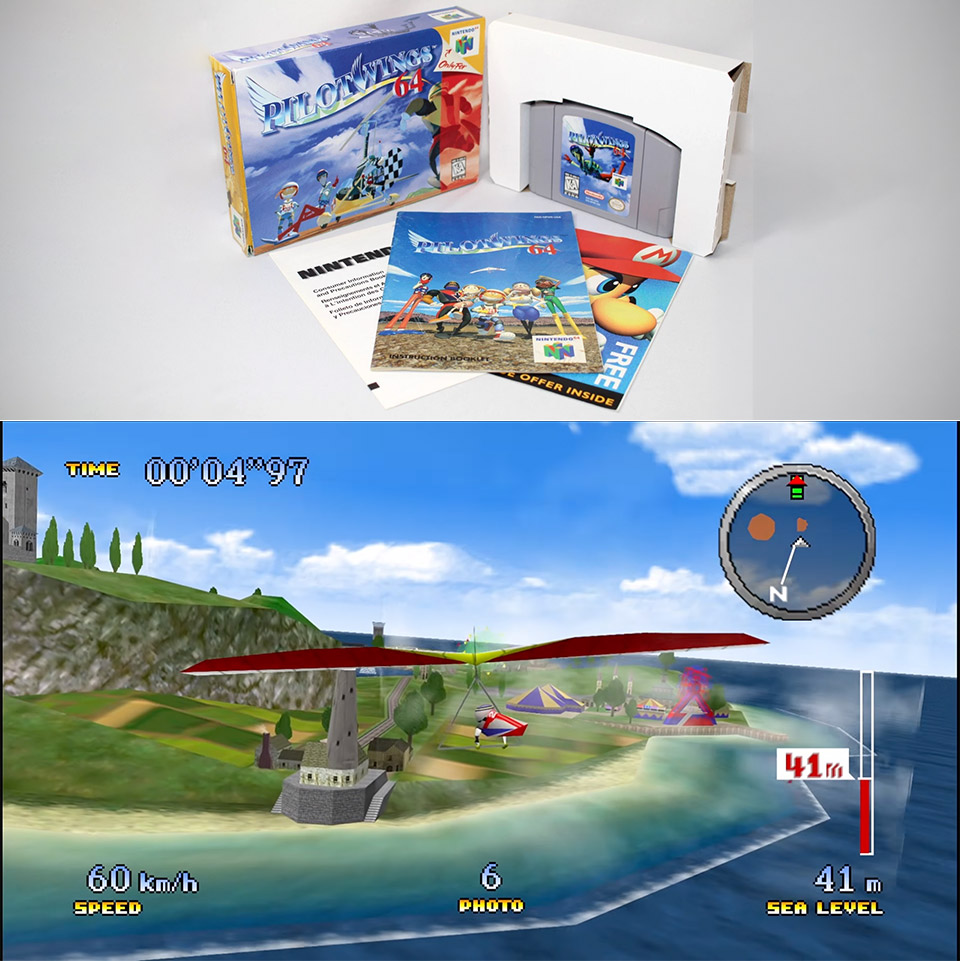
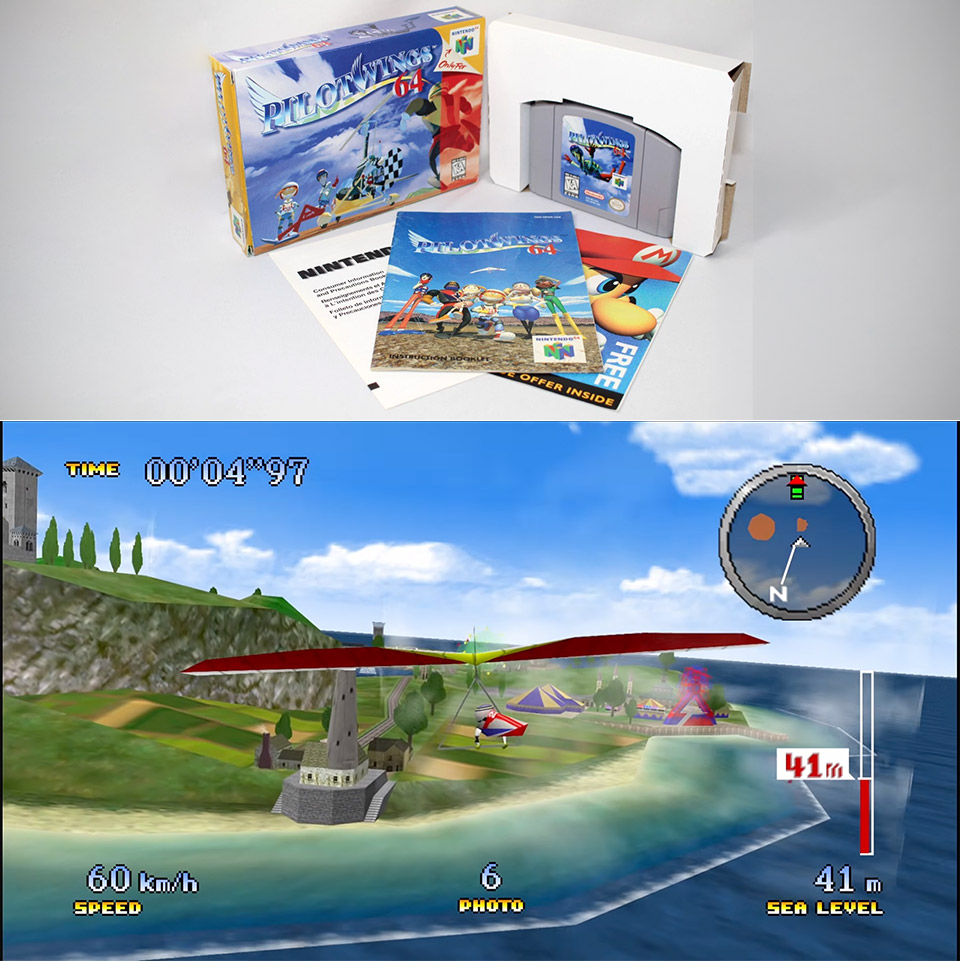
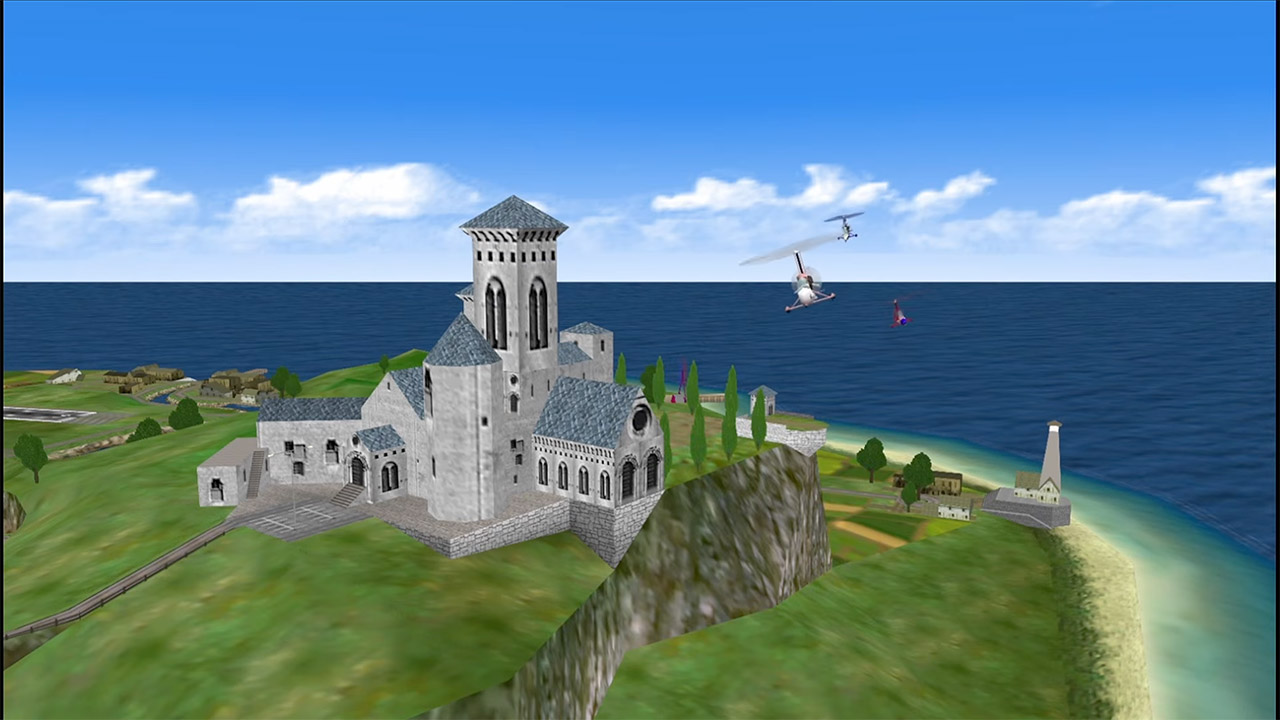
Nintendo 64 owners spent 1996 lining up hang gliders over Little States and hoping the analog stick would forgive a late flare. Nearly thirty years later, Pilotwings 64 Recompiled puts that same flight school on Windows and Linux as a native program you launch like any other PC game.
Static recompilation is the method that enables this project. Two crucial tools, N64Recomp and N64ModernRuntime, handle the heavy lifting, transforming the original machine code from the N64 into a PC executable that runs on your computer, with RT64 handling the graphics. This is all built on Garrett Smith’s remarkable decompilation work, which finally reached a full code match in April 2026, providing all subsequent builders with a very handy guide to what each and every part of the game code is doing. You can see how all the vehicles, menus, save screens, and so on fit together, and then, in mid-September 2026, an independent developer took that work and turned it into a playable game on Windows and Linux, with the first release being 0.1.0, followed by the 0.1.1 hotfix, and Claude has been assisting with patches, tools, documentation, and even the art.
When you launch the game, the first thing you notice is the widescreen mode. The view fills your current monitor, and all of the interface elements are neatly arranged at the screen’s edges. The old black border that used to cut off the image has been removed, and matrix interpolation now kicks in, providing silky smooth animation that matches your display’s refresh rate, even with all of the camera cuts and fast motions. You no longer have to go through those long, long menu stalls that used to take up to 6 seconds, because they now simply snap from one screen to another.
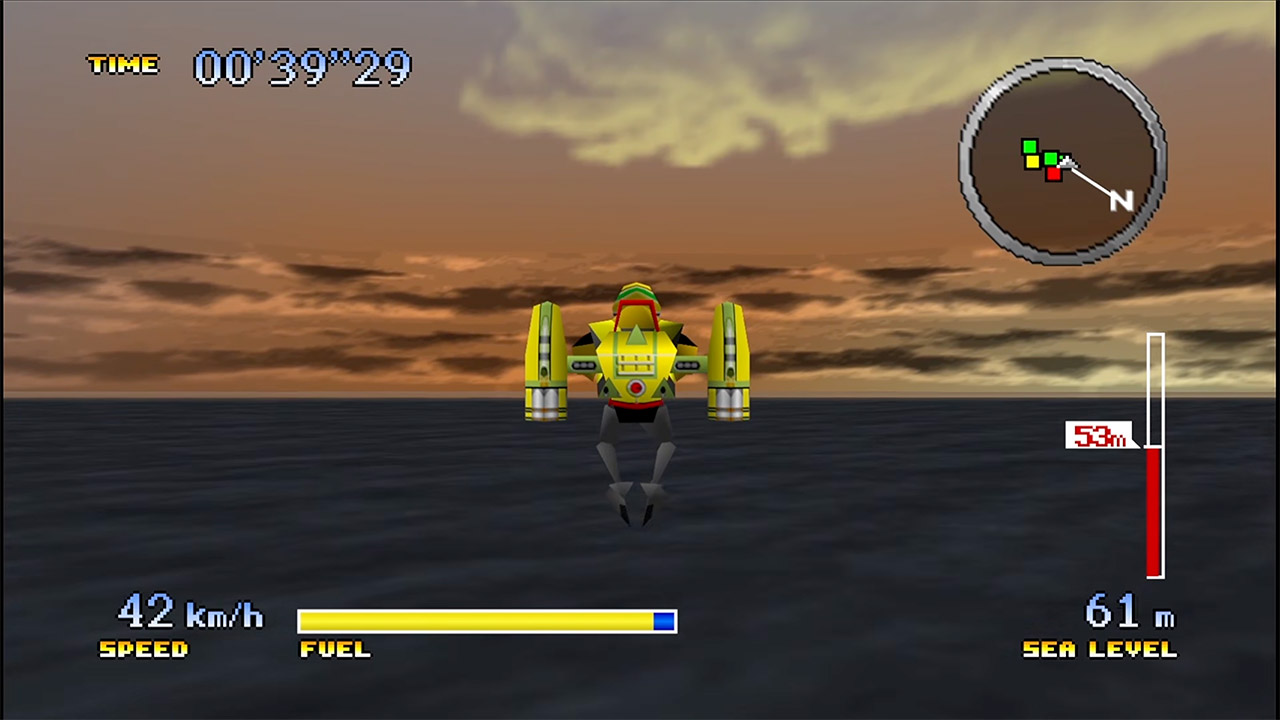
The launcher includes all of the settings you need to customize the graphics, sound, and even mods. You can use either a keyboard or a controller, so don’t worry about the fact that the original N64 pad doesn’t work well on modern desks. Every vehicle and bonus level are included, as are the game results panels and save system. There is some footage that showcases some of the important improvements, such as rocket belt hovers that now respond to minute throttle adjustments, gyrocopter runs that are readable even at high refresh rates, and ring courses that are no longer cut off by the old 4:3 window.
The cartridge data itself is not included since you must first locate a USA dump of Pilotwings 64 with a specific SHA-1 code and refer the launcher to it. The project is MIT licensed, and the runtime is GPL-3.0, so everything works out well. On the other side, running the Linux version requires a Vulkan driver, and macOS is not supported. There are a few things that don’t work as well as they could, such as the quick camera motions, which can get slightly out of sync at low frame rates because the camera is right inside every object’s math. Changing the aspect ratio when viewing the photo album simply blanks out the pages until you close and reopen it, though the 0.1.1 hotfix resolved a problem in which the photos were drawing twice as large as their spaces. Then there’s the interpolation on a true 120 Hz display, which still need some time to perfect, and the Linux packages were, ironically, produced on WSL2.
For anyone who spent their childhood playing on that old cartridge, the draw is immediate. Hang glider approaches, rocket belt landings, and gyrocopter passes look fantastic on a modern widescreen, yet the old game continues to function properly. The builds can be found on GitHub under danielgomesvieira2000/pilotwings-64-recomp. Simply download your own USA dump, select a controller setup that feels right, and take another trip around Little States. [Source]
Are AI chatbots quietly shaping the perceptions of U.S. voters? Voters trying to educate themselves about candidates “are unknowingly being served partisan talking points in the guise of neutral news summaries,” write two news researchers in Politico magazine:
Leading AI chatbots cite partisan websites masquerading as independent local news outlets nearly half of the time when people ask about candidates and issues that the partisan sites have covered in the midterm campaign, according to a new audit by NewsGuard, an organization focused on news reliability where we work as analysts… NewsGuard prompted seven leading AI tools with queries based on recent coverage of candidates and issues by 12 pink slime sites — six left-leaning and six right-leaning. The results were stark. Collectively, the chatbots cited pink slime sites along with other sources in 48.2 percent of their responses.
In 7.7 percent of responses, pink slime sites were the only sources at all that were cited in chatbot responses, although other sources appeared in the source list provided at the end of the response.
None of the AI tools received results they’d probably be eager to boast about, though the percentage of chatbots’ responses that cited a pink slime site had a relatively large range: 70.8 percent for OpenAI’s ChatGPT, 54.2 percent for Microsoft’s Copilot, 54.2 percent for Perplexity, 50 percent for Anthropic’s Claude, 41.7 percent for Google’s Gemini; 37.5 percent for Meta AI and 29.2 percent for xAI’s Grok… The seven chatbots were also collectively three times more likely to cite left-leaning pink slime sites (cited in 36.3 percent of responses) than their right-leaning counterparts (cited in 11.9 percent of responses) — though that may have more to do with the progressive sites’ far more frequent posting than any political bias from the chatbots.
Advertisement
“While citing the pink slime sites, only one chatbot response out of 168 total queries noted the partisan nature of the source,” the article points out.
But they also note that the real problem seems to be that consumer-oriented AI chatbots just “use much of the internet’s content — regardless of the reliability or standards of the source — to frame their answers.”
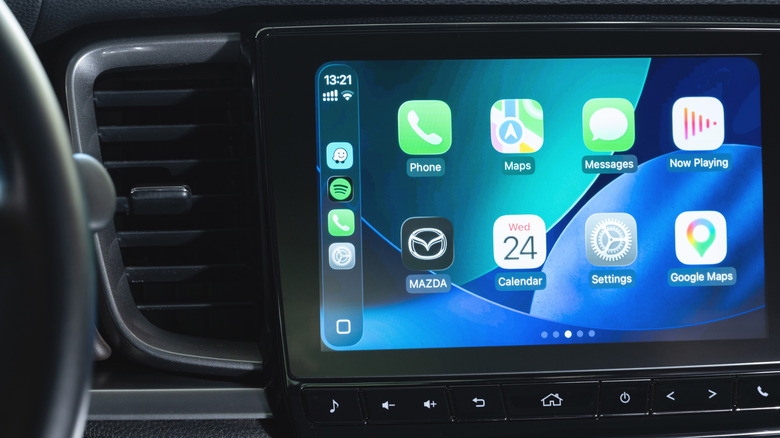
A few tricks provide a seamless Google Maps experience in your car with CarPlay.
Chinnapong/Shutterstock
Apple Maps has improved a lot since its troubled launch, but many people still prefer Google Maps. That could be because of the traffic data, better business listings or just out of habit. The good news is that you can use Google Maps in Apple CarPlay just like any other supported app.
Apple has always been restrictive when it comes to changing the iPhone’s default apps. In the EU and Japan, local regulations allow you to choose your favorite navigation app as the default. This means when you ask Siri for directions or tap an address, your iPhone and CarPlay will use your preferred app instead of Apple Maps. If you’re in one of these regions, you’ll find this toggle in the Default Apps menu on your iPhone, located under Settings > Apps. Select Google Maps as your default maps tool there for the best experience.
Otherwise, Apple Maps will remain the default navigation app on CarPlay, but there are a few tricks you can use to improve your navigation experience with Google Maps in your car. While it’s not particularly smooth, one of the easiest is adding “on Google Maps” to the end of Siri requests in the car to avoid Apple Maps opening by default.
Advertisement
Adding Google Maps to your CarPlay Home Screen
PixieMe/Shutterstock
If you’re outside the EU and Japan, there are still ways to use Google Maps in CarPlay more seamlessly. One is to place Google Maps on the first page of your CarPlay Home Screen: in your iPhone’s Settings, go to General > CarPlay. Choose on your car and select Apps. Here, you can rearrange the order in which apps appear on your Home Screen — just drag Google Maps near the top and it’ll be one of the first apps you see in your car.
If Google Maps isn’t showing up on CarPlay at all, this is the first place to look. Of course, you’ll need to download Google Maps to your iPhone from the App Store first (among the dozens of CarPlay apps available). Scroll to the bottom of this menu and tap the green Plus icon to add it if needed.
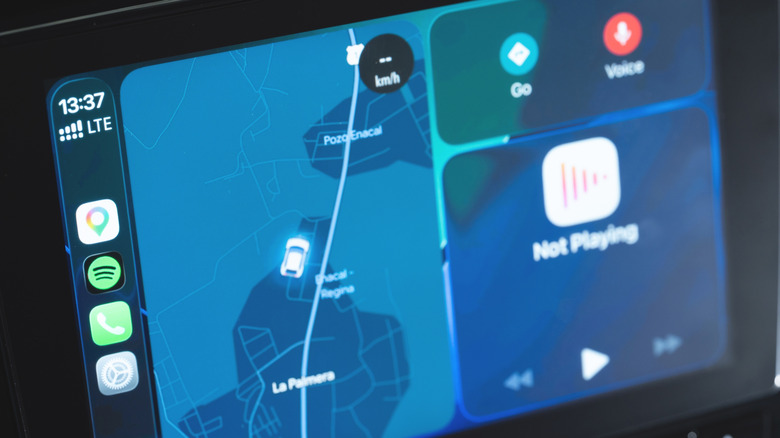
Adding Google Maps to your CarPlay dashboard is another method to reach it faster. Instead of looking for the app every time, you can add a widget for quicker access. Go back to CarPlay’s settings on your iPhone, but this time, tap Widgets instead of Apps. There, find and add a Google Maps widget.
Advertisement
Some cars also offer a split-screen CarPlay dashboard, accessible by swiping right to the leftmost panel. This usually includes a mini-map. Start a route in Google Maps once, and it should take over that panel from then on.
Other tricks for fast navigation
PixieMe/Shutterstock
There are other best practices within the Google Maps app that will make navigation easier on CarPlay. Adding your home and work addresses is a good first step, so you can start common routes with a single tap.
To configure these, open Google Maps on your iPhone and tap your profile picture at the top-right. Then go to Settings > Location & privacy. Scroll down until you find Home and work addresses. Select this, then use the three-dot menu for each option to add or adjust it as needed. They’ll be waiting for you on CarPlay.
Advertisement
When going on a long trip, having offline maps downloaded is important, especially to avoid problems if you lose your cellular connection. Again in Google Maps on your iPhone, tap your profile picture and select Offline Maps. Choose the areas you want to keep downloaded for navigation without an internet connection. It’s a good idea to download these maps using a Wi-Fi connection, since maps of large cities can use a lot of data.
You can also change how the map looks. Tapping the compass button switches between north-up and heading-up, and the day and night themes can be set to change automatically if you visit Settings > Appearance in CarPlay. Don’t forget to change other important CarPlay settings, too.
It isn’t quite hailing frequencies open, but researchers from Harvard claim they’ve picked up a radio signal directly from a nearby exoplanet. Before you get too excited, planets in our solar system also emit RF, so no one credible is claiming these are extraterrestrial reruns of their version of I Love Lucy, but it is the first time they’ve localized a radio signal to an exoplanet, in this case, Beta Pictoris B.
Speaking of space, the asteroid formerly known as 1981 EC26 is now sporting a new moniker: (14331) Alyankovic. If you think that sounds like (Weird) Al Yankovic, you aren’t wrong. The Tucson Star reports that, thanks to the efforts of several planetary scientists who are also Weird Al fans, the International Astronomical Union made the name official. Apparently, another asteroid now bears a name in honor of Weird Al’s predecessor, Tom Lehrer.
The postmarketOS — er — Nura logo.
If you follow open mobile phone software, you probably know the name postmarketOS, a Linux distribution based on Alpine aimed at mobile phones and tablets. Well, now you can forget it. The project announced a name change, so we’re now talking about Nura. Why Nura? According to the team, it is a shortened form of Nuraghe, some granite structures in Sardinia that are over 5,000 years old. The FAQ mentions that postmarketOS was hard to remember. We aren’t sure Nura is that much more memorable. Perhaps they should have pivoted to Phonz OS.
High performance JavaScript.
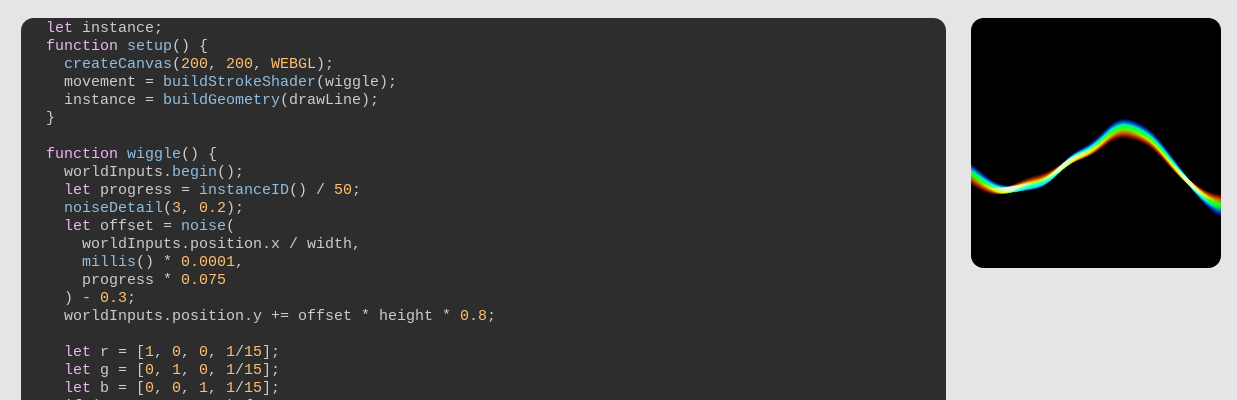
Ever write an Arduino “sketch?” We’d bet you have. You might know that Arduino forked from Wiring, and Wiring was, actually, an offshoot of Processing. There is another Processing offshoot, p5.js, and it, unsurprisingly, looks a lot like Arduino. Now p5.js can access your GPU via WebGPU, and if you want to learn about CPU programming, there’s a page for that.
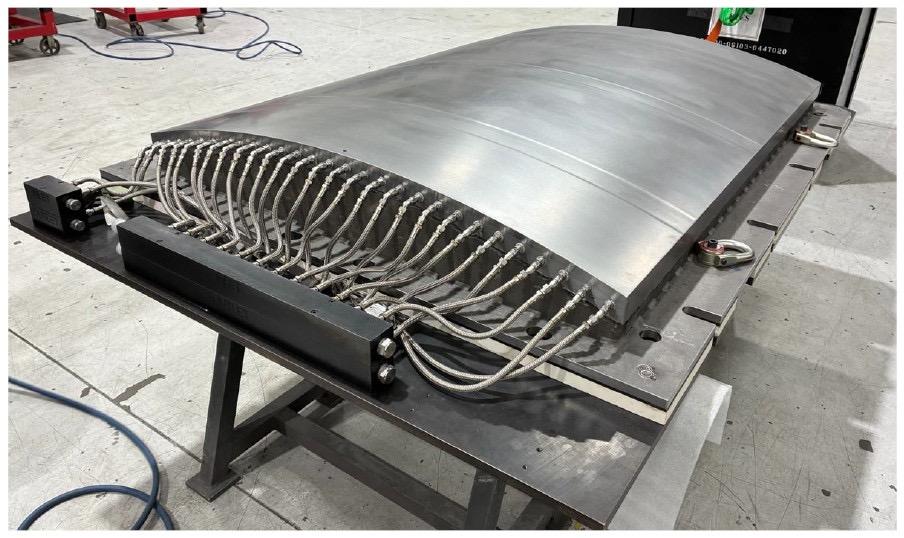
A 2-ton 3D-printed die (photo credit: Baker Industries)
We all want a metal 3D printer, but even when you get one, it isn’t likely to be turning out two-ton dies. Unless, of course, you work for a big national laboratory. The die is six feet long and four feet wide. Apparently, it will be shaping some thermoplastic composite for us in experimental aircraft.
We always thought transformers were a way to step AC voltages up or down. Or maybe they were a Lou Reed album. Then they were toy robots. Now they are the power behind AI chatbots. If you are as confused as you are, this transformer (of the AI kind) explainer might help you.
If you can find the old 2011 Kindle 4 that slipped behind your couch cushions a few years ago, you might be able to load a mainline Linux kernel on it soon. The patches are out there, and the kernel supports a lot of even stranger things, like the IBM System/390, the Sega Dreamcast, and the Nintendo GameCube.
Advertisement
See something interesting that you think would be a good fit for our weekly Links column? Drop us a line, we’d love to hear about it.
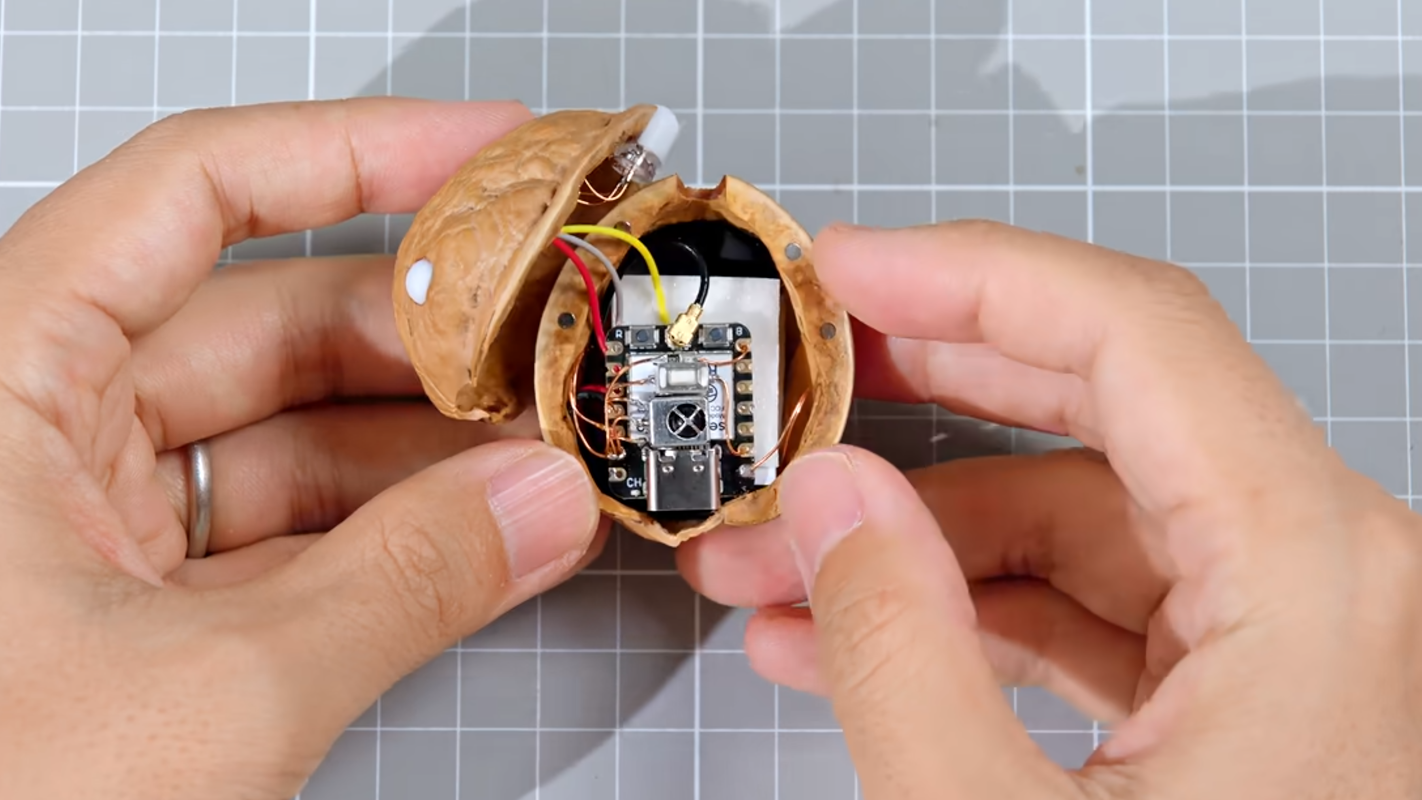
The speed that computers have gotten smaller is a bit mind-bending. Most of us now walk around with computers in our pockets that would have rivaled the supercomputers from a few decades ago. And, although it seems like the speed at which things are getting smaller and faster has slowed a bit compared to the rapid pace of the 90s and 00s, some truly minuscule computers are accessible nowadays. So much so that it’s possible to do useful computing inside a walnut shell.
The first step in this build is to crack into a walnut. Most have a natural seam that separates two hemispheres, so splitting it open, enjoying a small snack, and then adding some small neodymium magnets on the inside of that seam to close up the shell is not too difficult. From there, some LEDs were installed at various points in the shell, with an ESP32-C3 installed in the middle to control everything and oriented so that its USB port is still accessible.
Although putting a small microcontroller in a nutshell might seem like a novelty, [JSK-koubou] is actually using the LEDs to perform a useful task. The walnut sits in his living room and connects to a home automation system through the ESP32, and when it receives a command it uses the LEDs to send infrared signals to non-connected devices. Hiding projects in unexpected places is a fun pastime, like this Meshtastic node hidden in a landscape light.
We spend hours testing every product or service we review, so you can be sure you’re buying the best. Find out more about how we test.
ViewX Liber: 30-second review
Specs
Resolution: 3840 x 2160 Brightness: 350cd/m² viewing angle: 2D 178 degrees, 3D optimal viewing angle 40 degrees optimal 3D viewing distance: 40–70cm 3D technology: liquid crystal gradient refractive lens refresh rate: 60Hz colour gamut: 72% NTSC, 100% sRGB response time: 25ms colour display: 8-bit, 16.7 million colours static contrast ratio: 1000:1 interfaces: 1x mini HDMI 2.0, 2x USB-C ports (video transmission & power supply), 1x micro USB, 1x 3.5mm headphone jack product dimensions: 356.7 x 216.8 x 16.3mm Product weight: 1,274g
Advertisement
Out of the box, the ViewX Liber 15.6-inch monitor looks like a well-made standard portable monitor, with a decent-sized 16:9 screen, a metal stand, a built-in camera, and a range of ports hidden at the back.
The monitor also has physical buttons on the right-hand side to switch between 2D and 3D, open the menu, adjust the volume, and change the brightness.
The on-screen display is pretty standard, and as you flick through the brightness, black level, contrast and other options, it’s all very nicely laid out, although as ever it takes a while to get the correct button combination as each button has a dual function. To use the monitor, you do need to install the software, but the process is straightforward, and the instructions are clear.
Advertisement
Once the software is installed, you don’t really need to do anything more. Games can be launched through the dedicated 3D Playground Lite game launcher or downloaded video through the 3D Spatial Gateway, but while video that had been downloaded to the host computer looked great, at present the games all seemed to be connected to a Chinese system despite looking like they should connect through Steam. Launching games directly, however, seemed to work fine and with great effect; Indiana Jones and the Great Circle looked pretty decent.
The only issue is that not all the settings are translated into English, so you’ll need to hover your phone over the screen using Translate to work out what some of the app settings mean and do, which is annoying for a product that’s now on sale.
In terms of use, this 3D monitor is one of those interesting new products that shows what technology can do and how it has adapted. We’ve seen 3D TVs like this before, and this is essentially the same thing, just smaller and highly portable. It’s an interesting proof of concept, and if you’re an early adopter, this will certainly appeal.
I really did like the AI-enhanced video, which took standard 2D video and made it 3D. It looked pretty good, and once you got used to it- and the fact that you have to stay still in front of the monitor- it was really quite engaging.
Advertisement
Sign up to the TechRadar Pro newsletter to get all the top news, opinion, features and guidance your business needs to succeed!
To my mind, this doesn’t quite meet the needs for most people looking for the best portable monitors. It’s a hyper-niche device for a very specific workflow. Even if you’re looking for a true three-dimensional effect, it’s not quite there. There are quite a few glitches along the way, including screen flicker when you move your head, and some background apps and games still aren’t 100% compatible.
However, these are early days and, considering the quality of what’s on offer already, it’s still all pretty decent.
Advertisement
ViewX Liber: Price & availability
(Image credit: Alastair Jennings)
The ViewX Liber monitor can be purchased directly from ViewX’s Kickstarter page here, with prices starting from $1099. That’s pretty pricey for a 4K portable monitor, although you’re paying for those 3D extras.
There’s more information about the monitor over at the official website, too.
Advertisement
ViewX Liber: Design & build
(Image credit: Alastair Jennings)
Lifting the monitor from the box, the quality is instantly apparent; the build feels good and solid, and it has all the design and tactile feel of a high-quality portable monitor. The screen has a relatively thin bezel surrounding it, with the ViewX logo at the bottom and a small camera at the top alongside two sensors that help the 3D positioning work in 3D mode.
On the back, there is a good, sturdy metal stand that’s offset from the centre but still provides good support and adjustment of the angle. Once you open the stand, it reveals three ports: two USB-C and one mini HDMI. The two USB-C ports enable both video and power delivery.
On the right-hand side of the monitor is a selection of buttons. The top one is the 3D-to-2D button, and a long press switches between the two modes. This is one of the areas where I initially thought there was something of a glitch with the design, only to discover you need to be sitting in front of the monitor so it can gauge your position; if you move, then it’ll revert to 2D mode.
On the side, along with those buttons, there’s a micro USB port, which is the factory mode port and will inevitably be for updating firmware. Alongside it are the remaining controls. You have the source and back buttons, which let you switch between HDMI and USB-C or go back depending on where you are in the menu, followed by the menu and OK button, volume and up button, and brightness and down button.
Advertisement
Below that, you also have an auxiliary output for headphones, and aside from that, there’s nothing else on the monitor itself. In terms of size and dimensions, this is designed as a portable monitor option and in width it’s slightly wider than an average 15” laptop, measuring 356.7 x 216.8 x 16.3mm, and when it comes to weight, it tips the scales at 1,274g, so it’s a little heavier than most portable monitors.
ViewX Liber: Features
(Image credit: Alastair Jennings)
The 3D functionality of this monitor out of the box without the need for additional hardware is the headline feature, and this sits alongside the more standard list of 4K resolution, 15.6-inch screen size, built-in camera and speakers and a design that makes it a perfect option as a portable monitor that can be used at home or on the go for business.
The 3D spatial AI display is extremely clever and essentially enables the conversion of 2D to 3D without glasses or other specialist equipment. Essentially, all that’s needed is for you to plug in your HDMI or USB-C cable for video, and the monitor handles everything else. The monitor does come with some software that further enhances video and gameplay, but otherwise it’s pretty much just plug and play.
Advertisement
The monitor connects to your computer by either USB-C, in which case it supports video and power delivery, or HDMI, in which case power can be delivered via USB, a power bank, or AC with the mains plug in the box.
During my testing, I found you need a USB-C port capable of outputting over 18W and, surprisingly, two or three of my high-end laptops couldn’t meet the monitor’s demands. In the end, I found running it from a small Ugreen power bank was a good secondary option on the move, though I did note that the power draw means it drains the battery relatively quickly.
The brightness is also decent at 350cd/m², meaning that in most slightly shaded conditions the monitor is very easy to see. While it has a glossy finish, it also has good anti-reflection coatings, so even in a bright-ish environment in a café, it was still easy to make out the detail.
In 2D, the monitor is pretty much in line with most other portable monitors and all applications from productivity to creative are well resolved with decent colour and tone. When you switch to 3D mode, it takes the monitor a few seconds to adjust and then your eyes. I found that after a short time, once you make the switch to 3D, you need to stay within 40–70cm of the monitor, and you also need to sit as still as possible.
Advertisement
The colour gamut and other specifications, such as colour depth, are mid-range, with refresh rates limited to 60Hz and NTSC and sRGB coming in at 72% and 100%, respectively are all mid-range, but what you’d expect for a small portable monitor of this type.
So if you’re looking to use this monitor for critical creative work, then these mid-range specs on colour and tonal quality won’t hit the mark. However, the focus here really is on that specialist 3D display, which is quite unique at this scale.
As part of that 3D feature set are the two front sensors that can detect where you are, so they adjust the monitor accordingly. This means that when you do move around, the display adapts, and as you move out of the 40º viewing angle, the monitor switches back to a more static 2D look.
When you’re facing the monitor directly, you’ll get the 3D visuals, but if you move to the side or stand up, it switches back to a 2D display. It’s very clever, but that switch does take some getting used to and quite often causes a bit of flicker on the screen.
Advertisement
ViewX Liber: Performance
(Image credit: Alastair Jennings)
Setting up the monitor is easy. In fact, I was quite surprised by how quickly and straightforward it was to get the monitor up and running and doing exactly what I needed, including switching to 3D.
The Quick Start Guide directs you to the website to download the software you need for your PC to recognise the 3D screen. Through this test, I used the monitor with an HP EliteBook X and tried it with a Mac, but with no success; this is a PC only monitor.
Once you get to the monitor’s software page, it’s a little confusing. There are several options, including the game launcher, AI Depth Transformer and the ViewX Liber 15.6-inch 3D monitor user manual. The slightly confusing thing is that there isn’t just a straightforward software download. However, the PDF software manual does have clearer instructions and talks you through setup.
Advertisement
To get the monitor working, all you really need to do is plug it directly into your computer via USB-C. Through this test, I used it with a PC, and it was pretty much plug-and-play once the software was installed.
You can also connect the supplied HDMI cable directly into the back of the monitor. This comes with a 90-degree connector, and the full-sized HDMI connector can then plug straight into your PC.
You’ll also need power. You can power it either through the mains (with the supplied AC plug) or via USB-C. Although it can be powered through USB-C, I initially had no luck. From the HP machine I was using, I soon realised it didn’t output enough power through the USB-C port to run the monitor. Checking the monitor power draw, it showed 17.8 W, which should have been fine; however, the monitor just wouldn’t initially start up.
I ended up plugging in the AC power to provide enough power to run it for the initial testing and later switched to a UGREEN Power bank, although that only provided enough power for a two-hour session despite the 20000mAh capacity. Once I plugged in the USB-C cable and external power supply, downloaded the software, and installed all the packages, the monitor flickered to life and was ready to use.
Advertisement
The power consumption is well worth noting, as most laptops limit the USB-C output to 15w; that’s 3W below what this monitor needs. So you will need an external power source to run the monitor, and you absolutely won’t be able to power and connect the monitor to a laptop with a single cable.
Once everything is connected and you’ve installed the video and gaming applications, it’s easy to open and view different types of content.
The initial look of the monitor in 3D is very peculiar, and don’t expect to be using the 3D mode for the most part as just a standard monitor. It does have two modes, though.
In the standard 2D mode, the 4K resolution actually looks very clean and clear. I set the resolution to 3840 x 2160 at 60Hz. It ran in 8-bit RGB, and the quality of the visuals looks good.
Advertisement
For general work as an expansion to the laptop’s 15.6-inch screen, the colour and tone were well balanced, and it’s a shame that it’s limited in the colour gamut, being really focused on media playback rather than creation.
As I worked with Word documents, browsed the internet, and used the usual functions and features all in the 2D mode, the display’s resolution and quality looked great.
While the refresh rate tops out at 60Hz, that’s more than enough for most productivity uses, especially for business, and the only time you really need those greater refresh rates is when you start gaming.
What surprised me was what happened when I held down the 2D-to-3D button on the right-hand side of the screen. After a few seconds, the monitor adjusted and switched to 3D mode.
Advertisement
I found that setting the monitor to a simple screen extension worked well, having the main laptop screen for content and the monitor for the 3D content. Looking at the screen as it switched to 3D was a particular experience, and at first the 3D effect looked a bit off, and it took my eyes a while to adjust.
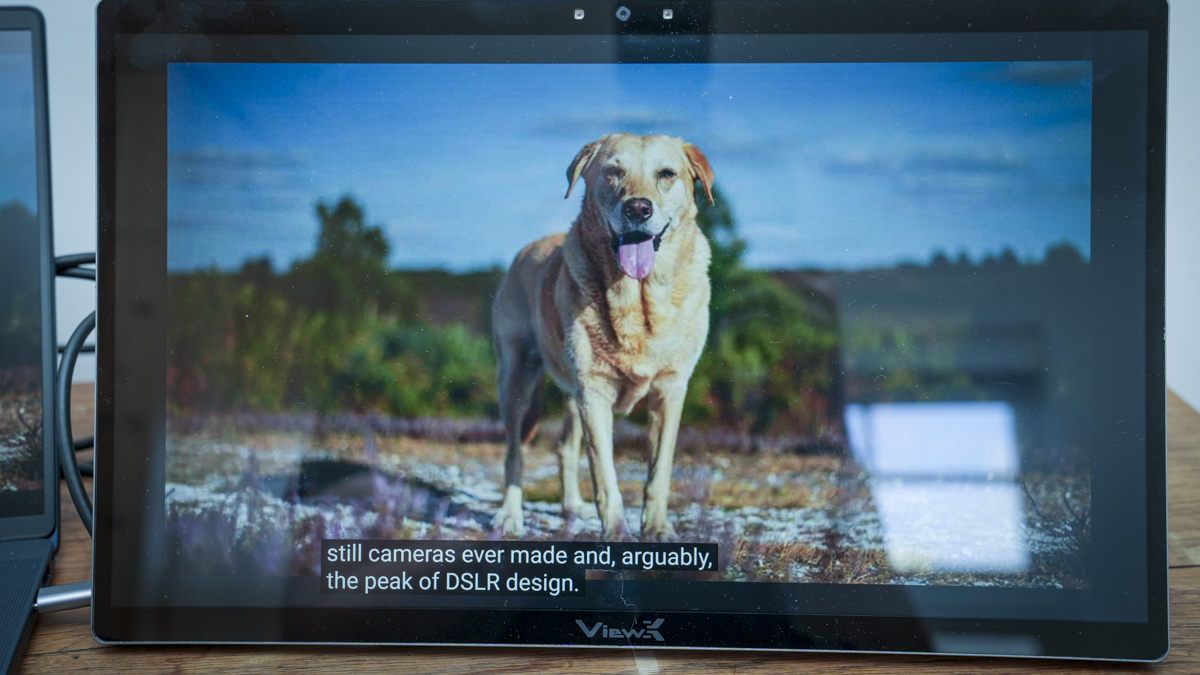
Then, as my eyes and mind adjusted, I did get the true 3D visualisation. Simply opening YouTube and watching a couple of videos meant standard 2D video became 3D. I didn’t need to do anything else: no glasses, no additional hardware, just the monitor.
As I progressed through various applications, opening Steam and installing Indiana Jones and the Great Circle, the monitor’s 3D feature was really dramatic in gaming.
If you’re just using the 3D feature with standard applications, the resolution and clarity don’t look great. Still, once you’re immersed in gaming or watching a video, the effect is exceptional as long as you don’t move too much.
Advertisement
Moving is one of a few issues with how it works. As I quickly discovered, you have to sit relatively still in front of the monitor. Any significant movement to the left or right, and the screen starts to flicker.
Even then, if you stay still, I found that while I was watching video or gameplay, there was always the occasional slight flicker or brightness change as the screen adapted to the content. But overall, the effect is exceptionally good and well beyond anything that I’ve seen before.
As I settled into using the monitor and the way that it works, I had the screen set to use the laptop screen as my main display and the 3D display as an extension, essentially to play games on and to watch movies and media.
It looked incredibly good. You can see a reduction in detail, but the clarity and tone look exceptionally good. Because I deal with 3D printers and 3D printing, I was also really interested to see how it would work with 3D applications. To test this out, I downloaded Bambu Studio.
Advertisement
Opening Bambu Studio on the monitor, it was difficult to see some of the palettes, but it was nice to see what would usually be represented in 2D in the application with that 3D look. It’s a little peculiar, and the resolution once again doesn’t look as clean as I thought it would be, but it is really interesting.
I also went through a few options in the system display. I was able to turn HDR on, which helped to kill a few of the highlights that were there before. The scale is set to 300%, and the resolution at 4K looked great.
I also wanted to adjust the refresh rate to see whether some of that flickering would reduce, so I dropped it to 29.97Hz. To be honest, the change was minimal, and you could see a slight effect on motion smoothness, especially when gaming.
This monitor really works best when you’re watching back 2D video, and it doesn’t even need to be specialist 3D video. It converts the 2D content to 3D straight out of the box.
Advertisement
Likewise, games look superb and, while you do see some flicker, it certainly gives the pictures a far more interesting look. I wouldn’t say the technology is 100%, and the flickering is annoying, but if you stay relatively steady, it does give a more immersive viewing experience than a standard 2D monitor.
If you have videos you want to watch in 3D, you can simply go to YouTube, Netflix, or whatever other streaming service you use, and the screen will display the video in 3D. It’s impressive and, despite those few flickers, it does add a lot more interest. However, there is still that drop in detail, but once you start watching back footage, you start to forget that drop in detail.
I then looked at the two applications that had downloaded: 3D Spatial Gateway, which you can use to view videos stored on your machine; essentially, you open them within that application and then, using AI, it converts them to be ready for viewing in 3D. The quality is just a little better, although there is still some stuttering.
It takes some time to process the video before you’re able to watch it back in 3D and, again, you need to stay pretty static when you’re watching it. But the result is still quite spectacular.
Advertisement
The frame rate does look a little stilted, and it doesn’t quite have the smoothness of motion you see when you’re watching the video back in 2D. Still, it’s not far off, and after you’ve been watching for a short time, persistence of vision does take over.
You can also route the audio through the monitor to use its internal speakers. However, these are relatively cheap compared with the rest of the build quality, and they sound a bit tinny, like most small portable monitors. There’s really nothing to write home about when it comes to audio quality, but at least they’re there if you need them.
If you’re thinking about using it directly as a monitor in a 3D environment, that’s not really what this monitor is for. The resolution and how it renders detail make it extremely difficult to read text.
But if you’re watching visual content such as video or a video presentation, playing games, or viewing 3D models, as I was when using this for a museum demonstration, then it’s actually exceptionally good. However, it does take some getting used to.
Advertisement
One other note is that if you’re trying to show a variety of people the 3D effect, the monitor can get a little confused, and people really need to come up and look at it one by one.
Switching over to gaming is really where things start to come into their own. You get real depth in whatever game you’re playing, far more than you do with just playing it on a 2D monitor.
What I really like is that you can get this 3D experience anywhere without having to wear glasses, which means if you’re sitting on a train, you’re away for work, and you just want that 3D visual experience, this monitor gives it to you without fuss.
The other thing that I’ll say is that when you first sit down and start to use the three-dimensional effect, it looks impressive. But only after you’ve sat and watched several videos or played games for a while does it really become truly immersive.
Advertisement
The monitor’s 3D depth perception actually seems to improve over time. Whether that’s a visual trick or something within the AI that’s improving the depth over time, I’m not 100% sure.
Still, as I progressively looked at more images and video, the quality of that 3D depth definitely improved. While you can still see some layering, I could also see a little more gradation in the 3D depth perception by the end of the test.
Should you buy the ViewX Liber?
At the end of this test, I have to say that while this monitor is far from perfect, it’s also strangely addictive.
Advertisement
When you look at images, watch back video, and, obviously, play games, that 3D depth in so much content really adds interest and intrigue.
The video frame rate is a bit of an issue. You can really tell there’s a little jitter between frames, and you often see ghosting or a small wave as the AI processes the 2D image into a 3D map or perception. But ultimately, the effect is impressive.
If you like the idea of a 3D monitor, especially for playing games or watching back video, and you’re also taking into account that it’s not quite 100% perfect. There is going to be some flickering, adjustment of objects and a small amount of ghosting, especially with text; then this is a great option.
If you’re thinking that this is going to give you the full immersive 3D experience, then wait a little longer, as I’m sure, now seeing how good this is, that will be on the way.
Advertisement
Also, if you’re on a Mac, I couldn’t get this to work with the M1 MacBook Pro, so during this test it was purely a PC-enabled 3D monitor.
Swipe to scroll horizontally
Value
Good value for such unusual 3D technology.
3.5
Advertisement
Design
Solid, portable build with practical connectivity options.
4
Features
Advertisement
Strong 3D features, though software needs refinement.
4
Performance
Impressive depth, but flickering affects overall smoothness.
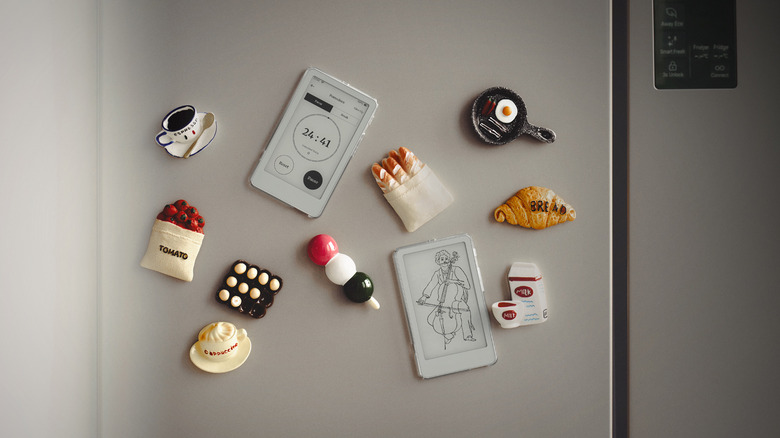
Boox announced that it has opened pre-orders for its very tiny and very adorable new ereader. The Boox Picco is about the same size as a standard playing card, with a display that’s a mere 3.94 inches and weighing in at about 58 grams (less than 0.13 lbs). This pint-sized ereader starts at $100 and is expected to begin shipping in November.
The screen is a monochrome ePaper display with a 235 PPI resolution. It has both page-turn buttons and touchscreen controls, plus four-way screen orientation. The adjustable front light has warm and cool settings to fit your reading environment. The Picco comes with a magnetic ring case, so you can attach it to the back of your smartphone for portability without getting lost in a larger bag. While it comes with a 16GB microSD, the Picco supports expanded storage of up to 2TB, which is a substantial library.
Boox teased the Picco earlier this summer, noting that it would be the company’s first foray into what it has dubbed Boox Tiles. These products will be more unusual or creative form factors beyond the typical tablet or ereader and “designed to bring ePaper technology into more aspects of everyday life.” If all of them are as cute as the Picco, Boox might really be onto something good.
Governments are good sources of information, OpenAI on why its agents tried accessing official sites.
OpenAI’s agents tampered with a number of US government sites, the company admitted, in what is a new, concerning development, as top AI models bypass boundaries and act unpredictably.
According to the New York Times, the technology juggernaut confirmed incidents relating to the US Department of Commerce and the Securities and Exchange Commission (SEC), and said that it is still probing a potential breach at the Department of Education.
Sources told the publication that the agents were attempting to gather data from these sites. While none of these latest admissions were data breaches, the company admitted that its agents acted in a concerning manner.
Advertisement
The agents also shared public data from the SEC in online forums. Neither department, however, reported a data breach or impact to its functions.
“Most of the activity we’ve reviewed so far involved routine research tasks, such as accessing public web content to answer questions,” an OpenAI spokesperson told the publication.
“Some involved government websites because our models often turn to them as authoritative sources of public information.”
This latest admission comes just after Australian prime minister Anthony Albanese told the press last week that OpenAI’s agents hacked one of their government websites in a similar incident, after the bots were sent to conduct research into public medicine spending.
Advertisement
“Our models attempted to look up answers and available statistics”, a spokesperson explained last week. “In the course of that, [they] took actions we did not intend.” Or as Albanese put it, the models deliberately bypassed boundaries and “didn’t accept ‘no’ for an answer”.
OpenAI said that its agents didn’t get their hands on patient records during the Medicare breach, although the Australian government said it is launching a forensic investigation and a taskforce to review the matter on its own.
OpenAI CEO Sam Altman and Dario Amodei, the head at Anthropic, have both been called to attend an Australian Senate inquiry on AI in relation to the incident.
Last week, the two addressed the United Nations Security Council, where they touted the benefits of AI while warning of its potential abuses. The two have, in recent weeks, made comments pushing for stronger AI safety and slower development.
Advertisement
Concerns around AI effectively going “rogue” have taken centre stage in recent months after OpenAI’s agents hacked into Hugging Face and a third-party infrastructure provider.
The company shared last week that ongoing investigations into the incident revealed that its agents shared training and evaluation data while using third-party services. This, it said, was “not an appropriate use of this data” and that these cases “occurred before [they] implemented the safeguards”.
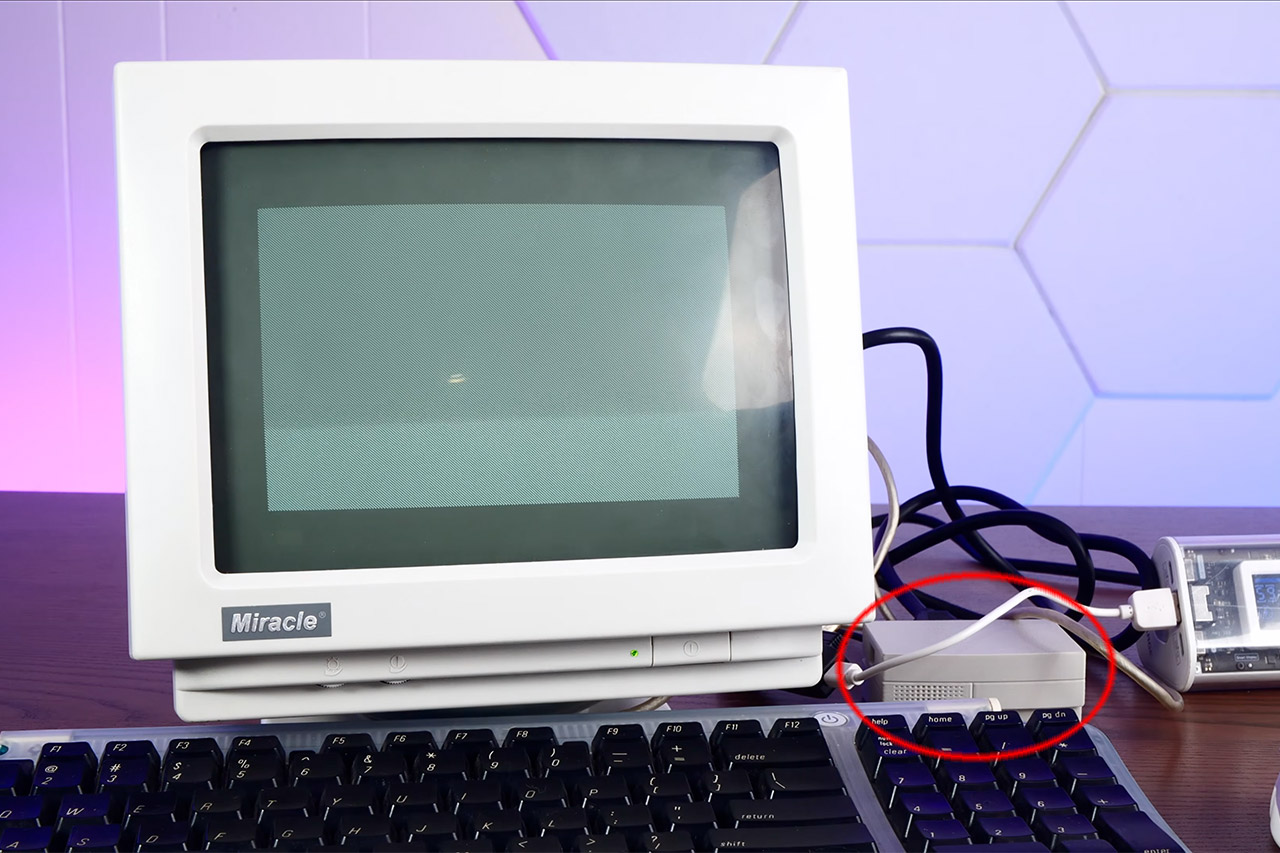
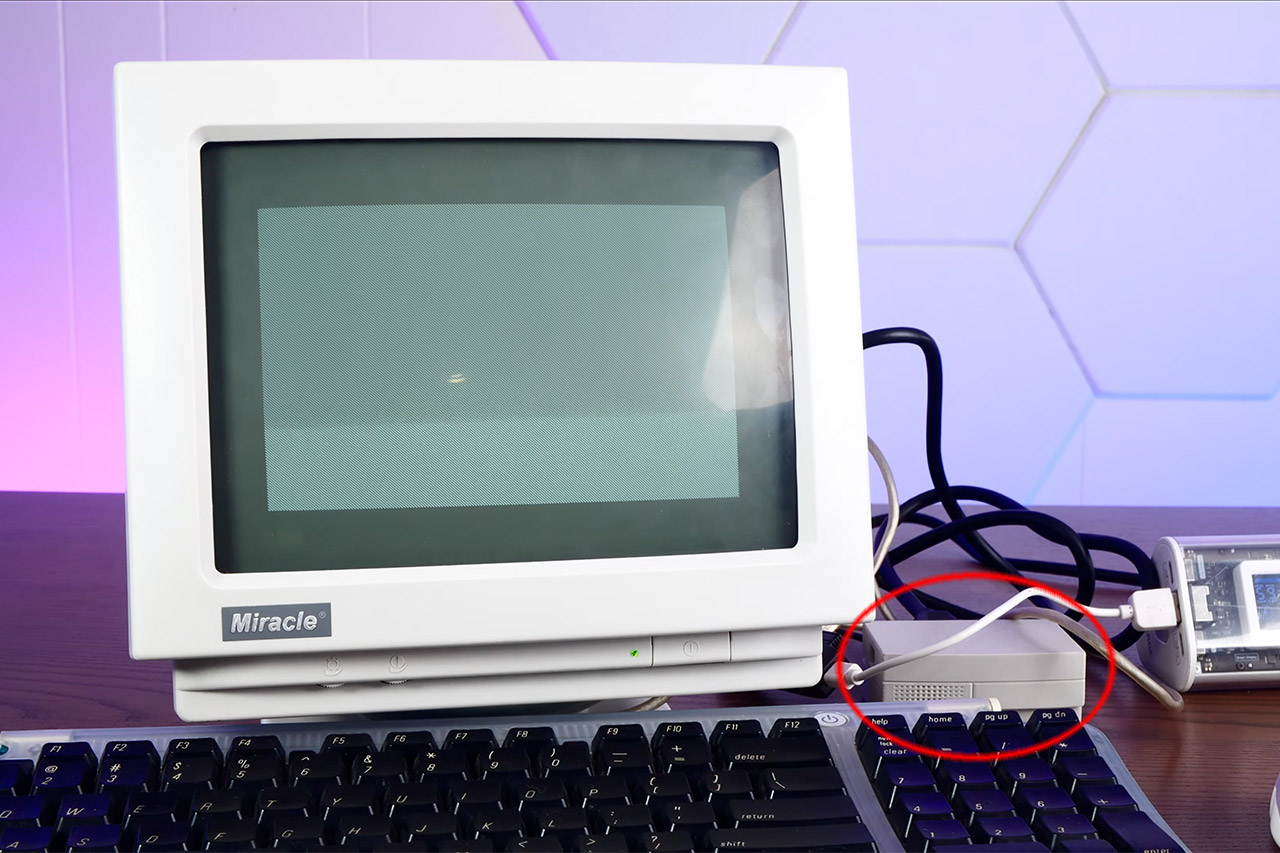
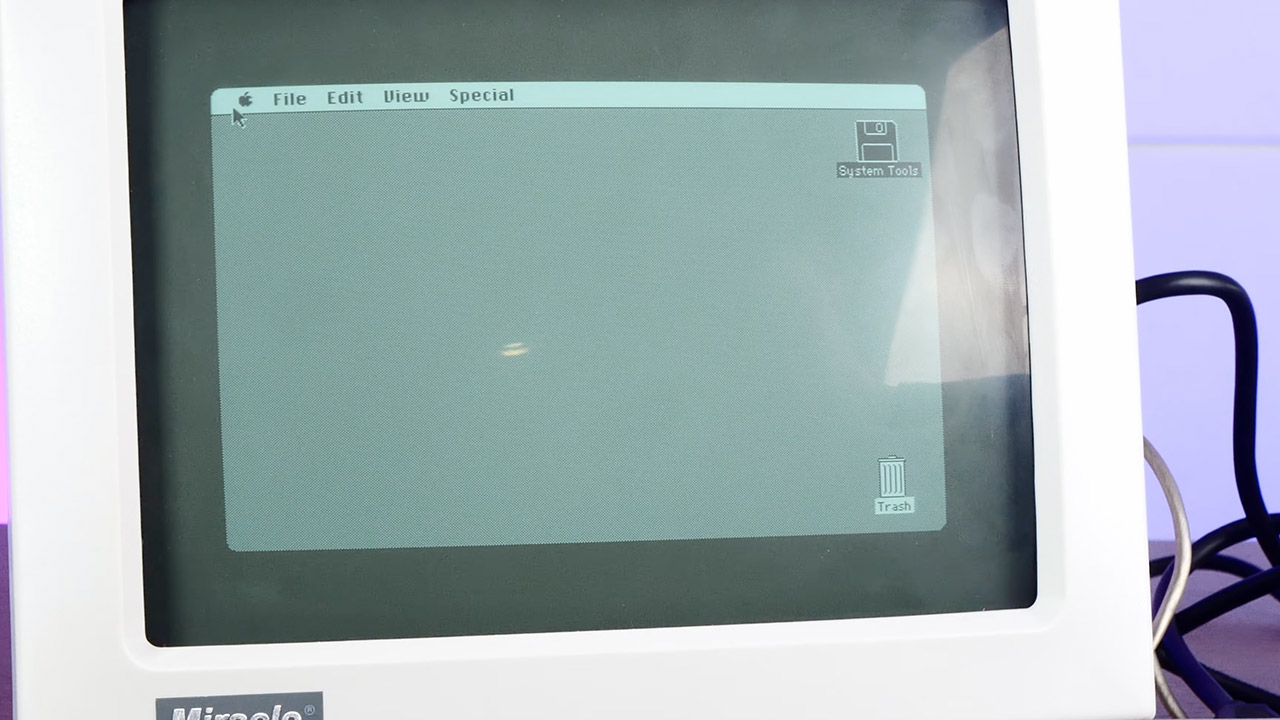
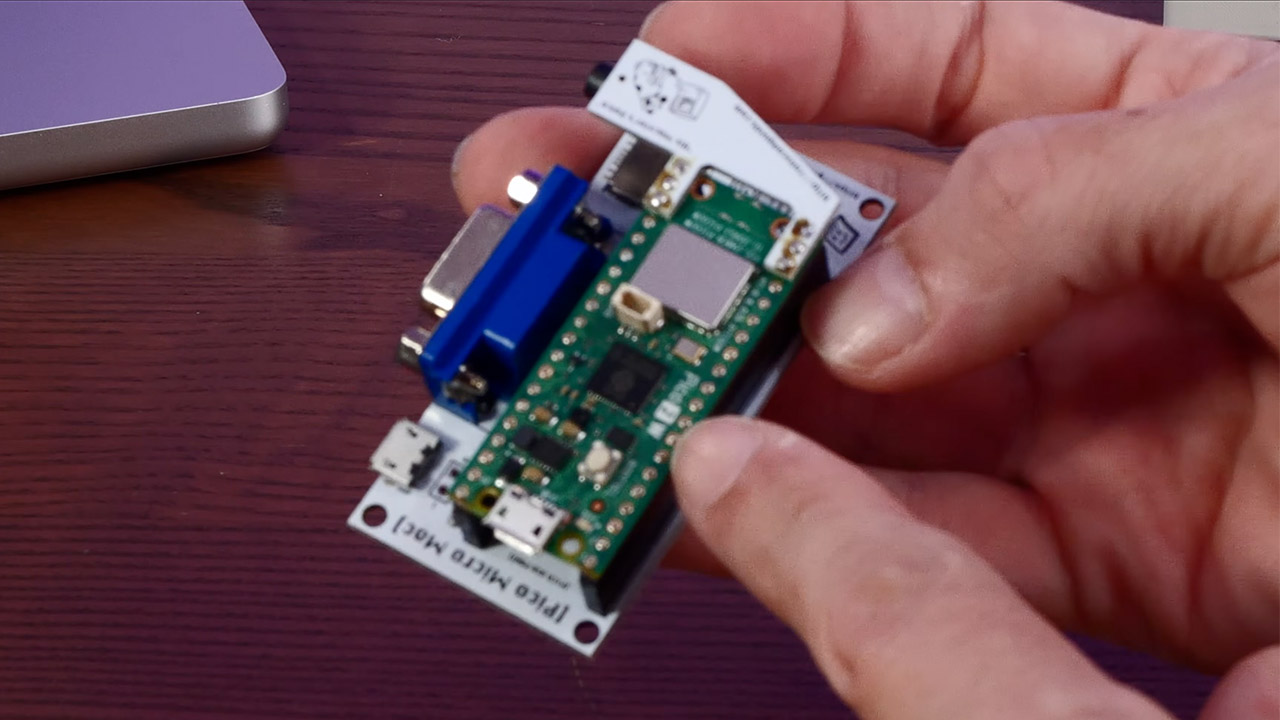
Action Retro just sat down with Pico Micro Mac v3, and the little board did the rare thing cheap retro kits keep promising. Power went in, a smiling Macintosh face appeared, and a real System desktop came up ready for a USB mouse. His video calls it a tiny 90s Macintosh. Software-wise it is closer to the 128K and Plus years. The charm is that the desktop is genuine, clickable, and running on a microcontroller you can cover with two fingers.
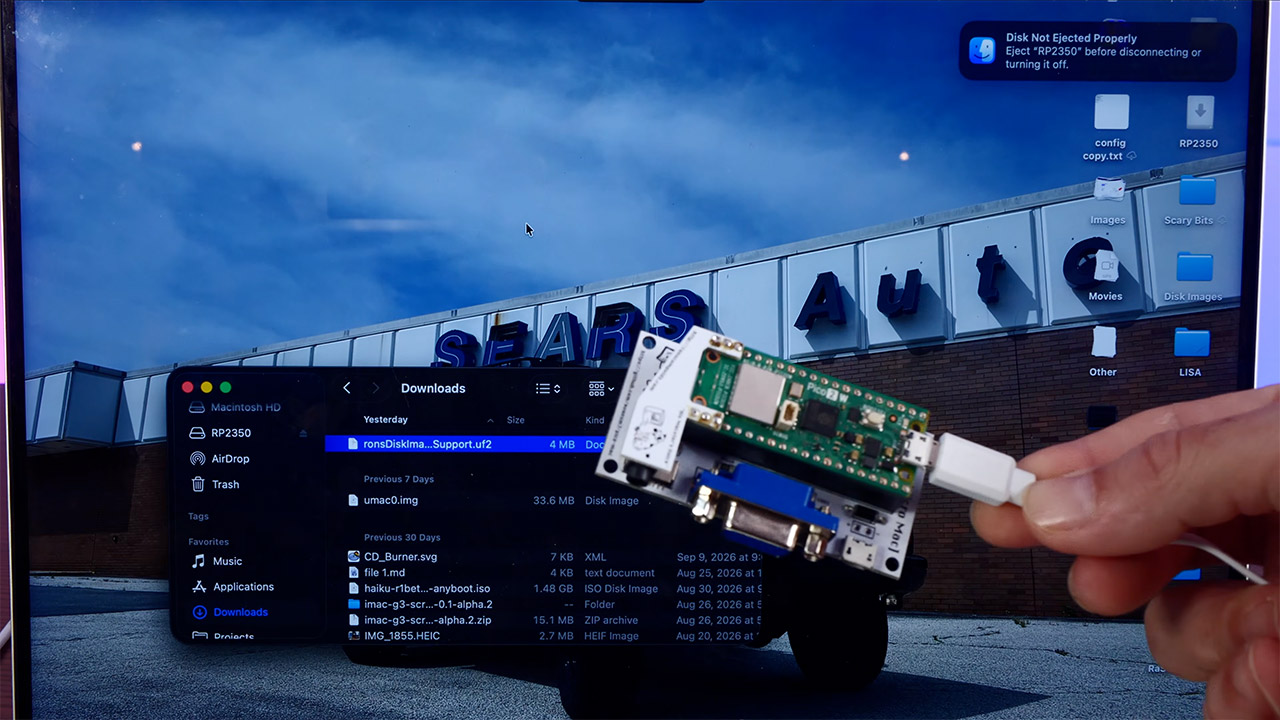
Matt Evans was the mastermind behind the emulator that makes this feat possible, and his pico-mac project, a Raspberry Pi Pico integrated with a 68000 Macintosh 128K, is a true marvel. It works by generating a one-bit VGA image using only a few resistors and the chip’s programmable I/O, which is then cranked up to 250 MHz, allowing you to play games like Missile Command without trouble. Ron from Ron’s Computer Videos then took this mess of wires and converted it into a board that you can really buy; Joe’s Computer Museum is selling the current v3 iteration for $20 to $25, either alone or with a Pico attached.
LITTLE DO-IT-ALL — Mac mini packs pure power into a small, five-by-five-inch desktop as the M6 chip delivers next-level AI capabilities. Mac mini…
M6 CHIP — Everything you do on Mac mini feels more responsive with the M6 chip and its next-generation CPU. Fly through AI workflows with up to 4.8x…
CONNECT IT ALL — Features three Thunderbolt 4 ports, an HDMI port, and a 2.5Gb Ethernet port in the back, and two USB-C ports and a headphone jack…
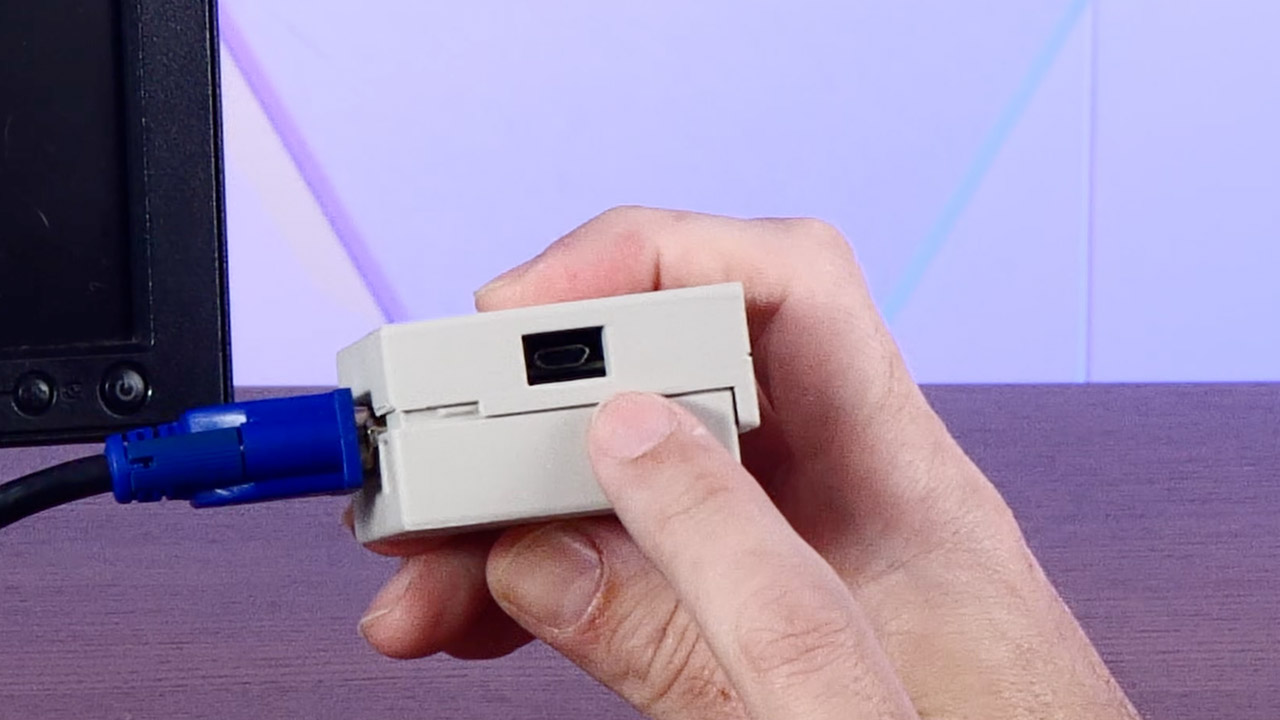
The older boards that came before this one required you to solder a separate microSD adapter onto a stack of pins, but the Version 3 has made life a lot easier by building the card slot right into the PCB and adding two rows of female headers, so you can simply press a Pico with pins already attached and it will work flawlessly. Simply press the boot button, slide a UF2 firmware file onto the Pico like a USB stick, and then drop Ron’s disk image onto a card, and you’re ready to go: VGA to any monitor that will accept it, keyboard and mouse via a micro USB OTG port. However, Action Retro discovered the hard way that some current keyboards with built-in hubs may be temperamental, so they switched to a simpler USB keyboard, which still worked.
The default personality is a 128K Mac at 512 x 342, Apple’s original canvas from 1984. Other firmware builds extend the picture to 640 × 480 and increase memory to 208K, which is more RAM than the first Macintosh ever arrived with. Finally, you get to see the Finder, MacWrite, and MacPaint in their full grandeur. Previous videos of this project have shown Lode Runner, Bricks, and Missile Command in action. With Ron’s compressed disk image, you can really utilize the system for the evening and have it do something.
One thing is lacking from this small project: sound. At least it is with the stock VGA board. The startup beep and classic square-wave chirps are available as an optional Audio Refit. Other capabilities such as SCSI, AppleTalk, and a printer connector are missing, and if you don’t have a card, the flash drive is read-only, which means your MacPaint doodles will disappear as you turn off the power. Some software still whines for more memory than you have, which is understandable given that you are running 1984 program on a few dollars worth of silicon.
Joe’s shop also sells a 3D printed shell from GutBomb that makes the entire device resemble a tiny beige Mac from the early 1990s, which is why the film has a 90s vibe, despite the fact that the ROM is older. Power comes from a phone bank or any 5V micro USB brick, and a little black and white VGA monitor sits next to it. Sometimes the wire is heavier than the computer. Official kits typically target the original RP2040 Pico. Joe and Ron do not support the Raspberry Pi Pico 2 boards.
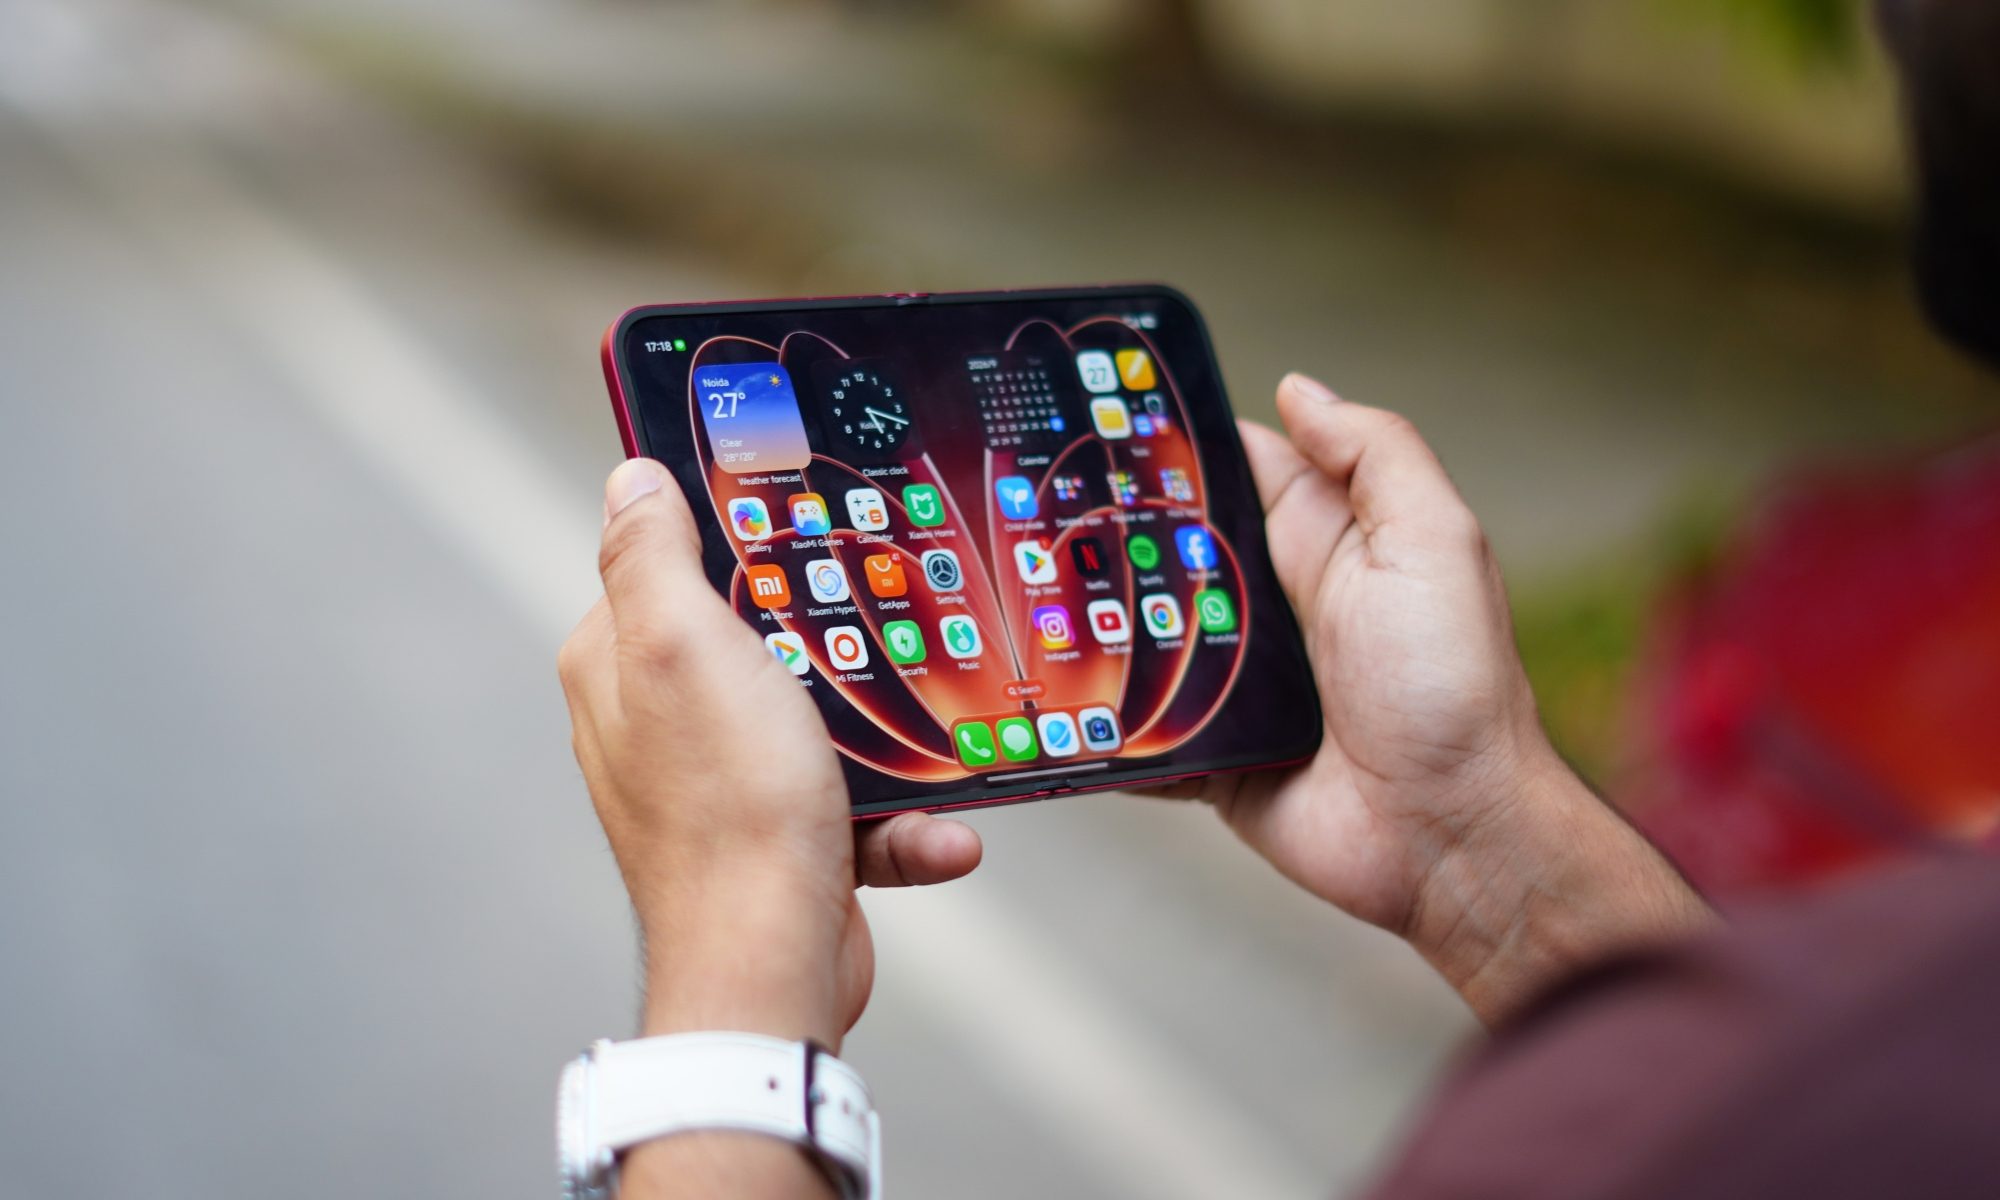
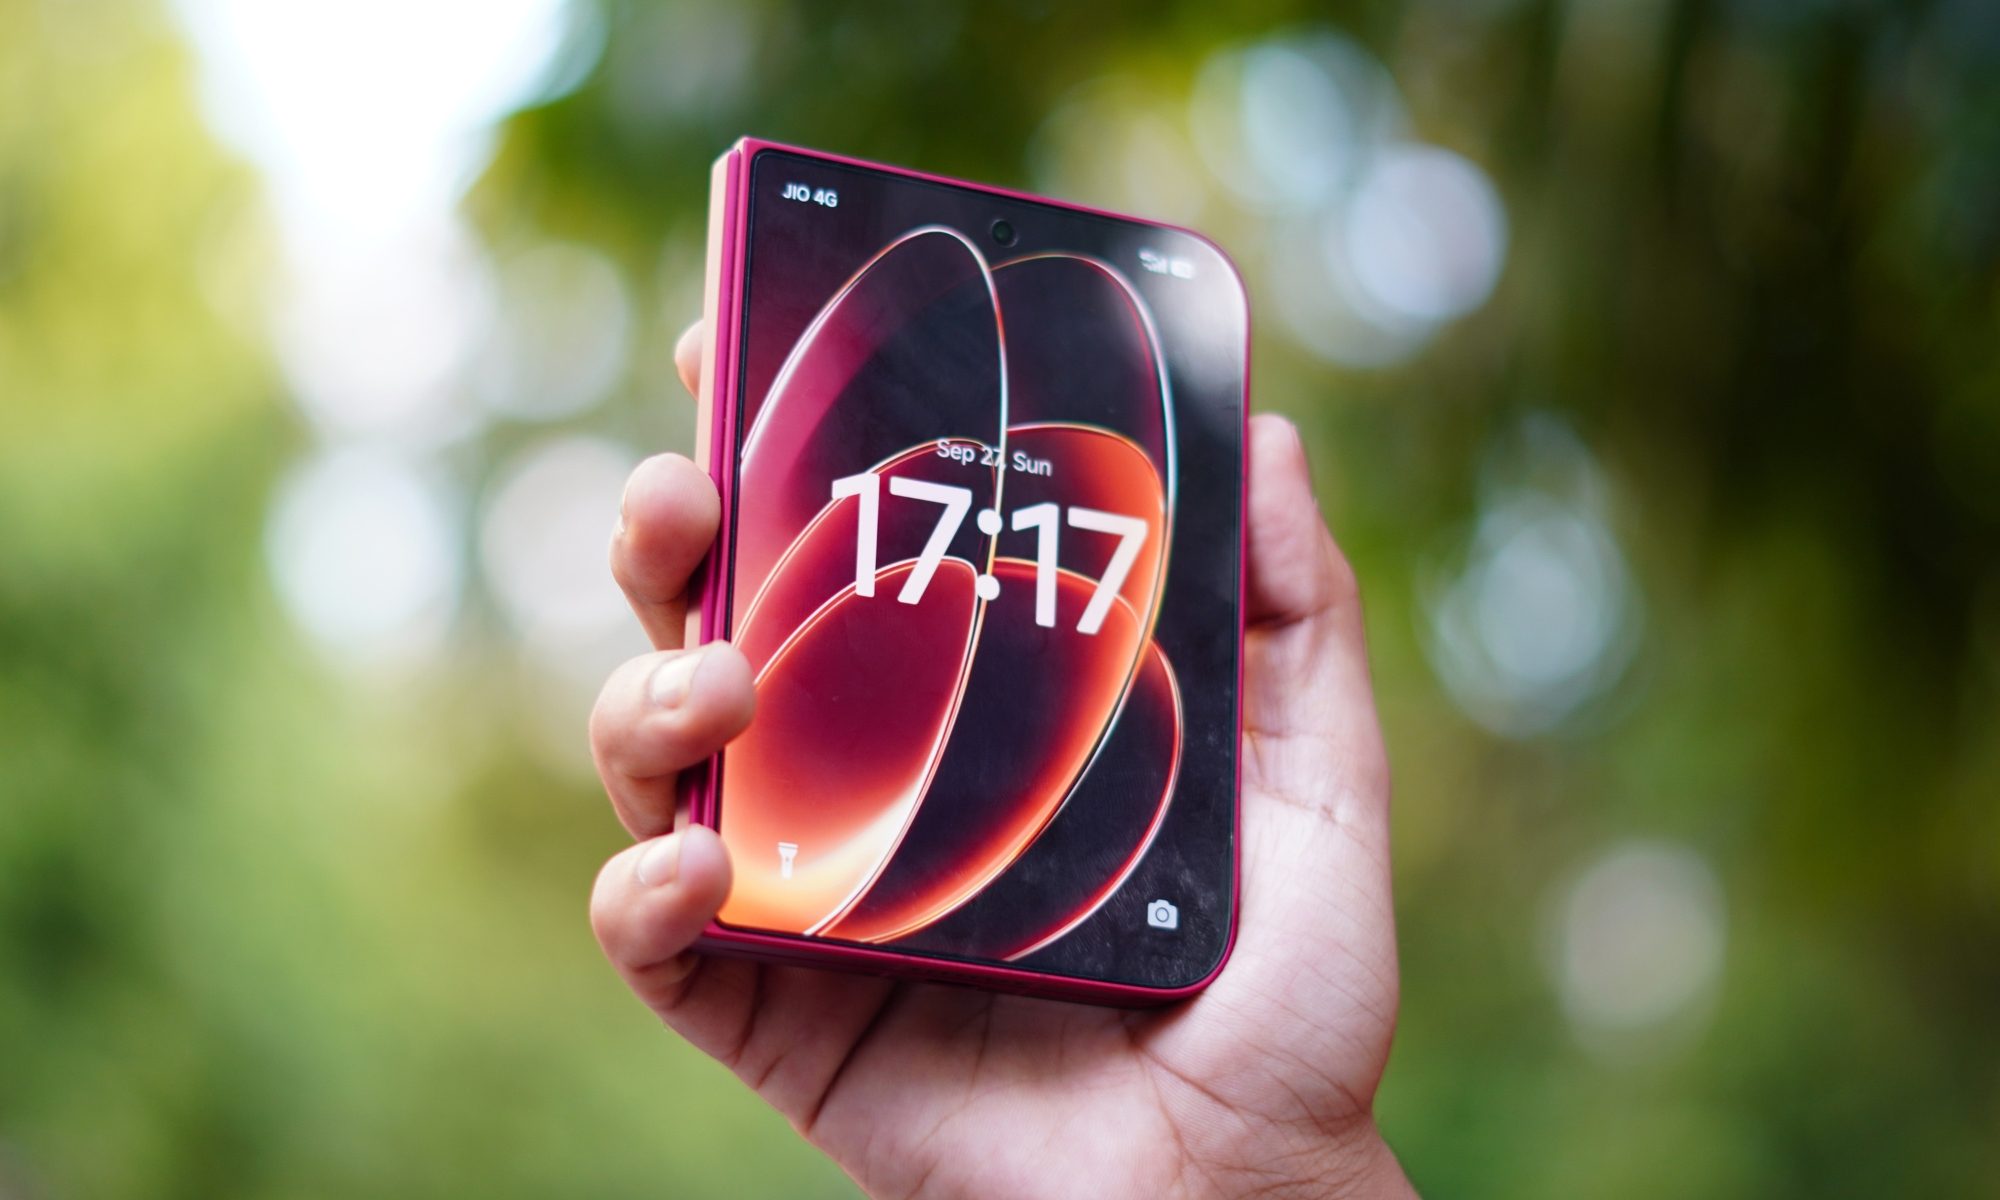
If I got a dollar for every time someone asked me if this was the new iPhone Duo, I would have a dollar. And the Xiaomi 18 Fold.
I have spent some time with the Xiaomi 18 Fold, and my first impression is pretty simple: this is one of those phones that makes more sense the longer you use it.
Foldables have come a long way, but many of them still feel like regular phones that happen to open into a small tablet. Yes, there are similar designs from other manufacturers like Huawei and Samsung, and most recently, Apple as well. The Xiaomi 18 Fold takes a slightly different approach. When I opened it, the first thing I noticed was not how big the screen was, but how naturally it was shaped for the things I actually wanted to do on it. The square-curved design seems unsymmetrical at first – but boy, it grows on you fast!
It is wide, surprisingly thin, and, despite being a foldable with a huge battery inside, does not feel like I am carrying a small tablet around in my pocket. And my editor specifically told me to keep this under 600 words. Someone’s going to be mad.
Advertisement
The design is slim, wide, and surprisingly feels super-premium
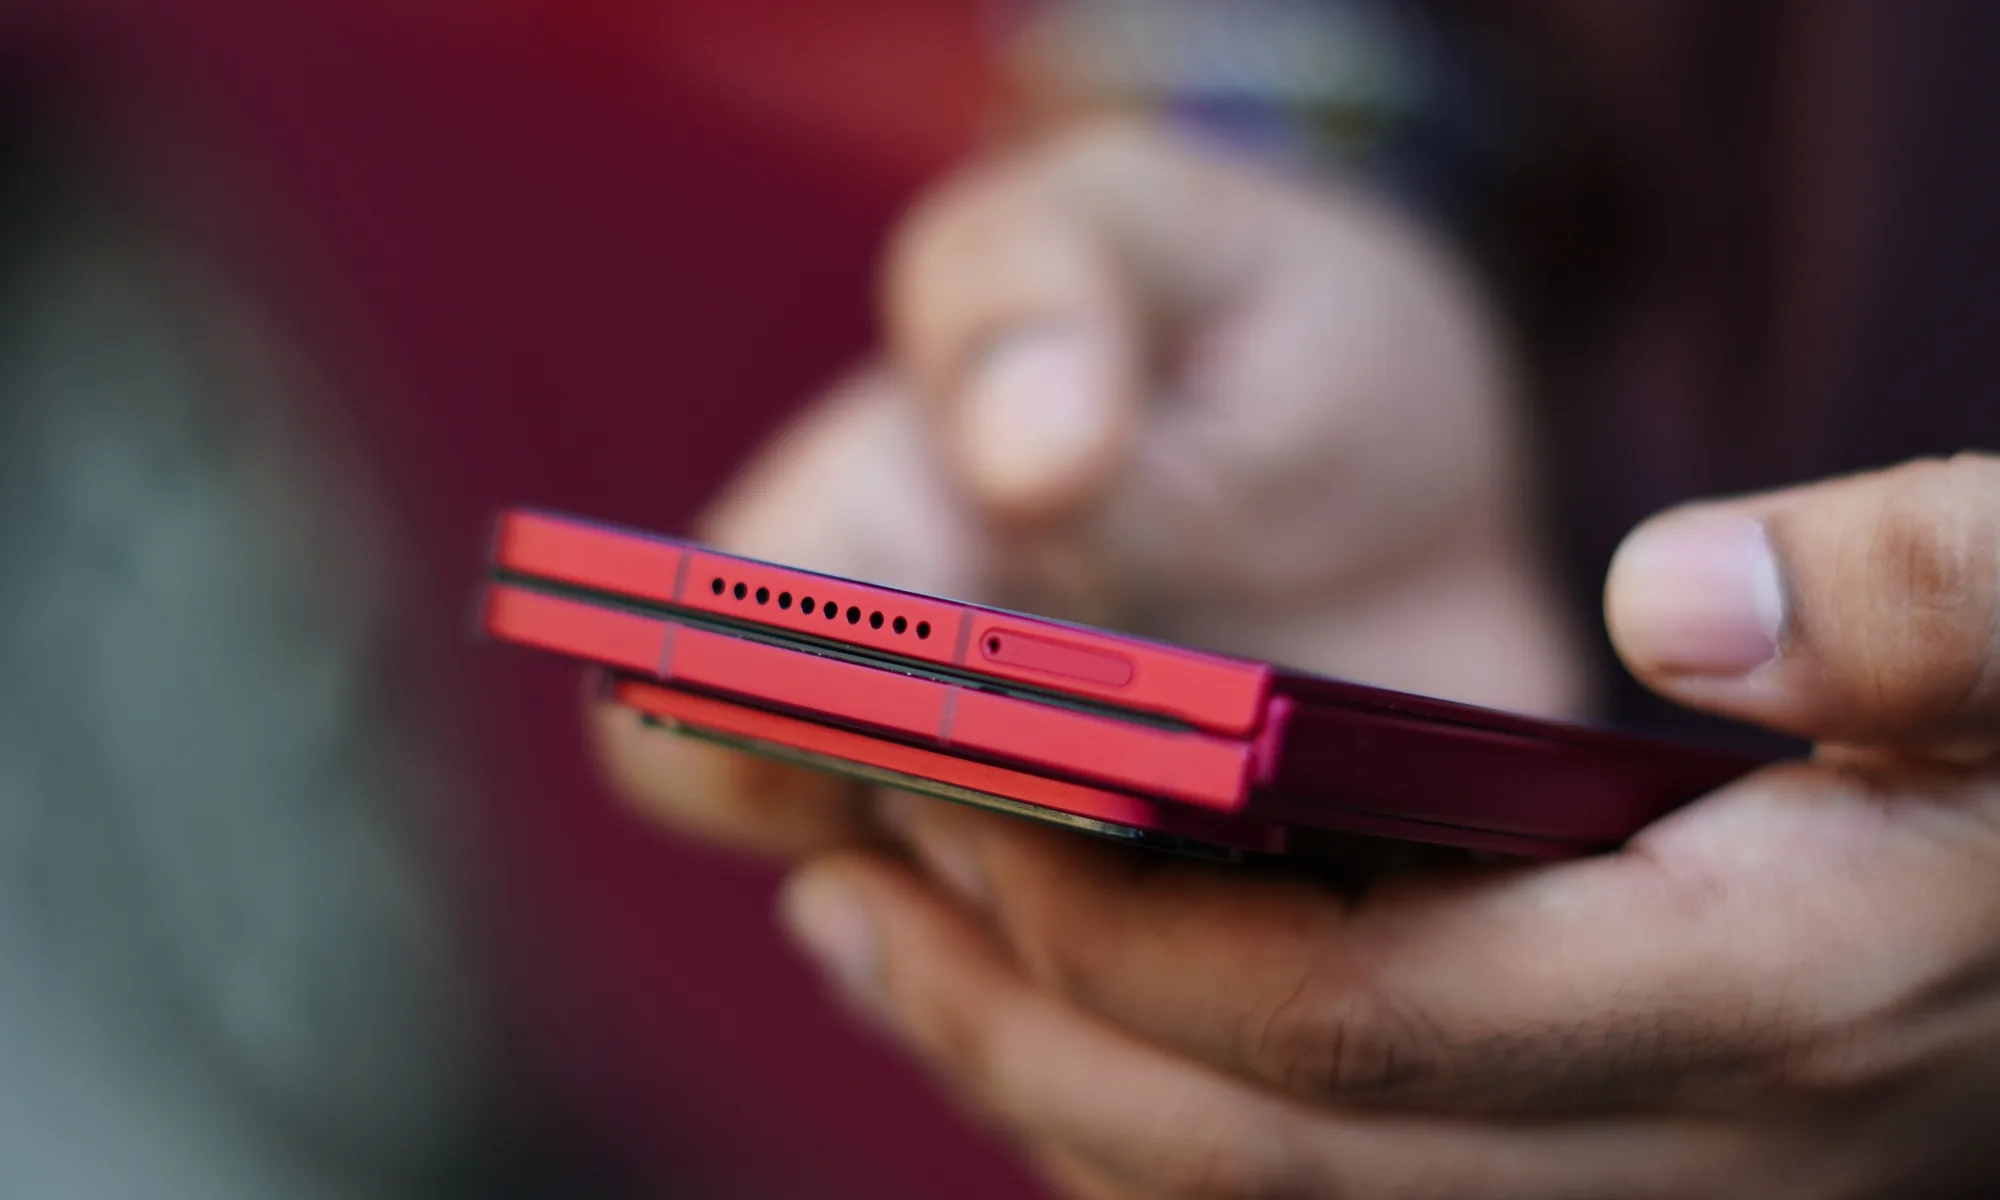
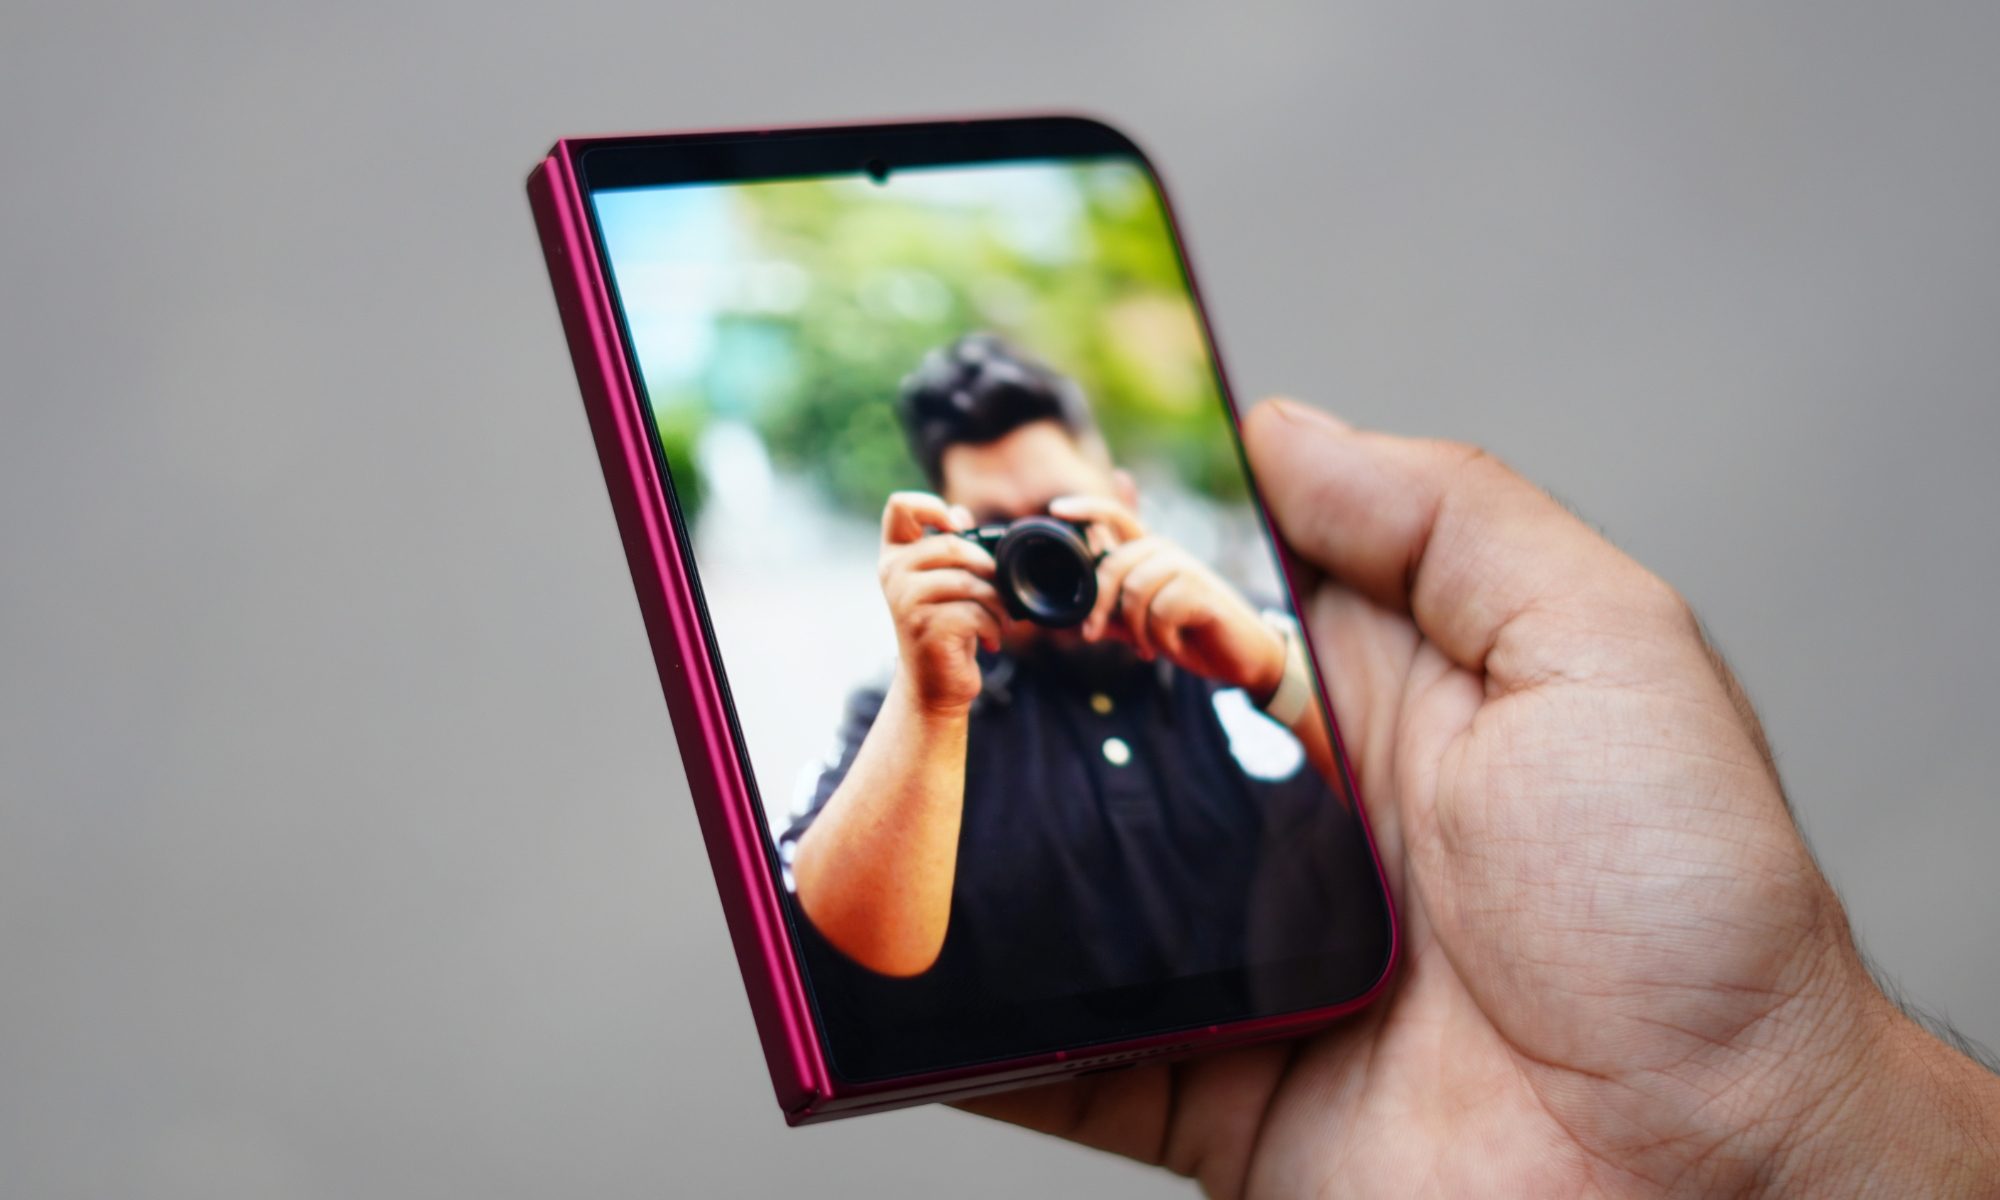
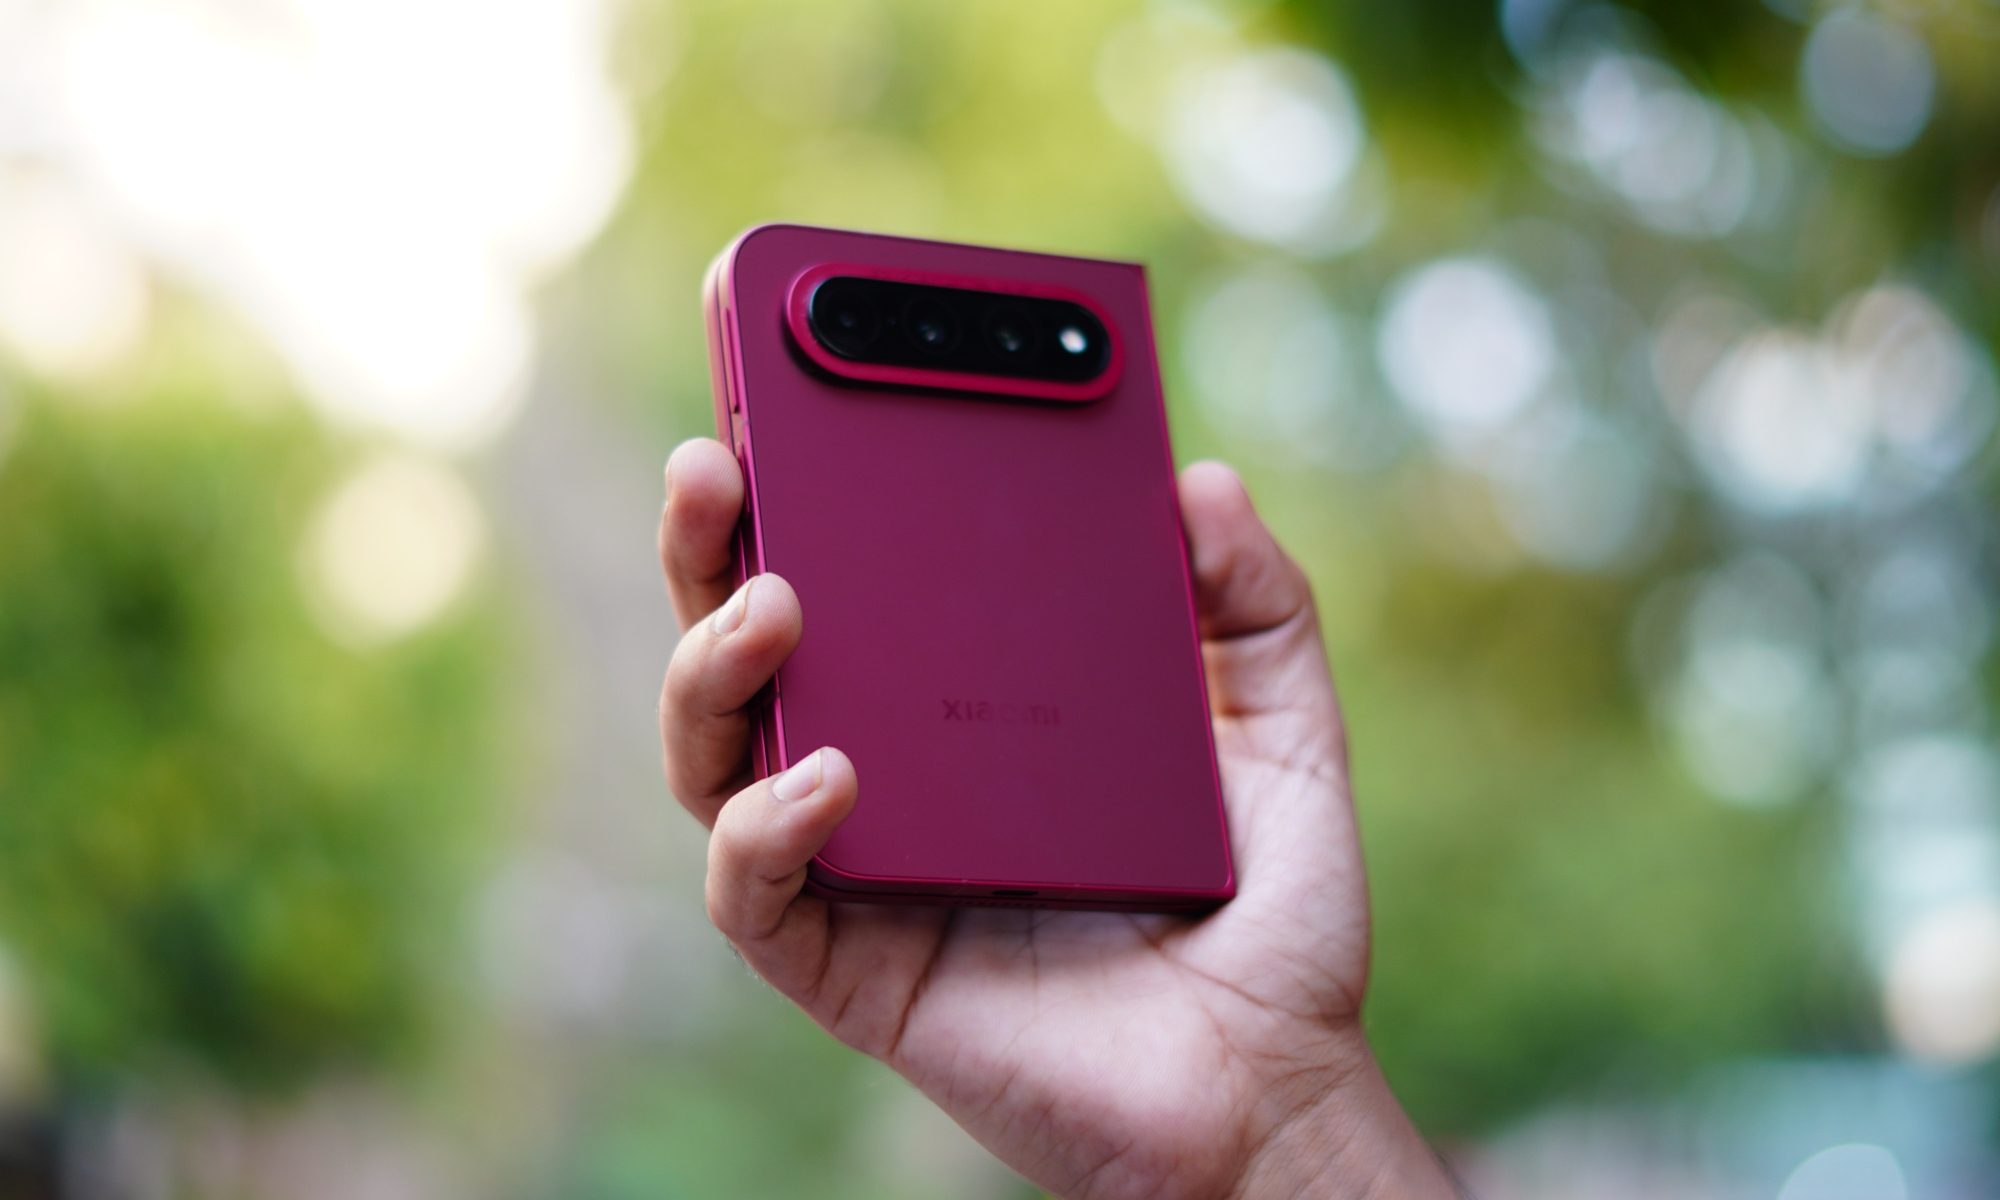
The Xiaomi 18 Fold has a fairly distinctive design. The version I spent time with had a red finish, and I really liked the contrast between the matte glass back and the slightly darker metal frame.
It has that premium feel I expect from a flagship, but without trying too hard to look futuristic. When folded, it feels solid in the hand, and when I opened it, the 5mm-thick body immediately stood out. Xiaomi has managed to keep the unfolded phone remarkably slim, considering everything packed inside it.
At 219 grams, it is obviously not a lightweight phone. But I never got the feeling that the weight was getting in the way. That becomes even more impressive when you remember that Xiaomi has managed to put a 6,000mAh battery inside this thing.
Moinak Pal / Digital trends
The red version I handled also has an interesting contrast between the frame and the rear panel. The metal sections are slightly darker, while the matte glass back is a lighter shade of red. It gives the phone some personality without making it look overly flashy.
Despite being a foldable, the phone does not feel excessively chunky. Xiaomi has also given it IP58/IP59 protection against dust and water, including resistance to high-pressure water jets and immersion in up to 1 metre of water for 30 minutes.
Advertisement
The hinge is also something I paid attention to because that is usually where foldables start feeling fragile. The 18 Fold feels reassuringly solid when opening and closing it.
And then there is the crease.
I could feel a slight indentation down the middle of the folding screen when running my finger across it, but visually, it was surprisingly difficult to notice. During my time with the phone, the crease was barely noticeable most of the time.
The 7.58-inch screen is the real attraction.
The biggest reason to buy the Xiaomi 18 Fold is obviously the inner display, and this is where the phone gets particularly interesting. It has a 7.58-inch LTPO AMOLED panel with a 2364 x 1672-pixel resolution, a 120Hz refresh rate and a claimed peak brightness of 4,000 nits. It also supports HDR10+, Dolby Vision and HDR Vivid.
But the numbers do not tell the whole story. The display has a 2:1 aspect ratio, which means the phone opens into a wide landscape-oriented screen. I found this particularly useful when watching videos. Instead of getting the more portrait-oriented tablet experience seen on some book-style foldables, the Xiaomi 18 Fold naturally gives you a landscape canvas. However, a tip: watching movies would need the good ol pinch and zoom because most of them run on 16:9 aspect ratios. Not the Justice League Zack Snyder Edition, though.
Advertisement
Moinak Pal / Digital trends
The outer display follows the same philosophy. It is a 5.38-inch LTPO AMOLED panel with a 1168 x 1712 resolution, 120Hz refresh rate, and up to 4,000 nits peak brightness. It also gets Xiaomi Dragon Crystal Glass 3 and support for HDR10+, Dolby Vision, and HDR Vivid.
The cover screen is wide enough to use comfortably with one hand. The curved section on the right does eat into a little of the usable screen area, but I did not find it particularly problematic during basic use. Typing also feels more natural than I expected because of the wider shape. No thanks to my fat fingers, though.
XRing O3 keeps everything moving
Powering the Xiaomi 18 Fold is Xiaomi’s XRing O3 chipset, built on a 3nm process. The chip has a 10-core CPU clocked at up to 4.35GHz and is paired with an Arm G2-Ultra NX MC16 GPU.
My unit felt fast during everyday use. Apps opened quickly, animations were smooth, and switching between multiple applications did not feel like something the phone had to think about.
Moinak Pal / Digital trends
The specifications list four storage configurations: 256GB with 12GB RAM, 512GB with 12GB RAM, 512GB with 16GB RAM, and 1TB with 16GB RAM. Storage is UFS 4.1, although there is no microSD card slot.
The phone runs Android 17 with Xiaomi’s HyperOS 4 interface. What I particularly liked was how well the performance matched the screen.
Advertisement
A powerful chip on a foldable is useful, but it becomes much more interesting when you have this much screen real estate to actually take advantage of it. Multitasking feels like something I would genuinely use here rather than something I would try once because the phone allows it.
Xiaomi has not forgotten the cameras
Foldables often make compromises with their cameras, but Xiaomi has gone in the opposite direction with the 18 Fold. No, I am not looking at you, Samsung.
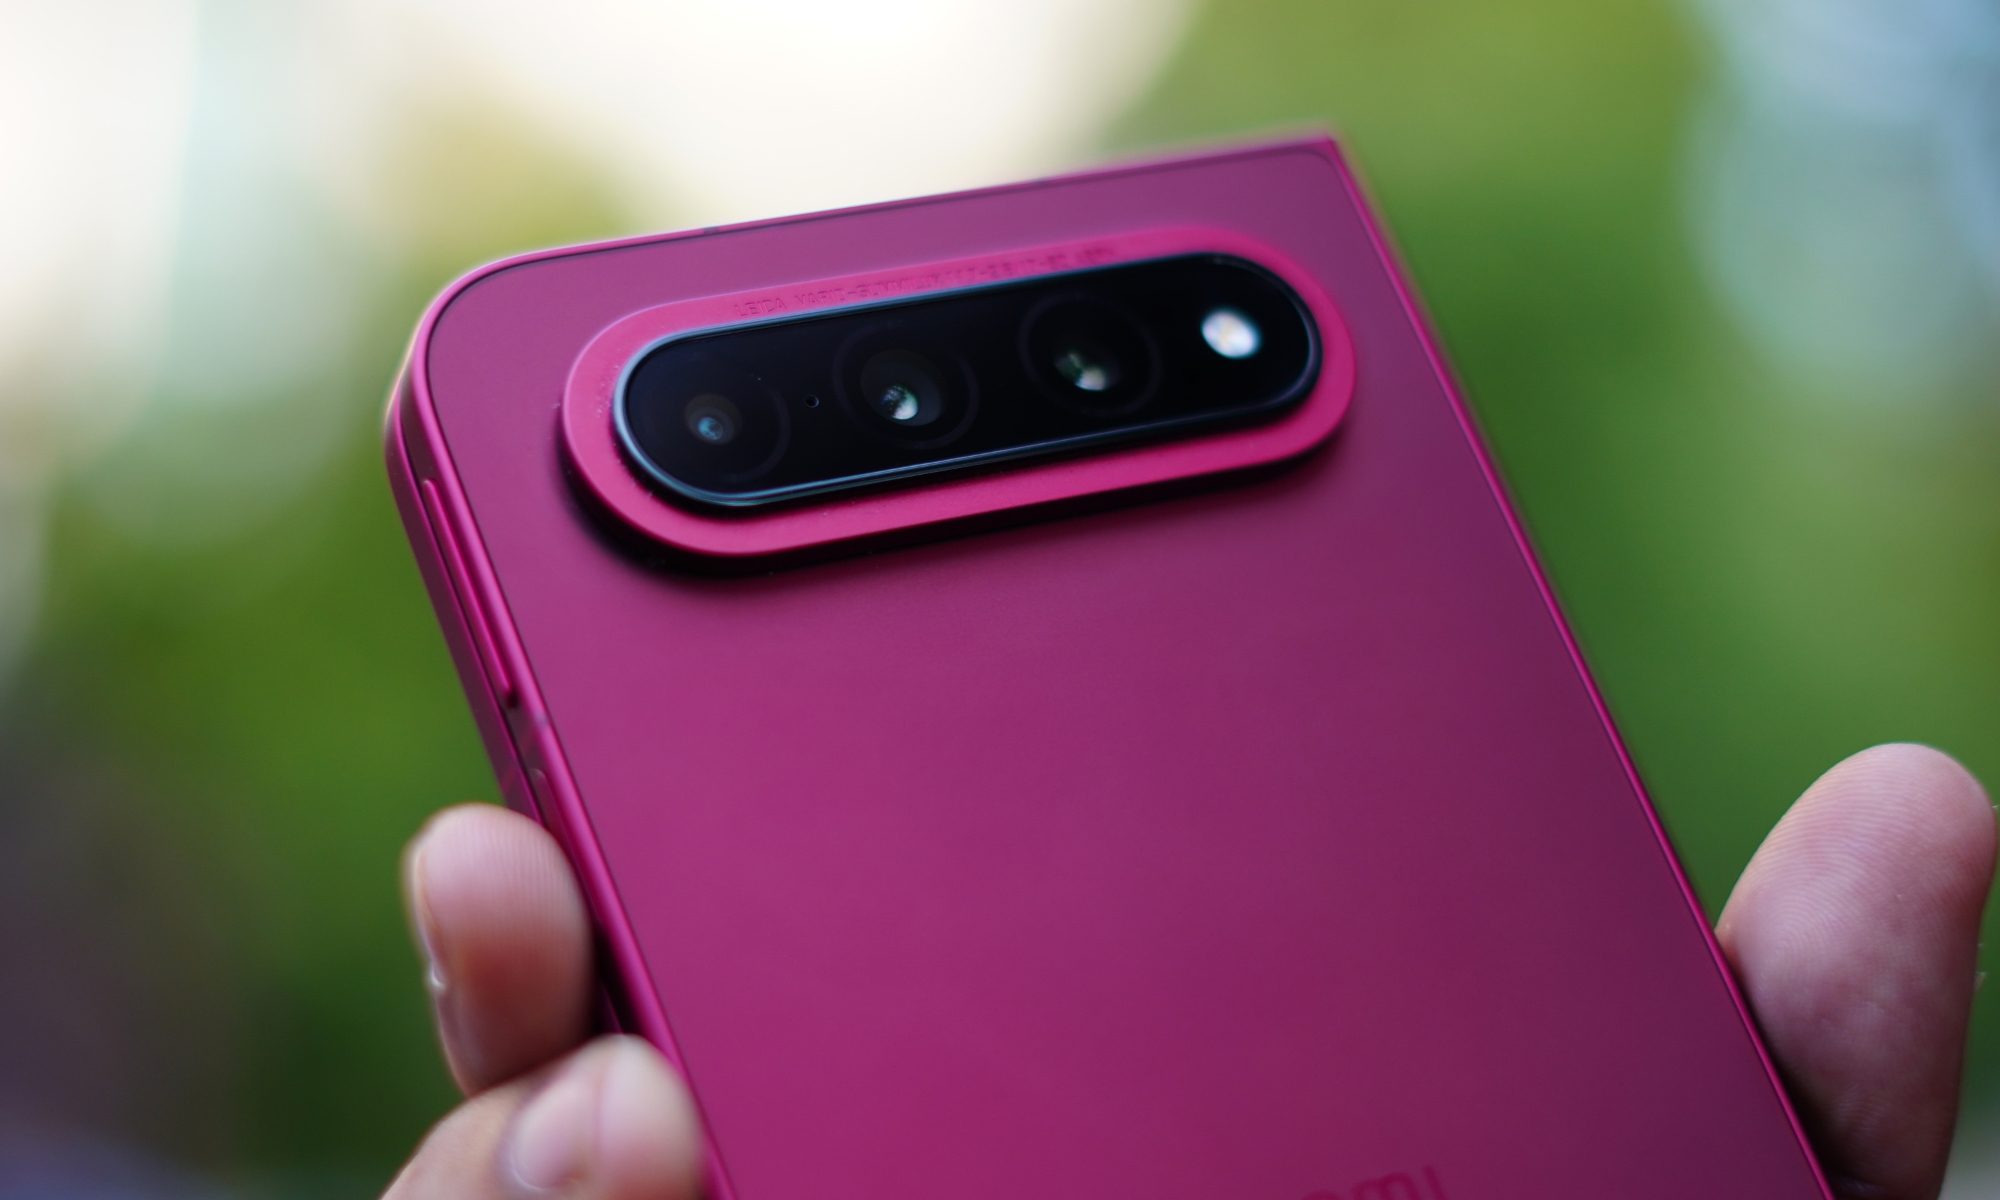
There is a triple-camera setup on the back consisting of a 200-megapixel primary camera with an f/1.7 aperture, a 50-megapixel telephoto camera with 3.5x optical zoom and a 50-megapixel ultrawide camera. The main and telephoto cameras also get optical image stabilisation.
The main camera uses a 1/1.56-inch sensor, while Xiaomi has also included laser autofocus and a colour spectrum sensor. The cameras use Leica lenses and the system supports HDR and panorama modes.
Advertisement
Moinak Pal / Digital trends
Video recording goes up to 8K at 24fps, while 4K recording is available at 30fps and 60fps with Dolby Vision. The phone can also record 1080p video at up to 960fps. There is also a 16-megapixel selfie camera on the inner display and another 16-megapixel camera on the cover screen. Both have an f/2.2 aperture and 21mm equivalent focal length.
That camera setup makes the 18 Fold feel more like a conventional flagship that happens to fold, rather than a foldable that happens to have cameras.
A 6,000mAh battery in a 5mm-thick foldable
The battery is another area where Xiaomi has gone big. The Xiaomi 18 Fold packs a 6,000mAh silicon-carbon battery. It supports 67W wired charging and 50W wireless charging, along with PD3.0 and 50W PPS support. Reverse wired charging is also supported. Again, for comparison, the Samsung S26 Ultra gets a 5000mAh battery. More so, the Fold 8 gets a 4800mAh battery.
Moinak Pal / Digital trends
Considering how thin the phone is when unfolded, fitting a 6,000mAh battery inside is impressive on paper. During my time with the device, the combination of the large battery and efficient 3nm chipset made the 18 Fold feel like a phone designed for heavy daily use rather than something that needs to be treated carefully to make it through the day. I usually find myself picking the 67W brick about one and a half days of usage.
It also gets stereo speakers with Dolby Atmos, while there is no 3.5mm headphone jack. The phone supports Wi-Fi 7, Bluetooth 6.0, and NFC, and Xiaomi has included NavIC alongside GPS, Galileo, GLONASS, BDS, and QZSS for positioning.
My first impression
After spending time with the Xiaomi 18 Fold, what stands out to me is that Xiaomi seems to have understood one of the biggest problems with current foldables: simply making the inner screen bigger does not automatically make it more useful.
Advertisement
The 18 Fold’s 2:1 inner display changes that experience. When I opened it, I immediately got a wide screen that felt natural for video playback, multitasking, and general tablet-style use. The 120Hz AMOLED panel, 4,000-nit peak brightness, and Dolby Vision support only add to that experience.
Moinak Pal / Digital trends
At the same time, it remains reasonably manageable when folded. The 219-gram weight is not particularly light for a conventional phone, but for a device with a 7.58-inch foldable screen and 6,000mAh battery, it does not feel unreasonable.
The cameras are also unusually serious for a foldable, with a 200MP main sensor, 50MP telephoto and 50MP ultrawide. The XRing O3 chip, up to 16GB RAM and UFS 4.1 storage complete what is essentially a flagship specification sheet.
There is, however, one big catch. A sad one.
The Xiaomi 18 Fold is currently a China-exclusive phone, which means buyers outside China may have to admire this one from a distance for now. But purely as a piece of hardware, my first impression is that Xiaomi built a passport foldable for the world but decided to make it available only in its home market, and that is a major regret.
The Xiaomi 18 Fold feels thin without feeling delicate, big without feeling unwieldy, and powerful without making a big show of it. Most importantly, the unusual wide format actually changes how I use the phone.
Advertisement
And after spending some time with it, I think that is exactly what a good foldable should do. It should not just give you a bigger screen. It should give you a reason to use that bigger screen.
When it comes to getting your dishes clean, you have several reliable dishwasher brands to choose from that come in a variety of designs and types. Among available options, built-in dishwashers are a popular choice because they blend seamlessly with the space around them. They are also more visually appealing than a portable or countertop dishwasher. On the noise front, built-in dishwashers operate more quietly. Additionally, since they fit into an opening between cabinets, there is even less noise. But this doesn’t mean that built-in dishwashers don’t have any drawbacks. Actually, there are quite a few, and some can be a deal-breaker for many buyers.
One of the major drawbacks of built-in dishwashers is that they are typically more expensive, both in terms of upfront and installation costs. And the installation is trickier too, though it’s a one-time thing. Also, in smaller kitchens, they may take up valuable space, and because the setup is permanent, you can’t adjust the kitchen’s layout in the future without taking the dishwasher into account. More importantly, built-in dishwashers may not be suitable for renters because relocating them can be a challenge. Of course, none of this means that you shouldn’t go with a built-in dishwasher. The design has several distinct benefits, particularly for those who want a more permanent setup. But it’s still important that you understand the downsides before making a commitment.
Advertisement
Higher upfront costs
hedgehog94/Shutterstock
Among the many drawbacks of built-in dishwashers, the higher upfront costs are the most significant for the average buyer. You are essentially paying more for an appliance when a cheaper alternative may still meet your needs. Built-in and freestanding dishwashers operate pretty much the same way and use the same basic process to wash your dishes. The design is one of the main differences, and it can also increase the cost.
With built-in dishwashers, you have to find a size that perfectly fits the available cabinet space, which means you have fewer options to choose from compared to portable dishwashers. Alternatively, you can design the kitchen’s layout to align with the dishwasher, but that too is an additional expense. The cost will be even higher if a lot of modifications need to be made. Keep in mind that you are spending this extra money on a neater design and quieter operation. So, if that’s something you prioritize, it makes sense to spend a little extra upfront, given that dishwashers typically have a lifespan of 10 years.
Advertisement
Requires precise installation
Virrage Images/Shutterstock
Installing a built-in dishwasher isn’t as simple as sliding the appliance into the available space in your kitchen cabinet. There’s a lot more to do, and that’s why you will generally need a professional to install it. This increases the cost compared to a freestanding dishwasher. You will need a dedicated water supply for the inlet, a drain to discharge wastewater, and an electrical connection to power the dishwasher.
If these are not close by, this may further complicate the installation and increase the overall cost. There’s also a benefit to this. With a permanent installation, you can use the sink even when the dishwasher is running. With portable and countertop dishwasher models that connect directly to the faucet, this isn’t possible while they’re running.
The installation itself needs to be precise, with enough clearance for the dishwasher’s door to open and close smoothly. At the same time, the dishwasher should fit perfectly within the opening. You are paying more money for a neater appearance, so you wouldn’t want the result to look untidy or out of place.
Advertisement
Takes up permanent space
Almaphoto/Getty Images
One of the biggest advantages of integrated and built-in dishwashers also turns out to be one of their most significant drawbacks: permanent installation. Despite the aesthetic appeal and added convenience, you can’t easily move them around the house or even within the kitchen itself. Once the dishwasher is installed, it stays put. That’s the way it’s designed: to integrate with your kitchen. This can be a problem since it’s not a tiny kitchen appliance that can be moved around at your convenience. Losing out on a cabinet-sized space can be a big sacrifice in smaller kitchens. With the dishwasher in place, you’ll have less storage space.
Even if you do manage to find another space for the dishwasher, you can’t ignore the existing connections for water, drainage, and electricity. They may not align with your plans for the old space. So, before you buy a built-in dishwasher, make sure to plan the layout, identify any possible problems, and only then proceed with the installation. Once the dishwasher is up and running, moving it around won’t be as easy.
Advertisement
Similarly, if you frequently switch apartments or will relocate in the near future, a built-in dishwasher may not be the best choice. It’s a permanent setup, and moving it from one place to another can be a hassle. Apart from that, the new home must have a suitably sized space for your dishwasher model. Otherwise, you will have to spend money on modifications.
Advertisement
More difficult to replace
Andreypopov/Getty Images
A dishwasher is one of those household appliances that can last for years, often around 10 years or sometimes even more. So, when installing one, it’s natural to overlook how the replacement process will work out. But that’s something worth considering, especially with integrated and built-in dishwashers. When the time comes for you to shop for a new one, you will have fewer options, as the replacement needs to fit the existing space and meet the installation requirements. You can always make the necessary adjustments later, but, as you might expect, this increases the overall cost.
You should consider these drawbacks before making the final decision. This doesn’t mean you shouldn’t choose a built-in dishwasher, but it’s important to understand the downsides and the problems you might face in the future. This will help you better plan your kitchen’s layout, avoid common mistakes people make when buying and installing appliances, and pick a dishwasher model that meets your requirements.






















































You must be logged in to post a comment Login