

Adobe Illustrator began development in 1985, with its initial release coming out in 1987. 39 years in an eternity in computing terms, and it’s amazing this venerable piece of software is still the ruling king when it comes to design, illustrations and vector-based work.
We’ve long championed it as one of the best graphic design software apps around – but now I’m taking a look at some of the new features that are being introduced with the latest version, Adobe Illustrator 2026 (I explored version 30.3).
Adobe Illustrator: Pricing & plans
- Subscription-only but the price befits its status as the king of the hill
- Cheaper alternatives available like Canva’s Affinity
- But they lack all the features and integration with other Adobe software
Adobe Illustrator is a professional app, and as such, is part of Adobe’s Creative Cloud Pro subscription. As has been the case for years now, you can’t purchase the software, you can only rent it.
Creative Cloud Pro includes over twenty high end software packages, including Photoshop, InDesign, and of course, Illustrator, and will cost you $35 a month for the first three months on an annual subscription (after that deal, the price reverts to $70 a month for the remainder of your agreement).
If that’s too much for you, you can subscribe to Illustrator on its own for $23 a month. Students and educational institutions can also get it or the entire suite at a steep discount.
Be aware though that every time you use generative AI, you’ll be spending credits. You get a set number every month with your plan, but also have the option of purchasing more separately, either as a one-off, or as part of another subscription.
OK, time to take a look at some of the new features that caught my eye in Adobe Illustrator’s new release.
Adobe Illustrator: Features

- Loads of new features added
- I especially like those focused on interface improvements like color artboards
- Great tools for refining your designs including snapping to tangents
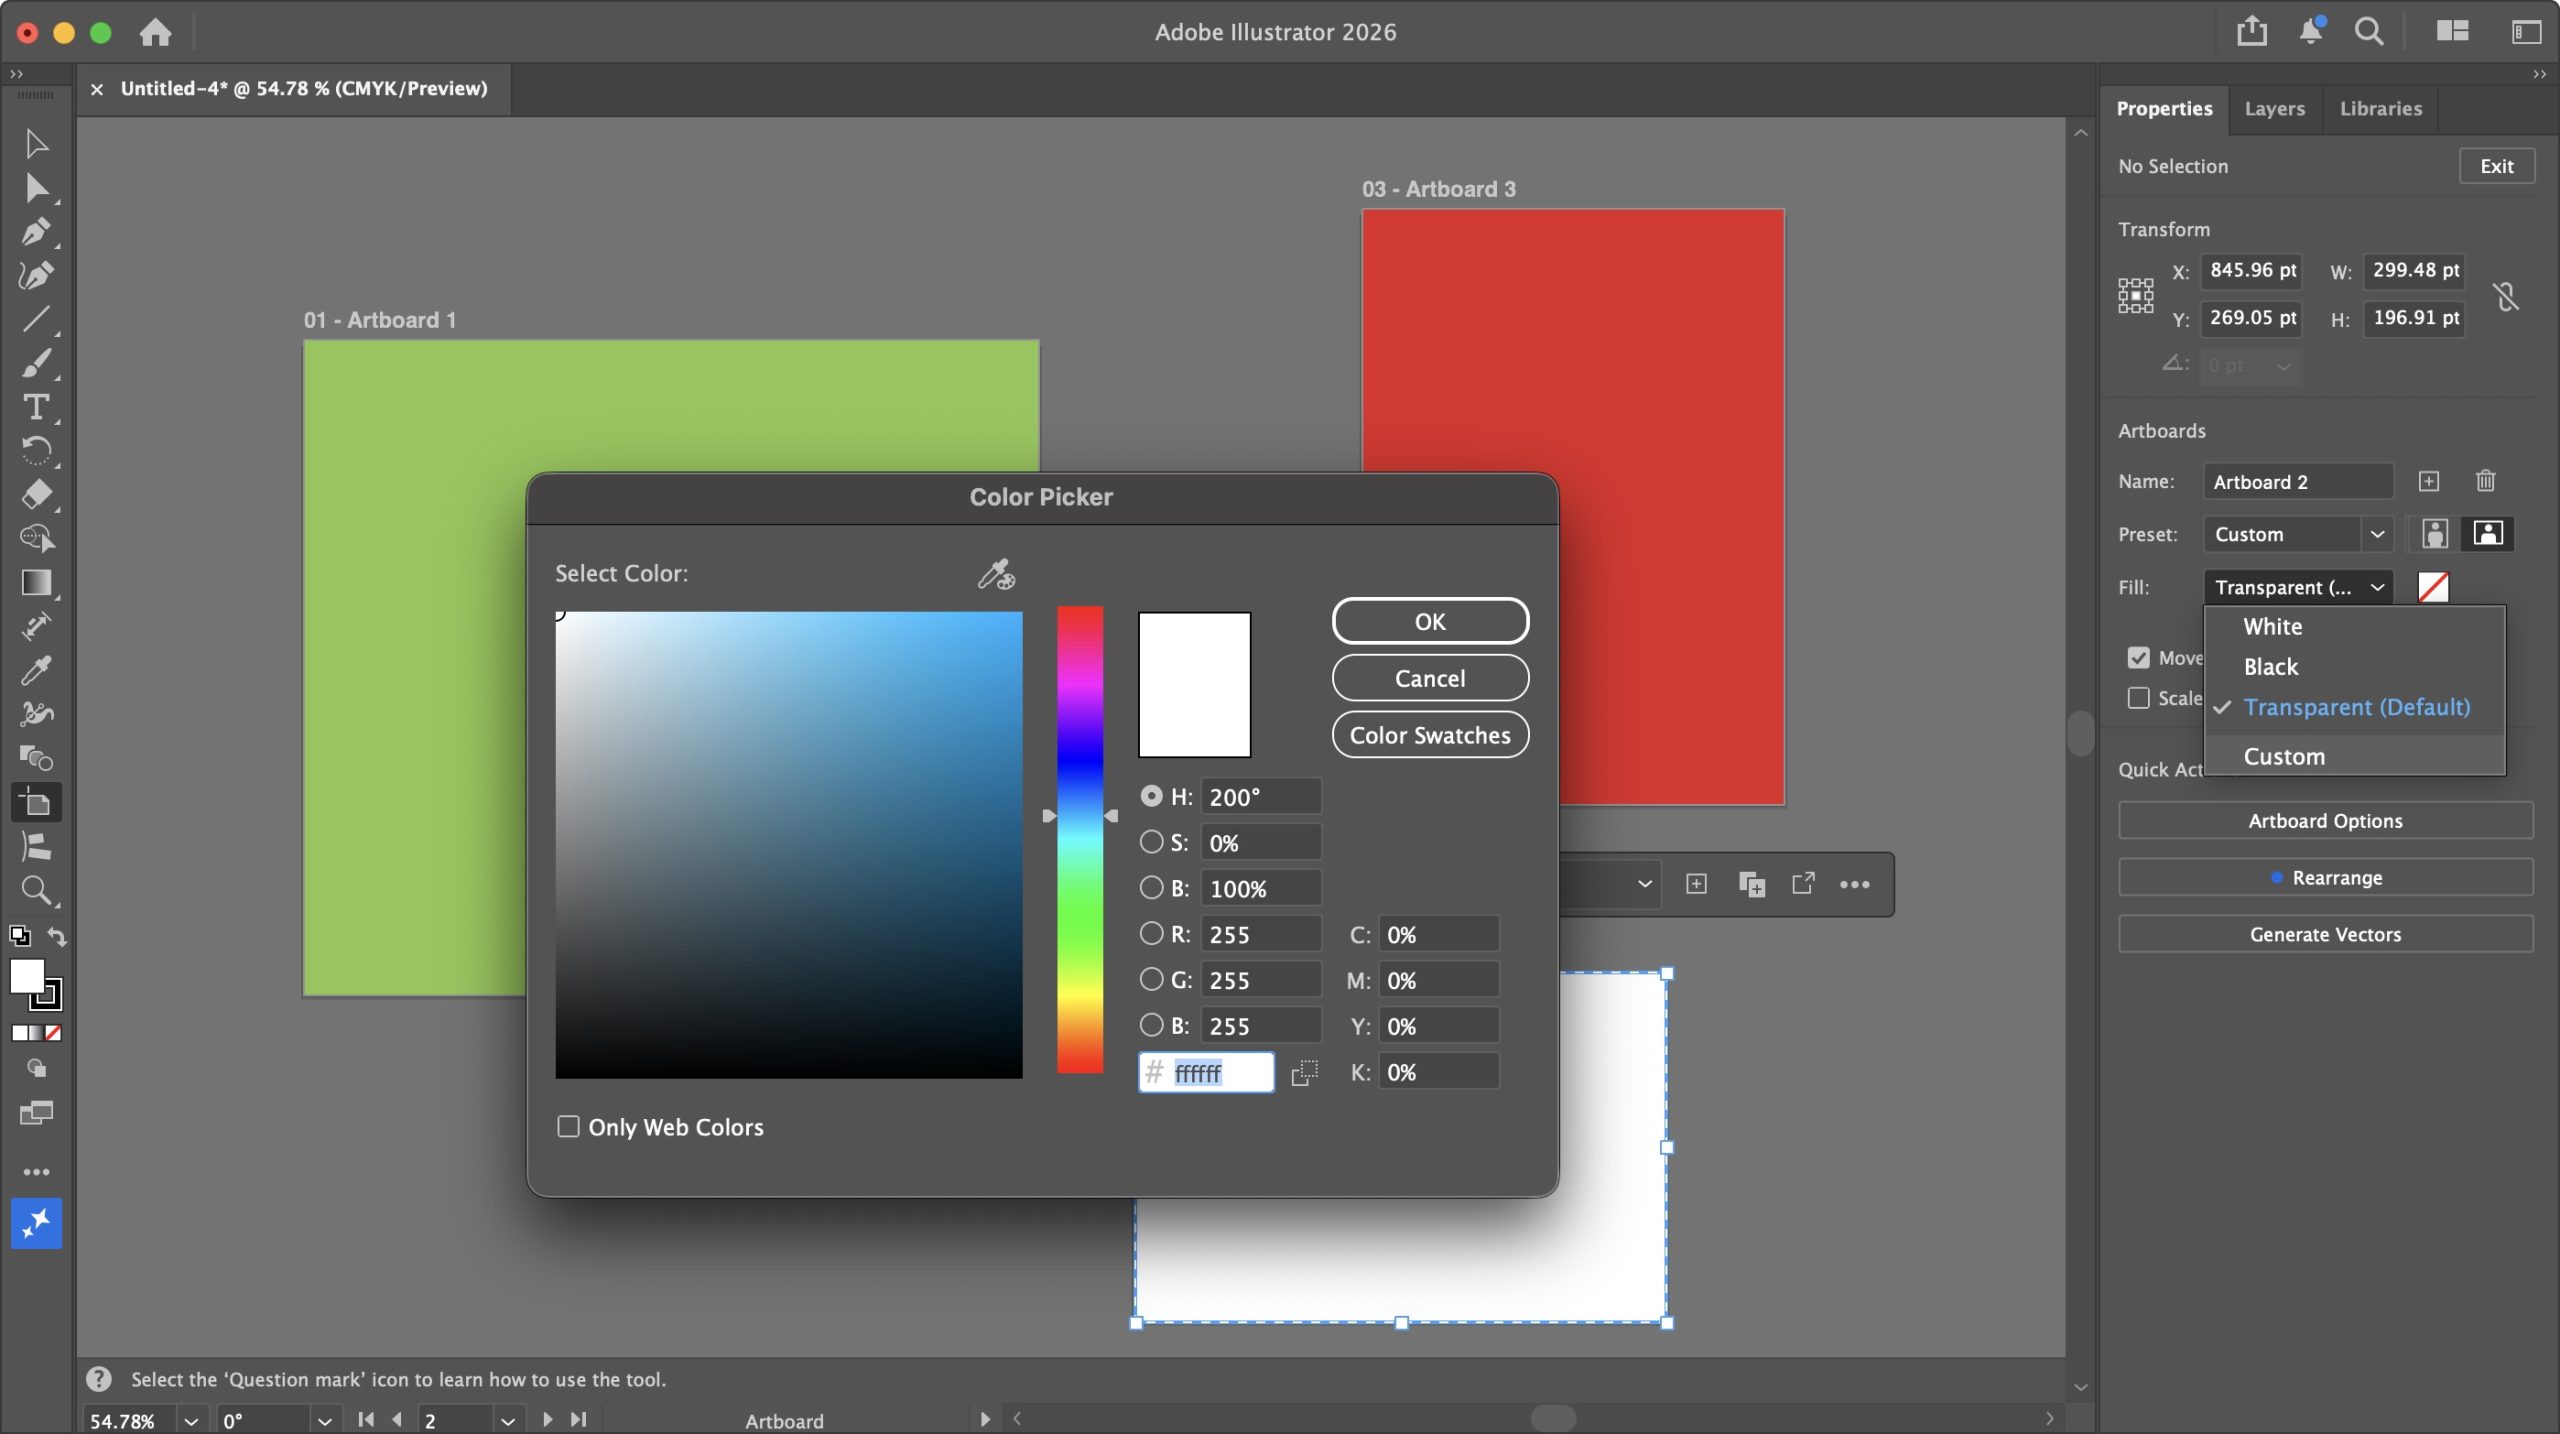
Let’s start with some simple improvements to do with Artboards. Up to now, if you needed them to have colored backgrounds, you’d have to create a rectangle, apply a color to it and use that as your backdrop, which, although doable, was cumbersome.
Now, finally, you can apply different colors to each of your Artboards, right from the Properties panel, through its Fill dropdown menu. By default, it’s set to transparent, but you can also choose either black or white, and if that’s not enough, selecting ‘Custom’ gains you access to a virtually unlimited gamut of colors.
Right-clicking on the canvas offers some handy options to manage your document’s artboards. You’re able to rename, duplicate, or delete them, or even create new ones with ease. There’s also the option to lock a selected artboard, but sadly no option to unlock it – to do that you need to go to Window > Artboards, and click on its lock icon from the popup window. So, I guess ‘cumbersome’ hasn’t completely gone away.

But it’s still an improvement. And speaking of improvements, the classic Eyedropper tool has been enhanced, and I found it works more reliably than before. A single click, for instance, will now properly copy the color and stroke of a selected object (you can extract more of course, but that depends on what you selected in the Eyedropper options).
There’s also shift-clicking. Press and hold the shift key, and you’ll get a large circle around the eyedropper cursor. The bottom half represents the current color, while the top half is the color it’ll change to once you click.
A color picker that works as advertised and has added functionality, I can work with that.

This leads us to some subtle additions you probably never knew you needed, like how the end of a straight line now snaps to a circle’s tangent, or how one line snaps perpendicularly to another. Those are on by default and will make precise designs much easier.
And speaking of much easier, how about gradients with fewer banding – or no banding at all, even? Depending on how close you get to a gradient, you’ll start to notice lines along it as the one color changes to another. This latest version of Illustrator introduces two options to dissipate those lines, creating a much smoother gradient.

The first one is via a new menu in the gradient Properties called “Method”. By default, it’s set to ‘Classic’, but change it to ‘Perceptual’, and it should look more like it would in real life – at least that’s the intention. The change can be quite subtle depending on the complexity of your gradient, and in my experience, it ranged from no discernible change, to a pleasing improvement.
The second option is a ‘Dither’ tick box. This one works in either ‘Method’, and when toggled, it adds a mesh of subtle imperfections to the gradient to conceal any banding, and I found the results to be very effective.
Adobe Illustrator: AI tools

- Introduces impressive AI-based tools to expand your creation’s horizons
But why do all the hard work when you can let a complex algorithm do it all for you, right? Right? Well… not quite, but Adobe Illustrator now comes with some interesting “AI” tools to broaden your digital creations, like Generative Expand.
Triggering the tool will give you handles which you then drag beyond the confines of your original creation. This will create pink borders, making it clear where Illustrator needs to apply itself. When you’re ready (and you have enough credits), click on ‘Generate’ and the machine will get to work.
It should only take a few seconds but I found the end results, like Generative Expand on Photoshop, to be impressive – and I don’t particularly like AI! The results weren’t perfect, mind, but it should be much easier to manually refine the output as opposed to creating all that expanded area yourself.

Another complex algorithm feature I was impressed by is Turntable. It’s designed to turn a 2D vector graphic into a 3D one. Your results may vary, and the tool itself warns you if it thinks the image you’ve selected might not yield good results. That warning may, or may not be correct – sometimes the only way to know for sure is to spend your credits and try it out.
The objects I experimented with, varied in their success. The globe was… interesting, but then again Illustrator did warn me it might not work as expected, so kudos for the warning. The butterfly was mostly flawless, and the horse’s head (a sketch of a head, not a Godfather triggering nightmare) was perfect.
So yes, your mileage may vary, but when it works great, it’s eye opening (but not in A Clockwork Orange way). Once done, you’re able to rotate your now-3D object 360 degrees using a slider. To the right of it are Up and Down arrows; these allow you to see your design from above or below by a maximum of 30 degrees either way.
All in all, Illustrator keeps getting refined with each update. The improvements are most welcome, and the new features will certainly please a lot of artists. There’s something here for everyone which is always a positive thing.
Should I buy?

Buy it if…
You need a powerful vector-based illustration system with a steady stream of improvements and new features to make the expensive subscription worthwhile
Don’t buy it if…
You’re not a fan of the increasing incursion of AI into the software, or despite all its features, the asking price is just too much for you.
We’ve also tested out the best Adobe InDesign alternatives and the best alternatives to Adobe Photoshop


You must be logged in to post a comment Login