
Join Mikko Hyppönen and security leaders from the NFL, CHANEL, and Atlassian for a two-hour digital summit on what AI-speed attacks change, what defenders should stop doing, and how to validate, decide, fix, and re-validate at machine speed.
Tech
US soldier gets 70 months in prison for extorting 10 tech, telecom firms



A former U.S. Army soldier has been sentenced to 70 months in prison for hacking and extorting at least 10 U.S. technology and telecommunications companies between April 2023 and December 2024.
21-year-old Cameron John Wagenius (also known online as ‘kiberphant0m’ and ‘cyb3rph4nt0m’ ) was arrested in Texas in December 2024.
He pleaded guilty in February 2025 to hacking AT&T and Verizon after being charged on two counts of unlawfully transferring confidential phone records, and in July 2025 to multiple counts of aggravated identity theft, conspiracy to commit wire fraud, and extortion related to computer fraud.
According to court documents, while on active duty with the U.S. Army, Wagenius and his accomplices stole login credentials for the victim’s networks using the SSH Brute hacking tool he helped develop. They also used Telegram to transfer stolen credentials and plan their attacks.
“After data was stolen, Wagenius and his conspirators extorted the victim organizations both privately and in public forums. The extortion attempts included threats to post the stolen data on cybercrime forums such as BreachForums and XSS.is,” the Justice Department said.
“In other instances, conspirators offered to sell stolen data for thousands of dollars via posts on these forums. They successfully sold at least some of this stolen data and also used stolen data to perpetuate other frauds, including SIM-swapping. In total, Wagenius and his co-conspirators attempted to extort at least $1 million from victim data owners.”
In addition to the 70-month prison sentence, Wagenius was ordered to pay $294,978 in restitution for hacking into telecom companies’ databases, accessing sensitive customer records, and extorting the companies under threat of releasing stolen data unless they paid ransoms.
Two of his accomplices, Connor Riley Moucka (a.ka. “Waifu” and “Judische”) and John Erin Binns (aka “irdev” and “j_irdev1337”), were accused in November 2024 of breaching and stealing terabytes of data from more than 165 organizations using the services of Snowflake cloud storage company and demanding ransom payments to delete the stolen information and not leak it online.
Moucka was arrested on October 30, 2024, in Canada at the request of the United States and pleaded guilty to his role in the Snowflake hacking campaign in August 2026.
Data breaches linked to Snowflake attacks affected hundreds of millions of people, customers of AT&T, Ticketmaster, Santander, Los Angeles Unified, QuoteWizard/LendingTree, Pure Storage, Advance Auto Parts, and Neiman Marcus.
After these incidents led to massive data breaches, Snowflake announced it would enforce multi-factor authentication (MFA) and require customers to choose passwords at least 14 characters long.


Continue Reading

Your phone may be all you need until battery life, navigation or rough conditions start getting in the way.

Most of what a casual cyclist wants from a bike computer can already be accomplished with a smartphone. Install it in a secure handlebar mount and it will give you turn-by-turn directions, log a ride and display your speed, distance and elapsed time. If you’re just commuting or take the occasional weekend ride, it’s hard to convince yourself that you need to buy another screen for your handlebars.
A fitness smartwatch makes that decision more difficult. An Apple Watch can track heart rate and cycling activity, connect to Bluetooth speed, cadence and power sensors, and display the workout on an iPhone through a full-screen Live Activity. That means a bike computer must address a problem you actually have. For a lot of riders, it won’t do that.
Your phone and watch may already be enough

The phone has an obvious cost advantage since you already paid for it. A good mount is much cheaper than a dedicated cycling computer and apps can be used for navigation and GPS ride recording.
Google Maps provides bicycle directions in areas where it supports them, but there’s one annoying thing if you’re going somewhere where reception is not great: cycling directions don’t work offline, even if you’ve downloaded the map of the area. There are apps like Komoot and Ride with GPS that can do offline cycling navigation, but some features may require a subscription or map purchase.
An old GPS-equipped phone can also serve as a good bike computer. Fill it up with routes via Wi-Fi and leave your primary phone in a safer location, since GPS recording and downloaded navigation do not require an active SIM.
A smartwatch completes the picture by collecting heart rate and other fitness metrics during exercise, with the phone managing the map. Even the battery-life argument becomes less of a factor on the occasional long ride when you throw a small power bank in a bag.
There are still compromises. Your daily driver is left out on the ride to deal with rain, direct sunlight, crashes and whatever else the road or trail has in store. It’s also consuming battery that you might need for calls or emergencies. And if you’re uploading regular routes to a fitness service, check its privacy settings before casually publishing a very accurate map of where you leave home every morning.
When the compromises become routine, it makes sense to use a bike computer

Dedicated hardware begins to outpace the phone on battery life. Today’s bike computers can run GPS and navigation while keeping the display visible for many hours without touching your phone’s battery. That matters more to endurance riders, bikepackers and anyone regularly spending half a day in the saddle.
Purpose-built hardware also earns points when the weather gets ugly. Bike computers are built around secure mounting and water resistance, and many include controls that can be operated even in rain, mud or gloves. For serious riders, they can be paired with power meters, heart-rate straps, cadence sensors, rear-facing radar and more via Bluetooth or ANT+.
That doesn’t mean that the smartphone is second-rate. Its larger screen is sometimes better for checking a map, locating a restaurant or altering plans mid-ride. Some bike computer safety features also still require a paired phone for data, so don’t assume that you’ll be leaving your handset at home when you get a bike computer.
The better question is whether these annoyances happen often enough to justify another device. If a phone mount, smartwatch and occasional power bank get you through your rides without much fuss, keep your money. Once preserving phone battery, all-day navigation, wet-weather controls or dedicated sensor support stop being hypothetical problems, a bike computer starts earning its place on the handlebars.


Aoibheann Daly has been recognised by the European Commission for her project and will go on to participate at Regeneron ISEF in 2027.
Irish student and Stripe Young Scientist and Technology Exhibition (YSTE) winner Aoibheann Daly has won a core prize at the European Union Contest for Young Scientists 2026 (EUCYS).
The ceremony in Kiel, Germany, which was held from 22 to 27 September, saw more than 140 young scientists from 36 European and international guest teams showcase their research across a range of scientific disciplines.
Daly received the Special Jury Award for Youth, which is awarded directly by the European Commission and according to EUCYS, is given in recognition of the delivery of the best scientific projects presented during the contest.
Her project, GlioScope: Multi-task Deep Learning and Causal AI for Glioma and Glioblastoma Profiling, utilises AI intelligence to enable doctors to diagnose and treat brain cancer. The project aims to improve patient care, deliver significant healthcare benefits and save valuable time.
Daly will go on to participate as a finalist at Regeneron ISEF 2027 in Los Angeles, California.
Commenting on the win, Daly said, “Receiving a core prize at EUCYS and being selected as a finalist for Regeneron ISEF 2027 is an incredible honour. To represent Ireland on the European stage was already a privilege, and I’m hugely grateful to the Stripe Young Scientist & Technology Exhibition, my teachers, family and everyone who supported me along the way.”
Alison Ahern, the head of Stripe Young Scientist and Education Partnerships, added, “We are incredibly proud to see Aoibheann receive a core prize at EUCYS 2026, and to be selected to participate as a finalist at Regeneron ISEF 2027 in Los Angeles, California.
“From the moment she presented her project at the Stripe Young Scientist & Technology Exhibition, it was clear that her work combined scientific rigour, innovation and real-world impact. To see that recognised on the European stage is a proud moment for Irish science, and reflects the extraordinary standard of young scientific talent in Ireland which we at Stripe are honoured to play a small part in.”
Don’t miss out on the knowledge you need to succeed. Sign up for the Daily Brief, Silicon Republic’s digest of need-to-know sci-tech news.

When you go off-roading, you expect things to get a little messy — mud on the fenders, some chip damage on the rims, etc. But you may be surprised when you see your tires are blue underneath the mud. For the most part, the blue color you’re seeing is usually a reaction after your tires are exposed to certain chemicals, heat, or mud.
Tires contain a wide range of chemicals in their composition, including benzothiazoles, chlorinated paraffins, melamines, and others that may be considered toxic to the environment. If these chemicals migrate to the surface of the tire, there could be a reaction when exposed to UV rays, heat, certain cleaning products, or mud particles. Some mud can have abrasive particles that wear down a tire, exposing the blue tone underneath and reacting with the chemicals inside the tire. So if you see blue on your tires after an off-roading adventure, it doesn’t necessarily mean your vehicle is damaged, but it could stain the tires if you don’t try to wash it off.
How to maintain off-roading tires (to avoid blue staining)

If you want to avoid blue stains on your sidewalls, you need to properly maintain your off-roading tires, which requires a few extra measures. First, you should reduce the air pressure before tackling a trail to improve traction on challenging surfaces and obstacles. This also reduces wear and tear on the tread since you won’t be slipping as often. You will also want to check your shocks, since off-roading relies so heavily on suspension. Shocks are meant to absorb the impact of your tires on the ground — your tires will take the brunt of these impact if your shocks aren’t working as intended. This can cause uneven wear as you go over bumpier and more uneven surfaces.
While most drivers know to rotate their tires, off-roaders also have to consider their spare — this ensures that all five tires have equal wear and gives each one a break. Those with a full-size spare will have to learn the clockwise five-tire rotation pattern to ensure each one spends time as a spare. Tire alignment is also important if you want even wear, but you may need to go to someone who better understands lifted trucks and SUVs.
After you go off-roading, you’ll want to clean off your tires to remove debris and avoid the possible blue staining. Rinse them, then use a stiff tire brush to scrub specialized tire cleaner on the tread and a softer brush for the sidewalls. Rinse again, then dry the tire with a clean towel. You’ll want to avoid cleaners with harsher chemicals in case it interacts with the tire chemicals that have risen to the surface. You may even want to consider tire sealant. Lastly, store your tires away from the heat and sun, and consider tire covers to slow down any cracking in the rubber.


We may receive a commission on purchases made from links.
The Bosch brand is one with many different areas of focus. It’s a key brand in the household appliance industry, and of course it also makes a wide array of hand and power tools. You’ll find numerous Bosch-badged tools and accessories in the hands of professionals and homeowners looking for good durability and favorable pricing. The company is among the best German tool brands on the market, offering tools and tool service in around 150 countries.
With so many pieces of gear contained within Bosch’s catalog, it’s only natural that many of them would be niche finds or specialized variants of standard tools, designed to handle hyper-specific tasks that users might encounter. Everything from unique drilling tools to high-powered cutting equipment designed to go above and beyond the casual user’s needs can be found. These tools represent some of the most specialized equipment Bosch has to offer, meant to support the most niche tasks.
Expert 18V 6-Inch Random Orbit Sander
The orbital sander is a mainstay in any toolkit, but not every one is built with the same capabilities. Bosch’s Expert 18V 6-Inch Random Orbit Sander is larger than is typical for this kind of tool. It’s priced at $389 at Acme Tools and features an adjustable speed rating between 5,000 and 10,000 RPM. The tool’s ³⁄₁₆-inch orbital motion offers rapid material removal, rated for up to 50% more than a standard 18V Bosch model. It also features a dust canister that includes a HEPA filter for a more effective collection function and a cleaner overall workspace.
The tool is designed to provide the sort of premium experience that professional woodworkers and others who spend exorbitant amounts of time tackling finishing touches on building jobs need in their tools. It operates with a unique body shape, creating a more ergonomic handle structure for a comfortable grip over longer periods of use. It’s also part of the AmpShare system, which means it’s designed to operate interchangeably with other brands’ 18V catalogs.
18V Press Tool Kit
The 18V Press Tool Kit features ½, ¾, and 1-inch jaws. It comes boxed up in a carrying case and also features a charger and 4.0Ah. The kit’s also quite expensive, which immediately relegates it to the professional sphere, selling for $2,719 at Acme Tools (although there is a promotion as of mid-September with a 10% discount). This is key tool for plumbers, as it makes secure pipe connections without using solder or a torch. The clamping force it produces is also suitable for use on pipes with water present, as well, making it a versatile and fast acting plumbing option.
This press tool features a rotatable head, making it able to access pipe segments in areas that are difficult to reach. It features a 3-second cycle time, so if you’ve got a lot of plumbing installation work to do, it shouldn’t take an undue amount of time. There’s also an LED work light built into the tool and it works with both Bosch and Rothenberger (another quality German tool brand specializing in these kinds of tools) press jaws.
18V 14-Inch Dry Cut Saw
Cutting demanding material like tile, rebar, or brick frequently falls outside capabilities of the sorts of power saws used by home improvers and DIYers. As such, tools like the 18V 14-Inch Dry Cut Saw from Bosch are usually found on job sites and other working environments that fall into more niche categories. The tool is priced at $755 on Amazon and offers mobile cutting to support all manner of high intensity needs. It also features a laser line that helps line up cuts with exacting precision. There’s even a K-adapter integrated into the tool for holding round material up to 4½ inches in diameter, providing coverage for both square and round stock.
This tool is specifically designed for cutting metal. It can handle angle iron, metal pipe, banded rebar, and banded drywall metal studs, as well as other metal stock. It features miter cutting capabilities, turning up to 45 degrees to the left. This is another Bosch tool that operates in the AmpShare system, giving it even more versatility. As the name implies, this tool cuts with a dry blade rather than adding a stream of water into the mix.
18V 5-Inch Concrete Surface Grinder
Grinding concrete surfaces is by all accounts a niche task that only professional tool users tend to perform. It’s something you’d do after pouring a concrete pad, for instance. That’s not to say DIYers won’t ever require the use of this kind of tool, but that the task falls outside the purview of most casual tool users. Bosch offers the 18V 5-Inch Concrete Surface Grinder, retailing for $735 at Acme Tools (with a free, 8Ah high power battery added as a promotion). It’s a battery operated solution, and in its kit variant the unit comes with a 5.0Ah battery and charger. The setup also includes a diamond cup wheel and two bristle brushes.
The tool’s power-to-weight ratio is best in class, delivering the equivalent of 13 amps of corded power to support fast material removal. The top handle rotates to accommodate a range of gripping requirements and it utilizes a guard and shroud system that is adjustable and helps to catch debris for a cleaner work environment, working well with other personal protective equipment you’ll use to remain in compliance with OSHA’s five basic safety rules. The tool helps smooth out surfaces after a pour or handle bulk removal during surface preparation before a different kind of installation. It offers three speed settings ranging from 2,600 to 8,500 RPM for a range of applications in various environments and across use cases.
18V Brushless Biscuit Joiner
Cutting recesses in the sides of boards is rarely necessary for rough timber work. If you’re finishing a basement, building a half wall to break up space in your home, or installing shelves in a closet, this isn’t a tool that will come into the picture. However, fine woodworking often requires pieces of wood together, end to end or side to side. Among the important tools that woodworkers rely on, the 18V Brushless Biscuit Joiner is certainly a niche piece of equipment, but it’s vital for some woodworking projects.
Priced at $315 (Acme Tools) as a bare tool, this piece of equipment cuts recessed spaces in the sides of the boards so that you can insert biscuits into them for a larger glueable surface when mating up boards. Biscuits are small, often oval-disc shaped pieces of wood, designed sit within the slots cut by this tool to create a bit of additional rigidity and a notable increase in interior surface area. They will go unnoticed in the finished product, and they can make a world of difference in how strong the glue joint ultimately becomes. This tool features a depth selection knob that allows you to adjust between #0, #10, and #20 biscuits, and it features an adjustable fence that can be set at an angle up to 90 degrees with positive detents at common measurements.
18V Brushless High Torque Mixer
Just about any drill can mix up a slurry to perform concrete work, plastering, or other jobs involving wet-mixed materials. Among some of the most versatile drill attachments you can find online and in hardware stores, mixing paddles are some of the most common. However, most drills aren’t actually designed to handle this kind of work, and a purpose-built mixing tool like the 18V Brushless High Torque Mixer is a much better option if you plan on mixing up big batches. It’s listed for $379 on Amazon.
The difference really comes down to what the tools are designed to output. A typical combi-drill produces plenty of torque, certainly, but it’s designed for fast speeds to allow for quick drilling or fastening through timber and other material. In contrast, this piece of equipment produces a maximum speed of 720 RPM. Its low speed and high torque output allow it to churning through material even when it becomes a gloopy mess that wants to slow things down. It also includes a two-handle design for better grip and control while standing directly over your bucket, which is a notable improvement over the alternative. It also features soft start technology that reduces splashing when you initiate the tool alongside integrated kickback controls.
18V High Torque ½-Inch Right Angle Drill
There are many great right angle drills on the market, and the Bosch 18V High Torque ½-Inch Right Angle Drill is a highly rated option among them. It features two speed settings, ranging up to 1,800 RPM in its second gear to produce fast drilling when a rapid pace is required. It also includes dual kickback controls to minimize bucking when bind-up occurs. Its 7-pound weight may seem quite heavy, but it’s actually rather lightweight for a right angle drill. This is a piece of equipment that’s frequently more powerful than a standard power drill, and typically requires two-handed operation. In a relative sense, a tool this weight should be reasonably maneuverable while still delivering solid performance and power.
The tool can handle up to 5-inch holes when paired with a hole saw, 2⁹⁄₁₆-inch holes with self-feed bits. This makes it a punchy option for larger hole requirements or for drilling longer segments into workpieces. The right angle drill is particularly useful when handling tasks involving rough-in work through joists and stud wall constructions. The tight confines of these areas make using a right angle drill sometimes the only practical option for getting a straight cut through the timber once it is secured in position. The tool is available for $299 at Lowe’s as a bare tool.
18V 16-Gauge Metal Shear
The 18V 16-Gauge Metal Shear ($345 at Acme Tools, with an added 4.0Ah battery promotion, as of mid-September) is, of course, a metal cutting tool. It runs with a brushless motor underpinning its performance, giving the tool durable and powerful cutting prowess that matches a 700W corded model’s capabilities. This piece of equipment features an ergonomic barrel grip shape and is lightweight, putting up a 3¾-pound figure on the scale. It delivers a 3,200 SPM blade speed and features quality of life enhancements like distortion- and waste-free cutting capabilities and a soft start to make the tool easier to initiate.
This is designed for cutting sheet metal, and as such it’s not something that’s going to take up space in many casual tool users’ collections. From the specs, it appears powerful and effective at its job, but metalworking isn’t a common theme among DIYers seeking to make routine improvements around their homes or other living spaces. This is a potentially valuable addition for home mechanics working on project cars and others who naturally encounter metal parts, however. Instead of using an angle grinder, which can be a nerve-wracking tool to operate and often leaves jagged, uneven cut lines in your workpiece, this shear is meant to make more delicate and precise cuts for replacement parts or patches.
Non-Contact Voltage Tester with Flashlight (24 to 1,000V AC Rated)
Among some of the biggest mistakes you can make while handling electrical repairs, failing to use proper safety gear to test your work environment is potentially the most egregious. This is a simple workflow error rather than something that arises from a gap in knowledge or skill — it’s simply vital to know if the wiring you’re working with is live.
The Non-Contact Voltage Tester with Flashlight (24 to 1,000V AC Rated) can help support this mission effectively. It features a durable construction with an ergonomic rubber grip and TPE reinforced housing, making it jobsite-ready and capable of withstanding drops of up to 6 feet. It offers dual voltage range compatibility, With a standard 90 to 1,000V testing range and a lower 24V minimum threshold for both typical and low voltage applications. It’s also rounded out with an IP67 rating, making it great for use in challenging working environments.
The tool features a belt clip, so it should be easy to carry in a pocket or on a tool belt. It also utilizes an integrated flashlight, which is a handy addition considering that many electrical repair tasks will take place with the lights off. It features voltage indication using colored LED lights: Green for no voltage, red when voltage is detected, and orange for low voltage settings. It’s found at Home Depot for $47.
18V Brushless 9-Inch Cut Off Saw
Sometimes known as a “consaw” because it’s frequently used to cut concrete, the cut off saw can come in either electric and gasoline powered builds, with electric models offering the notable ability to be used indoors as a result of its emission-free operation. The battery-powered 18V Brushless 9-Inch Cut Off Saw is a $689 purchase at Acme Tools as a bare tool.
This saw comes with a 9-inch cutting wheel that offers over 3 inches in maximum cutting depth. The tool features a six-position cutting guard that allows you to adjust for a variety of cutting needs and working angles. It also operates with a wraparound handle and ergonomic design for better control. it can be used in either wet or dry cutting, with a simple water shutoff valve that allows you to swap between functions as necessary. This is a relatively lightweight option, weighing just under 12 pounds, and therefore delivers good control and the ability to use the tool for longer sessions without fatiguing too badly. This is also another tool offered under the AmpShare system.
12V 11.5-Foot Handheld Inspection Camera
Installation and repair tasks aren’t always straightforward. You’ll often encounter challenges in gaining access to certain areas, and in many cases, it can be impossible to progress beyond early stages without something like the 12V 11.5-Foot Handheld Inspection Camera in your arsenal. Running new wires, for instance, requires you to be able to find both ends that you’re looking to connect, ideally without destroying the wall in between. An inspection camera allows you to thread the end into the recessed space in order to evaluate what you’re working with in areas that are impossible to view otherwise.
This tool features an 11.5 foot camera cord, offering plenty of reach to tackle jobs behind walls, in recessed areas under the hood of a project car, an in HVAC settings, to name a few. It’s listed for $540 at Amazon.
The camera features a high resolution, enhanced display with a 5-inch screen that captures color images and video. It features an ergonomic handle and integrated connectivity that allows you to upload images directly to a computer via USB-C cable, with one included in the tool’s packaging. The camera runs on Bosch’s 12V battery system, making it lightweight and easier to maneuver than a larger, alternative 18V tool.
18V Brushless Threaded Rod Cutter
The 18V Brushless Threaded Rod Cutter ($365 at Acme Tools) eliminates the need to cut metal rods with a hacksaw or angle grinder. That difference is only marginal for anyone who only needs to cut a few lengths for a single project. However, frequent repetition of this task can become cumbersome without something specifically designed to handle the work.
This is because cutting just about any kind of metal component with a handheld hacksaw or a blunt instrument of destruction like the angle grinder often creates uneven faces and edges. Getting the cut precisely where you want it isn’t always easy, and you’ll often leave a burr on the end of your workpiece, adding another step that needs to be completed before the material is ready for use. Otherwise, you’ll risk deep cuts from the smallest of protrusions, as well as damage to other components. This tool promises burr-free cuts with the ability to cut up to ½-inch threaded rods with a range of multi-cutting dies. It features an auto stop function with an adjustable depth gauge to add key precision and consistency to your cuts.
12V Drill/Driver with 5-in-1 Flexiclick System
Your drill/driver combo very well may be the most used tool in your collection. It’s a versatile piece of equipment that’s called for in just about every project type you’ll encounter. However, some drills offer enhanced function with unique augmentations. The 12V Drill/Driver with 5-in-1 Flexiclick System ($224 at Walmart) is one of these tools and comes with four head attachments that expand on what a standard drill can do. The two primary standouts here are the offset and 90-degree heads (although there’s also a hex bit holder and keyless chuck, as well), allowing you to handle fastener driving at odd angles without breaking a sweat.
These attachments could be critically important for furniture making and plenty of repair tasks that require stripping down components and then eventually having to put the whole thing back together. The tool comes as a kit with a carrying case, charger, two 2.0Ah batteries, and the four heads. These drill attachments can be oriented in any of 16 positions, and they feature the ability to rotate without removing the head, giving you the ability to adjust on the fly with ease.


Makita offers several different battery systems for cordless tools. It has a small 12V system called CXT for compact handheld tools. There’s the 40V XGT system for larger, mostly outdoor tools. For its largest system, there’s ConnectX, which is designed for commercial tools. In the middle of it all is probably Makita’s most versatile and common system: the 18V LXT system. With these batteries, you have the ability to power everything from a drill driver to a lawn mower.
The LXT line doesn’t conform to one thing, though. LXT-branded tools come in three different categories. There are the LXT X2 tools that require two 18V batteries to properly power the tool, but the bigger difference is between LXT Premium and LXT Sub-Compact tools. Both use the same 18V LXT batteries, but there’s a clear difference between them — mostly, it comes down to size.
Makita designs the LXT Sub-Compact tools to resemble the feel of holding a smaller tool that would normally only use a 12V battery, but it has the performance of a tool that has an 18V battery. Despite the “Premium” in the name, LXT Premium tools are Makita’s name for its standard 18V tools. The two lines share many tools, whether it’s a drill/driver or a circular saw, so with a Sub-Compact model, you’re essentially getting a smaller version. You can easily tell the difference because LXT Premium tools’ primary color is Makita’s signature teal, while LXT Sub-Compact tools are primarily black. While size may be the main difference, you can see more discrepancies if you look at the details of each tool.
An LXT Premium and Sub-Compact tool-to-tool comparison
To see how the LXT Premium and LXT Sub-Compact lines differ, compare and contrast an equivalent tool from each line. A great test case is one of the most common tools out there: a cordless half-inch drill/driver. The LXT Premium tool is 6-7/8 inches long and weighs 4.65 pounds, which includes the weight of a battery. Meanwhile, the Sub-Compact version of this tool is 5-7/8 inches long and weighs only 2.9 pounds with a battery. While that may be much easier to hold, it delivers far less power.
The Sub-Compact drill/driver can generate 350 in.-lb. of maximum torque. That’s paltry compared to the whopping 970 in.-lb. of maximum torque achieved by the Premium model. Both drill/drivers have two variable-speed settings, but the Premium maxes out at 550 and 1,800 RPM, while the Sub-Compact gets to 500 and 1,700 RPM. In terms of how far it can actually drill into a particular material, the Sub-Compact can get up to 1-7/16 inches into wood, but the Premium can get a full two inches. Where they come out on the same level is with steel, each offering a half-inch drilling capacity.
Beyond the tools themselves, there’s also the price difference. Because they’re smaller and less powerful, the LXT Sub-Compact tools cost less than the LXT Premium ones. With these drills, the Sub-Compact model goes for $139, with the Premium one retailing for $159. It’s up to you to determine whether you want a lighter, less expensive option or a more powerful one.

Are AI chatbots quietly shaping the perceptions of U.S. voters? Voters trying to educate themselves about candidates “are unknowingly being served partisan talking points in the guise of neutral news summaries,” write two news researchers in Politico magazine:
Leading AI chatbots cite partisan websites masquerading as independent local news outlets nearly half of the time when people ask about candidates and issues that the partisan sites have covered in the midterm campaign, according to a new audit by NewsGuard, an organization focused on news reliability where we work as analysts… NewsGuard prompted seven leading AI tools with queries based on recent coverage of candidates and issues by 12 pink slime sites — six left-leaning and six right-leaning. The results were stark. Collectively, the chatbots cited pink slime sites along with other sources in 48.2 percent of their responses.
In 7.7 percent of responses, pink slime sites were the only sources at all that were cited in chatbot responses, although other sources appeared in the source list provided at the end of the response.
None of the AI tools received results they’d probably be eager to boast about, though the percentage of chatbots’ responses that cited a pink slime site had a relatively large range: 70.8 percent for OpenAI’s ChatGPT, 54.2 percent for Microsoft’s Copilot, 54.2 percent for Perplexity, 50 percent for Anthropic’s Claude, 41.7 percent for Google’s Gemini; 37.5 percent for Meta AI and 29.2 percent for xAI’s Grok… The seven chatbots were also collectively three times more likely to cite left-leaning pink slime sites (cited in 36.3 percent of responses) than their right-leaning counterparts (cited in 11.9 percent of responses) — though that may have more to do with the progressive sites’ far more frequent posting than any political bias from the chatbots.
“While citing the pink slime sites, only one chatbot response out of 168 total queries noted the partisan nature of the source,” the article points out.
But they also note that the real problem seems to be that consumer-oriented AI chatbots just “use much of the internet’s content — regardless of the reliability or standards of the source — to frame their answers.”


Read more of this story at Slashdot.

A few tricks provide a seamless Google Maps experience in your car with CarPlay.

Apple Maps has improved a lot since its troubled launch, but many people still prefer Google Maps. That could be because of the traffic data, better business listings or just out of habit. The good news is that you can use Google Maps in Apple CarPlay just like any other supported app.
Apple has always been restrictive when it comes to changing the iPhone’s default apps. In the EU and Japan, local regulations allow you to choose your favorite navigation app as the default. This means when you ask Siri for directions or tap an address, your iPhone and CarPlay will use your preferred app instead of Apple Maps. If you’re in one of these regions, you’ll find this toggle in the Default Apps menu on your iPhone, located under Settings > Apps. Select Google Maps as your default maps tool there for the best experience.
Otherwise, Apple Maps will remain the default navigation app on CarPlay, but there are a few tricks you can use to improve your navigation experience with Google Maps in your car. While it’s not particularly smooth, one of the easiest is adding “on Google Maps” to the end of Siri requests in the car to avoid Apple Maps opening by default.
Adding Google Maps to your CarPlay Home Screen

If you’re outside the EU and Japan, there are still ways to use Google Maps in CarPlay more seamlessly. One is to place Google Maps on the first page of your CarPlay Home Screen: in your iPhone’s Settings, go to General > CarPlay. Choose on your car and select Apps. Here, you can rearrange the order in which apps appear on your Home Screen — just drag Google Maps near the top and it’ll be one of the first apps you see in your car.
If Google Maps isn’t showing up on CarPlay at all, this is the first place to look. Of course, you’ll need to download Google Maps to your iPhone from the App Store first (among the dozens of CarPlay apps available). Scroll to the bottom of this menu and tap the green Plus icon to add it if needed.
Adding Google Maps to your CarPlay dashboard is another method to reach it faster. Instead of looking for the app every time, you can add a widget for quicker access. Go back to CarPlay’s settings on your iPhone, but this time, tap Widgets instead of Apps. There, find and add a Google Maps widget.
Some cars also offer a split-screen CarPlay dashboard, accessible by swiping right to the leftmost panel. This usually includes a mini-map. Start a route in Google Maps once, and it should take over that panel from then on.
Other tricks for fast navigation

There are other best practices within the Google Maps app that will make navigation easier on CarPlay. Adding your home and work addresses is a good first step, so you can start common routes with a single tap.
To configure these, open Google Maps on your iPhone and tap your profile picture at the top-right. Then go to Settings > Location & privacy. Scroll down until you find Home and work addresses. Select this, then use the three-dot menu for each option to add or adjust it as needed. They’ll be waiting for you on CarPlay.
When going on a long trip, having offline maps downloaded is important, especially to avoid problems if you lose your cellular connection. Again in Google Maps on your iPhone, tap your profile picture and select Offline Maps. Choose the areas you want to keep downloaded for navigation without an internet connection. It’s a good idea to download these maps using a Wi-Fi connection, since maps of large cities can use a lot of data.
You can also change how the map looks. Tapping the compass button switches between north-up and heading-up, and the day and night themes can be set to change automatically if you visit Settings > Appearance in CarPlay. Don’t forget to change other important CarPlay settings, too.

It isn’t quite hailing frequencies open, but researchers from Harvard claim they’ve picked up a radio signal directly from a nearby exoplanet. Before you get too excited, planets in our solar system also emit RF, so no one credible is claiming these are extraterrestrial reruns of their version of I Love Lucy, but it is the first time they’ve localized a radio signal to an exoplanet, in this case, Beta Pictoris B.
Speaking of space, the asteroid formerly known as 1981 EC26 is now sporting a new moniker: (14331) Alyankovic. If you think that sounds like (Weird) Al Yankovic, you aren’t wrong. The Tucson Star reports that, thanks to the efforts of several planetary scientists who are also Weird Al fans, the International Astronomical Union made the name official. Apparently, another asteroid now bears a name in honor of Weird Al’s predecessor, Tom Lehrer.

If you follow open mobile phone software, you probably know the name postmarketOS, a Linux distribution based on Alpine aimed at mobile phones and tablets. Well, now you can forget it. The project announced a name change, so we’re now talking about Nura. Why Nura? According to the team, it is a shortened form of Nuraghe, some granite structures in Sardinia that are over 5,000 years old. The FAQ mentions that postmarketOS was hard to remember. We aren’t sure Nura is that much more memorable. Perhaps they should have pivoted to Phonz OS.

Ever write an Arduino “sketch?” We’d bet you have. You might know that Arduino forked from Wiring, and Wiring was, actually, an offshoot of Processing. There is another Processing offshoot, p5.js, and it, unsurprisingly, looks a lot like Arduino. Now p5.js can access your GPU via WebGPU, and if you want to learn about CPU programming, there’s a page for that.
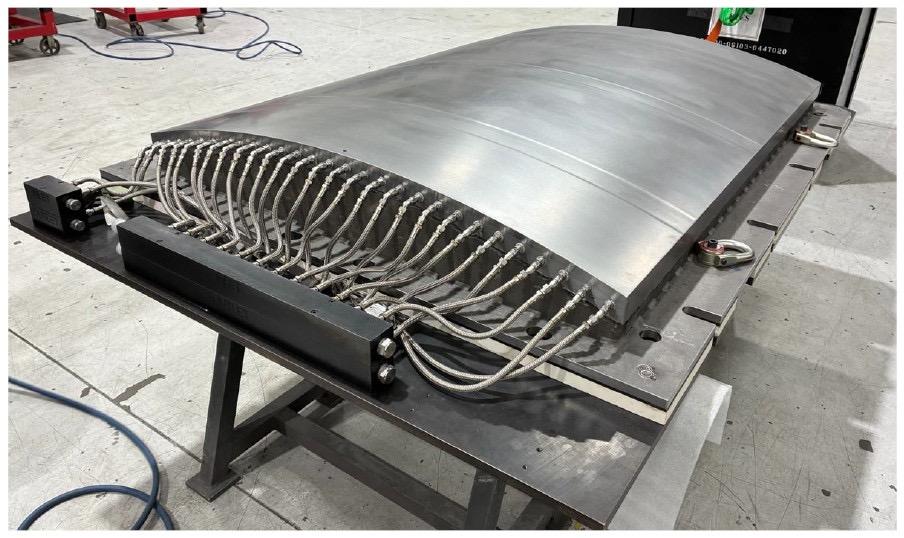
We all want a metal 3D printer, but even when you get one, it isn’t likely to be turning out two-ton dies. Unless, of course, you work for a big national laboratory. The die is six feet long and four feet wide. Apparently, it will be shaping some thermoplastic composite for us in experimental aircraft.
We always thought transformers were a way to step AC voltages up or down. Or maybe they were a Lou Reed album. Then they were toy robots. Now they are the power behind AI chatbots. If you are as confused as you are, this transformer (of the AI kind) explainer might help you.
If you can find the old 2011 Kindle 4 that slipped behind your couch cushions a few years ago, you might be able to load a mainline Linux kernel on it soon. The patches are out there, and the kernel supports a lot of even stranger things, like the IBM System/390, the Sega Dreamcast, and the Nintendo GameCube.
See something interesting that you think would be a good fit for our weekly Links column? Drop us a line, we’d love to hear about it.

The speed that computers have gotten smaller is a bit mind-bending. Most of us now walk around with computers in our pockets that would have rivaled the supercomputers from a few decades ago. And, although it seems like the speed at which things are getting smaller and faster has slowed a bit compared to the rapid pace of the 90s and 00s, some truly minuscule computers are accessible nowadays. So much so that it’s possible to do useful computing inside a walnut shell.
The first step in this build is to crack into a walnut. Most have a natural seam that separates two hemispheres, so splitting it open, enjoying a small snack, and then adding some small neodymium magnets on the inside of that seam to close up the shell is not too difficult. From there, some LEDs were installed at various points in the shell, with an ESP32-C3 installed in the middle to control everything and oriented so that its USB port is still accessible.
Although putting a small microcontroller in a nutshell might seem like a novelty, [JSK-koubou] is actually using the LEDs to perform a useful task. The walnut sits in his living room and connects to a home automation system through the ESP32, and when it receives a command it uses the LEDs to send infrared signals to non-connected devices. Hiding projects in unexpected places is a fun pastime, like this Meshtastic node hidden in a landscape light.
Why you can trust TechRadar
We spend hours testing every product or service we review, so you can be sure you’re buying the best. Find out more about how we test.
ViewX Liber: 30-second review
Specs
Resolution: 3840 x 2160
Brightness: 350cd/m²
viewing angle: 2D 178 degrees, 3D optimal viewing angle 40 degrees
optimal 3D viewing distance: 40–70cm
3D technology: liquid crystal gradient refractive lens
refresh rate: 60Hz
colour gamut: 72% NTSC, 100% sRGB
response time: 25ms
colour display: 8-bit, 16.7 million colours
static contrast ratio: 1000:1
interfaces: 1x mini HDMI 2.0, 2x USB-C ports (video transmission & power supply), 1x micro USB, 1x 3.5mm headphone jack
product dimensions: 356.7 x 216.8 x 16.3mm
Product weight: 1,274g
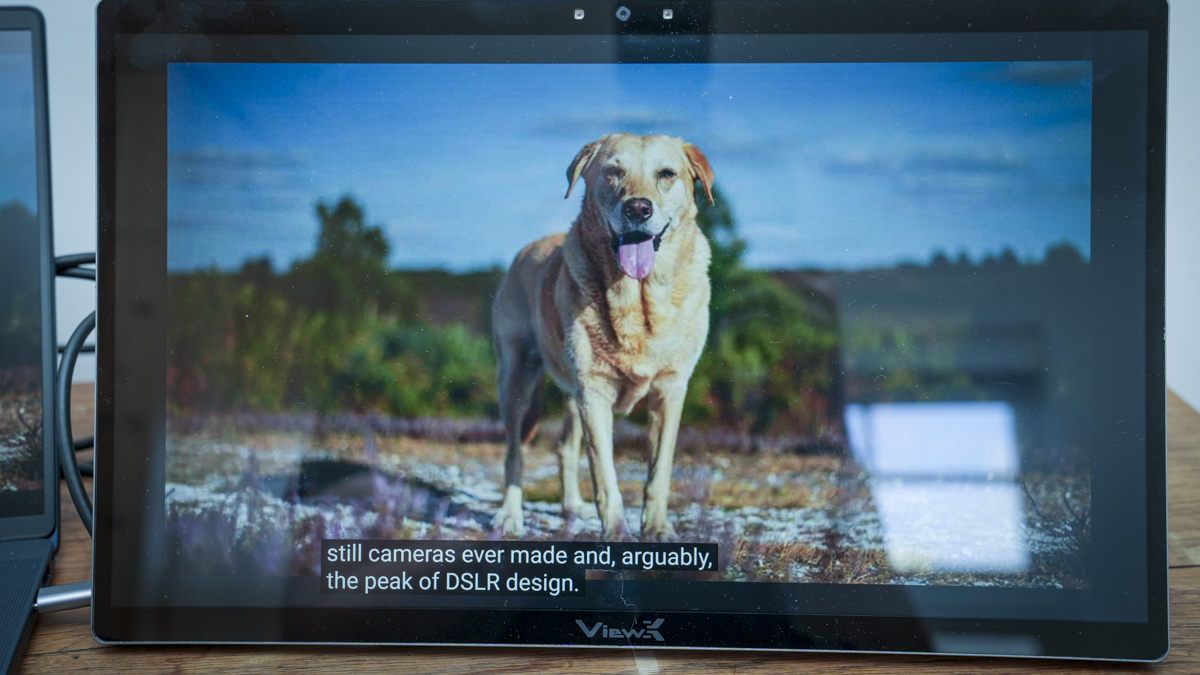
Out of the box, the ViewX Liber 15.6-inch monitor looks like a well-made standard portable monitor, with a decent-sized 16:9 screen, a metal stand, a built-in camera, and a range of ports hidden at the back.
The monitor also has physical buttons on the right-hand side to switch between 2D and 3D, open the menu, adjust the volume, and change the brightness.
The on-screen display is pretty standard, and as you flick through the brightness, black level, contrast and other options, it’s all very nicely laid out, although as ever it takes a while to get the correct button combination as each button has a dual function. To use the monitor, you do need to install the software, but the process is straightforward, and the instructions are clear.
Once the software is installed, you don’t really need to do anything more. Games can be launched through the dedicated 3D Playground Lite game launcher or downloaded video through the 3D Spatial Gateway, but while video that had been downloaded to the host computer looked great, at present the games all seemed to be connected to a Chinese system despite looking like they should connect through Steam. Launching games directly, however, seemed to work fine and with great effect; Indiana Jones and the Great Circle looked pretty decent.
The only issue is that not all the settings are translated into English, so you’ll need to hover your phone over the screen using Translate to work out what some of the app settings mean and do, which is annoying for a product that’s now on sale.
In terms of use, this 3D monitor is one of those interesting new products that shows what technology can do and how it has adapted. We’ve seen 3D TVs like this before, and this is essentially the same thing, just smaller and highly portable. It’s an interesting proof of concept, and if you’re an early adopter, this will certainly appeal.
I really did like the AI-enhanced video, which took standard 2D video and made it 3D. It looked pretty good, and once you got used to it- and the fact that you have to stay still in front of the monitor- it was really quite engaging.
To my mind, this doesn’t quite meet the needs for most people looking for the best portable monitors. It’s a hyper-niche device for a very specific workflow. Even if you’re looking for a true three-dimensional effect, it’s not quite there. There are quite a few glitches along the way, including screen flicker when you move your head, and some background apps and games still aren’t 100% compatible.
However, these are early days and, considering the quality of what’s on offer already, it’s still all pretty decent.
ViewX Liber: Price & availability

The ViewX Liber monitor can be purchased directly from ViewX’s Kickstarter page here, with prices starting from $1099. That’s pretty pricey for a 4K portable monitor, although you’re paying for those 3D extras.
There’s more information about the monitor over at the official website, too.
ViewX Liber: Design & build

Lifting the monitor from the box, the quality is instantly apparent; the build feels good and solid, and it has all the design and tactile feel of a high-quality portable monitor. The screen has a relatively thin bezel surrounding it, with the ViewX logo at the bottom and a small camera at the top alongside two sensors that help the 3D positioning work in 3D mode.
On the back, there is a good, sturdy metal stand that’s offset from the centre but still provides good support and adjustment of the angle. Once you open the stand, it reveals three ports: two USB-C and one mini HDMI. The two USB-C ports enable both video and power delivery.
On the right-hand side of the monitor is a selection of buttons. The top one is the 3D-to-2D button, and a long press switches between the two modes. This is one of the areas where I initially thought there was something of a glitch with the design, only to discover you need to be sitting in front of the monitor so it can gauge your position; if you move, then it’ll revert to 2D mode.
On the side, along with those buttons, there’s a micro USB port, which is the factory mode port and will inevitably be for updating firmware. Alongside it are the remaining controls. You have the source and back buttons, which let you switch between HDMI and USB-C or go back depending on where you are in the menu, followed by the menu and OK button, volume and up button, and brightness and down button.
Below that, you also have an auxiliary output for headphones, and aside from that, there’s nothing else on the monitor itself. In terms of size and dimensions, this is designed as a portable monitor option and in width it’s slightly wider than an average 15” laptop, measuring 356.7 x 216.8 x 16.3mm, and when it comes to weight, it tips the scales at 1,274g, so it’s a little heavier than most portable monitors.
ViewX Liber: Features

The 3D functionality of this monitor out of the box without the need for additional hardware is the headline feature, and this sits alongside the more standard list of 4K resolution, 15.6-inch screen size, built-in camera and speakers and a design that makes it a perfect option as a portable monitor that can be used at home or on the go for business.
The 3D spatial AI display is extremely clever and essentially enables the conversion of 2D to 3D without glasses or other specialist equipment. Essentially, all that’s needed is for you to plug in your HDMI or USB-C cable for video, and the monitor handles everything else. The monitor does come with some software that further enhances video and gameplay, but otherwise it’s pretty much just plug and play.
The monitor connects to your computer by either USB-C, in which case it supports video and power delivery, or HDMI, in which case power can be delivered via USB, a power bank, or AC with the mains plug in the box.
During my testing, I found you need a USB-C port capable of outputting over 18W and, surprisingly, two or three of my high-end laptops couldn’t meet the monitor’s demands. In the end, I found running it from a small Ugreen power bank was a good secondary option on the move, though I did note that the power draw means it drains the battery relatively quickly.
The brightness is also decent at 350cd/m², meaning that in most slightly shaded conditions the monitor is very easy to see. While it has a glossy finish, it also has good anti-reflection coatings, so even in a bright-ish environment in a café, it was still easy to make out the detail.
In 2D, the monitor is pretty much in line with most other portable monitors and all applications from productivity to creative are well resolved with decent colour and tone. When you switch to 3D mode, it takes the monitor a few seconds to adjust and then your eyes. I found that after a short time, once you make the switch to 3D, you need to stay within 40–70cm of the monitor, and you also need to sit as still as possible.
The colour gamut and other specifications, such as colour depth, are mid-range, with refresh rates limited to 60Hz and NTSC and sRGB coming in at 72% and 100%, respectively are all mid-range, but what you’d expect for a small portable monitor of this type.
So if you’re looking to use this monitor for critical creative work, then these mid-range specs on colour and tonal quality won’t hit the mark. However, the focus here really is on that specialist 3D display, which is quite unique at this scale.
As part of that 3D feature set are the two front sensors that can detect where you are, so they adjust the monitor accordingly. This means that when you do move around, the display adapts, and as you move out of the 40º viewing angle, the monitor switches back to a more static 2D look.
When you’re facing the monitor directly, you’ll get the 3D visuals, but if you move to the side or stand up, it switches back to a 2D display. It’s very clever, but that switch does take some getting used to and quite often causes a bit of flicker on the screen.
ViewX Liber: Performance

Setting up the monitor is easy. In fact, I was quite surprised by how quickly and straightforward it was to get the monitor up and running and doing exactly what I needed, including switching to 3D.
The Quick Start Guide directs you to the website to download the software you need for your PC to recognise the 3D screen. Through this test, I used the monitor with an HP EliteBook X and tried it with a Mac, but with no success; this is a PC only monitor.
Once you get to the monitor’s software page, it’s a little confusing. There are several options, including the game launcher, AI Depth Transformer and the ViewX Liber 15.6-inch 3D monitor user manual. The slightly confusing thing is that there isn’t just a straightforward software download. However, the PDF software manual does have clearer instructions and talks you through setup.
To get the monitor working, all you really need to do is plug it directly into your computer via USB-C. Through this test, I used it with a PC, and it was pretty much plug-and-play once the software was installed.
You can also connect the supplied HDMI cable directly into the back of the monitor. This comes with a 90-degree connector, and the full-sized HDMI connector can then plug straight into your PC.
You’ll also need power. You can power it either through the mains (with the supplied AC plug) or via USB-C. Although it can be powered through USB-C, I initially had no luck. From the HP machine I was using, I soon realised it didn’t output enough power through the USB-C port to run the monitor. Checking the monitor power draw, it showed 17.8 W, which should have been fine; however, the monitor just wouldn’t initially start up.
I ended up plugging in the AC power to provide enough power to run it for the initial testing and later switched to a UGREEN Power bank, although that only provided enough power for a two-hour session despite the 20000mAh capacity. Once I plugged in the USB-C cable and external power supply, downloaded the software, and installed all the packages, the monitor flickered to life and was ready to use.
The power consumption is well worth noting, as most laptops limit the USB-C output to 15w; that’s 3W below what this monitor needs. So you will need an external power source to run the monitor, and you absolutely won’t be able to power and connect the monitor to a laptop with a single cable.
Once everything is connected and you’ve installed the video and gaming applications, it’s easy to open and view different types of content.
The initial look of the monitor in 3D is very peculiar, and don’t expect to be using the 3D mode for the most part as just a standard monitor. It does have two modes, though.
In the standard 2D mode, the 4K resolution actually looks very clean and clear. I set the resolution to 3840 x 2160 at 60Hz. It ran in 8-bit RGB, and the quality of the visuals looks good.
For general work as an expansion to the laptop’s 15.6-inch screen, the colour and tone were well balanced, and it’s a shame that it’s limited in the colour gamut, being really focused on media playback rather than creation.
As I worked with Word documents, browsed the internet, and used the usual functions and features all in the 2D mode, the display’s resolution and quality looked great.
While the refresh rate tops out at 60Hz, that’s more than enough for most productivity uses, especially for business, and the only time you really need those greater refresh rates is when you start gaming.
What surprised me was what happened when I held down the 2D-to-3D button on the right-hand side of the screen. After a few seconds, the monitor adjusted and switched to 3D mode.
I found that setting the monitor to a simple screen extension worked well, having the main laptop screen for content and the monitor for the 3D content. Looking at the screen as it switched to 3D was a particular experience, and at first the 3D effect looked a bit off, and it took my eyes a while to adjust.
Then, as my eyes and mind adjusted, I did get the true 3D visualisation. Simply opening YouTube and watching a couple of videos meant standard 2D video became 3D. I didn’t need to do anything else: no glasses, no additional hardware, just the monitor.
As I progressed through various applications, opening Steam and installing Indiana Jones and the Great Circle, the monitor’s 3D feature was really dramatic in gaming.
If you’re just using the 3D feature with standard applications, the resolution and clarity don’t look great. Still, once you’re immersed in gaming or watching a video, the effect is exceptional as long as you don’t move too much.
Moving is one of a few issues with how it works. As I quickly discovered, you have to sit relatively still in front of the monitor. Any significant movement to the left or right, and the screen starts to flicker.
Even then, if you stay still, I found that while I was watching video or gameplay, there was always the occasional slight flicker or brightness change as the screen adapted to the content. But overall, the effect is exceptionally good and well beyond anything that I’ve seen before.
As I settled into using the monitor and the way that it works, I had the screen set to use the laptop screen as my main display and the 3D display as an extension, essentially to play games on and to watch movies and media.
It looked incredibly good. You can see a reduction in detail, but the clarity and tone look exceptionally good. Because I deal with 3D printers and 3D printing, I was also really interested to see how it would work with 3D applications. To test this out, I downloaded Bambu Studio.
Opening Bambu Studio on the monitor, it was difficult to see some of the palettes, but it was nice to see what would usually be represented in 2D in the application with that 3D look. It’s a little peculiar, and the resolution once again doesn’t look as clean as I thought it would be, but it is really interesting.
I also went through a few options in the system display. I was able to turn HDR on, which helped to kill a few of the highlights that were there before. The scale is set to 300%, and the resolution at 4K looked great.
I also wanted to adjust the refresh rate to see whether some of that flickering would reduce, so I dropped it to 29.97Hz. To be honest, the change was minimal, and you could see a slight effect on motion smoothness, especially when gaming.
This monitor really works best when you’re watching back 2D video, and it doesn’t even need to be specialist 3D video. It converts the 2D content to 3D straight out of the box.
Likewise, games look superb and, while you do see some flicker, it certainly gives the pictures a far more interesting look. I wouldn’t say the technology is 100%, and the flickering is annoying, but if you stay relatively steady, it does give a more immersive viewing experience than a standard 2D monitor.
If you have videos you want to watch in 3D, you can simply go to YouTube, Netflix, or whatever other streaming service you use, and the screen will display the video in 3D. It’s impressive and, despite those few flickers, it does add a lot more interest. However, there is still that drop in detail, but once you start watching back footage, you start to forget that drop in detail.
I then looked at the two applications that had downloaded: 3D Spatial Gateway, which you can use to view videos stored on your machine; essentially, you open them within that application and then, using AI, it converts them to be ready for viewing in 3D. The quality is just a little better, although there is still some stuttering.
It takes some time to process the video before you’re able to watch it back in 3D and, again, you need to stay pretty static when you’re watching it. But the result is still quite spectacular.
The frame rate does look a little stilted, and it doesn’t quite have the smoothness of motion you see when you’re watching the video back in 2D. Still, it’s not far off, and after you’ve been watching for a short time, persistence of vision does take over.
You can also route the audio through the monitor to use its internal speakers. However, these are relatively cheap compared with the rest of the build quality, and they sound a bit tinny, like most small portable monitors. There’s really nothing to write home about when it comes to audio quality, but at least they’re there if you need them.
If you’re thinking about using it directly as a monitor in a 3D environment, that’s not really what this monitor is for. The resolution and how it renders detail make it extremely difficult to read text.
But if you’re watching visual content such as video or a video presentation, playing games, or viewing 3D models, as I was when using this for a museum demonstration, then it’s actually exceptionally good. However, it does take some getting used to.
One other note is that if you’re trying to show a variety of people the 3D effect, the monitor can get a little confused, and people really need to come up and look at it one by one.
Switching over to gaming is really where things start to come into their own. You get real depth in whatever game you’re playing, far more than you do with just playing it on a 2D monitor.
What I really like is that you can get this 3D experience anywhere without having to wear glasses, which means if you’re sitting on a train, you’re away for work, and you just want that 3D visual experience, this monitor gives it to you without fuss.
The other thing that I’ll say is that when you first sit down and start to use the three-dimensional effect, it looks impressive. But only after you’ve sat and watched several videos or played games for a while does it really become truly immersive.
The monitor’s 3D depth perception actually seems to improve over time. Whether that’s a visual trick or something within the AI that’s improving the depth over time, I’m not 100% sure.
Still, as I progressively looked at more images and video, the quality of that 3D depth definitely improved. While you can still see some layering, I could also see a little more gradation in the 3D depth perception by the end of the test.
Should you buy the ViewX Liber?
At the end of this test, I have to say that while this monitor is far from perfect, it’s also strangely addictive.
When you look at images, watch back video, and, obviously, play games, that 3D depth in so much content really adds interest and intrigue.
The video frame rate is a bit of an issue. You can really tell there’s a little jitter between frames, and you often see ghosting or a small wave as the AI processes the 2D image into a 3D map or perception. But ultimately, the effect is impressive.
If you like the idea of a 3D monitor, especially for playing games or watching back video, and you’re also taking into account that it’s not quite 100% perfect. There is going to be some flickering, adjustment of objects and a small amount of ghosting, especially with text; then this is a great option.
If you’re thinking that this is going to give you the full immersive 3D experience, then wait a little longer, as I’m sure, now seeing how good this is, that will be on the way.
Also, if you’re on a Mac, I couldn’t get this to work with the M1 MacBook Pro, so during this test it was purely a PC-enabled 3D monitor.
Swipe to scroll horizontally
|
Value |
Good value for such unusual 3D technology. |
3.5 |
|
Design |
Solid, portable build with practical connectivity options. |
4 |
|
Features |
Strong 3D features, though software needs refinement. |
4 |
|
Performance |
Impressive depth, but flickering affects overall smoothness. |
4 |
|
Overall |
Engaging 3D experience with a few compromises. |
4 |

Buy it if…
Don’t buy it if…

Crypto World3 minutes ago
U.S., China to lower tariffs on $60 billion of goods. Here’s what qualifies

Tech4 minutes ago
When Is It Worth Using A Bike Computer Over A Smartphone?

NewsBeat5 minutes ago
The ethical fashion brand championing change across the industry





-

 Fashion3 days ago
Weekend Open Thread: J.McLaughlin – Corporette.com
-

 Tech11 hours ago
OpenAI is preparing “o,” an always-on ChatGPT assistant that could handle email
-

 Crypto World5 days ago
Goldman Sachs and Deutsche Bank Agree: The S&P 500 Rally Isn't Over
-

 Fashion4 days ago
8 iPhone Accessories That Add Personality
-

 Entertainment5 days ago
These 17 Fall Amazon Dresses Seriously Look Like Anthropologie
-
 Tech5 days ago
Reolink’s solar 4K security camera falls to its lowest price in months
-

 Crypto World5 days ago
This Bearish Netflix Stock Trade Can Cash In On Video Streaming Giant’s Woes
-

 Crypto World6 days ago
Trump-Xi Polymarket Odds for Handshake Hit 50%
-

 Tech7 days ago
Google’s $899 Googlebook is a bet that you’ll buy a new laptop for Gemini
-

 Crypto World4 days ago
Crude Oil Prices Pressured by Diplomatic Hopes in the Middle East
-

 Crypto World4 days ago
Bitcoin price tests $83,600 Supertrend support after $87K rejection
-
 Business5 days ago
Oil Price Today (September 23): Crude oil below $100 on hopes of US-Iran talks. What did Trump say?
-

 Crypto World4 days ago
Bitcoin Threatens Sub-$84,000 Breakdown as Long Liquidations Spike
-

 Crypto World5 days ago
BitGo says Bitcoin absorbed Fed hike, CLARITY failure
-

 Crypto World6 days ago
Meta Jumps 11% As Muse Shines and Investors Show an Appetite for Advancing AI
-

 Crypto World5 days ago
Did Jim Cramer Just Give GameStop Stock the Kiss of Death When He Said the Turnaround Is Working?
-

 Crypto World6 days ago
Trump, Xi Meet on S&P 500's Best Day Since Early August: Will Markets Stay Bullish?
-
 Tech5 days ago
UiPath’s Dines says AI needs a manual and launches Cartographer to write it
-

 Tech10 hours ago
Anthropic turns Claude into an AI marketplace with 2,000+ plugins and connectors
-

 Crypto World7 days ago
Strategy Adds 950 BTC for $76M, Funds $174M STRC Buyback
You must be logged in to post a comment Login