Although the Atari 2600 was a hugely popular game console in the late 70s, its hardware specs were limited, to say the least. For a dedicated game console of the era this isn’t too surprising, but things like 128 bytes of RAM meant programmers had to work hard to make games that were fun and playable (and they didn’t always succeed). Programming on this system even now is difficult, but nonetheless [Vince] wanted to get a version of Myst running on this system.
Obviously a PC game from the 90s is much to large, in many ways, to fit into an Atari cartridge or play on the 70s-era hardware. For that, there is a “demake” of Myst, a recreation of the game purposely built to run on older hardware it was never meant for. Even so, the game is running on a specialized cartridge built by [Vince] using parts from the real Atari game cartridge BurgerTime which had a bit more memory than normal. It wasn’t quite as straightforward as flashing the new game file to an old EEPROM though; [Vince] came across all kinds of timing issues and other miscellaneous problems that stretched this project out to around a three-year endeavor.
At the end of everything, though, he has a cartridge that will run Myst on the Atari, using the E7 bank switching scheme which afforded this system more memory within the cartridge. For [Vince], who is a fan of the demo scene for consoles like this, this was an interesting experiment to push original hardware to its limits. And, if you want to try this on an Atari 2600 handheld which also uses original hardware, we’d recommend using one of these.
Depending on where you live and what comes out of your tap, you may need to do damage control with the water that goes into your coffee machine, kettle, or French press. Water quality can greatly affect coffee outcomes, both by preventing off-flavors and aromas and by providing the right mineral composition to interact with the coffee’s aroma and flavor compounds.
When I previously spoke with Jose Lepe, director of sourcing and quality control for Sightglass Coffee, about whether you might need to use filtered water for coffee, he pointed out that “water hardness is part of what is going to make your coffee taste right, so you need some of that minerality in coffee to help pull out the actual flavors.”
The Best Drip Coffee Makers for 2026
Advertisement
High-end coffee shops typically use a water system that relies on reverse osmosis, which distills local water into its purest H2O form, then remineralizes it for the perfect balance. Not every major coffee city relies on a system like this, but in places like Los Angeles, which (according to Lepe) has famously terrible water for coffee, this is definitely in play.
Believe it or not, you can re-create this exact process at home without any five-figure specialized equipment.
Why consider making water for coffee?
Santevia makes a nifty unit that remineralizes water after filtering it.David Watsky/CNET
There are a few good reasons to tackle bespoke coffee water recipes. Consider the mineral composition of New York City tap water, often upheld as the liquid gold standard. NYC’s water is soft, with low concentrations of dissolved minerals such as calcium and magnesium and trace amounts of sodium, according to NYC.gov.
I spend much of the year in London, where the tap water ultimately tastes fine, but the mineral composition can quickly choke the life out of any coffee machine with narrow water conduits if it isn’t treated with a descaler. (Do I know this firsthand? I do. RIP steam wand.) London’s water has about eight to 10 times the calcium content of New York’s. Las Vegas, Indianapolis and San Antonio are just a few US cities where the water is almost as hard as London’s and considered extremely hard.
Best Water Filters and Dispensers, Lab-Tested by CNET
Advertisement
Water hardness can be somewhat fixed with filtered water, but filtering water removes most minerals without putting any back in. It’s not as bad as pure, distilled water (more on that below), but you’re not getting the most out of your coffee experience. The real reason to try a “water recipe,” frankly, is to save your devices while nerding out for the best possible cuppa. We’re into that kind of thing here.
You can both distill and remineralize water easily at home.Steve Conaway/CNET
What is remineralized water?
Rather than relying on filtered water, remineralized water is simply distilled or reverse osmosis water that has certain minerals added back in, specifically sodium bicarbonate and magnesium sulfate, according to a precise ratio. You can easily find distilled water in your grocery store or pharmacy shelves, but the other two? You can also find them in the same place. Sodium bicarbonate is commonly known as baking soda, and magnesium sulfate is sold as Epsom salt.
We’ll get into the ratios later, but if you’re not in the mood to turn your kitchen into an ersatz chem lab, brands like Third Wave Water and Lotus also offer simple mineral packets to add to distilled or reverse-osmosis-filtered water.
An actual recipe for coffee water
All the ingredients for remineralized water.Pamela Vachon/CNET
Digging into Reddit reveals a common DIY water recipe: add 0.25 grams of baking soda and 0.76 grams of Epsom salt to 1 gallon of distilled water. (This is the ratio the Specialty Coffee Association suggests.) You’ll notice this recipe relies on a kitchen scale that measures to the hundredth of a gram, unless you can scale up to 10 gallons of water at a time.
Without that particular piece of equipment, another potentially simpler method that doesn’t rely on a scale at all involves using standard measuring spoons to make liter-size batches of mineral water concentrates, one with Epsom salt and one with baking soda, and then adding easier-to-measure portions of the liquid concentrates to a larger quantity of distilled water. (If this is sending you back several paragraphs to look into those ready-to-use packets — I concur.)
Advertisement
The perfect coffee water taste test
I tested coffee made with remineralized water to see what the fuss is about.Pamela Vachon/CNET
To assess the actual flavor difference with remineralized water, I made three cups of coffee in succession, using precise ground and water measurements and an AeroPress: one with pure distilled water, one with regular tap water, and one with remineralized water. I tasted each black once, freshly brewed, then several more times as it cooled. I eventually splashed a little milk into each, since that’s how I normally drink coffee.
First things first, coffee made with pure distilled water was truly terrible. I was already forewarned and therefore forearmed for this, but I was honestly shocked at how bad it was, somehow both hollow in body and with a pronounced tang that was somewhere between acidic and metallic. Do not recommend.
The tap water cup, which I already knew I liked, soared by comparison next to the distilled water version, but was also noticeably heavier in body.
After mixing the remineralized water with microdoses of both baking soda and Epsom salt for the amount of distilled water I was using, I was somewhat dubious that so little could do so much, but I have to admit, it really did. I believe the resulting cup had what can reasonably be described as balance: good body, strength, and brightness, without the weird tang of the distilled water version, or the thud of the tap water.
Does this mean I would go through the trouble regularly? To save my electric coffee makers and enjoy the outcome a little bit more? You know what, I might.
Advertisement
Pamela Vachon
Contributor
Pamela is a freelance food and travel writer based in Astoria, Queens. While she writes about most things edible and potable (and accessories dedicated to those topics,) her real areas of expertise are cheese, chocolate, cooking and wine. She’s a culinary school grad, certified sommelier, former bartender and fine dining captain with 10 years in the industry. When not sitting at the keys, she leads in-home cheese classes, wine tastings and cocktail demonstrations.
See full bio
During the past year, the cybercrime group ShinyHunters has been extorting companies and, last week, took over a rival gang’s leak site. Now, it has gone after the agency that warned the public about it.
The FBI stated on Tuesday that it is investigating a possible breach of its online jobs portal after the cybercrime group said it had stolen ‘very sensitive’ data on ‘almost all’ FBI agents and those who had applied for positions at the bureau.
“The FBI is aware of claims regarding unauthorized activity affecting FBIjobs.gov and is currently investigating,” the bureau said in a statement.
The breach was first reported by 404 Media, which received a sample covering 5,000 purported agents, including names, home addresses, phone numbers, and details of their spouses.
Two people with knowledge of the breach told Politico that investigators consider the claims credible and view the incident as a significant counterintelligence failure.
Advertisement
“It’s really bad,” one said.
It is still unclear how the group gained access. According to the same source, the attackers seem to have exploited a vulnerability in Oracle PeopleSoft, a human resources software platform.
ShinyHunters told 404 Media that it had used a previously unknown flaw, but the source added that investigators have not verified this.
Politico noted that the group used a PeopleSoft zero-day against other organizations in June, a vulnerability that Oracle later patched, so it is possible that they reused that exploit on a system that had not been patched.
Unusually for a criminal group, ShinyHunters says it wants a correction rather than money.
Advertisement
In May, the FBI published an alert describing the group’s methods, after an attack on the Canvas learning platform knocked thousands of schools and universities offline.
The hack, the group said, was meant to force the bureau to “correct or simply remove” it.
Cynthia Kaiser, a former deputy assistant director of the FBI’s Cyber Division, told Politico the attack was
“[…]very atypical behavior for ransomware gangs, but goes to show you the unpredictability and immaturity of the group.”
This is the second major breach of FBI systems this year, following a breach in which China-associated hackers gained access to a wiretapping system in April.
Advertisement
The group wished for the FBI to cease referring to it, and for the moment has given the bureau a great deal more to say.
CarPlay can become even better when you take a few minutes to customize it.
Your iPhone turns your car’s infotainment system into a navigation and communication hub, thanks to CarPlay. While it works great by default, there are several ways to make it even better, plus new features that arrive every so often.
The easiest way to up your CarPlay game is customizing its layout to your liking. You may be surprised to learn that you must rearrange icons on your iPhone, not your car’s display. To do this, open Settings on your iPhone, tap General and select CarPlay. From there, select your vehicle and enter the Apps menu.
Here, you’ll find a list of apps on your phone compatible with CarPlay; drag them up or down to make the most important ones readily available on your CarPlay screen. The size of your car’s display defines how many apps make it onto the first page, so you may have to get creative when prioritizing your most-used ones. To remove or add apps, tap the red minus or green plus, respectively.
Advertisement
Starting with iOS 26, you can further organize your infotainment system through CarPlay widgets. These bring the same quick views you use on your phone’s Home screen, such as weather, calendar and clock, to your Car’s display. Edit them by tapping Widgets on the same menu where you selected your Apps earlier. CarPlay will intelligently swap your widgets throughout the day if enable Smart Rotate, and the similar Widget Suggestions will show available ones even if you haven’t added them.
CarPlay’s overall brightness should shift with your dash controls, but you can go further to toggle light and dark mode to suit the conditions to the time of day. Go to Settings > Appearance on your CarPlay screen, then select Automatic to allow your CarPlay brightness to adjust automatically. Apple’s CarPlay visual accessibility guide can also help here.
To spruce up its look, customize your wallpaper by opening Settings inside CarPlay and tapping Wallpaper. Choose your favorite option and hit Set. You can also change the colors of your icons, toggling between Default, Dark and Clear, under Settings > Customize icons in CarPlay.
Advertisement
Maximizing what you get from CarPlay
Siri is built into CarPlay; by saying “Hey Siri” or pressing the voice button on your car’s steering wheel, you can send messages, start navigation, change the playlist and take other actions. On a compatible iPhone, the revamped Siri AI in iOS 27 is also more useful in the car. And if the assistant is becoming a backseat driver, you can stop Siri from interrupting you while using CarPlay by tinkering with various settings.
If you like, you can go further by enabling Voice Commands, an accessibility feature that provides more CarPlay controls with your voice. To turn this on, go to Settings > Accessibility > Voice Control in CarPlay. Once enabled, it will continually listen for commands like opening apps, swiping left/right or touching a certain element on the screen. For a full list of commands, see Apple’s Voice Control CarPlay support page.
The Focus feature is a productivity must-have on your iPhone, and the Driving Focus helps reduce distractions from notifications while not affecting essential driving apps. To enable Driving Focus, go to the Settings on your vehicle’s CarPlay display, select Driving Focus and choose Activate with CarPlay. For best results, customize your Driving Focus notification settings on your phone by going to Settings > Focus > Driving. Under People, select contacts whose messages you’d like to allow through or silence. You can also allow repeated calls from people who are otherwise suppressed, as well as create auto-replies. Visit the While Driving tab to turn on this Focus automatically whenever you connect to CarPlay, if you didn’t already do so on your iPhone.
Advertisement
Beyond these settings and app changes, elite CarPlay users use both wireless and wired connections depending on the situation. Although a wireless connection is convenient, it doesn’t charge your phone while using it unless your car has a wireless charging pad. As such, on extended road trips, plugging in your phone is the right choice to keep the battery topped up.
Other little tricks make CarPlay even smoother. In the Messages app on your iPhone, tap and hold a frequent conversation and choose Pin to keep it at the top — doing this will also pin it in the Messages app for CarPlay. And don’t forget about the Shortcuts app, where you can build CarPlay automations.
Have you accidentally tapped the audio button inside iMessage’s text input bar when sending a message? Justin Bieber went viral with an Insta post complaining about how frequently it happened to him.
The problem is that tapping the button launches a voice recording session, during which your iPhone will stop playing music so it can record the message it thinks you want to send.
Advertisement
Bieber became frustrated enough at how often this accidentally happened to him while texting that he wrote, “The send button should not have multiple functions in the same spot,” and joked that he would put everyone at Apple in a “choke hold” until it got fixed.
His post generated thousands of likes, reposts and reactions. We don’t know if Apple was responding to Bieber or not, but it has made a change to ease the problem. iOS 27 now gives you a choice, permitting you to choose between continuing to display the default waveform-like record icon, a microphone icon for quick access to dictation, or even nothing at all.
Advertisement
iMessages text entry mastery
Starting with iOS 27, new choices are available in Settings > Apps> Messages > Show in Text Field. You can select one of three options:
Record Audio: You may want to retain this if you regularly send voice messages.
Start Dictation: Useful if you dictate texts rather than typing them.
None: The “Bieber” option for those who don’t dictate or record audio frequently enough to need these controls.
When you return to iMessages, you should see your choice appear in the text entry field. If it doesn’t, then force quit the app, open it again, and the change should appear.
Now even Bieber should no longer have this problem.
Advertisement
How do you access these functions in future?
You don’t lose any functionality when you remove these buttons from iMessage; all the options remain
You just need to know where to look:
To record voice messages, just tap the + (plus) button to the left of the text entry box and tap Audio from the list that appears.
To dictate a message, tap the microphone icon you see just under the keyboard on the lower right. (This should be on by default, but if you can’t see it, you can re-enable it in Settings > General > Keyboard > Enable Dictation.)
Apple made several improvements in iMessage with iOS 27. One nice enhancement (possibly introduced in preparation for the larger display available on the iPhone Duo) is a new Drawing app that lets you send sketches and handwritten notes, and it provides markup tools within iMessage.
Apple also introduced a new AI tool that suggests useful words and phrases and can automate tasks within a conversation, such as adding items to Reminders or Notes. It is also now possible to use one number across two separate iPhones. Finally, Apple’s messaging app now offers improved RCS support, including the ability to edit and unsend messages.
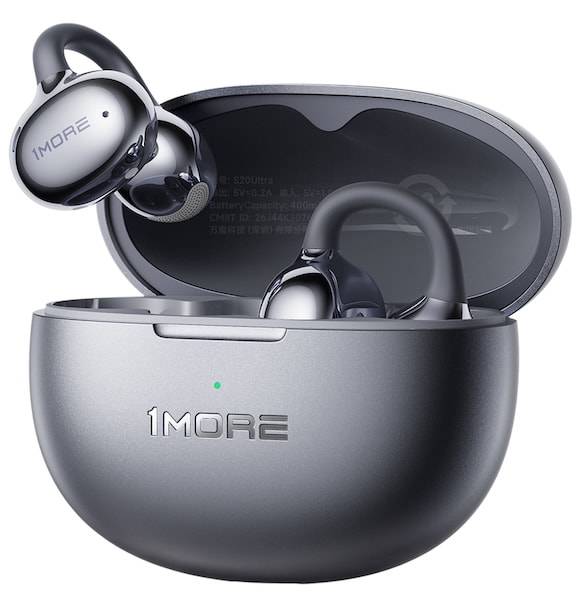
In our recent article, Open-ear Earbuds Are Booming While Traditional TWS Stalls, we noted that clip-on models are a major factor driving growth in the open-ear category. Continuing that trend, 1MORE has announced the S20 Ultra Wireless Clip-On Earbuds for a reasonable $79.99.
The S20 Ultra focuses on several longstanding challenges with this type of design, including sound leakage, wearing stability, and voice call performance. 1MORE combines high-resolution audio support with an ergonomic ear-clip design, smart features, and a feature set intended for everyday use.
Related Reading:
1MORE S20 Feature Overview
Open-Ear Awareness: Music can be enjoyed without blocking the ears, allowing users to remain aware of conversations, traffic, announcements, and other sounds around them. That makes the S20 Ultra well suited for commuting, outdoor walks, workouts, and everyday use.
Ultra-Light Comfort: Each 1MORE S20 Ultra earbud weighs just 5.5 grams. The company’s Balance AIR+ 3.0 design uses an ergonomic layout and balanced weight distribution to reduce pressure on the ear. Breathable, skin-friendly materials are intended to improve comfort during extended listening sessions.
Adaptive Secure Fit: The S20 Ultra uses flexible memory titanium C-rings designed to conform more naturally to different ear shapes. The clip-on design aims to reduce pinching and fatigue while maintaining a secure fit during workouts, commuting, work, and other daily activities.
Advertisement
All-Day Battery Life & IP66 Rating: The S20 Ultra provides up to 8.5 hours of playback per charge and up to 40 hours total with the charging case when SuperBass 3.0 is enabled. The earbuds are also IP66-rated for resistance to sweat, rain, dust, and splashes.
Audio Support: The 1MORE S20 Ultra features Bluetooth 6.0 with Hi-Res Audio support and the LDAC codec. Custom 11 mm triple magnet drivers use four layer diaphragms and support SuperBass 3.0.
BISA spatial audio is designed to create a more expansive, layered soundstage, while SDT 2.0 directional sound technology directs more of the audio toward the listener’s ears to reduce sound leakage.
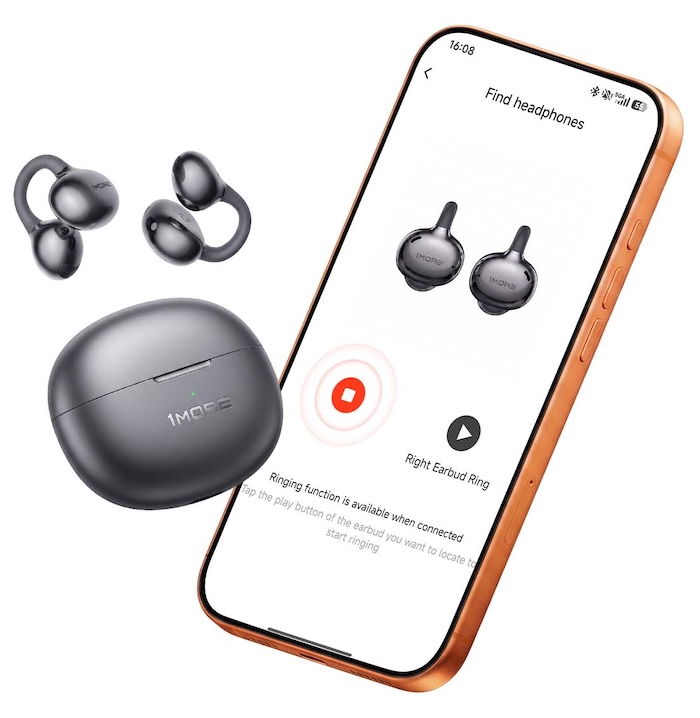
1MORE App: The 1MORE App for iOS and Android provides access to six preset EQ modes, a low latency gaming mode, Find Headphones, and additional settings and controls.
Clear Calls: The S20 Ultra uses four directional beamforming microphones with AI noise reduction to help isolate the user’s voice while reducing wind and surrounding noise. The system is designed to improve call clarity and stability in noisy environments, including during running, cycling, commuting, and outdoor work.
The 1MORE S20 Ultra arrives at exactly the right time. Clip-on earbuds have quickly become one of the more interesting parts of the wireless market because they offer something conventional TWS models cannot: music without sealing off your ears from everything happening around you.
Advertisement
Advertisement. Scroll to continue reading.
At $79.99, the S20 Ultra also offers a lot for the money. Bluetooth 6.0, LDAC, spatial audio, up to 40 hours of total battery life, an IP66 rating, and four microphone calling support make this more than just another inexpensive open ear option. The 5.5 gram design puts comfort at the center of the experience, while 1MORE’s SDT 2.0 directional sound technology attempts to address one of the category’s biggest weaknesses by directing more of the sound toward your ears and reducing leakage.
There is plenty of competition. The SOUNDPEATS Clip1 sells for $69.99, while the newer UU2 comes in at just $49.99 and also offers Bluetooth 6.0 and LDAC. At the other end of the category, the Shokz OpenDots ONE costs $199. That puts the S20 Ultra in an interesting middle ground for listeners who want more features than the least expensive clip on models without spending $200.
Who is it for? Commuters, runners, cyclists, office workers, and anyone who dislikes having conventional earbuds pushed into their ear canals but still wants better codec support and useful app features. The S20 Ultra does not reinvent the category, but for less than $80, 1MORE has assembled a rather compelling package in one of the fastest growing segments of the wireless earbud market.
We may receive a commission on purchases made from links.
As of 2025, the generations-long Ford F-Series and Chevy Silverado are the two best-selling vehicles in America, with the Ram Pickup coming in fifth. In fact, trucks had a higher share of vehicle purchases than passenger cars last year. All this means that truck driving isn’t just common in the U.S.; it’s a point of pride and a defining feature of the nation’s roads. To serve that massive portion of buyers, we’re highlighting a few tools that can prove important for truck drivers. But because of the unique nature of pickup trucks in comparison to cars, these tools can be rather different and more specialized.
Advertisement
Industry giant DeWalt has an enormous array of highly-rated tools in every category, and it can be quite difficult to know what’s best for your vehicle, especially if you’re newer to the world of trucks. So, if you’re looking to update your toolkit as a truck driver, the following popular picks from DeWalt are the perfect place to start. We’ve picked items from a range of different categories that we deem most useful for truck drivers, so that regardless of your budget or specific needs at the moment, there should be something to consider.
Advertisement
20V MAX LED handheld area light
That small emergency flashlight that you keep in your glove compartment can be perfectly suitable for illuminating the interior and exterior of your car as needed, but for truck drivers, this can dramatically complicate the work of finding an essential component, securing cargo, completing a routine maintenance job, or inspecting the truck before setting out on a job. Truck drivers, then, will typically appreciate something more heavy-duty.
If you’re a DeWalt customer, there’s one particular item that’s a good fit: The 20V MAX LED handheld area light. As the name suggests, it’s designed not simply to provide a narrow beam of light that the user has to direct by hand, but also to be quickly and temporarily affixed where needed to give broader, hands-free illumination. Its body is shaped with grips that make it more comfortable to hold for longer periods, and it also features a beltloop accessory.
The versatility of DeWalt’s 20V MAX* LED handheld area light extends to its suite of features as well. DeWalt notes that the area light features can be set between 300 and 1000 lumens, with a head that can swivel 140 degrees. Its compatibility with the rest of the range also means that users of other 20V MAX products may already have the battery and charging capacity they need for this model. Being designed for job sites, it can be a truck driver’s stalwart companion. You can currently find it for $55 on Best Buy and $45.10 on Amazon (down from $89), where it boasts an average of 4.8 stars based on over 1,300 reviews.
Advertisement
Grabo suction lifter
Pickup trucks are perfect for transporting heavier goods such as construction materials around a job site. However, a trucker needs a convenient, safety-compliant means of lifting them. Larger commercial trucks, of course, are often equipped with tail lifts for exactly this purpose, but another convenient tool for transporting heavy goods and equipment safely is the DeWalt Grabo Suction Lifter. A collaboration between DeWalt and GRABO, this is, according to the brand, “the first professional electric vacuum lifter.” A tool like a vacuum lifter, in some cases, may be the only practical way to move heavy loads with smooth surfaces, such as metal or plastic panels, slabs, and stones.
With a maximum load capacity of 265 lbs, this heavy-duty vacuum lifter is powered by batteries from DeWalt’s 18V or Flexcolt line. It boasts a foam/rubber seal with vital safety measures, including a two-action release and a warning and temporary inoperability state if a worker attempts to use it when its battery is below a certain threshold. As with the other items in the DeWalt range, it was created for versatility, and it is compatible with materials ranging from plywood and glass to MDF and pathing slabs. It will set you back $249 on Amazon, but it’s currently discounted to $189.99.
Advertisement
ToughSystem 2.0 DS450 mobile storage box
While trucks with big beds can transport large items — or large quantities of items — that a car owner would be unable to manage, transporting all those goods safely is just as important. This is where a rugged and hard-wearing storage solution you can keep safely in the bed of your truck comes in handy. There are a lot of things to consider before buying a truck bed toolbox, but the DeWalt ToughSystem 2.0 DS450 Mobile storage box could be just the solution for you.
Advertisement
DeWalt’s ToughSystem is a product range created to meet these sorts of needs, to transport both heavy and hard-wearing and more fragile tools without the risk of damage. The DS450 mobile storage box boasts a generous capacity that’s further customizable depending on how the user intends to transport their items. It’s designed to be operated with one hand to be wheeled across a work site on its 8-inch wheels, while its metal two-piece latches on the front keep the tools inside secure.
Because of the range’s modular nature, it can also be used as one important part of an even larger storage system that includes two additional storage boxes as part of the three-piece tower. Couple this with the 250-lb load capacity of the original storage box itself, and it’s clear just how much storage users can have and, of course, how much room they’ll need in a truck bed. The box is available in several stores, including Home Depot, where it’s priced at $125, while all three boxes will set you back $259.97, but are recommended by 82% of the customers.
Advertisement
heavy-duty ratchet tie-down straps
A lot of trucks have open beds, which is naturally a setup that can leave any cargo prone to shifting around heavily with the motion of the vehicle. For the vital job of securing everything you’re carrying in your truck’s open bed, then, you can consider DeWalt’s Heavy-Duty Ratchet Tie-Down Straps. DeWalt’s ratchet straps are available in several varieties, with two hefty versions being the 1.25-inch-by-16-foot Ratchet Tie Down Straps with 3,000 pounds of break strength and the 2-inch-by-27-foot Heavy-Duty RATCHET Tie-Down Strap with a formidable break strength of 10,000 lbs.
These straps are created for different weights or quantities of cargo, and while they also have utility for securing loads in other situations such as trailers, they’re primarily useful with trucks rather than smaller cars. They are made from polyester and feature metal ratchets and armored caps, but note that DeWalt specifies they are weather-resistant rather than weatherproof. The clips are designed to be hard-wearing yet quick to attach.
ACME Tools lists the larger and more formidable variety of 10,000-lb break strength straps for $29.99. Compared to some truck drivers’ essentials, they are far from breaking the bank and can also be easily stored away for convenient access when needed. Though a compact package when not in use, they also have considerable length. Nonetheless, it’s also important to remember that there’s still a limit to these products, and it can be extremely dangerous to exceed it. According to DeWalt, a 10,000-lb break strength translates to a safe working strength of 3,333 lbs, while a 3,000-lb break strength translates to 1,000 lbs.
I come from a car family, the kind that always had four or five vehicles in various states of “restoration.” Changing your own oil in my house was not only a rite of passage but a duty—proof that you were self-sufficient and economical, not, as my uncle would say, a “handy-man.” (“I open my wallet and hand over my credit card!” he’d roar.)
Suffice it to say, I changed my own oil for most of my adult life until about eight years ago, when I bought my first new hybrid SUV. Opening the hood for the first time, I saw an arrangement of black plastic rectangles, not the discrete auto parts I recognized. I didn’t know how to change the oil, and I wasn’t sure I wanted to figure it out. I was (and still am) a working parent, and I always appreciate having another chore taken off my plate.
The nearest oil change facility to my house turned out to be a Valvoline Instant Oil Change, and I have been going there ever since, for both that same hybrid SUV and a second one I bought a few years later. Hybrid vehicles require fully synthetic oil, which costs about twice as much per quart as conventional oil, so having the oil changed by a shop is typically worth it when factoring in the labor—especially if you have a Valvoline Instant Oil Change coupon.
Valvoline may be best known for its line of retail automotive products like oil and additives, but it also operates 2,100 US locations of Valvoline Instant Oil Change garages, which perform oil changes at up to 50 percent less than most car dealerships. And faster, too—usually around half an hour in my experience. If you, too, would like to have your oil changed quickly and inexpensively, or get some cash off some quarts of motor oil if you’re still DIY-ing, check out our Valvoline coupons and deals below.
Advertisement
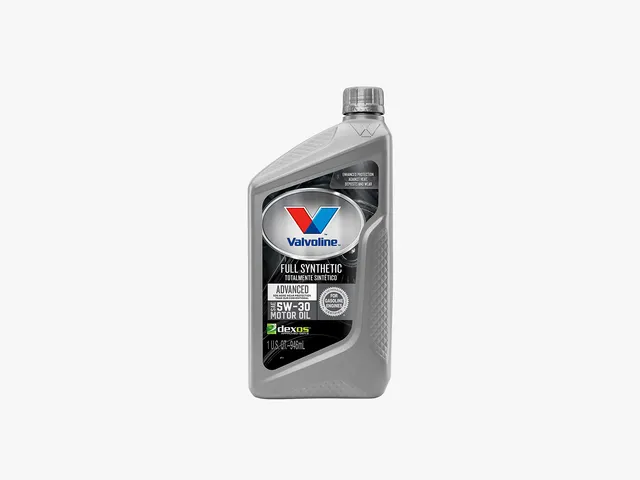
Valvoline Advanced Full Synthetic 5W-30 Engine Oil
Get $10 Off Full-Service Conventional Oil Change
If you have a basic, non-hybrid vehicle driven under normal conditions (infrequent stop-and-go traffic, no towing), you’re in luck—your oil change will already be relatively inexpensive. It will be even cheaper with this $10-off Valvoline coupon, which includes 5 quarts of Valvoline brand motor oil (diesel quarts may vary), a filter, lube and maintenance check, and tax. Print it or save it to your phone so you have it next time you’re out and about. Not valid with other offers or customer-supplied oil (at that point, you may as well do it yourself).
Unlock $15 Off with Valvoline Blend Oil Change Coupon
This is the coupon I personally use when I get my oil changed. In fact, I’m printing it out right now! Synthetic and synthetic blend oils are best for hybrid vehicles, luxury vehicles, vehicles subjected to a lot of stop-and-go traffic, trucks that tow, or any car with an engine that needs a little TLC. Because synthetic oil is engineered to be more consistent and uniform, it provides better temperature stability and cleaning power, leading to less wear and tear on an engine. It is also, of course, more expensive than conventional oil, so this Valvoline coupon offers a little more off—$15 as opposed to $10. Like the offer above, this Valvoline coupon is good for up to 5 quarts of Valvoline oil, a filter, lube and maintenance check, and tax.
Save 25% When You Subscribe and Save
When you buy more at Valvoline, you save more. One of the easiest ways to save is to buy in bulk, which is especially cost-effective if you have multiple cars or a family with several cars. When you purchase multiple units of motor oil, gear oil, or transmission fluid, you’ll receive a larger discount the more you buy, up to 25% off.
Valvoline Promo Code: $5 Off
Do you change your own oil and shop at a farm store, such as Fleet Farm, Blains, Rural King, Bomgaars, Theisen, Farm King, Quincy, L&M, Runnings, Buchheit, Family Farm & Home, Tractor Supply, or Norby’s? If so, you can get a $5 rebate with the purchase of five quarts of any Valvoline Motor Oil or 1 gallon of Premium Blue Heavy Diesel Engine Oil. Limit 3.
Advertisement
Find Your Nearest Valvoline Oil Change
There’s a reason Valvoline is a go-to for convenient, one-stop oil changes. With more than 2,100 locations nationwide, it’s likely there’s a Valvoline within twenty minutes of you. You can even check online—enter your location on the map and it’ll instantly show the nearest locations, so you and your car can hit the road again. Be sure to check Valvoline’s offers, which often include several oil change coupons so you can save big on your next Valvoline Instant Oil Change. When you find an offer on the coupon page, text or email it, print it from your desktop, or save it to your mobile wallet so you have it handy for your next discounted oil change.
KRAFTON India has launched KIGI Cohort 4 to support more game developers and studios in the country. Applications open on September 22, 2026. Through KIGI, developers can get financial assistance, expert guidance, and access to global platforms as they work on their games. The new cohort will also consider projects that have moved beyond early development.
KIGI Cohort 4 Expands Support for Games at Different Stages
KIGI Cohort 4 will continue to support early-stage teams and new game concepts. However, the program is expanding its scope to include games further along in development. Mobile games in beta or soft launch can now be considered. For PC games, developers can apply with titles that have a live Steam demo. The demo should also be receiving encouraging community interest. This wider approach gives developers a chance to seek support at different stages of development.
KIGI’s Previous Cohorts and Growing Game Development Support
KIGI launched in 2023 to support emerging game development talent in India. Since then, its earlier cohorts have helped several studios move their projects forward. Studios from the first batch have already reached a successful soft launch. In the second batch, Mumbai-based studio Singular Scheme made progress. Its game, Frontier Paladin, became the first PC game to come out of KIGI and launched on Steam on April 24, 2026.
KIGI Cohort 3 received around 1,000 applications before selecting four studios. These included Xod Games Studio, EvolX Games, Ether Games, and RedDevil Studio. With Cohort 4 now open for applications, more game development teams can apply for support through the program.
What just happened? A KLM flight from Amsterdam to Curaçao returned to the Netherlands after a portable charger caught fire in the business-class cabin. The incident underscores how a small battery failure can become a major operational issue on a long-haul flight, especially when an aircraft is far from its destination. It also put a former KLM chief executive at the center of an incident that highlighted the airline industry’s growing focus on portable power banks.
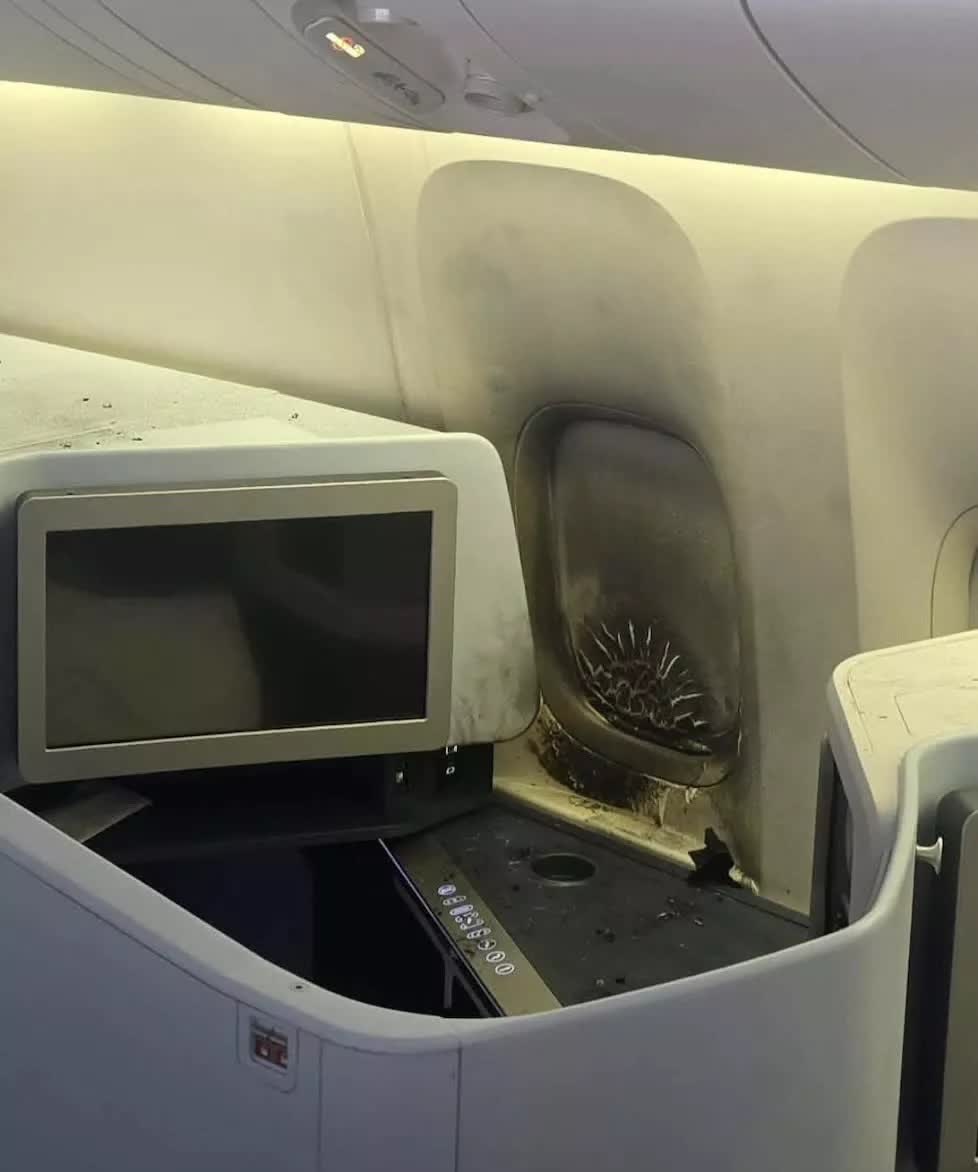
The power bank belonged to Camiel Eurlings, the former chief executive of KLM. The fire started nearly six hours into the flight, while the aircraft was over the Atlantic Ocean. The device left marks on Eurlings’ business-class seat and the window blind beside it.
The timing added to the disruption. Returning to the Netherlands required passengers to retrace much of the route rather than continue to Curaçao. The delay also carried into the next day, when travelers were rebooked on another flight and eventually completed the journey without further disruption.
The diversion shows why airlines pay close attention to portable chargers and other battery-powered devices. A power bank is small, but it contains lithium-ion cells capable of storing a significant amount of energy. If a battery overheats or fails, it can produce heat, smoke, and flames in a confined cabin. Such an incident is harder to manage on a long-haul route, especially when an aircraft is already far from its destination.
Advertisement
Airline rules vary, but carriers have tightened their policies around power banks and charging cords in recent years. Passengers are generally instructed to stop using a device if it becomes hot or begins to smoke.
The incident drew added attention because Eurlings once led KLM. He was not simply a passenger on the diverted flight; he had previously been responsible for the airline whose aircraft was involved.
One passenger told Dutch broadcaster RTL that Eurlings was “very upset” by the disruption but described his decision as “stupid.” Another passenger said: “If you are just a passenger, such a mistake can happen. But if you have enforced the company’s house rules, then this is very strange.”
As portable chargers become standard travel gear, airlines face a difficult balance. Keeping the devices in the cabin gives crews and passengers a chance to spot overheating batteries quickly, but it also puts a potential ignition source in a crowded, enclosed space.
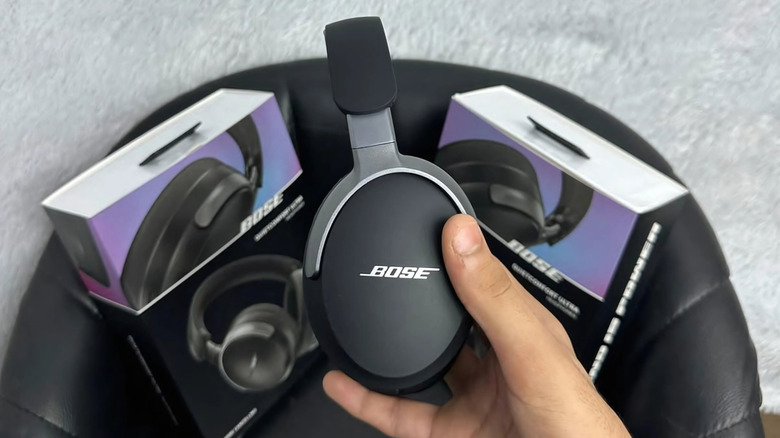
One of the most essential accessories for a person who keeps up with technology is a good pair of headphones. If you’re looking for the top-of-the-line products, you’ll likely come across Bose. We’ve highlighted several of the company’s offerings, from customer favorite Bose earbuds, to more immersive over-ear models such as the Bose QuietComfort headphones. If you have the budget for it, Bose is certainly one of the tried-and-true headphone options out there.
Of course, even premium electronics run into glitches sometimes. If, for some reason, your Bose headphones stop working as intended, there are a number of ways to troubleshoot them. The first step is usually turning the headphones off and then on again after around 30 seconds to one minute to force a power cycle. How to do it on your Bose headphones will depend on what model you own, but in general, there should be a power button right on the device that you can press.
Advertisement
If performing a basic power cycle doesn’t get your headphones back to working condition, your user manual or Bose’s support pages may offer solutions specific to the headphone function you’re having an issue with. When all else fails, your last resort could be to factory reset your Bose headphones and start fresh.
Advertisement
How to turn off your Bose headphones and perform a power cycle
RYO Alexandre/Shutterstock
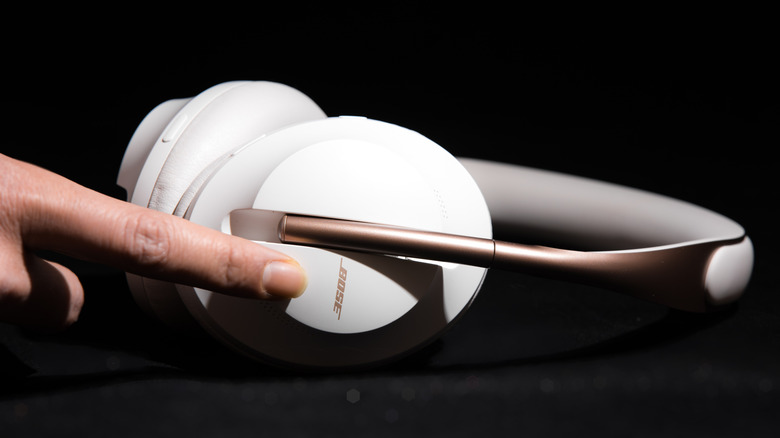
Before you panic and contact customer service, one of the easiest glitch fixes you can try without huge repercussions is turning your Bose headphones off. In some cases — for older models such as the Bose Noise Cancelling Headphones 700 – all it takes is a quick press and release of the power/Bluetooth button to turn the headphones off.
Headsets like the Bose QuietComfort 35 may have a slide power button that you’ll have to push to the left to shut the device down. For newer iterations, namely the Bose QuietComfort Ultra Headphones (2nd Gen), you will need to long-press the power/Bluetooth button until you hear a power down tone or see the status light turn off. If you happen to have Bose earbuds, you’ll probably need to place both back in the charging case and close the lid to execute a power down.
After around 30 to 60 seconds, hit the power button again or take your earbuds out of the case to complete a basic power cycle. Normally, this should clear any temporary bugs or memory issues without erasing any pertinent device preferences. If a problem persists, consult your user manual or Bose’s Help Center for your specific needs. Only consider factory resetting your Bose headphones as a last resort as it may clear your paired device history and other customizations you’ve done to your headphones’ audio settings. Apart from the power switch on the headphones, another common fix is toggling the Bluetooth function your Bose headphones are connected to, forcing a new connection by unpairing the headphones from your device, or updating the Bose app on your device. If none of these work, you may need tо go with the factory reset.
Advertisement
How to reset your Bose headphones by rebooting
Resetting your Bose accessory can be further classified into two actions: you can either “reboot” or “restore” your device. The less aggressive of the two is to reboot, which entails restarting your device without modifying any of your settings. This is often the move if your headphones are not responding or if none of the controls are working. Although performing a power cycle can also be a way of restarting your headphones, actual rebooting refers to a series of steps to be performed in order.
Remove the headphones from your device’s Bluetooth list.
Disconnect any charging or audio cables from the headphones.
Connect the headphones’ charging cable and charger head to a power outlet, or a powered on computer’s USB port. Do not connect the headphones to the charging cable yet.
Long-press the power/Bluetooth button on your headphones.
While long-pressing the button, connect the charging cable to the left (on the Bose QuietComfort Ultra Headphones 2nd Gen) or right (on the Bose QuietComfort Headphones 2nd Gen) earcup. This should cause the power light to blink twice.
Once connected, wait a few seconds then let go of the power/Bluetooth button.
For the Bose QuietComfort Ultra Earbuds (2nd Gen):
Place the earbuds in the charging case and make sure the light that indicates it’s charging is on.
Close the lid of the charging case.
Plug the charging case to a wall charger or a powered on computer using its charging cable.
Long-press the button on the back of the case for around 30 seconds until the light on the case turns off.
Advertisement
How to reset your Bose headphones by restoring
LUCKY4UU/Shutterstock
For most Bose headphones, rebooting should be sufficient enough to fix unresponsiveness. If not, you can try the reboot process one more time. If it really doesn’t do anything to fix the problem, you may need to go all-in and reset your headphones by completely restoring them.
Also known as a “factory reset” or “factory default,” restoring returns your headphones to its original, out-of-the-box state. It will remove all your settings modifications as well as all the pairings you’ve established. This option is usually reserved for more serious issues, such as headphones that won’t connect or pair to a device.
Here’s how to restore the Bose QuietComfort Ultra Headphones (2nd Gen) to factory default settings:
Remove the headphones from your device’s Bluetooth list.
Remove the headphones from your Bose account using the Bose app on your mobile device.
Long-press the power/Bluetooth button and multi-function button at the same time. This will cause the status light to blink amber for five seconds.
Keep long-pressing both buttons for 15 seconds until the status light turns solid white. The light should pulse blue when the restore process is complete, indicating that it’s ready for Bluetooth pairing.
To restore the Bose QuietComfort Ultra Earbuds (2nd Gen) to factory settings, do the following after removing the headphones from your device’s Bluetooth list as well as from your Bose account via the Bose app:
Place both earbuds in the charging case and keep the lid open.
Long-press the button on the back of the case for 25 seconds until the status light blinks white twice, pulses blue, and then turns off.
Repeat step 2 two more times. After the third time, the status light should blink amber for three seconds to indicate that the reset is starting. The light will pulse blue once the restore process is complete.
Based on testing, some Bose headphones models only offer the “reboot” option to reset your product. Double-check your manual and your product’s dedicated page on Bose’s Help Center for steps on resetting your product by “restoring” your headphones to factory settings. If you can’t find any, reach out to customer support via Bose’s Contact Us page for assistance in restoring your Bose headphones to its out-of-box conditions.






























































You must be logged in to post a comment Login