

.jpg)
-2.jpg)
Hi readers! Shayla Love here, science journalist and longtime fan of Your Mileage May Vary. I’m honored to be subbing for Sigal Samuel while she’s out on parental leave. I’m diving into your questions as a way to help understand human nature and our choices through multiple lenses: philosophical, psychological, and beyond. Please send in any emotional, body/brain, sociological, perceptual, or other kind of life quandaries you might have.
Tech
Our Lab Data Revealed the Portable Power Stations That Will Keep Your Fridge Running During Outages

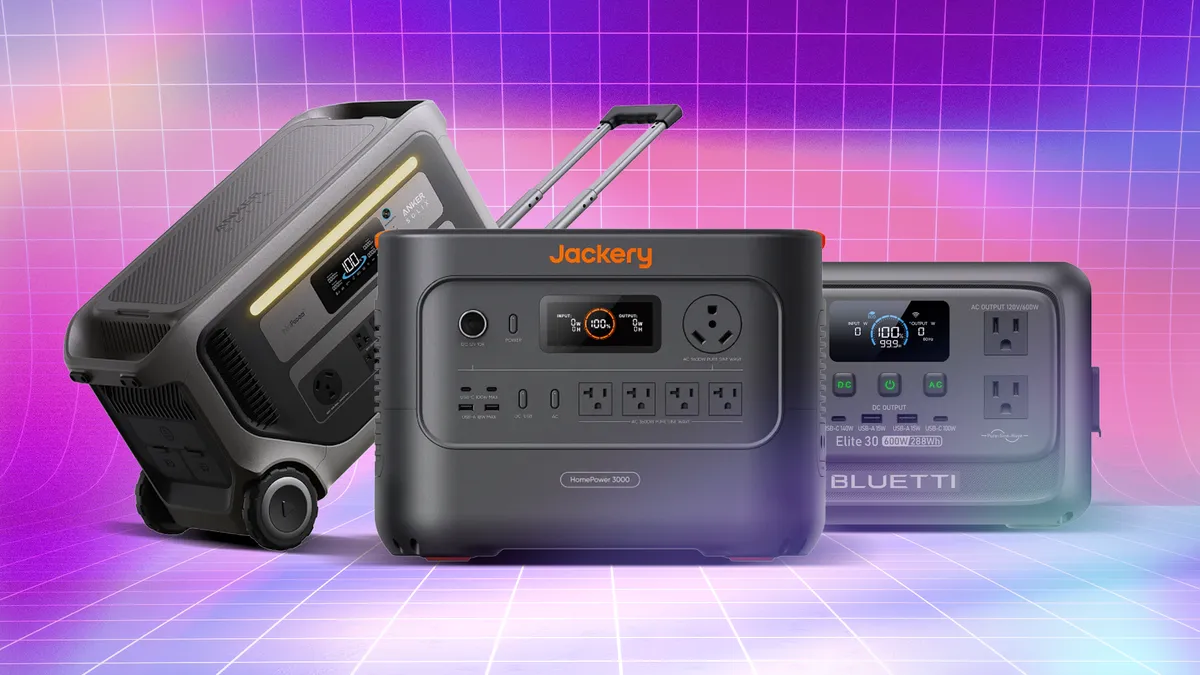
Portable power stations are a great tool for keeping your most important devices — including phones, laptops and routers — charged during an emergency such as a power outage, but what if you need to power your fridge or washing machine? You may be under the impression that you need to spend thousands of dollars on a whole-home backup system such as a Tesla Powerwall. But thankfully, CNET’s lab testing has revealed you don’t need as much wattage to run your home appliances as you might think.
We tested 19 large and extra-large portable power stations to see how long they could keep our test fridge running in the lab. The results showed that while extra-large models can oftentimes keep your fridge running longer, that’s not universally true, and depending on your energy needs, a smaller portable power station can work just as well for many large appliances.
Key takeaways:
- The Fossibot 3600 Pro performed the best overall, keeping the test refrigerator running for an impressive 44.65 hours (1.86 days). The Oupes Mega 5 followed closely behind in second place at 43.72 hours (1.82 days).
- The Oscal Power Max 2400 had the shortest runtime by far, lasting only 12.58 hours (0.52 days).
- The Anker Solix F3800 Plus performed poorly for its size, lasting only 25.68 hours (1.07 days) despite its large 3,840Wh capacity.
- The Bluetti AC200L unit is the efficiency king for large appliances, lasting 29.27 hours on a 2,048Wh battery.
- The Anker Solix C2000 Gen 2 is a standout performer, lasting 27.4 hours on a 2,048Wh battery.
The Solix C2000 Gen 2 was a particularly impressive performer in our fridge test for its size.
Lab awards for power stations:
CNET’s lab testing gives us reams and reams of data that let us determine the most efficient portable power stations across every size category. Our winners for round-trip efficiency, which measures how much energy you get back from the power station compared to how much power you need to draw from a wall outlet to charge it, are listed below.
Most Efficient Small Unit (<600 Wh): UDPower AC0600 (RTE: 72.92%)
Most Efficient Medium Unit (600-1299 Wh): Bluetti Elite 100 V2 Bio-Based (RTE: 83.44%)
Most Efficient Large Unit (1300-2199 Wh): Bluetti Elite 200 (RTE: 81.08%)
Most Efficient X-Large Unit (>2200 Wh): Jackery HomePower 3600 Plus (RTE: 79.66%)
For charging speed, which measures how quickly a portable power station can charge to 100% from empty, we have only one winner.
Fastest charging: Oupes Mega 1 Lite 0.73 hours (about 44 minutes)
How CNET stress tests portable power stations for disasters
Each of the 19 portable power stations in our test batch was used to power a full-size refrigerator (Whirlpool, 60Hz, single-phase, 118V, full-load 7.2A) until the battery completely drained. We measured how long each unit kept the refrigerator running and reported the results measured in hours and days. Since this test reflects real-world use rather than a controlled laboratory measurement of battery capacity, efficiency ratings (round-trip efficiency) are only reported from our standard testing procedure.
While the results showed that larger units last longer for demanding appliances, they also revealed that slim, custom-designed models such as the Bluetti FridgeGuard prove you don’t need huge, bulky home backups. In fact, several of our better-performing models weren’t what we consider “extra-large,” ones with a capacity larger than 2,200 watt-hours, but rather fell in a more modest 1,300 to 2,199Wh range.
Unique measurements we use for our fridge stress testing
Measured watt-hours (Wh): The total usable capacity the battery has available to give.
Fridge watt-hours (Wh): The actual amount of energy the refrigerator consumed over the duration of the test.
Delta: The difference between the measured Wh and the fridge Wh. This represents the energy the power station consumed itself (idle draw) just to keep its inverter running for that amount of time.
Percentage reduction: The delta divided by the measured Wh. This gives us the exact percentage of the battery’s total usable energy that was wasted as internal overhead.
The best power stations for large appliances
Below is our list of power stations, ordered by how long they kept our test fridge running.
As seen in the combined list below, while the units with massive XL battery capacities generally sit near the top, highly efficient large units including the Bluetti AC200L and the Anker Solix C2000 Gen 2 can outrank several bigger systems (such as the Anker Solix F3800 Plus and Pecron E3600LFP) simply because they waste far less energy.
The extra-large models naturally dominated the absolute runtimes, but performance varied widely by efficiency, with the Fossibot 3600 Pro being our overall winner for both sheer runtime and efficiency at 44.65 hours (1.86 days). In the large category, while they have smaller batteries, the top large units proved incredibly power-efficient, with the Bluetti AC200L as the overall winner, delivering 29.27 hours of fridge runtime (1.22 days).
Fridge runtime in order from highest to lowest
- Fossibot 3600 Pro: 44.65 hours (1.86 days)
- Oupes Mega 5: 43.72 hours (1.82 days)
- Jackery Home Power 3600 Plus: 38.58 hours (1.61 days)
- Jackery Home Power 3000: 32.05 hours (1.34 days)
- Bluetti Apex 300: 30.43 hours (1.27 days)
- Bluetti AC200L: 29.27 hours (1.22 days)
- Anker Solix F3000: 28.97 hours (1.21 days)
- Pecron E3600LFP: 28.15 hours (1.17 days)
- Anker Solix C2000 Gen 2: 27.40 hours (1.14 days)
- Bluetti Elite 200: 26.32 hours (1.10 days)
- Anker Solix F3800 Plus: 25.68 hours (1.07 days)
- Bluetti FridgePower: 23.43 hours (0.98 days)
- ETAKER M2000: 22.48 hours (0.94 days)
- DJI Power 2000: 22.42 hours (0.93 days)
- BougeRV Rover 2000: 21.10 hours (0.88 days)
- Dabbsson 2000L: 21.00 hours (0.88 days)
- Grecell H2400: 17.75 hours (0.74 days)
- GoalZero Yeedi 1500: 16.50 hours (0.69 days)
- OSCAL Power Max 2400: 12.58 hours (0.52 days)
After testing eight, there’s only one extra-large portable power station we recommend for fridges
Extra-large (>2,200Wh)
- Fossibot 3600 Pro: 44.65 hours (1.86 days)
- Oupes Mega 5: 43.72 hours (1.82 days)
- Jackery Home Power 3600 Plus: 38.58 hours (1.61 days)
- Jackery Home Power 3000: 32.05 hours (1.34 days)
- Bluetti Apex 300: 30.43 hours (1.27 days)
- Anker Solix F3000: 28.97 hours (1.21 days)
- Pecron E3600LFP: 28.15 hours (1.17 days)
- Anker Solix F3800 Plus: 25.68 hours (1.07 days)
The Fossibot 3600 Pro is our top choice for keeping your fridge running.
The Fossibot 3600 Pro is the best power station for keeping your fridge running. It kept our test fridge running for 44.65 hours (1.86 days). That means you can get almost two days of cooling during a power outage if you own the 3600 Pro. It’s also remarkably power-efficient. Even though the Oupes Mega 5 had a much larger measured watt-hour (4,352.86Wh compared to the Fossibot’s 3,293.74Wh), the Oupes wasted an incredible 1,730.22Wh just to keep its inverter running.
This resulted in a 39.75% reduction in efficiency for the Oupes Mega 5. Meanwhile, the Fossibot only lost 860.03Wh to overhead (a 26.11% reduction), allowing it to power the fridge for almost an hour longer despite its smaller battery. This shows better power efficiency when handling the cycling loads of a refrigerator.
The Oupes Mega 5 has tons of power, letting you run a fridge for nearly two days.
The Oupes Mega 5 comes a close second in the extra-large category, offering 43.72 hours (or 1.82 days) of power. On paper, while these models sound like they’re in a dead heat, it actually speaks poorly of the much larger Mega 5, which only has 4,352.86watt-hours, according to our measurements, despite what it claims on its box.
Contrast this with the 3,293.74Wh measured wattage of the Fossibot 3600 Pro. That means, despite having a massive 5,040Wh capacity on paper, the Oupes Mega 5 actually loses a huge chunk of it in real-world use, making it inefficient for running the cycling loads of a typical refrigerator.
After the Oupes Mega 5, our list starts to separate into more distinct winners. The Jackery Home Power 36000 Plus lasts 38.58 hours (1.61 days), while the Home Power 3000 lasts 32.05 hours (1.34 days). This is to be expected as a function of size and capacity, since each subsequent unit, such as the Bluetti Apex 300, had lower measured watt-hours and capacity than the preceding model.
The large portable power stations that punch above their weight
Large (1,300–2,199Wh
- Bluetti AC200L: 29.27 hours (1.22 days)
- Anker Solix C2000 Gen 2: 27.40 hours (1.14 days)
- Bluetti Elite 200: 26.32 hours (1.10 days)
- Bluetti FridgePower: 23.43 hours (0.98 days)
- ETAKER M2000: 22.48 hours (0.94 days)
- DJI Power 2000: 22.42 hours (0.93 days)
- BougeRV Rover2000: 21.10 hours (0.88 days)
- Dabbsson 2000L: 21.00 hours (0.88 days)
- Grecell H2400: 17.75 hours (0.74 days)
- GoalZero Yeedi 1500: 16.50 hours (0.69 days)
- OSCAL Power Max 2400: 12.58 hours (0.52 days)
If you’re looking for a smaller portable power station that can still keep your fridge and other key home appliances running, look no further than the Bluetti AC200L. With a capacity of just 2,048Wh, it ran the fridge for 29.27 hours.
It completely outclassed several XL units with significantly larger batteries, including the Anker Solix F3000 (3,072Wh), which lasted 28.97 hours, the Pecron E3600LFP (3,072Wh), which lasted 28.15 hours and the Anker Solix F3800 Plus (3,840Wh), which lasted 25.68 hours.
The Elite 200 can keep your fridge running for over 26 hours.
It led the large category by a solid margin, beating out the Anker Solix C2000 Gen 2 (27.40 hours) and the Bluetti Elite 200 (26.32 hours).
However, the Anker Solix C2000 Gen 2 is worth considering as well. Also offering a 2,048Wh capacity, it achieved 27.40 hours of runtime, comfortably outlasting the XL Anker Solix F3800 Plus despite having nearly half the battery size on paper.
How much power/wattage do you really need to run your key home appliances?
Watch this: Portable Power 101: Solar ‘Generators’ Explained
Our lab testing shows that you may not need as much power or wattage in your portable power stations as you might think. It all comes down to what you’re trying to power.
“In plain terms, 80% of users’ actual emergency power needs fall under 200W,” Sean Tan, PR manager at Anker Solix, said, referencing data from a survey of 759 Anker power station customers. “Fridges, Wi-Fi routers, lights, phone/laptop charging. Not air conditioners. Not power tools. The ‘wattage arms race’ has been optimizing for the 20% edge cases while the 80% majority pays a premium for capability they never use.”
For fridges specifically, you need to consider that they’re intermittent loads. That means they cycle on and off, drawing power heavily for short periods and then entering a low-power standby mode. Because of this, a power station’s inverter efficiency and self-consumption (idle draw) matter more than just battery size. That’s why a portable power station such as the Fossibot F3600 Pro can beat something like the Oupes Mega 5, which looks larger on paper in terms of capacity.
The Jackery HomePower 3600 has a huge amount of capacity for fridge backup. But despite winning a lab award, it surprisingly wasn’t our top performer.
“We generally recommend a 1kw or 2kw power station for common kitchen appliances such as refrigerators, microwaves and coffee makers,” said Brian Essenmacher, head of North American business development for EcoFlow. “These mid-sized units can typically power a fridge for a half day or full day.”
“A smaller 10- to 15-cubic foot refrigerator during a short four-hour outage may only require around a 1kWh power station,” said Marc Deng, R&D manager at Bluetti, concurring with the power estimate, though he pointed out that for US consumers, the requirement may be on the higher end. “But the reality for many American households is different. Larger French-door and side-by-side refrigerators are often in the 18- to 28-cubic-foot range, with typical power consumption around 80 to 190W. For families preparing for longer outages caused by hurricanes, winter storms or grid failures, around 2kWh becomes a much more practical starting point.”
What you need to know before buying a power station for a fridge
“The biggest trap is looking at capacity alone,” said Tan. “Capacity tells you how much energy is stored, not how much actually reaches the device.” He points to two things that matter more: light-load efficiency and idle consumption. “A home fridge runs at 100–200W, cycling on and off. Most of the time the power station is operating well below its rated output. Efficiency at these light loads varies dramatically between units.” As more idle consumption, “When the fridge compressor is off, the power station is essentially sitting idle, but still burning power. Industry typical idle draw is 15–20W. That adds up fast.”
Those looking for a reliable emergency fridge backup should prioritize low idle power consumption and high small-load efficiency over buying the largest, heaviest battery available. A well-optimized 2,000Wh unit can easily outlast a poorly optimized over 3,000Wh unit, as our data shows. By default, all portable power stations waste some energy; the key is to find the one that wastes the least, while also providing stable power.
Ideally, you also want one with an uninterruptible power supply (or UPS), which helps maintain stable, continuous power. “Modern refrigerators often rely on electronic controls and variable-frequency compressors, which are designed to operate continuously under stable power conditions,” said Marc Deng, R&D manager at Bluetti. “A good rule of thumb is that the UPS transition time should be below 20 milliseconds, with around 10 milliseconds being ideal. If the transfer is too slow, the refrigerator’s internal electronics may reset, causing the compressor and control system to restart unnecessarily. Over time, repeated interruptions can create additional stress on the appliance.”
It’s also important not to overlook the surge power stat that many portable power stations advertise. Deng pointed out that depending on the refrigerator model, the startup surge can range from around 600W to well over 1,200W. “Surge power matters a lot,” Tan said. “Compressor startup pulls several times the running wattage. A station needs 2,500–3,000W peak to reliably handle most residential fridges.”
The FridgeGuard is thin enough that it can sit on top of a fridge or in a tight corner.
You also need to consider the percentage of energy wasted as overhead. The Anker Solix F3800 Plus wasted 46.63% of its energy just keeping itself running, which explains its short runtime. The Pecron E3600LFP had the lowest overhead loss with a tiny 15.75% reduction, while other highly efficient units included the Anker Solix C2000 Gen 2 (18.21% loss) and the Bluetti AC200L (22.16% loss). These low-loss units ensure that power actually reaches the refrigerator rather than being lost as internal heat.
In the XL category, our undisputed winner is the Fossibot F3600 Pro, which is $2,600 at full price, but frequently on sale for less. It lasted the longest and wasted the least energy in the XL category. For the large power stations, our winner is the Bluetti AC200L. It punched above its size and power capacity, offering excellent efficiency and the longest fridge runtime of any large portable power station.
Do you need a portable power station specially designed for fridges?
The FridgePower lets you pair multiple BlueCell batteries with it, giving you up to four days of runtime.
It’s worth noting that there’s a new category of portable power stations, with slim models designed to sit on or be mounted behind a fridge. Examples include the new Bluetti FridgePower and the Jackery FridgeGuard, both of which I’m testing at home, while Anker’s Solix S2000 is a more traditional take on the capability.
Of these, we’ve only been able to run lab tests on the FridgePower, and the results are impressive. It falls into the upper tier of large portable power, keeping our test fridge running 23.43 hours (0.98 days), so it lasts nearly a full day. Of its 1,621.09Wh measured capacity, the FridgePower only lost 328.08Wh (a 20.24% reduction) to internal inverter overhead. This compares favorably with other, more efficient models.
While it won’t keep the fridge running for multiple days, even the bulky Fossibot 3600 Pro is hard-pressed to do that. The design is its biggest selling point: The FridgePower is slim, lightweight and can be out of sight and out of mind, unlike hooking up your fridge to a traditional power station. So while it’s not required to power a fridge, the FridgePower won’t look out of place in your kitchen and it provides sufficient power to get you through an outage.
Continue Reading
A chainsaw is one of those essential yard tools that homeowners may not realize they really need until they actually do need one. If you’d prefer not to wait until you’ve got a yard full of fallen branches that need cutting down to see the need for a good chainsaw, they are easy enough to come by in the consumer market, with several major manufacturers putting their logos on quality devices these days.
There are so many options that it may be tough for some to determine which brand is most worthy of their hard earned money. But those who do even a little bit of research in the chainsaw market will learn with a quickness that Stihl is widely regarded as one of the best brands in the powered cutting tool game. If you’re interested in procuring a Stihl chainsaw for yourself, the brand currently features models to suit virtually any need in its online marketplace.
While you’re perusing those options, you might want to consider checking out some of the other tools and gear featured on the site, because Stihl has stretched its range of offerings well beyond just high-powered chainsaws. In fact, Stihl likely has a handful of powered and non-powered products available that even its most devoted fans had no idea even existed. Here’s a few you might genuinely be surprised to find among Stihl’s offerings.
Sprayers and misters
Apart from its well-regarded chainsaws, Stihl does indeed manufacture many other products fit for use by backyard DIYers and pro yard crews alike. That list includes mainstays like trimmers, pruners, blowers, and mowers. You may not realize it, but that list also includes a few more specialized tools like sprayers and misters.
If you’re unfamiliar with those devices, they are typically used to disseminate chemicals that help control pests, weeds, and fungi in your green spaces, as well as life-giving water and fertilizers. Sprayers tend to work better for focused coverage, while those with misting features are ideal for covering larger areas. At present, Stihl has 11 sprayers and misters listed among its online offerings, with styles ranging from non-powered handheld models, to backpack style builds that run on gasoline or lithium ion power.
Those sprayers vary dramatically in price, with the cheapest handheld model selling for $26.99 and the gas-powered S450 Backpack build listed for $859.99. Between those two models and the range of makes in between, Stihl seems to offer a sprayer that can meet the needs of most consumers. User ratings are not entirely encouraging for many of the models, however, so you’ll want to be sure to do your research before you purchase one.
Axes, Mauls, and other woodcutting gear
The Stihl brand has long-been been recognized as one of the preeminent manufacturers of powered chainsaws. As such, the family-owned outfit has, historically, focused the bulk of its production on gas and battery powered cutting tools. Given the company’s general market focus, you might be surprised to learn that Stihl also offers several non-powered woodcutting tools, including both axes and mauls.
For those who may not be in the know, even as those tools bear a striking resemblance to each other, they are designed for decidedly different purposes. To break it down simply, traditional axes are designed with a slim head to cut across wood fibers to more efficiently bring down trees and limbs of various sizes. A maul, on the other hand, is designed with a heavier, wedge-shaped head that makes it ideal for splitting logs. Whichever of those tools you might need, Stihl surprisingly offers multiple models of each online, ranging in price from $37.99 to $119.99. The brand also offers a 19.75-inch hatchet for $66.99 if you need one of those.
Perhaps more surprisingly, Stihl even features several logging accessories among its woodcutting wares. That includes various log-moving tools like a Cant Hook, a Log Carrier, and a Hookaroon.
Sweeping machine
For the sake of being fully transparent, we can tell you that, prior to coming across the tool on Stihl’s website, we were not really aware that sweeping machines were even a thing. They are. And as surprised as we were to learn that, we were even more surprised that Stihl actually makes one.
If you’re as uninformed as us on sweeping machines, you might now be wondering what, exactly, one does. Turns out that the name is pretty self explanatory — a sweeping machine is basically designed to be a sort of street sweeper for sidewalks, smaller hardscaped areas, and some home interiors. They look a lot like a lawn mower, except that the front end is equipped with spinning brushes that collect leaves and debris as the sweeper passes over them. The device is, of course, powered, and designed to run on Stihl’s AP 300 S lithium-ion battery.
According to the listing for Stihl’s Sweeping Machine, the sticker price includes neither the necessary battery or a charger. Given that it’s priced at $1039.99, that exclusion may be a deal breaker for some, particularly as the sweeping machine will likely be viewed as a luxury addition to most yard care routines. If you can afford it, however, the sweeping machine may be a luxury worth having.
Smart tool accessories
We are officially living in the age of the smart device, with the term being applied to everything from the phones in our pocket to the appliances in our kitchen. Given the fact, it’s only natural that the smart device craze has made its way into the power tool arena, with companies like DeWalt utilizing Bluetooth capabilities for its Tool Connect system.
Several of the other major players in the power tool market have followed suit, and Stihl is very much among them. At present, the brand features just two smart devices on its website — the Smart Connector and the Stihl Connected Hub. The former tool is, in essence, a smart tag tracker that can be attached to any Stihl tool. Once in place, the tag — which picks up on motor-generated electromagnetic fields — can transmit data to the Stihl app, allowing you to track a device’s runtime, performance, and, perhaps more importantly, its location.
Meanwhile, the Hub does exactly what you’d expect a hub to do, which is collect that Smart Connector information on a scale more befitting an entire fleet of tools, then storing it in the Stihl Cloud for easy user access. Stihl’s smart devices are priced at $203.99 and $235.99, respectively.
Inflators and Compressors
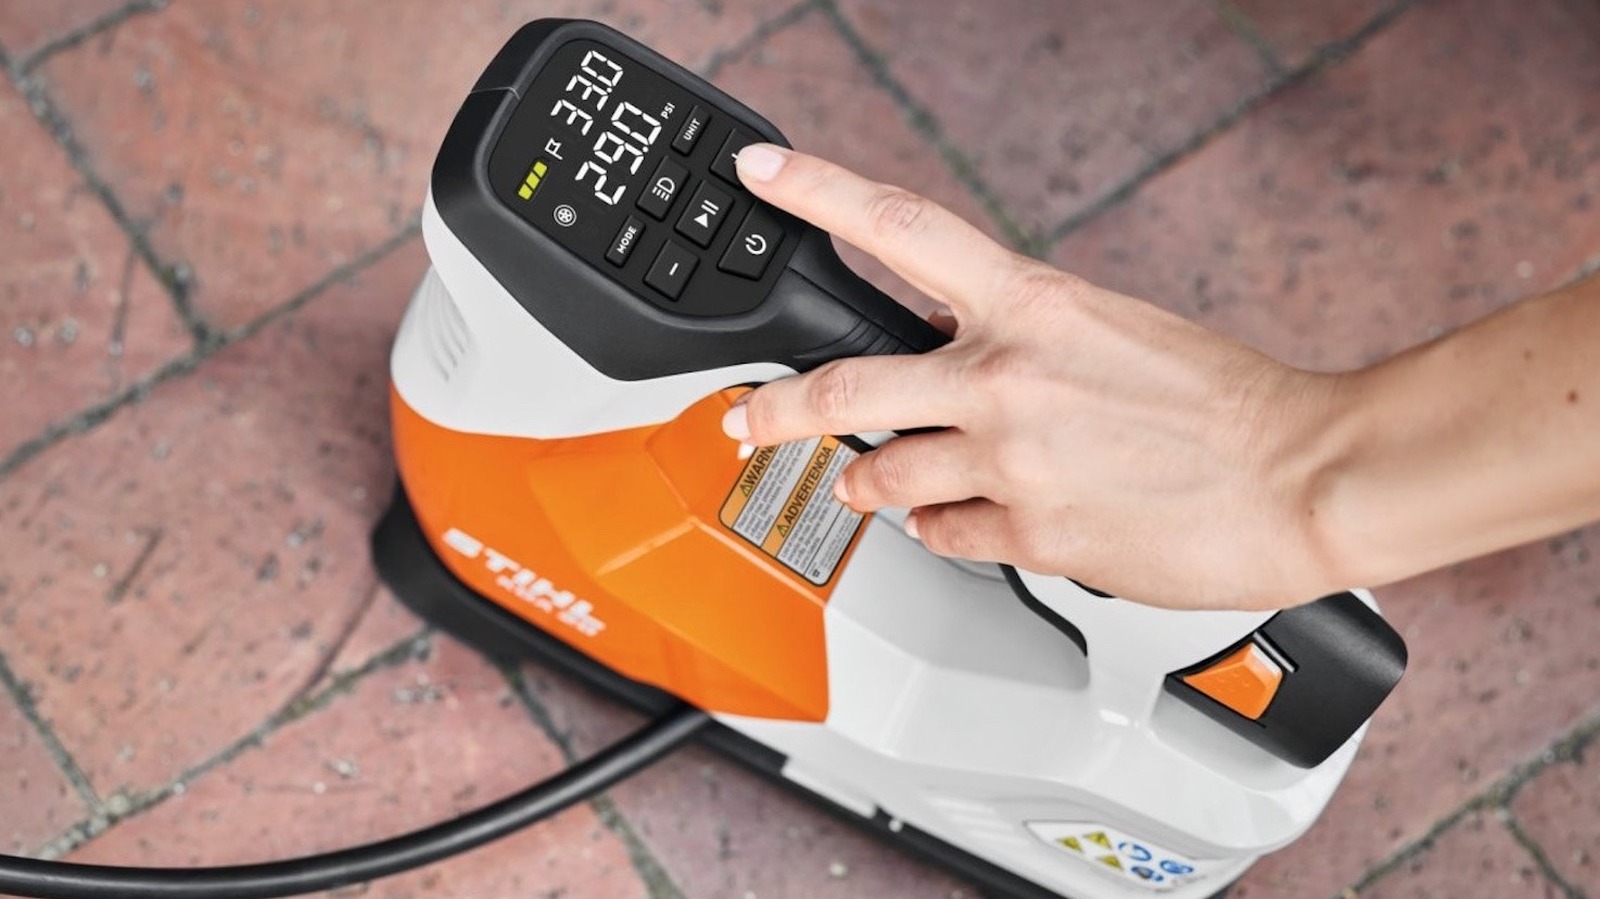
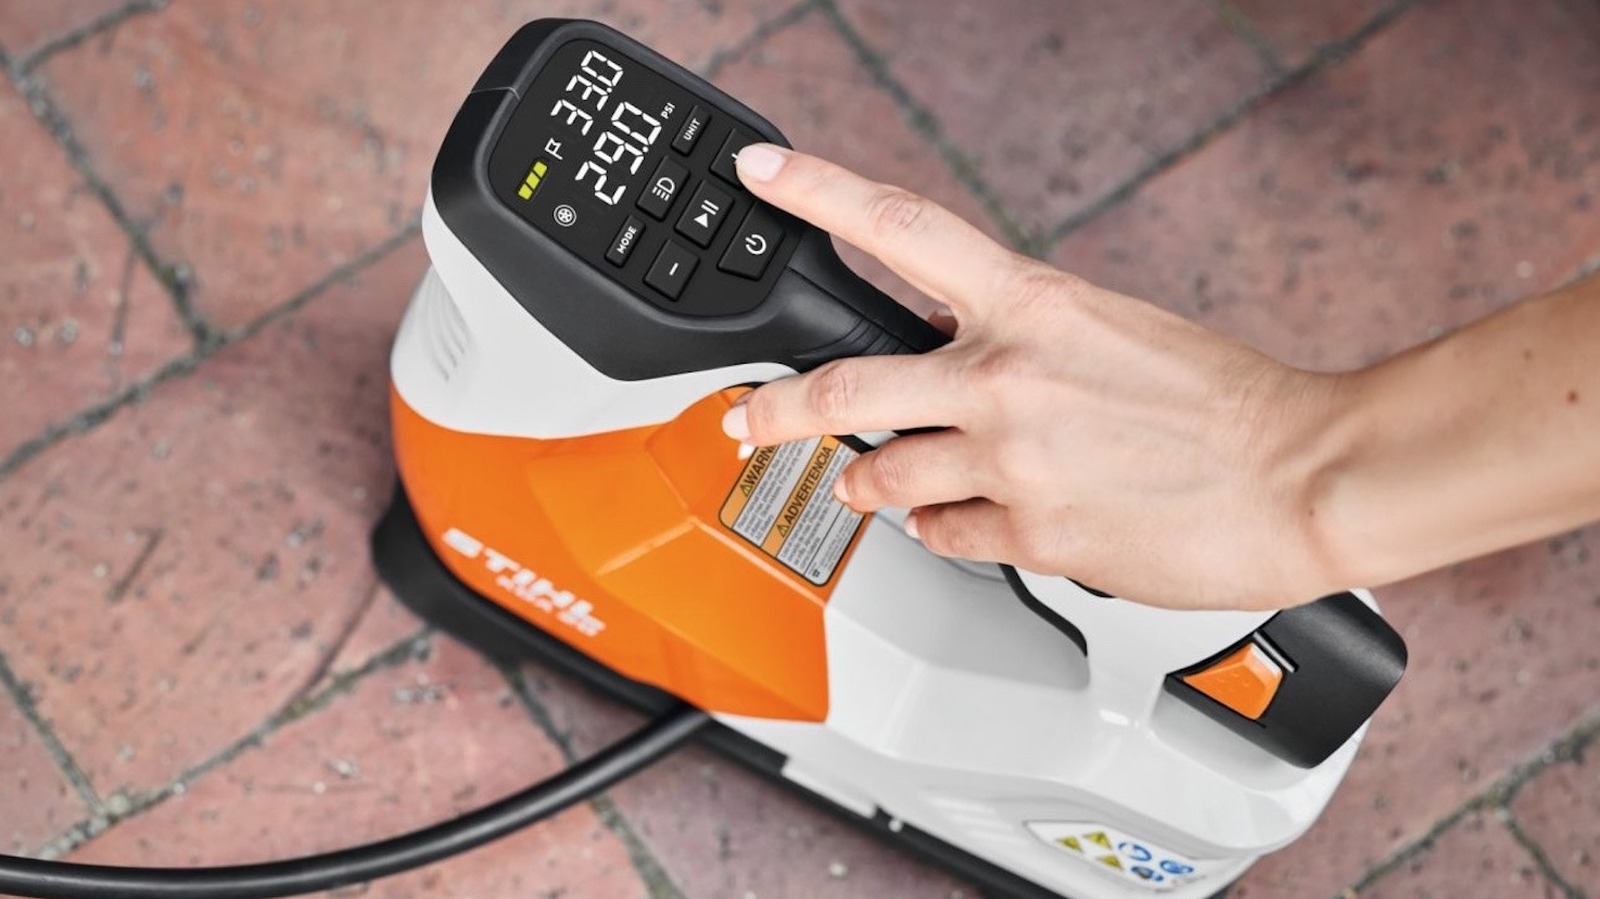
Even as advancements have been made regarding inflatable items, car tires, bike tires, and soccer balls still regularly turn up in need of air. While hand pumps are capable of filling those items with the requisite air they need to function, they are hardly convenient, and in the case of a car tire, may not properly do the job. As such, electric inflators have become all the rage among many of the major tool makers out there.
Yes, Stihl has indeed joined the inflator fray, offering a single battery-powered model among its tools. That inflator is the KOA 20, which is currently selling for $119.99 in tool-only format. If you’re looking to add the inflator to your garage setup, which requires an AS 2 battery and the AL 1 charger to power it, Stihl sells a kit with all three for $199.99.
Those prices are, more or less, on par with what you’ll find among inflators from some of the other major brands, and for what it’s worth, Stihl customers seem to be plenty impressed with the KOA 20 — which is IPX-4 rated for weather resistance and can also deflate items to desired pressures — rating it at five out of five stars on its product page.

This article is brought to you by COMSOL.
In pursuit of improved range, greater reliability, and faster charging, electric vehicles are driving the demand for high-voltage electronics. Other applications driving this demand include wind farms, data centers, and server farms, to name a few. As the interest for high-voltage electronics increases, the risks associated with their sudden failure must be considered.
Much of what causes high-voltage equipment to malfunction can be linked to the conditions of the climate in which it operates. Specifically, condensation on electronic surfaces caused by humidity can lead to corrosion, which can result in stray leak current and dendrite shorting during Electrochemical Migration (ECM).
Predicting, mitigating, and helping proactively design to account for corrosion is the focus of the Centre for Electronic Corrosion (CELCORR) research group at the Technical University of Denmark (DTU). The group’s researchers are working with industry partners to develop models and simulation apps that will help in building robust electronics designs. Their goal is to develop knowledge that can be used for manufacturing electronics to withstand humid operating conditions.
Electronic Failure: “It’s Not the Heat; It is the Humidity”
Automotive electrification and renewable energy systems rely on electronics at all stages of the energy chain. When these electronics, such as the example PCB in Figure 1, are exposed to the effects of moisture, they can become potential failure points.
“Anywhere you are producing, converting, transporting, and using energy, you need these high-power electronic systems that get affected by the humidity,” explained Dr. Rajan Ambat, DTU professor and manager of CELCORR. Ambient moisture can seep into the devices and machines that require these electronics and cause unexpected functional issues through corrosion. When these electronics are involved in particularly high-voltage applications (such as wind farms, data centers, electric vehicles, and server farms), failure due to humidity exposure can even lead to fire.
“There might be a situation where somebody installs a solar panel near the seashore or in an area with high humidity, and within a short period of time, a conducive condition forms inside the electronics that results in a failure,” Ambat said. “This is why we need to understand exactly how the conducive condition of condensation is created, when the condition is created, and how the system is failing.”
 Figure 1. The electrolyte potential and current density distributions on a PCB surface (with pinholes).CELCORR/DTU
Identifying corrosion as the underlying cause of some electronic failures is still a challenge. “Fifty percent of failures in electronics are currently branded with an unidentified root cause,” Ambat explained. “When engineers open up the system, they do not realize that the failure was due to corrosion, because moisture disappears without leaving any sign of corrosion unless there is ECM dendrite formation.”
This lack of awareness was a strong motivator for CELCORR, which turned to multiphysics simulation as a supplementary tool to help its partner organizations to better predict humidity-related issues at the design stage.
Modeling Moisture and Measuring Parameter Changes in PCBs
CELCORR believes the best way to identify and avoid electronic failures is to build more effective designs that better prevent corrosion from developing or can withstand a higher humidity load. Its research team applies its expertise in modeling to generate simulation apps that will help partner industries to evaluate safe designs for humidity robustness.
“We are at the intersection of materials science and the electronics industry. We work as a bridge between materials and electronics disciplines, using both kinds of language,” Dr. Anish Rao Lakkaraju, a postdoctoral researcher at CELCORR, explained.
To understand potential design issues, Ambat emphasized the importance of virtually breaking down systems to identify where problems may arise. “We need simulation software to analyze potential uses of designs and whether new designs are good or bad,” Ambat said.
Researchers at the Technical University of Denmark (DTU) are using simulation apps to predict corrosion and design electronics proactively to mitigate or withstand its effects.
Using the COMSOL Multiphysics software for investigation, the CELCORR research team together with other research partners (Aalborg University) built an example model with a simple PCB geometry that matched both its test circuit boards as well as the design of a device used by one of its partner companies. The team then added a water film layer on top to act as the relative humidity. From there, the team could introduce variation. “We change the layout, geometry, distance between electrodes, thickness of the water film, and conductivity of the water film depending on the conditions,” Ambat said.
Ambat and his team generate data on the effect of these variations and can identify which has the greatest impact on the device’s performance and whether any alterations can improve the device’s anticorrosion robustness. “We assume there is condensation forming on the electronic surfaces (Figure 2) and compute the electrochemical leak current for different design elements,” Ambat said. “The value of the computed electrochemical current between the parts will give us an indication of whether the PCB will be affected or not.”
 Figure 2. A 10-µm water film condensation effect on an example PCB.CELCORR/DTU
Altering the design elements and solving the model equations again and again allows the team to better understand what makes a design effective. “Now, we are at the current form of the model, and we are quite happy with where the physics are at this point,” Lakkaraju said. This modeling, however, was just the first part of CELCORR’s overarching goal of illuminating the destructive potential of corrosion in electronics and the best ways to avoid it.
Using Simulation Apps to Test Real-World Designs
To open up and ease access to these models, CELCORR used the Application Builder in COMSOL Multiphysics to create simulation applications for the members of the industrial consortium. Built with a simple 3D circuit board geometry with two oppositely biased electrodes and a water layer to replicate corrosion-causing moisture, the apps provide a pared-back, straightforward interface where users can vary model inputs. “We focused on fundamental aspects,” Lakkaraju said. “We boiled down our partners’ overarching concerns to create two apps with very simple geometries and the simplistic stuff that can be varied over multiple parameters.”
The simple simulation apps shown in Figures 3 and 4 are designed to show companies how the distance between the electrodes and the thickness of the moisture layer affect the leak current through the water film depending on different parameters. By analyzing multiple design elements and parameters, users can determine the relative benefits of certain design elements on the humidity robustness. “The apps we have built have really helped because they give the electronics engineers a plug-and-play sort of approach,” Lakkaraju explained.
 Figure 3. The UI of CELCORR’s standalone app showing the inputs that users can alter.CELCORR/DTU
“By using this app [Figure 3], companies have unlimited freedom to work with these sorts of variables,” Lakkaraju added. “This would be quite difficult to recreate in real life with physical design and testing, and the companies we work with are quite happy with the level of accuracy the app can provide.”
 Figure 4. The UI of one of the simulation apps showing a streamline plot with inputs such as the cathode voltage and blockage length.CELCORR/DTU
Looking Forward: Complex, High-Voltage Modeling
Alongside its collaboration with the industry consortium, CELCORR is also working toward improving the world’s general understanding of corrosion’s impact on electronics. To do this, Ambat and his team are undertaking multiple projects, including actively adding greater complexity to their models. In a tertiary current distribution model they are building, the team is drilling down into each of the basic inputs used in a secondary current distribution model, zooming in to examine the effects of the set of even more detailed inputs each basic input comprises.
“The next point is to study what each of these detailed inputs does,” Lakkaraju said. In particular, the team is examining mass transport properties and the chemical reactions’ rate constants.
In addition to these ongoing studies, CELCORR is expanding the scope of its research to investigate corrosion in high-power, high-voltage systems. Thanks to a 2024 grant from the Grundfos Foundation, CELCORR was able to establish the Centre for Climate Robust Electronics Design (CRED). The center’s lab facilities and expertise are being developed to address the humidity-robustness requirements of today’s high-voltage and high-power electronic equipment. “Using CELCORR’s uniquely deep understanding of materials and corrosion, we are equipped to find the root cause and provide knowledge for environmentally robust designs,” said Ambat.
For all of its investigation, CELCORR continues to rely on the agility of the COMSOL Multiphysics software. As Lakkaraju explained, “It is really quite nice how a model can be adapted to a variety of combinations of materials, geometries, and parameters and how the software allows you to keep building on from there.”
Related Articles Around the Web

Valar Atomics confirmed the whisperings that it was raising a giant round led by Sequoia on Monday. The startup’s founder and CEO Isaiah Taylor announced that the company has raised $1 billion in equity, with Sequoia partner Shaun Maguire joining its board, and that it also secured a $200 million line of credit from Erebor and other banks.
While the nuclear startup did not disclose its valuation, Bloomberg reported that it was $6 billion.
Valar is building small modular nuclear reactors (SMRs) — essentially miniaturized, factory-built power plants intended to be cheaper and faster to build than traditional reactors. In June, it demonstrated its Ward 250 reactor successfully powering an Nvidia Blackwell system, the company said, and announced a deal with Nvidia to develop a waterless 30MW AI factory.
Valar says its reactors generate the engineering, manufacturing, and operational data needed to improve next-generation reactors, speeding its development cycles.
“It took two years to complete the NOVA core. It took seven months to take Ward 250 critical. With each reactor built, the tick rate will become smaller until Valar is producing tens, then hundreds, then thousands of reactors per year,” it said, adding that this funding will allow it to reach to its next milestone: manufacturing fleets of its SMRs.
It certainly isn’t the only nuclear startup pursuing such ambitions. Over the past few months, Antares raised $470 million, and X-energy raised $1 billion through its IPO.
As for Valar’s new round, other investors include Apandion Capital, Atreides Management, Conviction, Dream Ventures, HOF Capital, Point72 Ventures, Riot Ventures, Snowpoint Ventures, and Valor Equity Partners.

Apple’s iPhone production in India is getting more of a boost, as the government considers extending a tax exemption on manufacturing machinery and component imports until 2041.
India is a major location in Apple’s work to diversify its production outside of China. While it has already benefited from many incentives from the country, its supply chain stands to benefit even more.
A draft proposal seen by Reuters affects a tax exemption that India introduced in February. That incentive, applicable to foreign companies, was introduced after Apple lobbied against being taxed for iPhone machinery it owned in India but provided to contract manufacturers.
Under the original incentive, it was set to expire in 2031. Under the proposals, it would instead run until 2041.
At this time, the draft proposal still needs to pass through both houses of Parliament for approval, in a process that can take months, if not years.
Beyond machinery
The proposals don’t just extend the period of exemption on taxes for machinery. It also extends into the realm of component storage with regard to exports.
India will also exempt foreign companies from being taxed for storing and shipping parts used to manufacture components and products. However, only for hardware that is not intended for sale in India.
Instead, factories and warehouses would have to set up in customs-bonded areas. This refers to regions that are considered to be outside India’s customs border for taxation purposes.
Items imported and stored in these areas would not be subject to import taxes. That is, so long as the products and components made with them are then exported out of the country.
If those items are then sold within India, they would be subject to import taxes as normal.
For Apple, the change would be beneficial, since it wouldn’t pay import duties. The intention is to make India more attractive for producing iPhones intended for exports.
Apple already benefits from import duty cuts on July 9, affecting select components used to produce smartphones. The proposed change will bring those same taxes down to zero, for export-only production.
Data storage
While the bulk of the proposals surround manufacturing, there’s also some relating to another kind of storage. That of data.
In February, India introduced a tax exemption for foreign companies using data centers in the country, for providing services to users around the world. That tax exemption lasts until 2047.
However, the proposal extends the exemption to allow those data centers to be leased by Indian partners, rather than be owned outright. The change means it will lower the capital requirements for Indian partners, opening it up to smaller and mid-sized firms.
To Apple, it means a bit more flexibility if it wants to set up data centers in the country.


Presented by NTT DATA AIVista
At VB Transform 2026, NTT DATA AIVista CEO Bratin Saha joined VentureBeat CEO and editor-in-chief Matt Marshall to discuss the last-mile challenge of operationalizing frontier models in regulated production, where reliability, context, guardrails, and security determine whether AI delivers enterprise value. The conversation centered around the question facing every enterprise now pouring money into AI: how to convert that spending into real, tangible value.
“It’s not just a model, you’re building a system around the model,” Saha said. The last mile is the work of wrapping a frontier model in an enterprise’s own data, workflows, and guardrails.
In the end, regulated production turns on more than just technology, Saha said. Today, most enterprise AI projects fail during implementation because of poor integration, domain specialization gaps, lack of governance, and unclear ownership of outcomes. Last-mile specialization turns a capable foundation model into an enterprise agent shaped by domain-specific workflows, risk appetite, client classifications, regulatory interpretations, and institutional knowledge.
Why frontier models stall in enterprise workflows
Frontier models fall well short of production-grade accuracy on many real-world insurance workflows, Saha said, but last-mile specialization can lift them to the reliability enterprises need. Out of the box, those models struggle with the complexity of regulated workflows such as multinational insurance claims.
“These forms are pretty complex, often have handwriting, lots of checkboxes, and so on,” he said, and that complexity is why frontier models like Fable 5, Opus 4.8, and GPT-5.5 fall short out of the box.
Saha said the biggest gains come from specializing the entire AI system, not just the foundation model.
That system gets specialized with the customer’s data, workflow and, in many cases, the tribal knowledge that never made it into an operating procedure document.
“The biggest bang for the buck comes from the specialization and then these specialized guardrails,” he said.
The work has three components:
capturing the enterprise’s context and making it consumable by AI
running an ensemble of models so cost does not go through the roof
and adding specialized guardrails that check the model and force a redo when it gets something wrong.
What the last mile of agentic AI actually requires
None of this involves fine-tuning. VentureBeat’s latest enterprise survey found it ranked last among companies’ model-selection priorities.
Instead, the last mile centers on domain knowledge and undocumented workflows that companies would never expose publicly without losing their competitive edge.
“The last mile is about taking data that’s proprietary to you and using that to build a system around the model that can steer the model in the right way that can put the appropriate guardrails around it,” Saha said.
In the end, enterprise AI is about moving a workflow from point A to point B rather than deploying a technology, and NTT’s advantage comes from pairing AI experts with subject domain experts.
“The only reason is because we go and talk to those human workers and we say, ‘How do you actually do the work,’” he said. That expertise is then encoded into an agent.
Success in insurance, manufacturing, and other regulated industries relies on three things at once, he added.
“You need technology, you need the domain expertise, and you need the change management expertise,” he explained, adding that across his team’s clients, technology is not the bottleneck.
How enterprises turn AI investment into tangible value
For enterprises weighing large AI budgets, Saha’s said the payoff comes not from the model but from the work built around it.
“When you’re deploying AI in the enterprise, you’re not deploying a technology,” he said. “You are taking a workflow that exists and taking it from point A to point B.” The value is created by the workflow that gets moved, not the model that helps move it.
That reorders where money should go.
“Technology is not the bottleneck,” Saha said, pointing instead to the domain expertise and change management wrapped around the model, and to the discipline of commiting to all three together. Spending aimed only at the model leaves most of the return on the table.
Enterprises don’t have to choose between embedding AI into existing workflows and redesigning those workflows from scratch. NTT sees the two as successive stages of the same journey.
“We are starting with embedding in the workflow because it’s easier change management,” he said, noting that customers running mission-critical operations will not let a vendor rip out a working process midstream. “Once that happens, then we go into, how can we now reimagine this? And that really is where the biggest bang is.”
Where enterprise AI stays bespoke and where it becomes scalable
Keeping intelligence in the surrounding system rather than the model also preserves swappability and lets enterprises take advantage of open-weight and open-source models as they mature. Saha’s team runs an ensemble that mixes frontier and open-source models, and he expects the industry to lean on open weights wherever the cost of a mistake is low while reserving frontier reasoning for the cases that demand it.
“In many situations, especially in regulated industries where mistakes are very expensive, that last extra couple of percent matters,” he said.
The platform follows the same pattern: Guardrail generation and neurosymbolic models scale across customers, while capturing each organization’s tribal knowledge remains bespoke. Saha pointed to NTT DATA’s position as one of the world’s largest insurance third-party administrators as an advantage in acquiring that expertise.
“The ability to take that knowledge and trust that has been built over 20 years is very hard to replicate instantly, and I do think that is a durable aspect of what we have,” he said.
Sponsored articles are content produced by a company that is either paying for the post or has a business relationship with VentureBeat, and they’re always clearly marked. For more information, contact sales@venturebeat.com.

In my current season of toddler parenthood, I’ve sometimes felt that I could cut the tension between myself and the TV remote with a knife. As much as I try to keep screen time in check, sometimes I need 10 uninterrupted minutes to unload the dishwasher before a certain almost-2-year-old goes for the dog bowl.
That’s where audio players are handy. In a world where screens are increasingly hard to avoid, parents are looking for alternatives—and these players, in their various formats, are to the rescue. The devices mark a sweet spot between independent play and story time, letting kids listen to music, audiobooks, and interactive stories without a tablet in sight. Some audio players are geared toward younger kiddos who enjoy tactile toys and familiar characters like Elmo and Bluey, while other options are designed to grow with them to chapter books, podcasts, and beyond.
Over the past several weeks, my family has tested some of the biggest names in the category to see how they stack up. Here’s the verdict on which ones are best suited for different families and their needs.
Want more recommendations for WIRED-tested kids’ toys? Here’s our guide to Brain-Boosting Toys for Kids, Kid-Approved STEM Toys, and the Best Gifts for Lego Lovers.
Best for Kids of All Ages
-
Photograph: Nicole Kinning
-
Photograph: Nicole Kinning
Yoto
Yoto Player (3rd Generation)
The Yoto Player is simple enough for toddlers to operate independently while offering a broad enough content library to keep it relevant as kids grow. Stories and music live on credit card–sized cards that my daughter could swap in and out with her little hands, and the small pixel display on the front of the machine adds a visual element without becoming another distracting screen.
You can add each Yoto card to your child’s library through the device’s companion app. Once you do, you can stream the content directly from your phone or remotely send it to the Yoto. That means you’re not necessarily tied to bringing the speaker with you everywhere you go. I saw this capability as being especially useful on road trips—you can play stories through your car speakers or listen from your phone if the player gets left behind or its battery dies.
Yoto offers more than the stories and songs from its player cards. You’ll also get kid-friendly daily radio, draw-alongs, toothbrush timers, white noise, a wake-up clock, and a nightlight that activates when you flip the player screen-side down. I only see it getting more useful as my daughter grows, and if I’m being honest, there is a Nancy Drew story collection I am secretly eyeing for myself.

The incredibly useful feature is only present in specific headphone and earbud models.

Bluetooth headphones have exploded in popularity, with the market continuing to grow each year. The category, which includes over-ear headphones like the Sony WH-1000XM6 and in-ear devices like Apple’s AirPods line, offers a mix of comfort and convenience, and we’ve reached a point where it’s hard to find name-brand headphones that don’t sound at least somewhat decent. But while most marketing for consumer-grade wireless headphones focuses on headline features like active noise canceling, there’s another feature most people should add to their list of non-negotiables.
Once upon a time, during the halcyon days of the ubiquitous headphone jack, swapping between devices was a matter of popping the plug out of one and into the other. Maybe you’d get an audio splitter if you really needed to use two audio sources at once, but that was as complicated as things usually got. With Bluetooth, simply switching even the best wireless headphones over to another device involves fiddling with settings menus and dealing with frustrating connection issues.
Finicky connections are a defining trait of the decades-old Bluetooth protocol, and although improvements continue to be made with each generational update, that essential character remains. That’s where Bluetooth multipoint comes in. It’s a feature that allows a Bluetooth device to remain connected to multiple devices at once, swapping between audio streams from each as you use them. While multipoint can introduce some annoyances of its own, it’s still far preferable to manually switching between devices over Bluetooth. Here’s why it’s a must-have for most headphone shoppers.
Bluetooth multipoint reduces friction for multi-device setups

Bluetooth multipoint is a manufacturer-introduced technology which can allow for a wireless audio device to maintain a connection to multiple audio sources. It usually allows for a connection to two devices, though there are exceptions. The feature is more common on high-end consumer headphones like the Sony WH-1000XM6, though it can sometimes be found on downrange products.
Your Bluetooth devices use different Bluetooth profiles for different types of audio. Music and other media streams use the A2DP profile. On certain devices, this can also transmit high-resolution wireless codecs like Qualcomm AptX and Sony LDAC. You may simultaneously use an AVRCP profile to send volume and play/pause commands to the host device. When you get a phone call, you’ll switch over to the lower-quality audio of the bidirectional HFP profile. When you’re listening to music on your laptop, you might get a phone call, and your headphones will prioritize the HFP connection to switch over. However, if you’re using HFP for a Zoom call, it may retain priority until you answer the incoming call.
Not all multipoint is made equal, and whether a particular implementation of it works for you depends on which devices you plan to use the headphones with. It’s a good idea to test the multipoint functionality of a pair of headphones before you buy them, if possible, to ensure that their multipoint implementation works well with your particular devices. If you can’t test that functionality before buying, do so before the return period ends.
Multipoint can create its own frustrations

Bluetooth multipoint can make it much easier to use multiple devices with a single pair of headphones, but it can also introduce new headaches. Multipoint is not part of the Bluetooth specification, and is instead implemented by device manufacturers on top of the Bluetooth stack. This explains why it remains a relative rarity despite consumer demand. The ability to handle multiple streams was added with Bluetooth 4.0, but multipoint features are logics built atop the Bluetooth protocol. Bluetooth cannot mux or sum together multiple audio streams, so multipoint does not allow a user to listen to audio from multiple devices at once. Instead, it decides which stream should take priority and pipes that to your ears, often pausing other media. Incoming phone calls usually demand precedence, for example.
Multipoint often assumes you’ll only use one device at a time, but try scrolling Instagram on your phone while listening to a podcast on your computer. As Instagram’s annoying autoplay causes the app to output audio, your multipoint headphones will divert away from your podcast. This will often happen even if your phone’s media volume is set to zero. Equally annoying notification dings on your phone may ride along on the same Bluetooth profile as phone calls, interrupting you with every group chat message.
Apple and Samsung have their own solution to this issue. Technically, the best AirPods and Galaxy Buds do have multipoint — a modified version designed to work exclusively with their own products. While often justifiably perceived as user-hostile, this approach can yield better Bluetooth switching results in normal use because the company controls the way Bluetooth is implemented on its headphones, phones and laptops, whereas companies like Sony or Bose do not have the benefit of bespoke ecosystems.

I’m swimming in information. I have tracking apps to keep tally of my daily steps, minutes online, my calories, my sleep. Throughout the day, I am awash with data — some “actionable” and some useless. I find it a struggle to prioritize. I find myself looking up the latest betting odds for a Senate race in a state where I don’t live. (I didn’t bet on the race.) What I want to know is: What should I know less about? I’ve heard that ignorance is bliss, though I don’t often find that to be the case. But maybe I know too much, or…too little about how much to know?
Dear Un-blissfully Aware,
As a fellow know-it-all, I relate to your impulse to gather as much information as possible. I used to obstinately reject the idea that ignorance was bliss. Even if I learned something that was unpleasant, wouldn’t it be much worse not to know it?
But, as you may suspect from sharing my temperament in this arena, this approach to life can lead to hoarding knowledge like a frantic animal preparing for winter. You’re acquiring information as if it’s a scarce resource (which it’s not) and as if choosing to know something is neutral (it isn’t). What helped me understand the implications of this sort of approach was learning about the cases when people decided not to know, or the study of “deliberate ignorance.”
Have a question you want answered in the next Your Mileage May Vary column?
Fill out this anonymous form! Newsletter subscribers will get my column before anyone else does and their questions will be prioritized for future editions. Sign up here!
Several years ago, a psychologist, Ralph Hertwig, and lawyer, Christoph Engel, who both work at the Max Planck Institute in Berlin, examined what happened in the early 1990s, when the archives of East Germany’s secret police, the Stasi, opened to the public. Any person who had been living in the German Democratic Republic could check if they had been spied on. There was a pretty substantial catch, though: The spies were often “unofficial collaborators” — friends, family, teachers, or lovers who had been tasked with covertly collecting information. When the files were opened, many elected not to look. Hertwig and Engel estimated that potentially more people chose not to know what their files contained than those who did.
This goes against what we think we know about humans and how you have described yourself. Even Aristotle seemed quite certain that “all men naturally desire knowledge.” In the 1980s, the psychologist George Miller followed along in this line of thinking. He described humans as informavores: creatures with minds that constantly seek out and consume information. So, it can feel surprising to hear about occasions when people didn’t start grabbing for every available datapoint like squirrels dashing for acorns as the first winds of fall arrive.
But, as Hertwig and Engel — who collaborated on an entire book called Deliberate Ignorance: Choosing Not to Know — point out, we’re surrounded by people choosing ignorance all the time. They avoid looking at their bank statements, they skip doctor’s appointments, and they cover their ears and say “no spoilers” if someone is talking about a movie they haven’t yet seen.
Even Nobel Laureates do this. When James Watson, one of the co-discoverers of DNA’s double helix, had his own genome sequenced, he requested that a specific gene be left out: ApoE4, which can reveal an increased Alzheimer’s risk. Watson’s grandmother had Alzheimer’s, and her experience clearly made an impression on him. (Then, many in the scientific world tried to remain ignorant to Watson’s increasingly misogynistic and racist comments, until it was unignorable.)
Why do people choose not to know? The most common reason: Ignorance can be an extremely effective way to regulate any emotions that might crop up in response to knowledge. You can minimize negative feelings by, for example, not knowing that your otherwise friendly neighbor had been reporting on your comings and goings.
In a study about romantic relationships, a majority of people said they didn’t want to know if their partner had ever thought about cheating on them (but never acted on it). Other research showed that most people wouldn’t want to know the exact time of their death. Alternatively, someone could cultivate the feelings of joy and surprise by waiting to find out the sex of a baby until it’s born.
Deliberate ignorance can also be used to protect us from our biases. Scientists do blinded studies, because the knowledge of what drugs are being used can unwittingly change the outcomes or research. When orchestras implemented blind auditions, more women musicians were accepted.
Of course, deliberate ignorance can be problematic when it causes harm to yourself or others, like failing to gather basic information about your financial or physical health. In some cases, for instance, about 10 percent of people who got tested for HIV didn’t come back for their results — which could lead to further spread of the disease.
But when skipping out on knowledge doesn’t endanger you or those around you, it’s worth asking: How would this information make me feel?
This sounds like a question that’s missing from your information-ingestion habits. You don’t have to — and shouldn’t — ignore everything that comes across your desk. But your deliberate ignorance filter is turned entirely off; seemingly anything passes through it. To take just one of your examples, you mentioned fitness wearables. It can be useful to be aware of your general activity levels and your sleep, but honestly, don’t you already know enough from your memories of a workout class and how rested you feel in the morning? A quest for more detailed knowledge like this can backfire, making people more anxious, and disconnected from their actual physical experience.
It’s not just about how much knowledge to take in, it’s also about what kind. The breadth of information that you’re seeking out makes me wonder if you’re not already using knowledge to regulate your emotions by favoring superficial knowledge over the meaningful. When we face difficult tasks (even if they’re important, and we want to get them done), that’s usually when, suddenly, a Senate race in a far-off state starts to become interesting, or you find yourself scrolling a high school acquaintance’s wife’s Instagram.
In the 1990s, two technology researchers proposed the concept of “information foraging,” which was inspired by early user behavior on the web. A few years later, Webster’s dictionary announced that their word of the year was “infosnacking,” or mindless grazing for useless knowledge online in order to pass the time.
Snacking sometimes is fine, but you’ll start to suffer if you only eat chips for every meal rather than something more nutritious. I suspect you might be avoiding the slightly more challenging task of taking in other, more nutrient-dense knowledge. If you cut out the step tallies, screen minute totals, and news headlines scrolling, what could you choose to know instead?
What I’ve learned about myself is that I will always lean towards being an informavore. I can’t help it. I am hungry to know, and there is no need to totally overhaul this valuable part of who you are (as I also tell myself!). This means you don’t need to replace your infosnacking with zenfully staring at the ceiling or emptying your mind through meditation. You can still put new things into it! But you could worry less about your daily information calorie intake and spend more time thinking about the nutrition content of your knowledge diet.
Take a lesson from our many deliberately ignorant friends, and try disregarding some of the little stuff — the body tracking, the random factoids — for a period of time. But, at the same time, increase your knowledge about other subjects: a neglected hobby or a nonfiction book collecting dust on your shelf. Have a long conversation with your best friend and ask each other questions you’ve never asked before or interview an older relative about their childhood.
And remember that all of this knowledge relates back to your emotional life. Rather than asking yourself what you should or shouldn’t know, examine how you might be using knowledge to alter how you feel. Knowledge changes us. It can make us happy, anxious, excited, or sad; it impacts our decisions and how we see ourselves and other people.
In some of your newfound spaces of intentional ignorance, you may find just some surprising moments of bliss.
Bonus: What I’m reading
- The ostrich may be famous for its head-burying ignorance, but that’s actually a myth dating back to the ancient Romans. Ostriches don’t hide their heads, but, rather, bury their eggs underground. I highly suggest flipping through the book Ostrich by Edgar Williams, professor of cardiopulmonary science at the University of South Wales, for a natural and cultural history of our largest living bird that is way more interesting than it needs to be.
- In a moving essay in the China Books Review, poet and writer Zhang Er remembers growing up during the Cultural Revolution and receiving “torn books,” or sections of forbidden books, to read from a family member. Even with incomplete knowledge, “my world expanded with each torn book,” she writes.
- Not a book, but a powerful story on the ripple effects of being exposed to new information in East Germany: the 2006 movie The Lives of Others, from director Florian Henckel von Donnersmarck, which I recently saw for the first time. A Stasi officer listens into the life of a playwright, whose own fragile ignorance about his situation in the GDR is becoming challenged.

Hank Green, a novelist, comedian, and YouTuber with 3.2 million subscribers, recently apologized to his audience for his growing reliance on AI chatbots.
The controversy started when, in the middle of a video posted on the educational channel Complexly, Green incongruously used the phrase “I appreciate the pushback,” leading viewers to speculate that he’d written the script with a chatbot — and, in the process, accidentally included its response to one of his prompts.
In response to a since-deleted post on X, Green acknowledged that he’d produced the video “under a ton of pressure” and used ChatGPT “for research on this script.” At the same time, he said the “pushback” line was actually a response to the episode’s guest.
Green then offered a more in-depth apology on Reddit, where he said he was “mortified” that he’d “let so many people down” and that he plans to reduce his video production as a result.
Green insisted that he’s only used ChatGPT to “locate papers and other resources for learning about topics,” and that the words and the “takes” have still been his. At the same time, he admitted it was fair to criticize him for “diluting” himself.
He also clarified that he’s “not a pure AI-hater,” while also listing a number of concerns about the technology, including its impact on climate change and “the speed at which these companies are trying to consolidate economic power.”
“Ultimately, what I am most scared of is ruining myself for people, but I have not been managing my impulses well,” he said. “You need to know that my words are mine. I don’t think that this hasn’t been true, but I’ve been moving so fast that my own process isn’t actually clear to me and I want to have it be a guarantee moving forward.”
It sounds like Green is going to take some time to figure out how to make that guarantee a reality. In the meantime, he’ll be pausing or posting less frequently to his various YouTube channels. Green said he wants to do more work like a recent meditative video “where the writing was the whole thing and I felt it all the way down.” Green also said he’ll probably make more videos with his “dumb unscripted straight to camera thoughts.”
“But mostly I need to come to terms with the fact that the level of dopamine I’ve been getting from interacting with LLMs…with doing more and more and more and more…is not healthy for me or good for the world,” Green said. “It is careless, and has disconnected me from where people are on this.”
When you purchase through links in our articles, we may earn a small commission. This doesn’t affect our editorial independence.

Several popular Samsung smart TV apps contain code that share the owner’s internet connection with strangers, potentially putting millions of Samsung smart TVs at risk of hijacking, according to new security research published on Monday.
Some of these apps claim to have been installed on hundreds of millions of smart TVs in people’s homes, per the app developers.
At least one of the smart TV apps was a simple Pac-Man game that Samsung had endorsed and prominently featured in its “Editor’s Choice” section on customers’ TV screens.
These apps contain software that funnels outsiders’ web traffic through ordinary home and office internet connections, known as residential proxy networks (or “resproxies”), which are increasingly being linked to cybercrime. When opened, apps with resproxy code can turn the smart TV into an always-on tunnel for outsiders to funnel their web traffic through, known as an exit node — even when the app is no longer open.
The security research by Norwegian cybersecurity company Mnemonic describes a perfect storm of problems that allows low-quality apps to proliferate across Samsung’s app store, containing code that puts users at risk of having their internet connections tapped by a rogue app.
Many of these apps are bare-bone shells, made from only a few lines of code, and are designed solely to load content from another website, such as a game. While such smart TV apps load content from another server, any review of these apps sees only the few lines of code within, and not necessarily the content itself.
“What was reviewed is not necessarily what is running,” wrote Harrison Sand, an offensive security consultant at Mnemonic.
After TechCrunch contacted Samsung with a request for comment about the research, the electronics giant said in an emailed statement that it was banning apps that share their users’ internet connections, and will remove apps that contain the functionality.
“We have already restricted new app registrations that incorporate such proxy functionalities on our Smart TV platform,” said a Samsung spokesperson. “We are currently implementing strict platform-wide developer policies explicitly banning residential proxy SDKs, and we are working to identify and remove all apps currently available in our store that contain these components.”
The move comes after LG said last month that it would ban apps that contain resproxy software after recent reporting found that around 42% of apps on the company’s app store enlisted a smart TV into a proxy network.
Inside a residential proxy network
The research also offers a rare look inside a residential proxy network.
Resproxy code can also be found in regular consumer phone apps, as well as other consumer electronics, like digital frames and Android streaming boxes, which then share that device’s internet connection.
Any time a resproxy app or device connects to the internet, an outsider can also pay to use it.
Resproxies are not inherently illegal. Some are used for evading censorship by routing internet traffic through ordinary looking residential homes. AI companies, for example, increasingly rely on resproxies to scrape data from multiple places on the internet in one go to train their AI models.
But cybersecurity companies say resproxies have gained a reputation for allowing hackers and spies to carry out cyberattacks and data breaches while hiding their malicious activity.
Cybersecurity companies find resproxies challenging to tackle because the network traffic looks like it’s coming from an ordinary household, rather than a malicious hacker located overseas, as they might expect.
Moreover, the network traffic that flows through a user’s device over resproxies is generally encrypted, which is generally impossible to unscramble and inspect.
By rooting a Samsung smart TV’s software, Mnemonic’s Sand gained deep access to the television’s internals and analyzed all of the network traffic that flowed in and out of the TV. This included any app that was sharing the smart TV’s internet connection with someone else.
He found the Pac-Man game contained resproxy code from Bright Data, an Israel-based company that provides proxy networks touting access to millions of residential networks around the world. The company also has a marketplace for selling access to scraped datasets. These datasets are derived from a network of enlisted smart TVs as exit nodes, which are used to download large amounts of public data from the web from multiple sources at once, often to circumvent systems designed to prevent scraping.
Sand found that Bright Data’s resproxy code loaded when opening the Pac-Man game, but noted that this did not automatically turn the Samsung smart TV into an exit node. Sand said the resproxy code is dormant until the user accepts a consent screen, which immediately activates the resproxy code to run in the background until the user deletes the app.
Aside from the user themselves consenting to enlisting their device into a resproxy, Sand warned that a “simple code change on a web server” could instantly activate hundreds of millions of smart TVs into a potentially malicious botnet.
With access to the network data flowing through his smart TV, Sand could see that much of it appeared to suggest the resproxy network was used for large-scale scraping of LinkedIn profiles, and for collecting AI training data. Sand said he only saw a tiny percentage of what was routed over Bright Data’s network.
Bright Data did not respond to a request for comment.
When you purchase through links in our articles, we may earn a small commission. This doesn’t affect our editorial independence.
Business4 seconds ago
Johnson & Johnson (JNJ) Discusses FDA Authorization and Market Introduction of OTTAVA Robotic Surgical System Transcript

Sports2 minutes ago
Veteran righty Chris Martin designated for assignment by Rangers after third IL stint

Tech3 minutes ago
5 STIHL Tools & Products You Probably Didn’t Realize Existed


-

 Business5 days ago
Why Trees Belong on the Risk Register
-

 Fashion3 days ago
Weekend Open Thread: Wit & Wisdom
-

 Politics3 days ago
Meta enters AI-training agreement with far-right ‘propaganda rag’ Newsmax
-
 Entertainment6 days ago
‘Stargate’ Creator’s New Sci-Fi Series Returns for Season 3 Tomorrow
-
 Crypto World2 days ago
MicroStrategy Post-Earnings CLARITY Act Push Could Add New Catalyst for Its Stock
-

 Politics6 days ago
The Part of the Electric Transition Nobody Wants to Discuss
-

 Business6 days ago
Major shareholder moves on Canyon
-

 Crypto World2 days ago
XRP Ledger v3.3.0 brings five institutional features
-

 News Videos4 days ago
Bitcoin Enters the 3rd Stage of the Bear Market
-

 Crypto World6 days ago
Kraken Enables Retail Access to Jersey Mike’s IPO via Tokenized Shares
-

 Tech7 days ago
New macOS Sequoia & Sonoma security updates for older Macs
-

 Politics4 days ago
Luke Littler’s dominance sparks GOAT debate
-

 News Videos6 days ago
Claude: Build Financial Dashboards in Minutes (2026)
-

 Business6 days ago
Johnson & Johnson agrees to $5.5B settlement over talc cancer claims
-

 Sports4 days ago
Seema Kaliramna Wins Discus Throw Bronze, Takes India’s CWG Medals Tally To 17
-

 Crypto World1 day ago
Crypto PAC spending tops $2M in Michigan House race
-

 Business3 days ago
Trump Announces Hamas Disarmament Agreement as Iran Strikes Kuwait Air Base and US Attacks Pause Overnight
-

 Crypto World3 days ago
New York sues Kalshi over prediction market gambling
-

 Tech5 days ago
Gemini can now summarize the messiest comment threads in Google Docs
-

 Tech1 day ago
ESET tracks rise in malicious AI skills and adaptable malware
You must be logged in to post a comment Login